
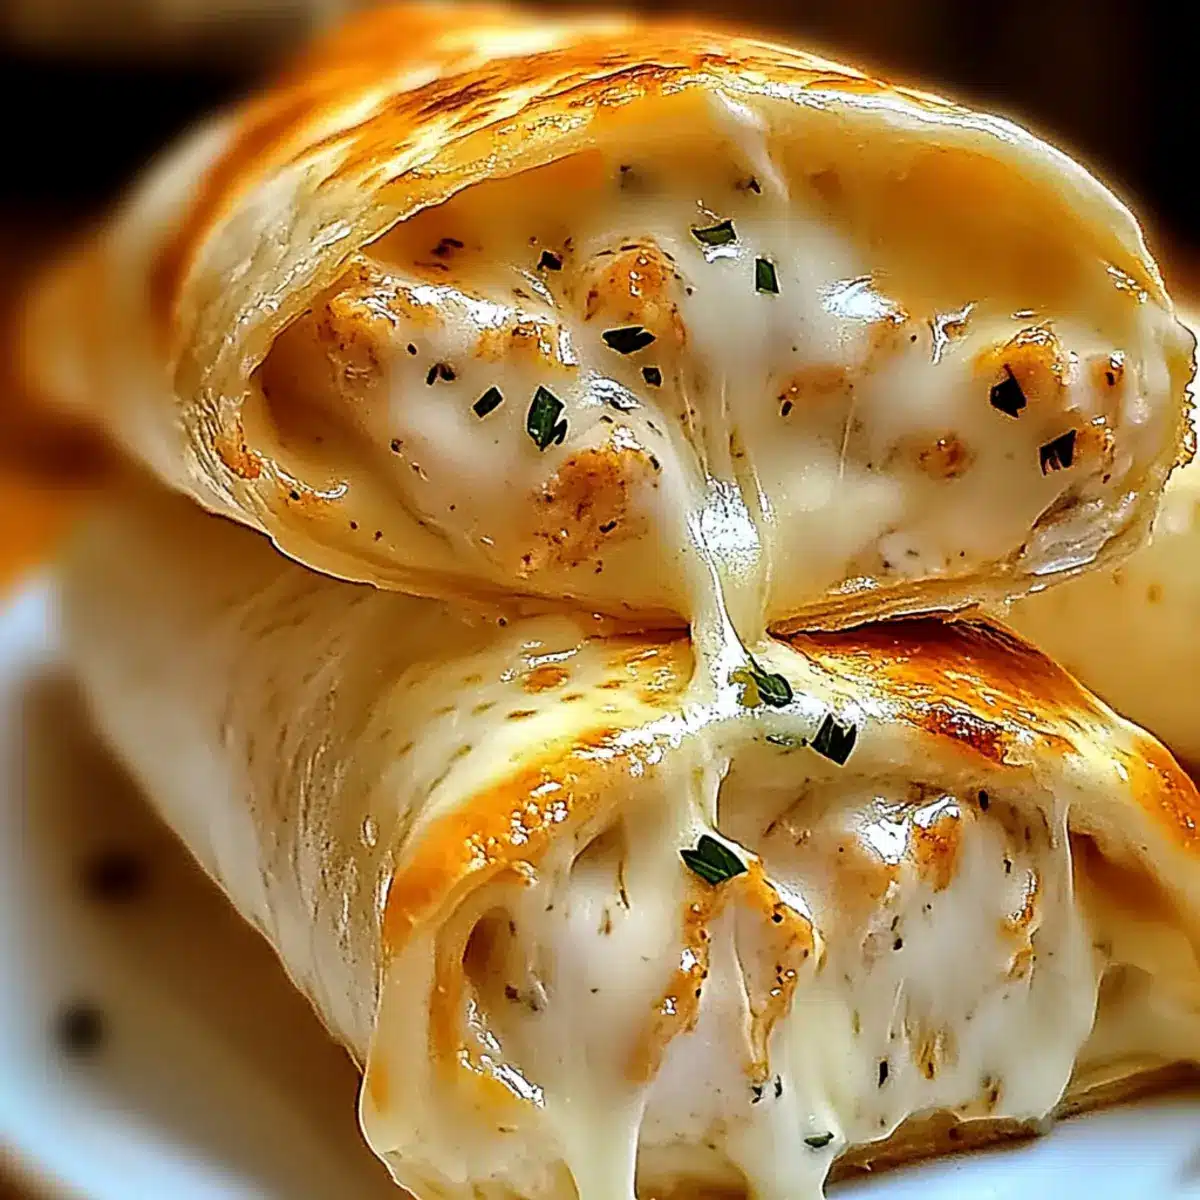
As I stood in the kitchen, the comforting aroma of sautéing garlic filled the air, instantly lifting my spirits. Today, I’m excited to share my recipe for Cheesy Garlic Chicken Wraps—a quick meal that can turn a busy day into a delightful culinary experience. In less than thirty minutes, you’ll have tender chicken enveloped in soft tortillas, all infused with rich garlic flavor and melted cheese. What’s even better? These wraps are not only customizable to suit your taste but also a fantastic way to use up leftover chicken. Perfect for lunch or dinner, they are just the kind of satisfying comfort food that makes you feel right at home. Ready to wrap up some cheesy goodness? Let’s dive into the recipe!
Why Will You Love These Wraps?
Simplicity at Its Best: These Cheesy Garlic Chicken Wraps are incredibly easy to whip up, making them an excellent choice for weeknight dinners or last-minute lunches.
Customizable: Feel free to adjust the ingredients based on your preference! Swap in your favorite veggies or use different cheeses like pepper jack for a spicy twist.
Crowd-Pleasing Flavor: The rich garlic aroma and melted cheese create a comforting and indulgent dish that everyone will love. Pair them with a side salad or some veggie sticks for a complete meal.
Time-Saving: Ready in under thirty minutes, these wraps are perfect for busy days when you need something quick yet delicious.
Leftover Friendly: Got leftover rotisserie chicken? Use it in this recipe to enhance flavor while saving time! If you’re looking for other tasty chicken ideas, check out these Cheesy Garlic Chicken or Garlic Parmesan Chicken recipes!
Cheesy Garlic Chicken Wraps Ingredients
For the Filling
• Cooked Chicken – Your main protein source; use shredded or diced chicken for the best texture.
• Cream Cheese – Adds a rich, creamy texture; make sure it’s softened for easy mixing.
• Sour Cream – Provides tang and creaminess; Greek yogurt makes a great lower-fat substitute.
• Shredded Cheese (Mozzarella/Cheddar) – Offers creaminess and flavor; feel free to mix and match for a taste that’s all yours!
For the Flavor
• Garlic (Minced) – The star ingredient for that aromatic, savory punch; don’t skimp on this!
• Butter – Used for sautéing garlic; it adds delicious richness.
• Garlic Powder – Enhances the garlic profile; adjust according to taste for your Cheesy Garlic Chicken Wraps.
• Italian Seasoning – Brings additional depth and flavor; customize with your favorite herbs!
• Salt and Pepper – Essential seasonings to elevate the overall taste.
For Assembly
• Tortillas – Your wrap base; feel free to go for gluten-free or whole-wheat options for a healthier choice.
• Fresh Parsley – An optional herb garnish that adds color and a fresh finish.
Pair these ingredients with your creativity, and you’re sure to create a deliciously satisfying meal!
Step‑by‑Step Instructions for Cheesy Garlic Chicken Wraps
Step 1: Sauté Garlic
Begin by melting 2 tablespoons of butter in a skillet over medium heat. Once the butter is bubbling, add 3 cloves of minced garlic and sauté for 1-2 minutes until fragrant and lightly golden. Keep an eye on the garlic to prevent it from burning, as burnt garlic can introduce a bitter taste.
Step 2: Heat Chicken
Add 2 cups of cooked chicken to the skillet, stirring to coat evenly with the garlic-infused butter. Season the chicken with ½ teaspoon of garlic powder, 1 teaspoon of Italian seasoning, and salt and pepper to taste. Cook for another 3-4 minutes until the chicken is heated through and well combined with all flavors.
Step 3: Mix Cheeses
In a mixing bowl, combine 4 ounces of softened cream cheese, ½ cup of sour cream, and 1 cup of shredded cheese (like mozzarella or cheddar). Stir well until all ingredients are smoothly mixed and creamy. This mixture will be the flavorful filling for your Cheesy Garlic Chicken Wraps.
Step 4: Combine Mixtures
Pour the hot chicken mixture into the bowl with the cheese mixture. Stir thoroughly until everything is fully blended, creating a rich and cheesy filling. The warmth of the chicken will help melt the cream cheese slightly, enhancing the overall texture of the filling.
Step 5: Assemble Wraps
Lay out 4 tortillas on a clean surface. Spoon equal portions of the chicken and cheese mixture into the center of each tortilla. Sprinkle the remaining cheese on top of the filling, then fold the sides inward and roll tightly to encase the filling.
Step 6: Cook Wraps
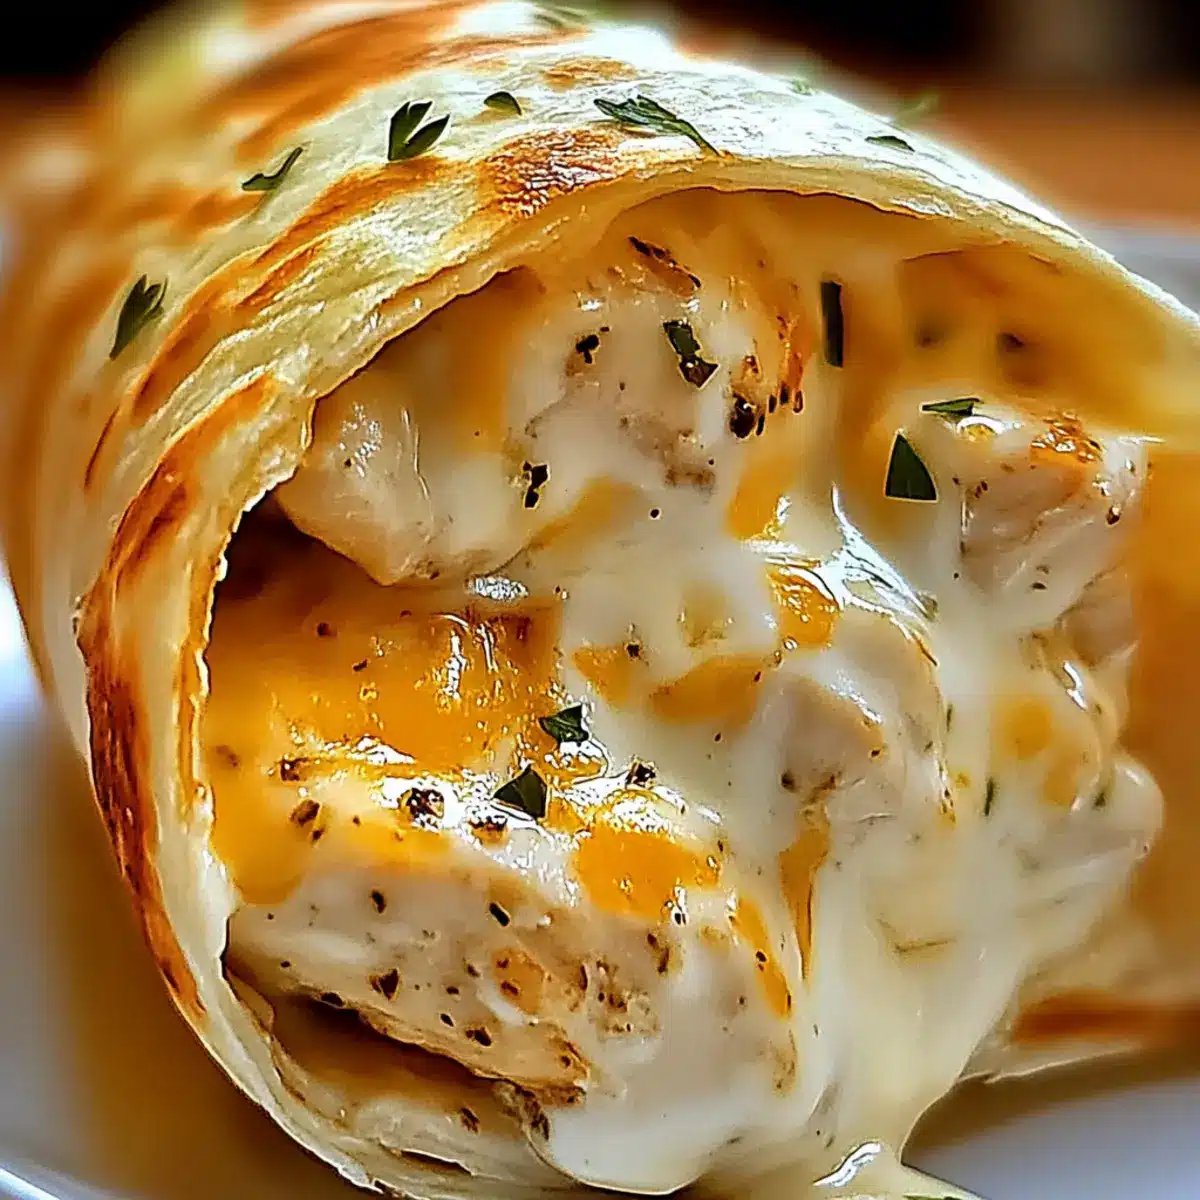
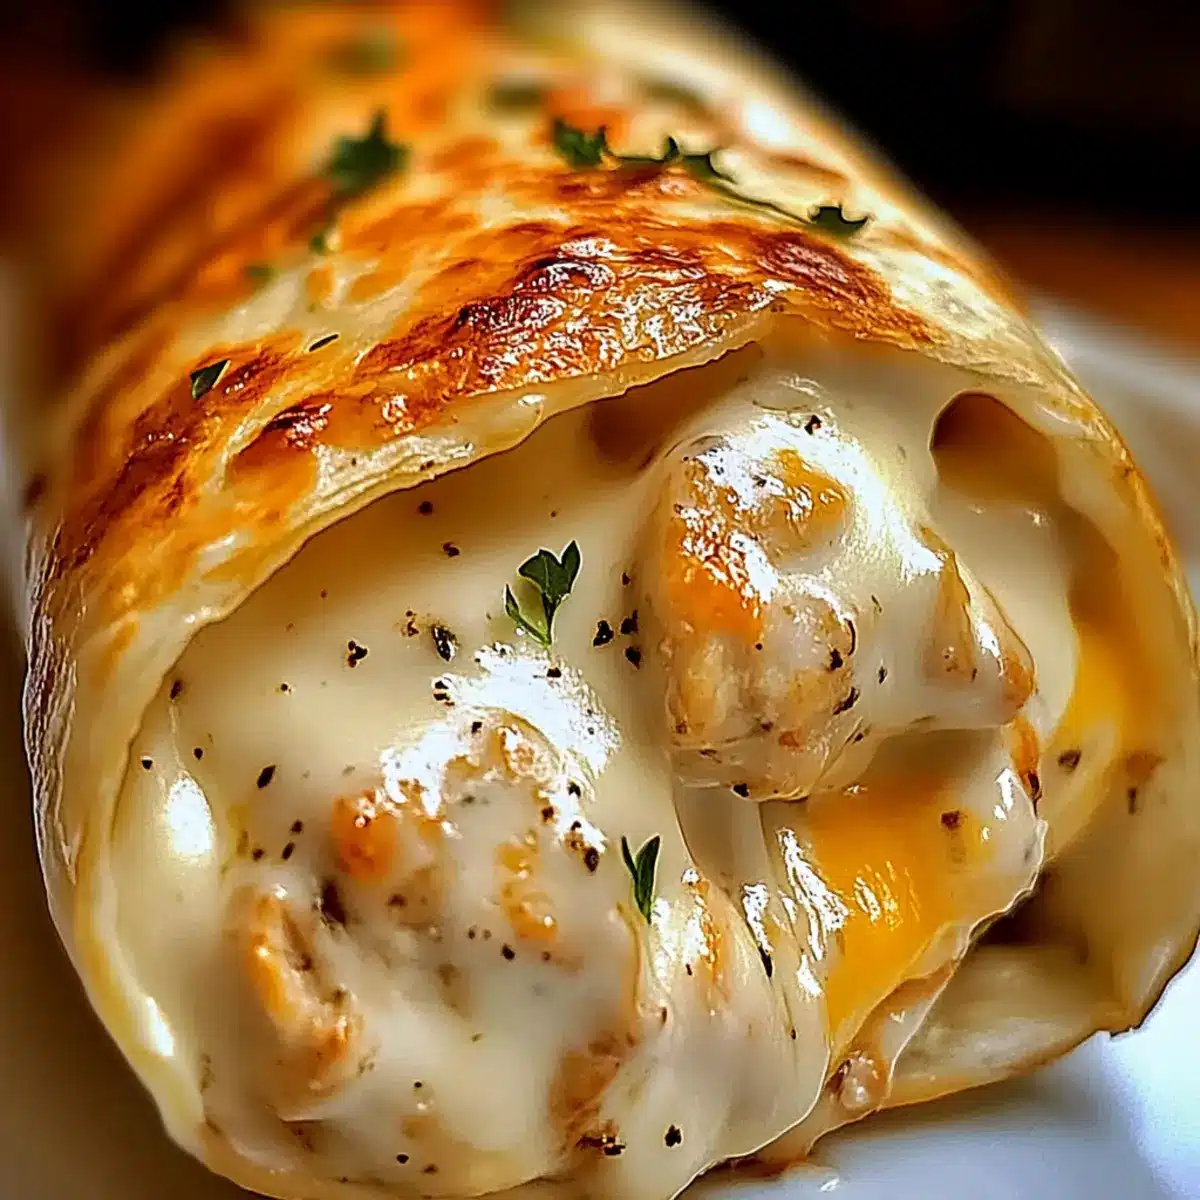
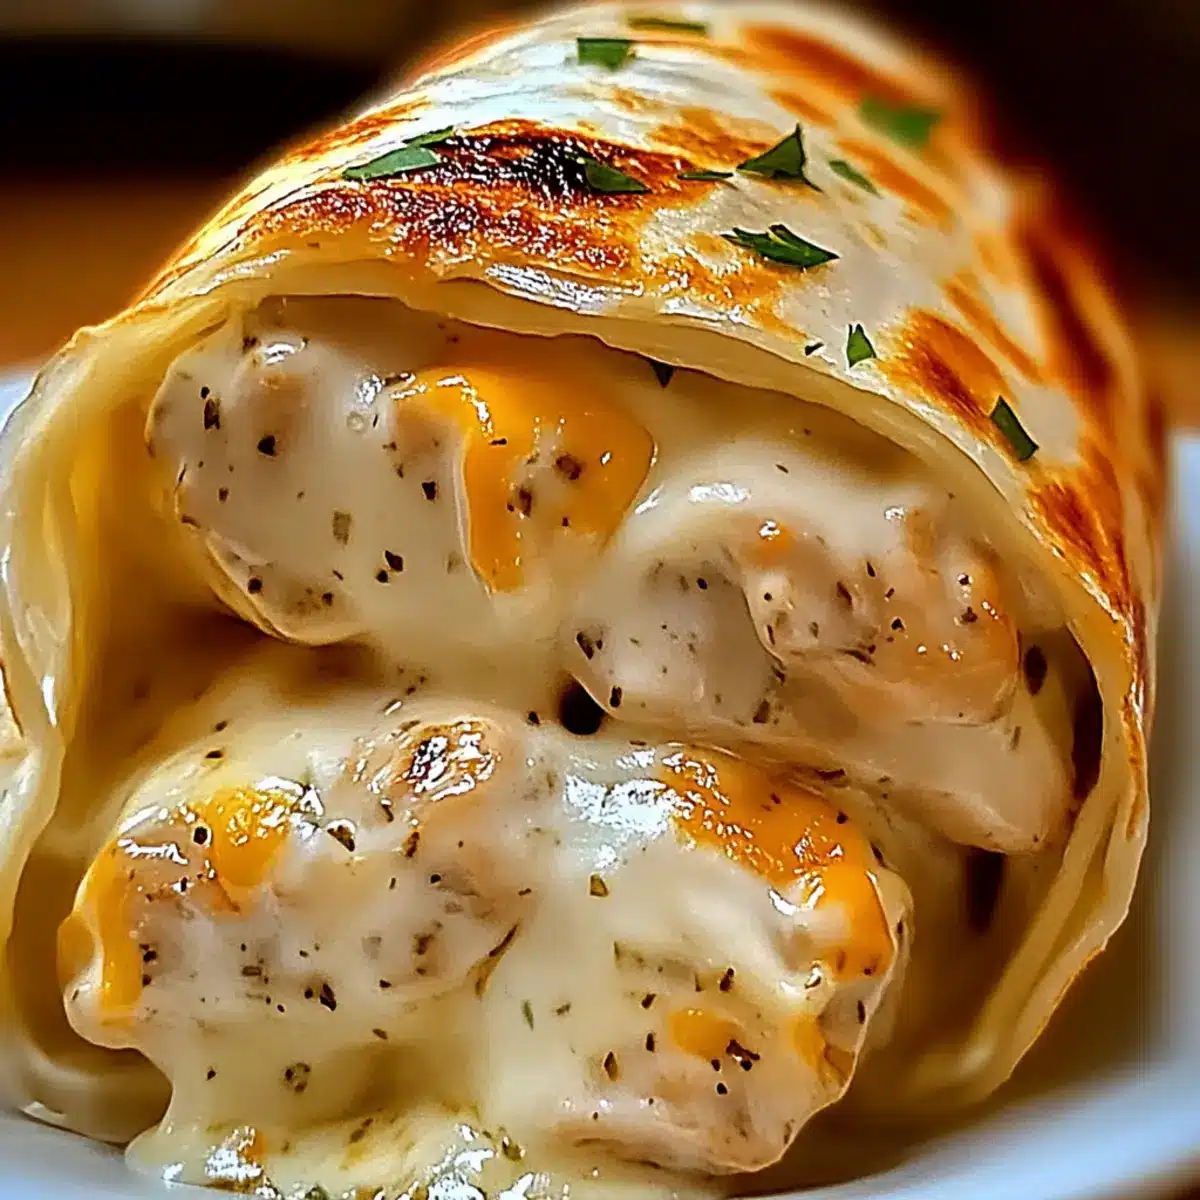
Heat the skillet over medium heat again and place the assembled wraps seam-side down. Cook for 2-3 minutes on each side until they are golden brown and crispy. You’ll know they’re ready to flip when the cheese starts to ooze out slightly.
Step 7: Serve and Enjoy
Once cooked, remove the wraps from the skillet and let them cool for a minute. Cut them in half if desired, and garnish with fresh parsley for a pop of color. Serve your Cheesy Garlic Chicken Wraps warm, perhaps alongside a simple salad or veggie sticks for a delightful and satisfying meal!
What to Serve with Cheesy Garlic Chicken Wraps
Transform your simple meal into an unforgettable feast by adding these delightful pairings.
-
Crispy Garden Salad: A fresh mix of greens adds a crunchy contrast to the warm, cheesy wraps. Toss in your favorite vinaigrette for a zesty touch.
-
Seasoned Veggie Sticks: Serve with celery and carrot sticks, lightly seasoned. Their crunchiness balances perfectly with the soft, gooey wraps.
-
Homemade Garlic Dip: Create a creamy garlic dip served on the side. It enhances the wraps’ flavor while inviting extra dippage!
-
Baked Sweet Potato Fries: The subtle sweetness of these fries complements the savory taste of the cheesy wraps, adding a delightful texture.
-
Refreshing Lemonade: A chilled glass of lemonade provides a tangy contrast that cuts through the richness of the wraps; ideal for summer evenings.
-
Chili Lime Rice: Fluffy rice seasoned with chili and lime enhances flavors and rounds out the meal; it pairs beautifully with cheesy goodness.
-
Fruit Salad Medley: A light fruit salad of berries and seasonal fruits offers a refreshing end to the meal while adding a touch of sweetness.
-
Crispy Tortilla Chips and Salsa: The crunch of chips with zesty salsa makes for a playful appetizer before diving into the main cheesy goodness.
Cheesy Garlic Chicken Wraps Variations
Feel free to explore these delicious twists to make your wraps unique and tailored to your taste!
-
Spicy Kick: Add diced jalapeños or sliced banana peppers to the chicken mixture for a zesty punch. The heat will elevate the overall flavor!
-
Veggie Delight: Incorporate sautéed bell peppers, mushrooms, or spinach for added nutrition and color. Not only do they enhance the taste, but they’re also a great way to sneak in some veggies!
-
Dairy-Free Option: Substitute regular cream cheese and shredded cheese with vegan cheese alternatives for a dairy-free version. Enjoy the same creamy texture and flavor while accommodating dietary needs.
-
Low-Carb Lettuce Wraps: Replace tortillas with large lettuce leaves, like romaine or butter lettuce, for a low-carb twist. These wraps are light and refreshing, perfect if you’re watching carbs!
-
Herb Infusion: Experiment with fresh herbs like cilantro or basil in the filling for a vibrant flavor boost. This will bring an exciting freshness and a delightful aroma to your wraps.
-
Cheesy Variations: Try mixing different cheeses such as pepper jack for a spicy flavor or Gouda for an intense, smoky taste. Don’t shy away from getting creative!
-
Crispy Bacon: Add crumbled crispy bacon to the filling for a savory crunch that elevates the flavor profile. The added texture will take your wraps to the next level!
-
Sweet Touch: For a hint of sweetness, add a spoonful of your favorite gourmet sauce or a drizzle of honey garlic sauce. This surprising twist will tantalize your taste buds and keep you coming back for more!
These adaptable variations make your Cheesy Garlic Chicken Wraps a fun dish to customize. For other delightful chicken ideas, don’t miss checking out my Honey Garlic Chicken Bites or Cheesy Cajun Garlic Chicken Rotini Skillet recipes!
How to Store and Freeze Cheesy Garlic Chicken Wraps
Fridge: Store wrapped Cheesy Garlic Chicken Wraps in an airtight container for up to 3 days. To maintain freshness, ensure they are completely cooled before sealing.
Freezer: You can freeze the assembled, uncooked wraps in a single layer on a baking sheet. Once frozen, transfer them to a freezer bag for up to 3 months.
Reheating: To reheat, thaw overnight in the fridge, then cook on a skillet over medium heat for about 5-7 minutes on each side until heated through and crispy.
Make-Ahead Tip: These wraps can be prepped in advance and assembled a day before cooking. Just refrigerate until you’re ready to cook for a quick meal option!
Make Ahead Options
These Cheesy Garlic Chicken Wraps are a wonderful option for meal prep enthusiasts! You can assemble the wraps up to 24 hours in advance; simply cover them tightly in plastic wrap or place them in an airtight container to prevent drying out. This allows you to save precious time on busy evenings. The filling can also be prepared up to 3 days ahead—just refrigerate it in a separate container to keep everything fresh. When you’re ready to enjoy, heat your skillet over medium heat and cook the wraps for 2-3 minutes on each side until golden brown and the cheese is melted, providing you with delicious, homemade comfort food at a moment’s notice!
Expert Tips for Cheesy Garlic Chicken Wraps
-
Use Rotisserie Chicken: For a more robust flavor and extra convenience, consider using leftover rotisserie chicken instead of cooking chicken from scratch.
-
Watch the Garlic: Sauté garlic gently to avoid burning, which can impart a bitter taste to your Cheesy Garlic Chicken Wraps. Keep it fragrant and golden!
-
Tortilla Sealing: Ensure the tortillas are tightly rolled and the sides are folded in; this will help prevent the delicious filling from spilling out during cooking.
-
Cheese Choices: Don’t hesitate to customize your cheese blend! Mixing different cheeses can elevate the flavor profile. Try pepper jack for a spicy kick!
-
Vegetable Add-Ins: Feel free to add sautéed vegetables like bell peppers or spinach to the filling for extra nutrition and flavor. They’ll make your wraps even more delightful!
-
Skillet Heat Management: Maintain medium heat while cooking the wraps to achieve even browning without burning. Gently press down with a spatula for a golden crust.
Cheesy Garlic Chicken Wraps Recipe FAQs
What type of chicken is best for these wraps?
Absolutely! For Cheesy Garlic Chicken Wraps, using cooked chicken like shredded rotisserie chicken is a great choice to infuse extra flavor and save time. You can also use leftover chicken or quickly sauté fresh diced chicken in the skillet.
How should I store leftover Cheesy Garlic Chicken Wraps?
To keep your wraps fresh, store them in an airtight container in the refrigerator for up to 3 days. Allow them to cool completely before sealing to prevent moisture buildup.
Can I freeze the Cheesy Garlic Chicken Wraps?
Yes, you can! Assemble the uncooked wraps and place them in a single layer on a baking sheet. Freeze until solid, then transfer them to a freezer bag, ensuring you remove as much air as possible. They can be stored for up to 3 months. When ready to eat, thaw overnight in the refrigerator and cook on a skillet for about 5-7 minutes per side.
What can I do if I have leftover ingredients?
The more the merrier! You can mix in any leftover veggies like bell peppers or spinach into your filling to create a more nutritious wrap. Alternatively, use any remaining cheese for topping another dish, or spread cream cheese on crackers for a quick snack.
Are there any dietary considerations for these wraps?
Certainly! If you’re catering to specific dietary needs, you can easily adapt this recipe. Use gluten-free tortillas for a gluten-free option, and substitute the cream cheese and sour cream with dairy-free alternatives for a vegan-friendly version. Just be mindful of cross-contamination if allergies are a concern!
Melt-in-Your-Mouth Cheesy Garlic Chicken Wraps to Savor
Ingredients
Equipment
Method
- Melt 2 tablespoons of butter in a skillet over medium heat. Add 3 cloves of minced garlic and sauté for 1-2 minutes until fragrant and lightly golden.
- Add 2 cups of cooked chicken to the skillet, stirring to coat evenly. Season with ½ teaspoon of garlic powder, 1 teaspoon of Italian seasoning, and salt and pepper to taste. Cook for another 3-4 minutes.
- In a mixing bowl, combine 4 ounces of softened cream cheese, ½ cup of sour cream, and 1 cup of shredded cheese. Stir well until creamy.
- Pour the hot chicken mixture into the bowl with the cheese mixture. Stir until fully blended.
- Lay out 4 tortillas and spoon equal portions of the filling into each. Sprinkle remaining cheese and fold the sides inward, then roll tightly.
- Heat the skillet over medium heat and cook the wraps seam-side down for 2-3 minutes on each side until golden brown and crispy.
- Remove the wraps from the skillet, let cool for a minute, and garnish with fresh parsley before serving.
Leave a Reply