
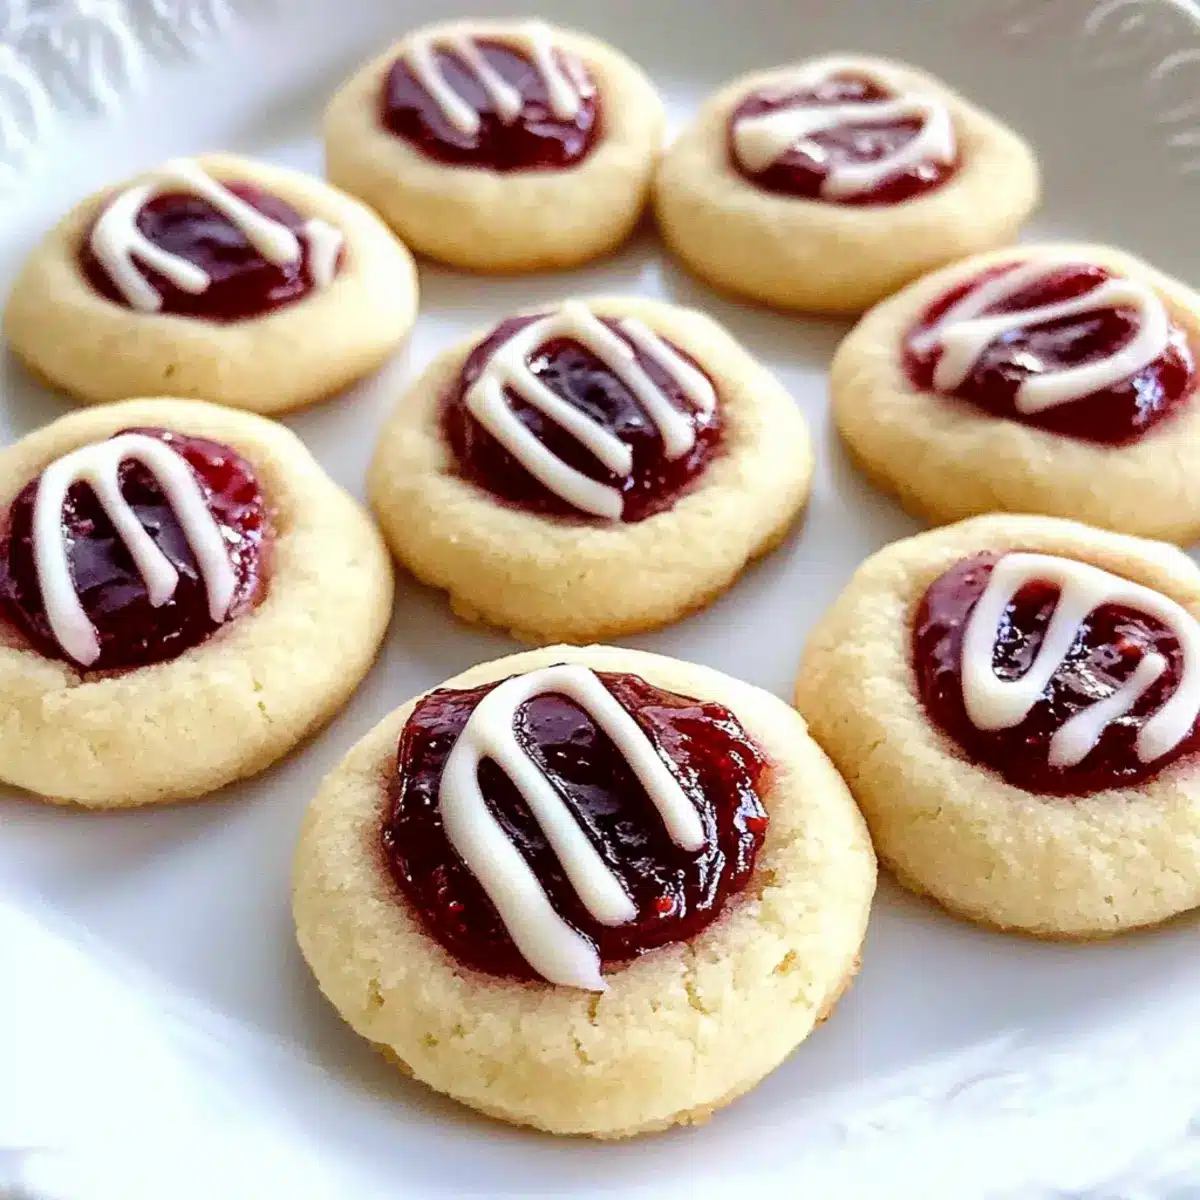
As a chill settles in and holiday spirit begins to twinkle, I find myself daydreaming of sweet, buttery goodness—the kind that warms your heart with each bite. Enter the Raspberry Thumbprint Cookies, a delightful combination of flaky shortbread embraced by luscious raspberry jam. Not only are these treats a cinch to whip up, but they also make the perfect addition to holiday cookie boxes, delighting friends and family alike. With such a simple preparation, they are bound to become a favorite in your seasonal baking repertoire. Let’s dive into this mouthwatering recipe together, shall we? What unique jam variations will you explore?
What Makes Raspberry Thumbprint Cookies Irresistible?
Melt-in-Your-Mouth Texture: These cookies deliver a tender shortbread that feels heavenly with every bite.
Endless Flavor Options: While raspberry jam shines in these cookies, feel free to swap in apricot or mixed fruit jams for a personalized twist.
Baking Made Easy: With just a few simple ingredients and straightforward methods, even novice bakers can whip these up without a hitch!
Perfect Holiday Treat: Great for gifting, they make charming additions to cookie boxes, alongside treats like Pecan Pie Cookies and Pumpkin Pie Cookies.
Versatile and Fun: Create variations with nuts or chocolate chips, allowing you to customize these charming cookies to your taste preferences.
Raspberry Thumbprint Cookies Ingredients
For the Dough
• Unsalted Butter – Provides richness and tenderness; ensure it’s at room temperature for easier mixing.
• Sugar – Sweetens the dough; granulated sugar works best for this recipe.
• Vanilla Extract – Adds depth of flavor; use pure vanilla for a richer taste.
• Almond Extract – Enhances the cookie’s flavor profile; can be substituted with additional vanilla if desired.
• Salt – Balances sweetness and enhances flavor; use fine salt for even distribution.
• All-Purpose Flour – Forms the structure of the cookie; no substitutes recommended for best results.
For the Filling
• Raspberry Jam – Fills the thumbprint and adds fruity sweetness; can be substituted with any jam or preserves of your choice.
For the Glaze
• Powdered Sugar – Used for glazing; can replace with granulated sugar for a different texture.
• Milk – Adjusts glazing consistency; non-dairy milk can be used for a vegan alternative.
Step‑by‑Step Instructions for Raspberry Thumbprint Cookies
Step 1: Mixing the Dough
Begin by beating room temperature unsalted butter in a large mixing bowl on high speed for about 1 minute until it becomes pale and creamy. Gradually add granulated sugar, pure vanilla extract, and almond extract, mixing on medium speed until fully combined. Slowly incorporate the all-purpose flour and fine salt, mixing on low speed until a soft, cohesive dough forms that clings together beautifully.
Step 2: Chilling the Dough
Once your dough for Raspberry Thumbprint Cookies is ready, use a tablespoon to scoop out portions and roll them into balls. Place these dough balls evenly spaced on lined baking sheets, ensuring there’s room for them to spread. Press your thumb gently into each ball to create an indent in the center, then cover the sheets with plastic wrap and refrigerate for at least 3 hours to firm up the dough, preventing the cookies from spreading in the oven.
Step 3: Preparing for Baking
Preheat your oven to 350°F (175°C), creating a warm environment perfect for baking. While the oven heats, remove the chilled dough from the refrigerator and take each thumbprint cookie, filling the center with about ½ teaspoon of raspberry jam or your preferred jam. Ensure not to overfill to keep the jam from spilling over during the baking process.
Step 4: Baking the Cookies
Place the prepared baking sheets in the preheated oven and bake the Raspberry Thumbprint Cookies for approximately 14-15 minutes. Keep a close eye on them, as they should turn lightly golden at the edges while remaining pale in the center. Once baked, allow the cookies to cool on the sheet for 5 minutes, allowing them to firm up slightly before transferring to a wire rack to cool completely.
Step 5: Glazing the Cookies
To make a smooth glaze, combine powdered sugar with a small amount of milk in a mixing bowl until you reach a drizzle consistency. Once the Raspberry Thumbprint Cookies have cooled, use a piping bag or a spoon to apply the glaze decoratively over the tops of the cookies. Allow the glaze to set for about 1 hour before serving, enjoying the delightful combination of buttery shortbread with sweet jam.
What to Serve with Raspberry Thumbprint Cookies?
Indulge your loved ones with a delightful spread that pairs beautifully with your sweet cookies, creating a warm gathering atmosphere.
- Hot Tea: A soothing cup of tea enhances the buttery flavor of the cookies, providing a calming companion for a cozy afternoon.
- Coffee: A rich, aromatic brew complements the sweetness of the raspberry jam, making each bite more satisfying and indulgent.
- Whipped Cream: Light and fluffy, whipped cream adds a creamy texture that contrasts wonderfully with the crumbly cookie base.
- Chocolate-Dipped Strawberries: The fresh berries add a pop of color and flavor that brightens the dessert table, perfect for pairing.
Serve your Raspberry Thumbprint Cookies alongside a warm beverage for a charming experience. Perhaps even try a glass of sparkling cider for a festive touch! Coziness awaits!
Expert Tips for Raspberry Thumbprint Cookies
• Room Temperature Butter: Make sure your butter is soft and at room temperature; this will create a creamier dough and help the cookies maintain their shape.
• Chill Dough Properly: Don’t skip the chilling step! This crucial time in the fridge prevents the Raspberry Thumbprint Cookies from spreading too much during baking.
• Jam Substitution: Feel free to experiment! While raspberry jam is delightful, you can swap it out for apricot, strawberry, or even chocolate chips for a tasty twist.
• Avoid Overfilling: When adding jam to the indents, use about ½ teaspoon; overfilling can lead to spills and messy cookies.
• Watch the Baking Time: Every oven is slightly different, so keep an eye on the cookies; they should be lightly golden at the edges and not overly browned.
• Glaze Consistency: For the best results, ensure your glaze is smooth and pourable; adjust the powdered sugar and milk ratio as needed for the right consistency.
Raspberry Thumbprint Cookies Variations
Customize your Raspberry Thumbprint Cookies for a delightful twist that makes your tastebuds sing!
-
Jam Swap: Replace raspberry jam with apricot, strawberry, or even orange marmalade for fresh flavor profiles. Each jam brings its unique sweetness, creating a delightful surprise with every bite!
-
Chocolate Twist: Add chopped chocolate chips or a chunk of chocolate in the thumbprint instead of jam for a chocolate lover’s dream. Imagine the creamy, melty goodness mingling with your buttery shortbread!
-
Nutty Addition: Stir in chopped nuts, such as walnuts or pecans, directly into the dough for added texture. This not only lends a satisfying crunch but also enhances the nutty aroma as they bake.
-
Zesty Glaze: Instead of a powdered sugar glaze, zest things up with a light lemon glaze! Just mix powdered sugar with lemon juice for a refreshing citrus kick that beautifully contrasts with the sweet cookie.
-
Spiced Version: Incorporate a pinch of cinnamon or nutmeg into the dough for warm aromatic undertones. The spices infuse a cozy flavor, making these cookies feel like a warm hug on a cold day.
-
Vegan Variation: Swap unsalted butter for a plant-based vegan spread and use non-dairy milk for glazing. You won’t miss a beat—these cookies will still be deliciously perfect!
-
Cranberry Surprise: Experiment with cranberry jam for a tart twist that complements the sweetness of the cookie beautifully. This unique flavor will make your cookies stand out during holiday gatherings!
-
Sugar Alternatives: Try using coconut sugar instead of granulated sugar for a healthier option with a hint of caramel flavor. Coconut sugar adds a lovely depth while keeping your cookies just as sweet and satisfying.
Don’t stop here! For other delicious baking ideas, try making these Chocolate Oat Cookies or give the decadent Chip Cheesecake Cookies a whirl. Happy baking!
How to Store and Freeze Raspberry Thumbprint Cookies
Room Temperature: Store cookies in an airtight container at room temperature for up to 3 days to maintain their delightful texture.
Fridge: For slightly longer storage, place cookies in the fridge where they’ll stay fresh for up to 6 days. Just ensure they are sealed well to prevent them from drying out.
Freezer: You can freeze unbaked cookie dough balls for up to 3 months. Thaw overnight in the fridge before filling with jam and baking.
Reheating: If you prefer to warm them up, reheat the cookies in the oven at 300°F (150°C) for about 5-7 minutes for a fresh-out-of-the-oven taste.
Make Ahead Options
These Raspberry Thumbprint Cookies are perfect for busy home cooks looking to save time during the hectic holiday season! You can prepare the dough up to 24 hours in advance by mixing it, rolling it into balls, and placing them on a lined baking sheet, covered with plastic wrap in the refrigerator. This chilling process not only firms up the dough but also enhances the flavors. Alternatively, you can bake the cookies, let them cool, and store them in an airtight container for up to 3 days at room temperature. When you’re ready to enjoy, simply glaze them before serving to make them just as delicious as when they were freshly baked!
Raspberry Thumbprint Cookies Recipe FAQs
What should I look for when selecting raspberries for the jam?
Absolutely! When choosing raspberries, look for plump, firm berries without any dark spots or mushiness. The sweetness will vary with ripeness, so aim for bright, fragrant berries for your best thumbprint cookie filling.
How should I store my Raspberry Thumbprint Cookies?
Very! You can store these delightful cookies in an airtight container at room temperature for 3 days. If you want them to last a bit longer, refrigeration is an option too; they will stay fresh for up to 6 days. Just make sure the container is well-sealed to keep them from drying out.
Can I freeze Raspberry Thumbprint Cookies?
Of course! To freeze the cookies, I recommend freezing the unbaked dough balls first. Place them on a lined baking sheet, freeze until solid, then transfer them to a freezer-safe bag or container for up to 3 months. When you’re ready to bake, simply thaw them overnight in the fridge, create the thumbprint, fill with jam, and bake as usual!
Why are my cookies spreading too much in the oven?
If your Raspberry Thumbprint Cookies are spreading too much, it may be due to a few factors. The most common reason is not chilling the dough long enough—it’s crucial for maintaining the cookie shape. Make sure to chill the dough for at least 3 hours. Also, ensure your butter was at room temperature and not melted, as melted butter can lead to cookies that spread during baking.
Are there any allergy concerns with the ingredients used?
Definitely! Watch for common allergens in this recipe, such as butter and flour. If you’re catering to dietary restrictions, you can replace butter with a vegan alternative and use gluten-free flour if needed. Always check the labels on any jam used as well, in case of additional allergens.

Raspberry Thumbprint Cookies: A Sweet Holiday Tradition
Ingredients
Equipment
Method
- Beat unsalted butter in a large mixing bowl on high speed for about 1 minute until pale and creamy.
- Gradually add sugar, vanilla extract, and almond extract, mixing on medium speed until combined.
- Slowly incorporate flour and salt, mixing on low speed until a cohesive dough forms.
- Scoop out portions of dough, roll into balls, and place on lined baking sheets.
- Press thumb into each ball to create an indent, cover with plastic wrap, and refrigerate for at least 3 hours.
- Preheat oven to 350°F (175°C). Fill each indent with about ½ teaspoon of raspberry jam.
- Bake cookies for approximately 14-15 minutes until lightly golden at the edges.
- Allow cookies to cool for 5 minutes before transferring to a wire rack to cool completely.
- Combine powdered sugar and milk until smooth, then glaze cookies once cooled.
- Allow the glaze to set for about 1 hour before serving.
Leave a Reply