
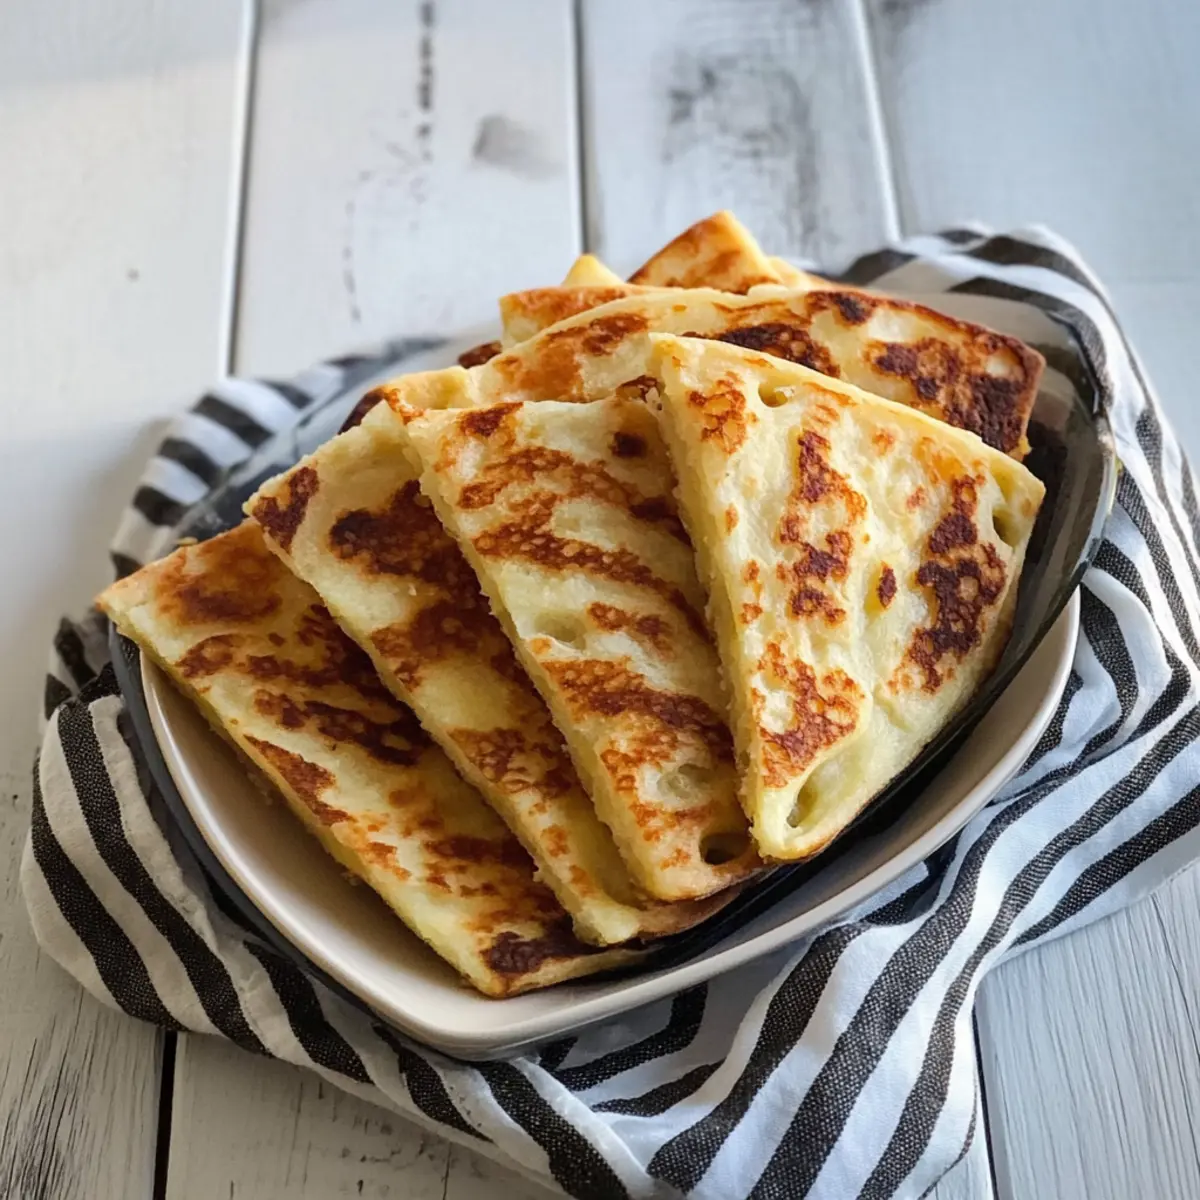
Walking through the rugged landscapes of Ireland, one can almost taste the nostalgia of home-cooked meals wafting through the air. Today, I’m excited to share with you my recipe for Super Simple Authentic Irish Potato Bread—a comforting classic that brings a touch of warmth to any table. With just four ingredients, this easy-to-make bread is perfect for those looking to ditch fast food for something wholesome and satisfying. Not only does it pair beautifully with breakfast staples like eggs and sausage, but it also offers gluten-friendly options for those who need them. Whether you prefer a crispy bite or a fluffier texture, you can customize this recipe to match your taste. Ready to roll up your sleeves and create something truly special? Let’s get started!
Why Is This Irish Potato Bread Special?
Simplicity at Its Best: With only four essential ingredients, this recipe is perfect for anyone, from novice cooks to seasoned chefs.
Comforting Flavor: The combination of creamy potatoes and butter creates a rich, homemade taste that will remind you of family gatherings.
Endless Varieties: Feel free to explore by adding herbs, cheese, or even bacon to tailor the bread to your palate.
Crowd-Pleaser: Whether served for breakfast, lunch, or as a snack, this bread pairs wonderfully with eggs, just like in this delightful Italian Sausage Potato dish.
Quick and Easy: Both preparation and cooking are a breeze, making it a great choice for busy weeknights or weekend brunches.
Heartwarming Tradition: Bring a taste of Ireland into your home with a recipe that’s made its way into the hearts—and stomachs—of many around the world.
Simple Authentic Irish Potato Bread Ingredients
• Ready to create your very own traditional Irish Potato Bread? Here’s what you’ll need!
For the Bread
- Potatoes – 750 grams (about 1.65 lbs); the soft, fluffy base for this delicious loaf.
- Butter – 30 grams (about 6 teaspoons, melted); enriches the flavor and texture of the bread.
- Plain Flour – 225 grams (approximately 1.5 cups); helps form the structure, creating that classic potato bread.
- Salt – A good pinch; elevates flavor but can be omitted if you’re using salted butter.
For Frying
- Extra Butter and Olive Oil – For frying, ensuring each piece becomes delightfully golden and crisp.
Feel free to customize with gluten-friendly alternatives and add your favorite extras to make this Simple Authentic Irish Potato Bread truly your own!
Step‑by‑Step Instructions for Simple Authentic Irish Potato Bread
Step 1: Prepare Potatoes
Start by peeling and chopping 750 grams of potatoes into quarters. Place them in a large pot, cover with cold water, and add a pinch of salt. Bring the water to a boil and cook the potatoes for about 15-20 minutes, or until tender when pierced with a fork. Once cooked, drain the potatoes and set them aside to cool slightly.
Step 2: Mash Potatoes
Once the potatoes are cool enough to handle, transfer them into a large mixing bowl. Use a potato ricer for a smoother texture or a masher for a rustic finish. Mash them thoroughly until no lumps remain, creating a fluffy base for your Simple Authentic Irish Potato Bread.
Step 3: Combine Ingredients
Add 30 grams of melted butter, 225 grams of plain flour, and a good pinch of salt to the mashed potatoes. Mix the ingredients together with a wooden spoon or your hands until a soft dough begins to form, ensuring everything is well incorporated and combined.
Step 4: Knead Dough
On a clean, floured surface, turn the dough out and lightly knead it for about 1-2 minutes. Aim for a smooth consistency while being careful not to over-knead, as this can affect the texture of your Simple Authentic Irish Potato Bread.
Step 5: Shape Dough
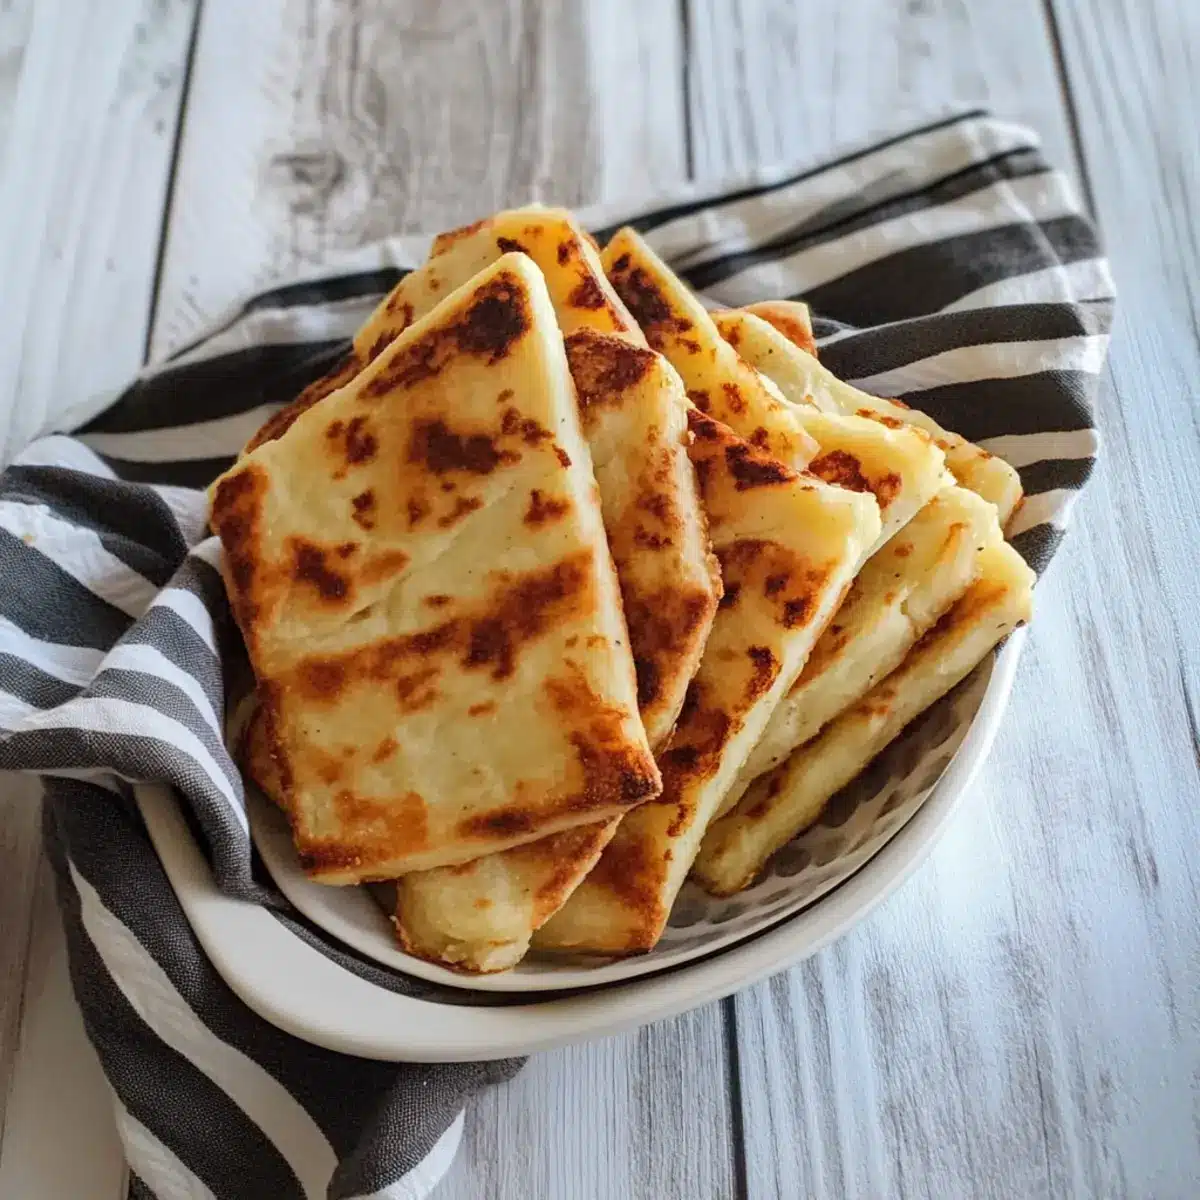
Divide the dough into six equal portions. Gently roll each piece into a ball and then press flat with your hands. For a thinner bread, aim for about 3mm; for a thicker texture, go for around 0.5cm. Ensure an even thickness for even cooking.
Step 6: Fry Bread
Heat a non-stick skillet over medium heat and add a mix of olive oil and extra butter. Once hot, carefully place each flattened dough piece into the pan. Fry for about 4-5 minutes on one side, until golden brown, then flip and cook the other side for an additional 4-5 minutes. Keep the cooked bread warm in a low oven while you finish frying the rest.

What to Serve with Super Simple Authentic Irish Potato Bread
Warm, fluffy, and utterly delightful, this traditional bread can be the star of your meal that pairs perfectly with a variety of comforting dishes.
-
Hearty Breakfast Scramble: The light and fluffy texture of potato bread complements a rich scramble of eggs, peppers, and sausage beautifully.
-
Creamy Mushroom Soup: Pair with a warm bowl of this velvety soup, allowing the bread to soak up all the delicious flavors.
-
Savory Buttermilk Pancakes: Enjoy them side by side for brunch; their flavors meld beautifully for an indulgent experience.
-
Glazed Ham: The comforting taste of potato bread balances perfectly with the salty-sweet glaze of ham, creating a satisfying duo.
-
Coleslaw: A crunchy, tangy coleslaw adds a refreshing contrast to the fluffy-ness of the potato bread, bringing a delightful crunch.
-
Fresh Garden Salad: Tossed greens with a zesty vinaigrette lighten up the meal while the potato bread adds heartiness.
-
Classic Irish Corned Beef: The distinctive flavors of corned beef pair harmoniously, inviting a taste of Irish tradition to your table.
-
Bread and Butter Pudding: For dessert, this warm, comforting dish is a lovely way to finish a meal filled with fluffy potato bread.
-
Freshly Brewed Irish Tea: A cup of fragrant tea is the perfect drink to enjoy alongside your potato bread, enhancing its warm, comforting essence.
Helpful Tricks for Simple Authentic Irish Potato Bread
-
Choose the Right Potatoes: Select starchy potatoes like Russets for a fluffier texture in your Simple Authentic Irish Potato Bread. Avoid waxy varieties which can be gummy.
-
Perfect Dough Consistency: If your dough feels sticky during kneading, don’t hesitate to add small amounts of flour until it becomes soft and manageable.
-
Even Cooking: Ensure your skillet is adequately preheated before frying, so the bread cooks evenly and achieves that lovely golden crust without burning.
-
Adjust Thickness Wisely: Keep your bread’s thickness consistent; thinner pieces will cook faster while thicker ones may need more time in the pan.
-
Try Flavor Variations: Experiment by adding herbs, garlic, or cheese to the dough before frying, enhancing your Simple Authentic Irish Potato Bread’s taste with personal flair.
-
Storage Tips: Store any leftover bread in an airtight container in the fridge for up to 3 days. To enjoy later, warm in the oven for that fresh-out-of-the-pan experience!
Simple Authentic Irish Potato Bread Variations
Feel free to make this delightful bread your own with these fun twists and substitutions.
-
Gluten-Free: Swap out plain flour for a gluten-free flour blend to enjoy this classic bread without gluten worries.
-
Herbed Delight: Add chopped fresh herbs like chives or parsley for a burst of flavor. This makes the bread perfect for pairing with soups or as a side dish for heartier meals.
-
Cheesy Twist: Mix in shredded cheese, such as cheddar or feta, for a deliciously melty and rich finish. It’s an indulgent option that takes the bread to the next level.
-
Bacon Booster: Incorporate crumbled cooked bacon into the dough for a savory kick that complements breakfast dishes beautifully. Your mouth will water at the thought of this flavor combo!
-
Spice It Up: Add a pinch of cayenne or smoked paprika for a hint of heat. This minor adjustment can elevate the flavor profile and awaken your taste buds.
-
Fruit Fusion: Mix in finely diced cooked apples or pears for a sweet and savory twist. This is a fantastic way to adapt your bread for a unique brunch offering.
-
Shape Shift: Instead of traditional rounds, try rolling the dough into larger oblongs or use cookie cutters for fun, festive shapes. The kids will love it, turning mealtime into a playful adventure!
-
Air-Fried Option: For a healthier take, consider air-frying the dough pieces, reducing oil while maintaining that crispy texture. This method also makes for a fun kitchen experiment!
For more delicious bread ideas, check out my Apple Bread Moist recipe to expand your baking expertise.
Make Ahead Options
These Simple Authentic Irish Potato Bread are a fantastic option for meal prep, saving you valuable time during busy weekdays! You can prepare the mashed potato mixture up to 24 hours in advance by simply combining your riced potatoes, melted butter, flour, and salt in a bowl. Store it in an airtight container in the refrigerator. When ready to enjoy, knead the mixture lightly and shape it into dough. Fry the pieces as desired for a delightful meal. For maximum freshness and to maintain that fluffy texture, avoid over-kneading and ensure your pan is adequately heated before cooking. You’ll still achieve that comforting, homemade taste with minimal effort!
Storage Tips for Simple Authentic Irish Potato Bread
Fridge: Store in an airtight container for up to 3 days to keep your Simple Authentic Irish Potato Bread fresh and flavorful.
Freezer: Freeze cooked pieces flat in an airtight bag for up to 3 months. When ready to enjoy, reheat wrapped in foil for a few minutes in a 350°F oven.
Reheating: For the best texture, reheat on a skillet over medium-low heat until warm and slightly crispy on the outside.
Avoid Moisture: Ensure bread is completely cool before storing to prevent sogginess and maintain that lovely, crispy crust.
Simple Authentic Irish Potato Bread Recipe FAQs
What type of potatoes are best for this recipe?
For the best results, choose starchy potatoes like Russets or Yukon Golds. They create a fluffier texture compared to waxy varieties, which can lead to a denser bread. Personally, I often reach for Russets for their lightness!
How long can I store the cooked Irish Potato Bread?
You can store your Simple Authentic Irish Potato Bread in an airtight container in the fridge for up to 3 days. If you want to keep it longer, I recommend freezing for optimal freshness, which can last for up to 3 months.
Can I freeze this potato bread?
Absolutely! To freeze, allow the bread to cool completely, then lay each piece flat in an airtight bag. This method helps preserve its texture. When you’re ready to enjoy it, reheat wrapped in foil in a 350°F oven until warmed through, usually about 10-15 minutes.
What should I do if my dough is too sticky?
If you encounter a sticky dough, don’t worry! Simply sprinkle a bit of flour onto your work surface and into the dough while kneading. Keep adding small amounts until it achieves a soft, manageable consistency. This step is crucial for getting that perfect dough texture!
Is there a gluten-free alternative for this recipe?
Yes, indeed! You can use a gluten-free all-purpose flour blend in place of regular plain flour. Just make sure it’s a blend that includes xanthan gum to mimic the structure of traditional flour, ensuring your Simple Authentic Irish Potato Bread remains delicious and fluffy.
Can I add other ingredients to the potato bread?
Of course! Feel free to get creative by mixing in herbs, spices, or even cooked bacon into your dough. These additions can elevate the flavor and create a personalized touch that makes your Simple Authentic Irish Potato Bread truly unique.

Irresistibly Simple Authentic Irish Potato Bread Recipe
Ingredients
Equipment
Method
- Peel and chop the potatoes into quarters. Place in a large pot, cover with cold water, and add a pinch of salt. Boil for 15-20 minutes until tender, then drain and cool slightly.
- Transfer the cooled potatoes into a bowl and mash until smooth. Use a potato ricer for a smoother texture or a masher for a rustic finish.
- Add melted butter, flour, and salt to the mashed potatoes. Mix until a soft dough forms.
- Turn the dough onto a floured surface and knead gently for 1-2 minutes until smooth.
- Divide the dough into six portions, roll into balls and flatten. Aim for about 3mm thickness for thinner bread or 0.5cm for thicker.
- Heat a skillet and add olive oil and extra butter. Fry each piece for 4-5 minutes on each side until golden. Keep warm in the oven.
Leave a Reply