
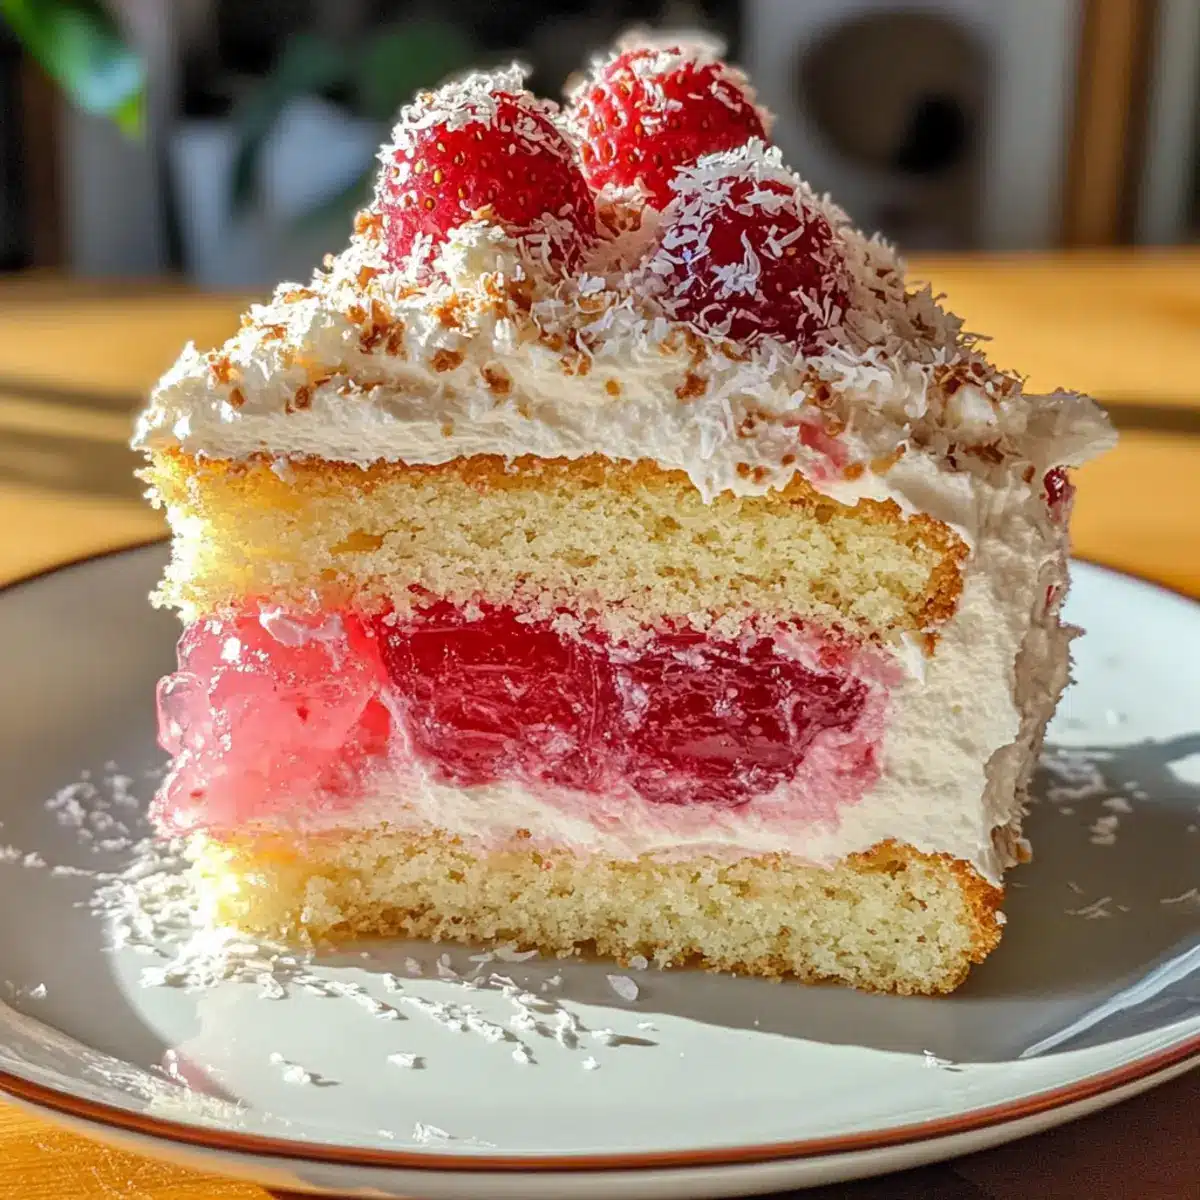
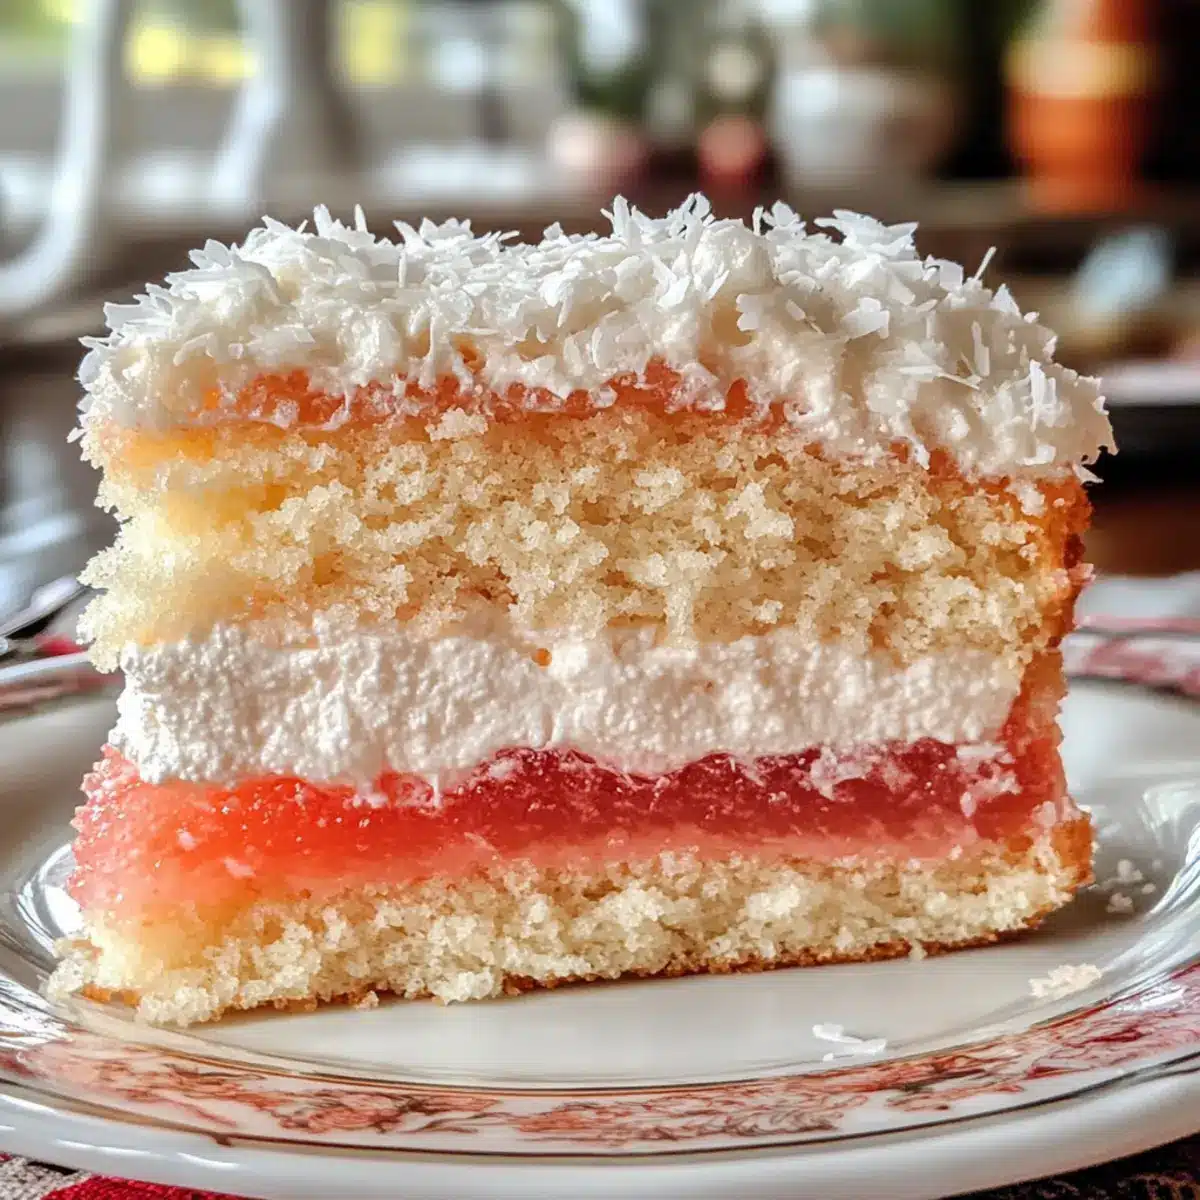
As I strolled through the quaint streets of a sun-soaked Australian town, the tantalizing aroma of freshly baked goodies lured me into a charming bakery. My heart raced as I spotted them—Old-Fashioned Pink Jelly Cakes, those delightful treasures of nostalgia that take me back to carefree afternoons filled with laughter and sweet treats. These Pink Jelly Cakes are not just a mouthwatering dessert; they’re a celebration of light, fluffy vanilla sponge enveloped in luscious strawberry jelly and rolled in crunchy coconut. Better yet, they’re incredibly easy to whip up, making them perfect for gathering family and friends or simply satisfying your sweet cravings. Join me as we recreate this classic Australian treat that’s sure to spark joy and warmth in your kitchen. Are you ready to dive into this delightful journey of flavor and memory?

Why Are Pink Jelly Cakes So Irresistible?
Nostalgic Charm: These Pink Jelly Cakes transport you back to joyful childhood memories, elevating any gathering with ease.
Effortless Preparation: With just a few simple steps, you can create a stunning dessert that looks like it came from a bakery.
Flavor Explosion: The combination of soft sponge, tangy strawberry jelly, and crunchy coconut is a match made in dessert heaven.
Versatile Treat: Perfect for afternoon teas or birthday parties, they’re bound to please guests of all ages!
Make Ahead Magic: Prepare them in advance and chill—ideal for busy hosts wanting to enjoy the festivities without stress!
Dive into more delightful treats with our popular Cinnamon Apple Cider Cupcakes or light and fluffy Cotton Cheesecake Cupcakes.
Pink Jelly Cakes Ingredients
• Get ready to create this nostalgic dessert!
For the Vanilla Sponge Cake
- All-purpose flour – This forms the cake’s foundation, ensuring it’s light and fluffy.
- Granulated sugar – Sweetens the cake; use organic for a richer flavor.
- Baking powder – Guarantees a light rise, making each bite airy.
- Salt – Enhances the sweetness and balances flavors.
- Unsalted butter – Adds moisture and a buttery richness; room temperature is best.
- Eggs – Essential for structure and moisture; use large, fresh eggs.
- Vanilla extract – Infuses lovely flavor; opt for pure extract for authenticity.
- Milk – Keeps your sponge tender; swap with almond milk for a dairy-free option.
For the Strawberry Jelly
- Strawberry jelly – Provides that classic fruity flavor and vibrant color. Other fruit flavors can be explored for delightful variations.
For the Coconut Coating
- Desiccated coconut – Adds texture and crunch; unsweetened coconut is preferable. Omit if you’re looking for a lighter dessert.
For the Whipped Cream
- Heavy cream – Essential for a rich and fluffy filling; real cream is highly recommended.
- Powdered sugar – Sweetens and stabilizes the cream for a perfect consistency.
- Vanilla extract – Infuses the cream with flavor, making it irresistibly delicious.
With these Pink Jelly Cakes ingredients at your fingertips, you’re all set to recreate this cherished Australian treat and bring a slice of nostalgia into your home!
Step‑by‑Step Instructions for Pink Jelly Cakes
Step 1: Prepare Sponge Cakes
Preheat your oven to 350°F (175°C) and grease a cake pan. In a mixing bowl, combine flour, sugar, baking powder, and salt. Beat in softened butter, eggs, milk, and vanilla extract until the mixture is smooth and light. Pour the batter into the prepared pan and bake for 25–30 minutes, or until a toothpick inserted in the center comes out clean. Allow the vanilla sponge to cool completely on a wire rack.
Step 2: Dip in Jelly
Once the sponge cakes have cooled, prepare the strawberry jelly according to the package instructions, allowing it to thicken slightly. Cut the sponge into rounds about 2 inches in diameter using a cookie cutter. Dip each sponge round into the strawberry jelly, ensuring they are fully coated and allow the excess to drip off. The vibrant pink color of the jelly should cover each cake beautifully.
Step 3: Coat with Coconut
On a plate, spread the desiccated coconut evenly. Take each jelly-coated sponge cake and roll it in the coconut, pressing gently to ensure a good coating. You want to create a beautiful, crunchy exterior that contrasts delightfully with the soft cake and jelly interior. Set the coconut-coated cakes aside on a clean platter as you finish coating the rest.
Step 4: Assemble with Cream
In a mixing bowl, whip the heavy cream with powdered sugar and vanilla extract until soft peaks form, creating a light and fluffy filling. Take two jelly-covered coconut cakes and spread a generous dollop of whipped cream on the flat side of one. Place another cake on top to make a sandwich. Repeat this process until all cakes are assembled, creating delightful layers of flavor and texture.
Step 5: Chill
Once the Pink Jelly Cakes are assembled, place them in the refrigerator for at least 30 minutes. Chilling allows the jelly to set and flavors to meld beautifully. You’ll notice the coconut coating firming up slightly, ensuring that each bite is a perfect blend of soft sponge, rich cream, and crunchy coconut. This step is essential for achieving the ideal texture!
Step 6: Serve and Delight
After chilling, remove the Pink Jelly Cakes from the refrigerator. Serve them on a decorative plate, possibly with fresh fruit or a dusting of powdered sugar for an elegant touch. The combination of flavors and textures will transport you straight back to those cherished moments of nostalgia. Perfect for afternoon tea or delightful gatherings, these treats are bound to impress your guests!

Pink Jelly Cakes Variations & Substitutions
Feel free to explore these fun variations that will make your Pink Jelly Cakes uniquely yours!
-
Fruit-Flavored Jellies: Try raspberry or orange jelly for a fruity twist. Each flavor brings a new layer of excitement to your cake.
-
Coconut-Free: For a lighter option, simply omit the desiccated coconut. This way, the focus remains on the luscious whipped cream and jelly layers.
-
Greek Yogurt Filling: Swap the whipped cream for Greek yogurt to create a tangy yet refreshing filling. This adds a protein boost, making your cakes a tad healthier!
-
Gluten-Free: Use a gluten-free flour blend in place of all-purpose flour for a delicious alternative that everyone can enjoy.
-
Chocolate Sponge: For chocolate lovers, replace the vanilla sponge with a rich chocolate cake base. The chocolate pairs perfectly with the strawberry jelly.
-
Nutty Crunch: Add crushed almonds or walnuts in the coconut layer for an extra crunch. The nutty flavor complements the sponge cake beautifully.
-
Spice It Up: Incorporate a hint of cinnamon or vanilla into the whipped cream. This subtle touch adds warmth and a delightful aroma.
-
Mini Cakes: Make bite-sized versions of these cakes for parties. Just adjust the baking time and enjoy these delightful treats in smaller portions!
By exploring these variations, you can create your own unforgettable memories with each bite. Want to add more sweetness to your dessert repertoire? Don’t miss our irresistible Cinnamon Apple Cider Cupcakes or light and airy Cotton Cheesecake Cupcakes.
Storage Tips for Pink Jelly Cakes
Fridge: Store leftover Pink Jelly Cakes in an airtight container for up to 2 days to maintain their freshness and flavor.
Freezer: If you’d like to keep them longer, freeze the individual cakes in a single layer, wrapped securely, for up to 3 months. Thaw in the fridge before serving.
Reheating: These cakes are best enjoyed chilled, but if you prefer them at room temperature, allow them to sit out for about 30 minutes after removing from the fridge or freezer.
What to Serve with Old-Fashioned Pink Jelly Cakes
Looking to create a delightful dining experience that complements the lightness of these sweet treats?
- Creamy Mashed Potatoes: Their smooth texture and buttery flavor provide a wholesome contrast to the airy cakes.
- Crisp Garden Salad: A fresh salad with vibrant greens and a tangy vinaigrette balances the sweetness; it’s a light accompaniment perfect for afternoon gatherings.
- Fruit Platter: A colorful array of seasonal fruits adds a refreshing touch and a variety of textures that harmonize beautifully with the Pink Jelly Cakes.
- Sparkling Lemonade: The bright, zesty notes of lemonade elevate the flavors and offer a bubbly companion to the sweetness of the cakes.
- Vanilla Ice Cream: A scoop of creamy vanilla ice cream is a classic accompaniment, providing a rich and luscious element to each bite.
- Chocolate-Dipped Strawberries: These decadent bites add an elegant touch and a burst of berry flavor, perfectly enhancing the sweet jelly experience.
- Herbal Tea: A soothing cup of chamomile or peppermint tea makes for a relaxing pairing, ideal for a cozy afternoon treat.
- Cheese Platter: A mix of soft cheeses and crackers introduces a savory edge, balancing the sweetness of the Jelly Cakes with rich creaminess.
- Chocolate Mousse: The luxurious texture of mousse offers a delightful contrast to the soft sponge, making every dessert plate truly indulgent!
Make Ahead Options
These Old-Fashioned Pink Jelly Cakes are ideal for meal prep, allowing you to savor the nostalgia without the last-minute rush! You can prepare the vanilla sponge and let it cool up to 24 hours in advance, sealing it tightly to retain moisture. Once you’re ready to serve, dip the sponge rounds in the strawberry jelly and coat with desiccated coconut. Additionally, whipped cream can be prepped within 3 days, just keep it stored in an airtight container in the refrigerator. When it’s time to assemble, simply sandwich the whipped cream between the coated cakes, chill for at least 30 minutes, and enjoy your delightful creation, just as fresh as the day you made it!
Expert Tips for Pink Jelly Cakes
- Jelly Thickness: Ensure the jelly is slightly thickened before dipping; this helps create an even coating that adheres well to the sponge.
- Sponge Cooling: Let the sponge cakes cool completely before dipping; warm cakes can cause the jelly to melt and slide off.
- Coconut Coating: Roll the cakes in coconut right after dipping in the jelly; this ensures the coconut sticks well and enhances that crunchy texture.
- Whipped Cream Consistency: Whip the cream until soft peaks form; over-whipping can lead to a grainy texture and ruin that smooth filling.
- Chilling Time: Don’t rush the chilling process; allowing the cakes to set for a full 30 minutes helps flavors meld, making each bite a joy.
Pink Jelly Cakes Recipe FAQs
What should I look for when selecting ripe strawberries or jelly?
Absolutely! When selecting strawberries, look for vibrant red color and firm texture without any dark spots. For jelly, check that it has a smooth consistency and vibrant color, ensuring fresh taste. If you’re using store-bought jelly, the brand can also influence flavor—opt for those made with real fruit juice for the best results.
How should I store leftover Pink Jelly Cakes?
To keep your Pink Jelly Cakes fresh, store them in an airtight container in the refrigerator for up to 2 days. Chilling enhances the flavors, making each bite even more delightful! If you happen to have leftovers, ensure they are well-sealed to prevent them from drying out.
Can I freeze Pink Jelly Cakes for later use?
Absolutely! For freezing, wrap each individual cake in plastic wrap and then place them in a freezer-safe bag. This will help prevent freezer burn. They can be stored for up to 3 months. When you’re ready to enjoy, simply thaw them in the refrigerator for several hours or overnight. This method retains the delicious flavors and textures beautifully!
What should I do if my sponge cake doesn’t rise properly?
No worries! If your sponge doesn’t rise, check that your baking powder is fresh and active. Also, be sure to measure ingredients accurately and mix the batter just until combined—overmixing can cause a dense cake. Next time, try beating your egg whites until soft peaks form to incorporate more air for a fluffier texture!
Are these Pink Jelly Cakes suitable for people with allergies?
While these cakes are a delightful vegan-friendly option, they do contain dairy and gluten. If you have dairy allergies, try substituting the heavy cream with coconut milk cream or a dairy-free whipped topping. For gluten sensitivity, use a gluten-free all-purpose flour blend. It’s always best to double-check the ingredient labels for any specific allergens!
How can I incorporate different flavors into my Pink Jelly Cakes?
Very! Exploring flavor variations can be so much fun. Instead of strawberry jelly, try using raspberry, passionfruit, or even a citrus jelly for a zesty twist. You can also experiment with different flavored whipped creams—add a bit of almond extract or cocoa powder to mix it up! Just let your taste buds guide you.
Delightful Pink Jelly Cakes – A Taste of Nostalgic Bliss
Ingredients
Equipment
Method
- Preheat your oven to 350°F (175°C) and grease a cake pan. In a mixing bowl, combine flour, sugar, baking powder, and salt. Beat in softened butter, eggs, milk, and vanilla extract until smooth. Pour into the prepared pan and bake for 25–30 minutes, until a toothpick comes out clean. Allow to cool completely.
- Prepare the strawberry jelly according to package instructions and cut the sponge into 2-inch rounds using a cookie cutter. Dip each round into the strawberry jelly and allow excess to drip off.
- Spread desiccated coconut on a plate. Roll each jelly-coated sponge cake in the coconut and set aside on a clean platter.
- Whip the heavy cream with powdered sugar and vanilla extract until soft peaks form. Make sandwiches with jelly-covered coconut cakes and whipped cream.
- Chill the assembled cakes in the refrigerator for at least 30 minutes before serving.
- Serve the Pink Jelly Cakes on a decorative plate, optionally with fresh fruit or powdered sugar.
Leave a Reply