
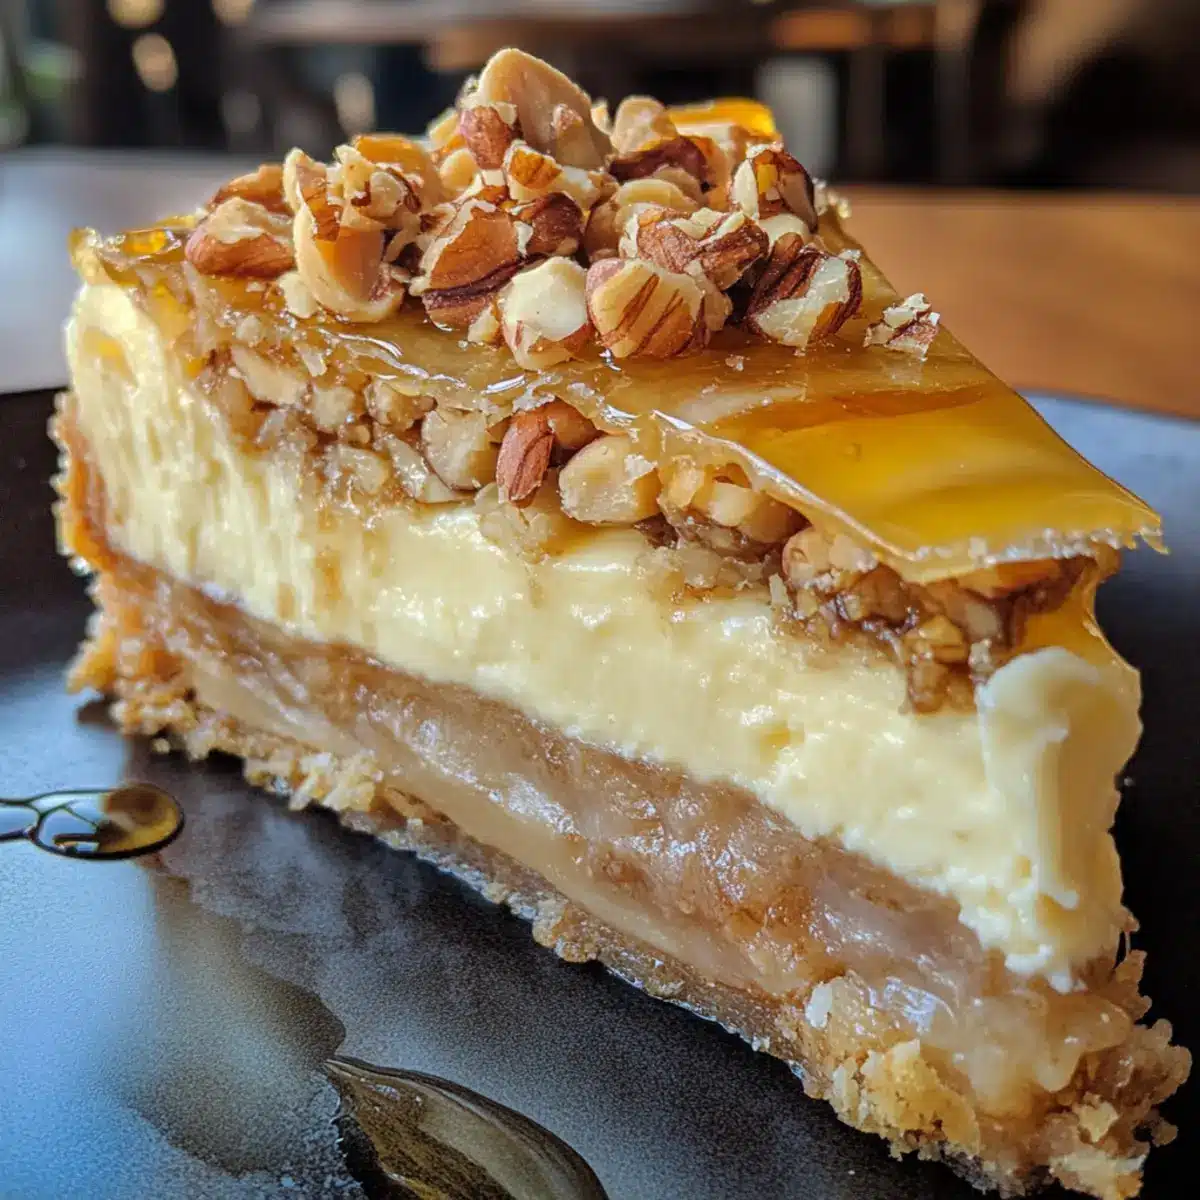
As I was exploring new dessert ideas, I stumbled upon an irresistible culinary mashup that had my taste buds dancing: Baklava Cheesecake. This enchanting fusion takes the nutty, honey-drizzled essence of traditional baklava and marries it with the creamy delight of classic cheesecake, creating a dessert that’s both familiar and exciting. It’s quick to prepare and customizable, allowing you to switch up nuts or sweeteners to suit your preferences. Whether you’re serving it at a special gathering or indulging in a well-deserved treat on a Wednesday night, this dessert promises to impress. Are you ready to discover how to create this decadent delight?
Why is Baklava Cheesecake a Must-Try?
Irresistible Fusion: This Baklava Cheesecake brings together the best of two worlds—rich baklava flavors and smooth cheesecake creaminess, making each bite a truly unique experience.
Customizable Delight: Easily adjust the recipe by swapping in your favorite nuts or sweeteners. Want gluten-free? Simply use ground almonds or gluten-free phyllo dough!
Quick and Easy: You don’t need to be a pastry chef to whip this up; the straightforward steps let you enjoy gourmet dessert goodness without the fuss.
Crowd-Pleaser: Perfect for celebrations or a cozy night in, this cheesecake never fails to impress guests and family alike.
Cultural Twist: Dive into a dessert that honors diverse culinary traditions and showcases an imaginative blend of flavors—similar to my Chocolate Chip Cheesecake for a sweet twist!
Baklava Cheesecake Ingredients
For the Crust
• Graham Cracker Crumbs – Provides the crust’s structure; substitute with ground almonds for a gluten-free crust.
• Melted Butter – Binds crust ingredients together; use coconut oil for a dairy-free option.
For the Filling
• Cream Cheese – Offers the creamy filling base; for a vegan version, replace with vegan cream cheese.
• Sugar – Sweetens the cheesecake; swap with honey or maple syrup to add deeper flavor.
• Eggs – Acts as a binder for the filling; for a vegan option, use flax eggs (1 tablespoon flaxseed meal + 2.5 tablespoons water for each egg).
• Sour Cream – Adds creaminess and tanginess; substitute with Greek yogurt for a lighter option.
• Chopped Nuts (e.g., walnuts or pistachios) – Introduces traditional baklava flavor; experiment with other nuts like almonds or hazelnuts.
For the Topping
• Honey – Provides natural sweetness and complements nutty flavors; agave syrup can be used as a vegan substitute.
• Phyllo Pastry – Forms a distinct layer in the cheesecake; for a gluten-free alternative, use gluten-free phyllo dough or an almond flour-based crust.
Step‑by‑Step Instructions for Baklava Cheesecake
Step 1: Preheat the Oven
Start by preheating your oven to 325°F (160°C). While the oven warms up, take a 9-inch springform pan and generously grease it with butter or cooking spray. This will help ensure that your Baklava Cheesecake releases easily after baking.
Step 2: Prepare the Crust
In a mixing bowl, combine graham cracker crumbs with melted butter, stirring until fully incorporated. Once mixed, firmly press this mixture into the base of the greased springform pan, creating an even layer. The crust sets the foundation for your luxurious Baklava Cheesecake, so ensure it’s compact and level.
Step 3: Create the Filling
In a large mixing bowl, beat together the cream cheese and sugar until the mixture is smooth and creamy, about 2-3 minutes. Add the eggs one at a time, mixing well after each addition. Next, incorporate sour cream until fully combined, creating a silky filling that complements the nutty layers of the baklava.
Step 4: Add Nuts
Gently fold in the chopped nuts of your choice, such as walnuts or pistachios, ensuring they’re evenly distributed throughout the cheesecake filling. This adds not only flavor but also the delightful crunch reminiscent of traditional baklava. Once combined, pour the filling over your prepared crust in the springform pan.
Step 5: Bake the Cheesecake
Carefully place the springform pan into the preheated oven, letting your Baklava Cheesecake bake for 50-60 minutes. Keep an eye on it; the edges should be set while the center remains slightly jiggly. This balance is key to achieving that perfect creamy texture.
Step 6: Cool Down
After baking, turn off the oven and leave the cheesecake inside with the door ajar for about 1 hour. This slow cooling method helps prevent cracking in your cheesecake. Once cooled, remove it from the oven and allow it to cool completely at room temperature.
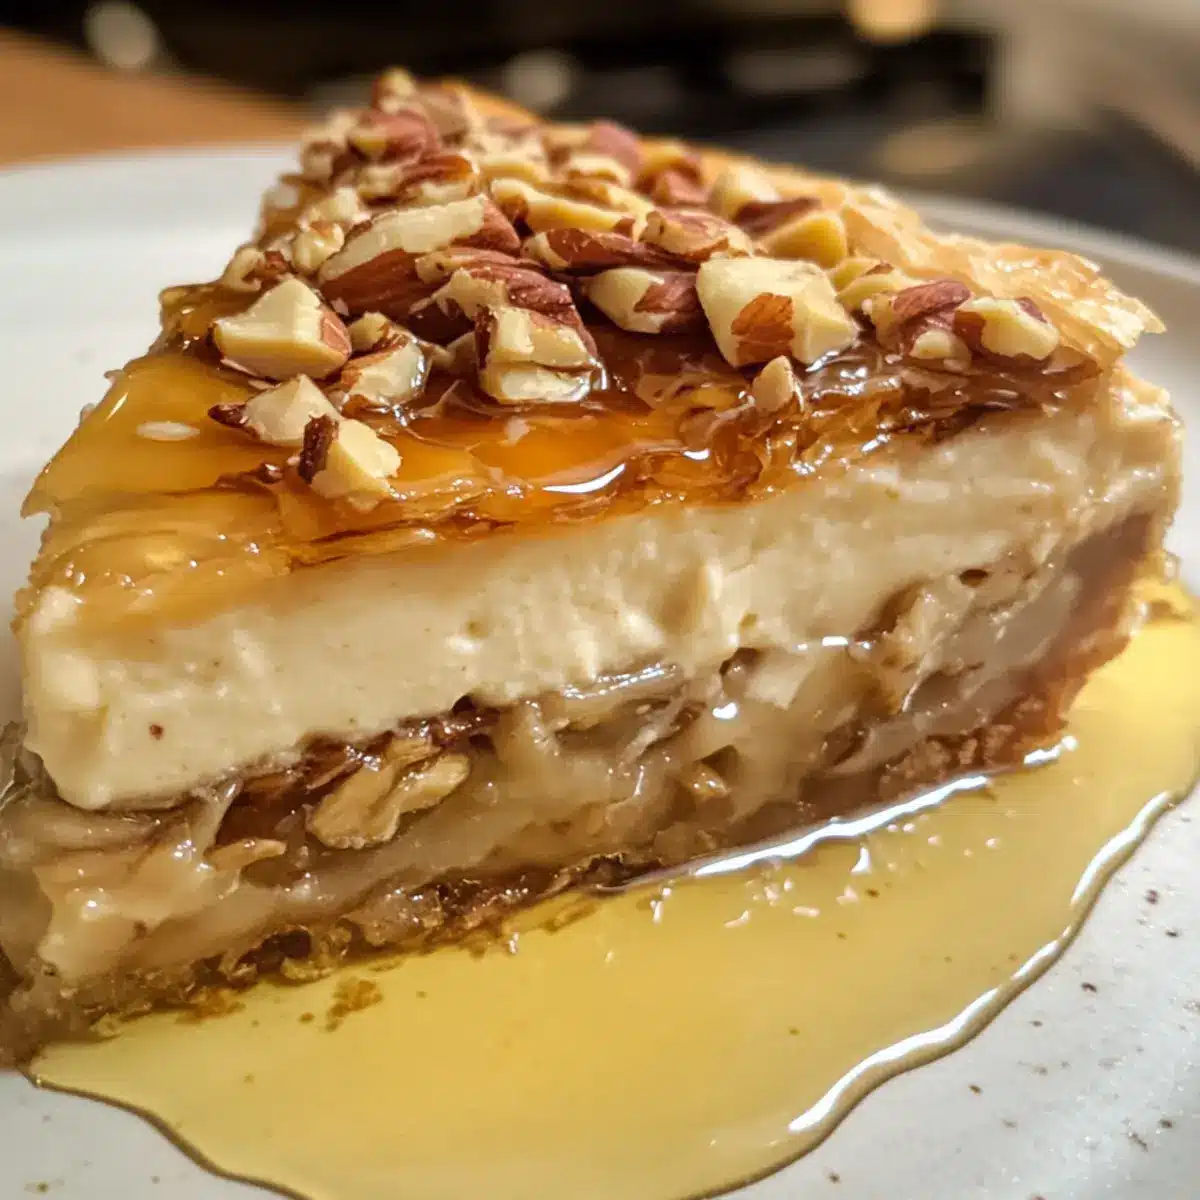
Step 7: Finish with Honey
Once your Baklava Cheesecake has cooled, drizzle honey generously over the top to enhance its sweetness and bring out its nutty flavors. Allow the dessert to chill in the refrigerator for at least 4 hours, or overnight, to let the flavors meld beautifully before slicing and serving.
Expert Tips for Baklava Cheesecake
-
Avoid Overmixing: Gently mix your filling ingredients to prevent incorporating too much air, ensuring a smooth, creamy texture in your Baklava Cheesecake.
-
Check Your Eggs: Use room-temperature eggs for better emulsification; this helps achieve a more consistent filling that binds well together.
-
Mind the Baking Time: Every oven is unique; start checking for doneness at 50 minutes by gently shaking the pan. If the center is still jiggly, continue to bake.
-
Cool Slow: After baking, let the cheesecake cool in the oven with the door ajar. This gradual temperature change helps prevent unsightly cracks.
-
Chill Before Serving: Refrigerate your Baklava Cheesecake for at least 4 hours or overnight. This allows the flavors to meld and the texture to set perfectly.
-
Customize to Taste: Feel free to experiment with different nuts and sweeteners to make this dessert your own—personalization makes it even more special!
Make Ahead Options
These Baklava Cheesecake delights are perfect for busy home cooks looking to save time during the week! You can prepare the crust (using graham cracker crumbs or gluten-free options) up to 24 hours in advance; just keep it tightly covered to maintain its crispness. The filling can also be mixed and refrigerated for 3 days before baking, but ensure it’s stored in an airtight container to prevent any drying out. When you’re ready to bake, simply pour the filling over the crust and follow the baking instructions. This way, you’ll enjoy a rich, creamy dessert that’s just as delicious as when freshly made, all while freeing up time for the things you love!
How to Store and Freeze Baklava Cheesecake
Fridge: Store your Baklava Cheesecake in an airtight container for up to 5 days. This keeps it fresh while preserving the creamy texture.
Freezer: If you want to enjoy it later, freeze the cheesecake for up to 3 months. Wrap it tightly in plastic wrap and foil to prevent freezer burn.
Reheating: Thaw the cheesecake overnight in the fridge before serving. Allow it to sit at room temperature for about 30 minutes to regain its creamy consistency.
Serving Options: Drizzle with honey again or top with fresh whipped cream after thawing for an extra touch of indulgence!
What to Serve with Baklava Cheesecake
Looking to create a memorable meal that perfectly balances with your luscious Baklava Cheesecake? Here are some delightful options that complement its rich flavors beautifully.
-
Creamy Vanilla Ice Cream: A scoop of vanilla ice cream next to the cheesecake enhances its sweetness while adding delightful creaminess.
-
Fresh Berries: Strawberries or blueberries provide a refreshing, tart contrast, cutting through the rich, nutty flavors of the cheesecake. Their bright color adds visual appeal, making dessert even more enticing!
-
Greek Yogurt with Honey: A dollop of tangy Greek yogurt drizzled with honey delivers a lovely creamy element, adding a refreshing twist that harmonizes wonderfully.
-
Nutty Baklava Bites: For those who want to honor both desserts, serve small baklava pieces alongside the cheesecake. The additional crunch and flavors echo the baklava influence in the cheesecake.
-
Charming Herbal Tea: A warm cup of chamomile or mint tea can serve as a comforting drink, enhancing the dessert experience through soothing flavors.
-
Chocolate Drizzle: Top your cheesecake with a drizzle of chocolate for a luxurious twist. The richness of chocolate pairs perfectly with the sweet layers, bringing an extra layer of decadence.
-
Honeyed Roasted Nuts: Serving warm, honey-glazed nuts creates a tasty, crunchy side that amplifies the nutty essence of the cheesecake. The warm flavors make a cozy pair!
-
Crisp Apple Slices: For a fresh, light option, pair with crisp apple slices tossed in cinnamon. Their crunchy texture and sweet tartness provide a delightful palate cleanser.
-
Sparkling Citrus Mocktail: A refreshing drink like sparkling lemonade or a citrus-infused mocktail brightens the dining experience, balancing the cheesecake’s sweetness with a vibrant zing.
-
Creme Brulee: For the ultimate indulgence in a dinner party setting, serve a small portion of creme brulee alongside. Its creamy custard and caramelized sugar will tantalize the guests for a truly luxurious dessert course!
Baklava Cheesecake Variations
Feel free to customize this delightful dessert, ensuring each bite is a unique experience that speaks to your taste buds!
-
Nut Choices: Experiment with different nuts like pecans or hazelnuts for varied flavor and crunch. Consider blending various nuts to create a robust nut medley that complements the overall cheesecake beautifully.
-
Spice It Up: Add a sprinkle of cardamom or nutmeg to the filling for a warm, inviting aroma. These spices are subtly aromatic and can elevate the flavors of your Baklava Cheesecake to new heights.
-
Lighter Option: Swap out cream cheese for low-fat cream cheese and Greek yogurt to lighten the dessert without sacrificing flavor. You’ll maintain that creamy filling while enjoying a guilt-free indulgence!
-
Sweetness Twist: Use maple syrup or agave instead of sugar to add a different layer of sweetness. Each sweetener brings its own unique flavor profile, making this cheesecake even more interesting.
-
Gluten-Free Alternative: Use gluten-free crackers or almond flour for the crust to ensure everyone gets to enjoy this delicious treat. It’s a great way to share a lovely dessert with gluten-sensitive friends and family.
-
Fruit Infusion: Incorporate dried fruits like raisins or apricots into the nut mixture for a sweet surprise. The added textures and flavors will make each slice a delightful blend of sweet and savory.
-
Vegan Delight: Replace the dairy in the recipe with vegan alternatives, such as coconut cream instead of cream cheese and flax eggs instead of regular eggs. This allows everyone to savor the experience of Baklava Cheesecake, even if they’re following a vegan lifestyle.
-
Topping Variations: Top with crushed baklava, whipped coconut cream, or a sprinkle of cinnamon before serving for a stunning presentation. These toppings not only enhance the visual appeal but also add delightful flavors and textures.
Feel free to explore these ideas, along with other creative variations, to craft your perfect Baklava Cheesecake! If you’re interested in other unique recipes, take a look at my Cheesecake Stuffed Baked Apples or indulge in the flavorful layers of Pumpkin Cheesecake Truffles. Happy baking!
Baklava Cheesecake Recipe FAQs
How do I choose the right nuts for my Baklava Cheesecake?
Absolutely! Traditional baklava uses walnuts or pistachios, but you can really personalize your cheesecake using your favorite nuts. Almonds or hazelnuts work beautifully too! Just ensure they are chopped finely to incorporate evenly into the filling.
What’s the best way to store Baklava Cheesecake?
Very important! Store your Baklava Cheesecake in an airtight container in the refrigerator for up to 5 days. This helps maintain its creamy texture. If you have leftovers, allow it to come to room temperature for about 30 minutes before serving afterward for the best taste.
Can I freeze Baklava Cheesecake?
Definitely! To freeze, wrap your Baklava Cheesecake tightly in plastic wrap and then in foil to prevent freezer burn. It can be stored for up to 3 months. When ready to enjoy, thaw in the fridge overnight and let it sit at room temperature for about 30 minutes for optimal creaminess.
What should I do if my cheesecake cracks during baking?
Don’t worry; this can happen sometimes! To minimize cracking in future bakes, be sure to cool your cheesecake slowly by leaving it in the oven with the door ajar for about an hour after baking. Using room temperature ingredients, especially eggs, can also help achieve a smoother texture.
Are there any dietary considerations for Baklava Cheesecake?
Absolutely! This recipe is quite versatile. For a gluten-free version, you can substitute graham cracker crumbs with ground almonds or gluten-free phyllo dough. If someone is vegan, you can use vegan cream cheese and flax eggs as replacements! Enjoying this creamy dessert is possible for everyone.
How long will my Baklava Cheesecake last in the fridge?
Your Baklava Cheesecake will stay fresh in the refrigerator for up to 5 days. Make sure it’s in an airtight container. To enjoy it at its best, let it sit at room temperature for about 30 minutes before serving to restore its creamy texture.
Baklava Cheesecake Bliss: Indulge in Nutty Creamy Goodness
Ingredients
Equipment
Method
- Preheat your oven to 325°F (160°C) and grease a 9-inch springform pan.
- Combine graham cracker crumbs with melted butter and press into the bottom of the pan.
- Beat together cream cheese and sugar until smooth; add eggs, mixing well, then incorporate sour cream.
- Fold in chopped nuts of choice and pour over prepared crust.
- Bake in preheated oven for 50-60 minutes until edges are set and center jiggles slightly.
- Cool in the oven with the door ajar for 1 hour, then at room temperature until completely cool.
- Drizzle honey over the cooled cheesecake and refrigerate for at least 4 hours before serving.
Leave a Reply