
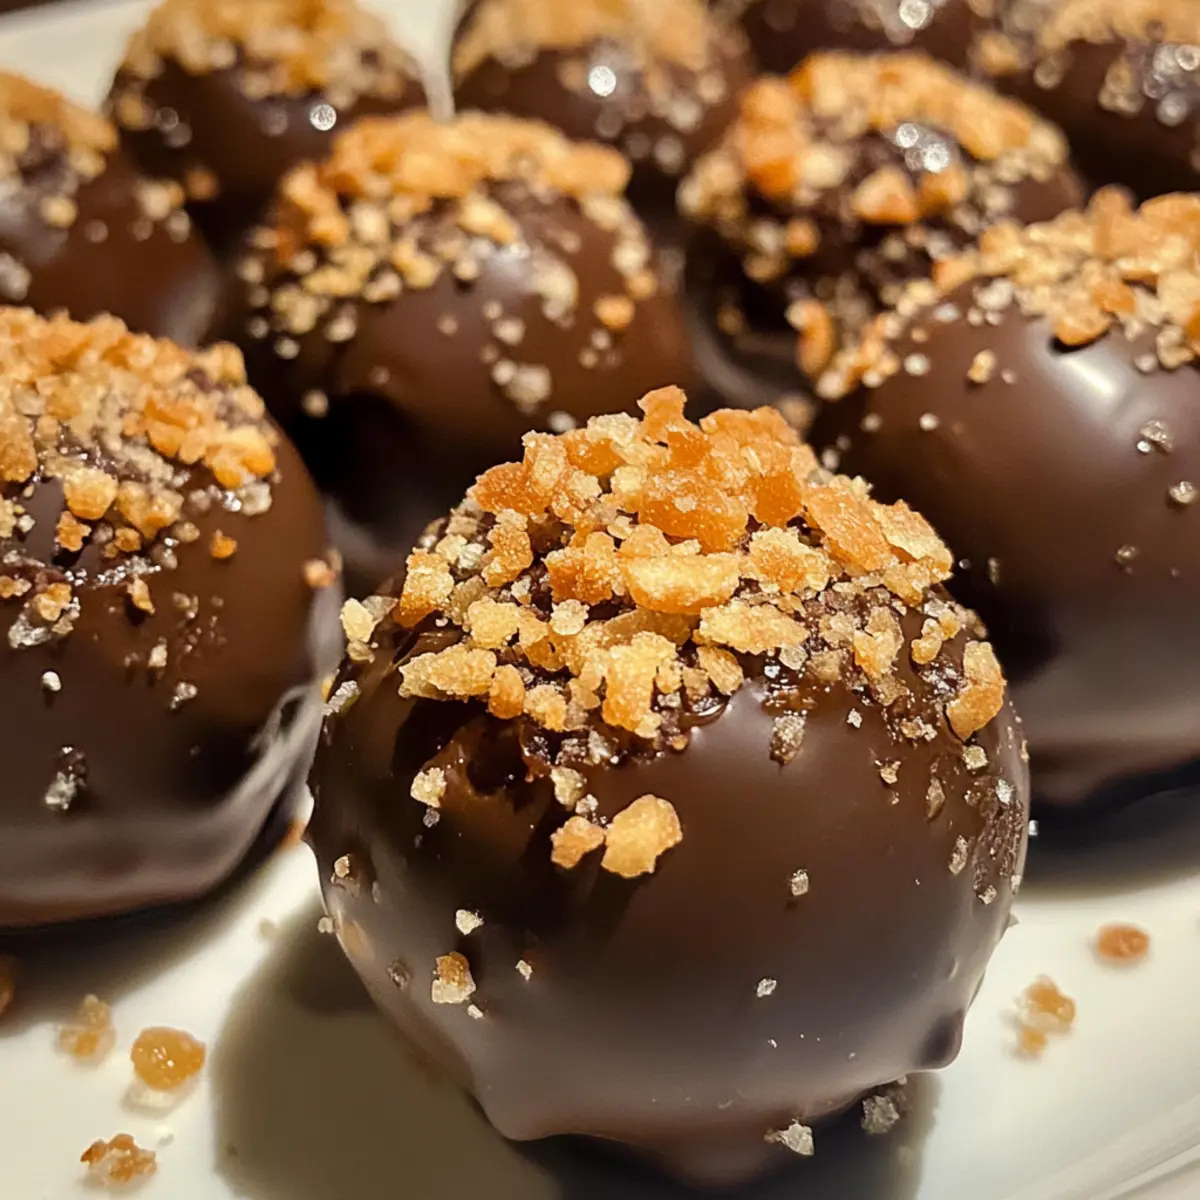
One afternoon, while I was rummaging through my pantry, I stumbled upon a treasure trove of graham crackers and peanut butter. Inspiration struck! That’s when I started whipping up these No-Bake Butterfinger Balls, a delightful treat that marries the creamy richness of peanut butter with the crunch of Butterfinger candy bars. This recipe is perfect for anyone who craves a quick and easy dessert without the fuss of baking. With just a handful of ingredients, you’ll create a sweet yet salty indulgence that’s sure to impress friends and family alike. Whether you’re hosting a gathering or just need a little excuse for a snack, these Butterfinger Balls are here to satisfy your cravings. Ready to dive into this delicious world of no-bake goodness? Let’s roll up our sleeves and get started!
Why are Butterfinger Balls a must-try?
Quick & Easy: These no-bake Butterfinger Balls come together in a snap, making them perfect for those busy days when you’re short on time.
Indulgent Flavors: Enjoy the rich combination of creamy peanut butter, crunchy graham crackers, and the delightful pop of Butterfinger candy, creating an irresistible treat.
Versatile Options: Get creative! Experiment with various toppings or swap in your favorite candy bars for a personalized touch.
Crowd-Pleasing Appeal: Whether it’s a school event or a family gathering, these treats disappear in minutes, making them a guaranteed hit!
Perfect Make-Ahead Treat: Prepare them in advance and store in the fridge; they’re ready to impress whenever the cravings strike. For a similar flair, check out my delightful Pumpkin Cheesecake Balls!
Butterfinger Balls Ingredients
For the Mixture
• Softened Butter – Adds richness and helps bind ingredients together. Substitution: Use unsalted butter for a more controlled salt level.
• Vanilla Extract – Enhances flavor depth. No substitution necessary, though vanilla paste could be used for added intensity.
• Powdered Sugar – Sweetens the mixture and gives a smooth texture. Substitution: Granulated sugar may be used, but will alter the texture slightly.
• Peanut Butter – The base of the recipe, contributing creaminess and flavor. Note: Avoid all-natural varieties as they may be too oily.
• Graham Cracker Crumbs – Provides structure and a crunchy texture. Substitution: Digestive biscuits or Vanilla Wafer crumbs can be used if graham crackers are unavailable.
• Crushed Butterfinger Bars – Adds crunch and unique flavor. Substitution: Other candy bars like Reese’s or Snickers can be used for different taste profiles.
For the Coating
• Chocolate Bark or Chocolate Chips – Provides the outer coating; ensures a glossy finish when tempered. Substitution: Use melting wafers or a combination for a different texture.
Optional Garnishes
• Additional Crushed Butterfinger Bars – Adds an extra layer of flavor and texture.
• Festive Sprinkles – Perfect for enhancing the visual appeal, making them suitable for celebrations.
• Coarse Sea Salt – Delivers a delightful contrast to the sweetness.
Prepare yourself to dive into these delicious Butterfinger Balls that are not only quick to make but also satisfy your sweet cravings!
Step‑by‑Step Instructions for Butterfinger Balls
Step 1: Prepare the Dough
In a mixing bowl, combine 1 cup of softened butter with 1 cup of peanut butter using an electric mixer. Beat on medium speed until the mixture is creamy and smooth, which should take about 2 minutes. The texture should be light and fluffy, signaling that it’s ready for the next step.
Step 2: Add Flavor
Next, stir in 1 teaspoon of vanilla extract into the peanut butter and butter mixture. Use a rubber spatula to scrape down the sides of the bowl and ensure all ingredients are well incorporated. This will enhance the flavor and complexity of your Butterfinger Balls.
Step 3: Incorporate Sweetness
Gradually sift in 2 cups of powdered sugar while mixing on low speed. This prevents a sugary cloud from forming. Mix until fully combined; the mixture will thicken and appear cohesive, resembling cookie dough. Ensure you scrape down the sides to avoid lumps.
Step 4: Mix in Crunch
Gently fold in 1 cup of graham cracker crumbs and 1 cup of crushed Butterfinger bars using a spatula. This addition creates the crunch and depth of flavor in your Butterfinger Balls. Combine until everything is evenly distributed, but be careful not to over-mix.
Step 5: Shape the Balls
Using a small cookie scoop or tablespoon, scoop out portions of the mixture, rolling them into 1 to 1½ inch balls with your hands. Place them evenly spaced on a lined cookie sheet. This helps keep them from sticking together as they chill.
Step 6: Chill
Cover the cookie sheet with plastic wrap and freeze the balls for about 30 minutes, or until they are solid. This step is crucial as it allows the balls to firm up, making them easier to coat with chocolate later on.
Step 7: Melt Chocolate
While the balls are chilling, melt 1 ½ cups of chocolate bark or chocolate chips in a microwave-safe bowl. Heat in 30-second intervals, stirring in between, until the chocolate is completely smooth and melted. Take care not to overheat it, as chocolate can seize.
Step 8: Coat the Balls
Remove the chilled Butterfinger Balls from the freezer. Dip each ball into the melted chocolate, allowing excess chocolate to drip off. Place the coated balls back onto the lined cookie sheet. The chocolate should have a glossy finish for that professional look.
Step 9: Add Finishing Touches
Before the chocolate sets, sprinkle extra crushed Butterfinger or a pinch of coarse sea salt on top of each ball. This added texture and flavor will enhance the overall deliciousness of your Butterfinger Balls, making them irresistibly inviting.
Step 10: Set and Serve
Let the coated Butterfinger Balls sit at room temperature until the chocolate hardens fully, which may take about 30 minutes. Once set, transfer them into an airtight container, and enjoy your delectable no-bake Butterfinger Balls!
What to Serve with No-Bake Butterfinger Balls
Indulge in a lovely feast by pairing delightful flavors with these easy-to-make treats.
-
Creamy Vanilla Ice Cream: The rich creaminess complements the crunchy texture of the Butterfinger Balls, creating a dessert experience that’s divine. Drizzling warm chocolate sauce over the ice cream adds an extra layer of indulgence.
-
Fresh Fruit Salad: A vibrant assortment of berries and citrus fruits balances the sweetness of the Butterfinger Balls, providing a juicy, refreshing side. The natural brightness and acidity cut through the richness beautifully.
-
Coffee or Espresso: The bold flavors of coffee enhance the chocolatey goodness of your Butterfinger Balls. Sipping on a warm cup creates a cozy pairing that’s perfect for unwinding after a long day.
-
Milkshake Madness: A thick milkshake, especially with peanut butter or chocolate flavors, pairs perfectly with your Butterfinger Balls. The creamy blend creates a decadent treat that’s hard to resist!
-
Nutty Trail Mix: A crunchy trail mix loaded with nuts and dried fruits complements the smoothness of the Butterfinger Balls. This nutritious option provides a delightful contrast in texture as you snack away.
-
Chocolate Dipped Pretzels: The sweet-and-salty vibe of chocolate-covered pretzels is a match made in heaven. They echo the flavors of the Butterfinger Balls while adding a satisfying crunch.
-
Classic Brownies: Rich, fudgy brownies harmonize beautifully alongside the peanut buttery sweetness. A shared chocolate theme draws these desserts together, ensuring a satisfying end to any meal.
-
Sparkling Water with Lime: For something refreshing, a bubbly drink with a splash of lime offers a light contrast to the richness of the treats, cleansing your palate with every sip.
-
Caramel Sauce: A drizzle of warm caramel sauce over the Butterfinger Balls elevates them to next-level indulgence. The gooey sweetness harmonizes with the crunchy elements, creating a taste sensation that’s unforgettable!
How to Store and Freeze Butterfinger Balls
Fridge: Store Butterfinger Balls in an airtight container in the refrigerator for up to 3-4 weeks. They stay fresh and ready to satisfy your sweet cravings!
Freezer: For longer storage, freeze the balls in a single layer on a baking sheet, then transfer them to a freezer-safe container. They can be frozen for up to 5-6 months.
Thawing: When ready to enjoy, thaw the Butterfinger Balls in the fridge overnight or at room temperature for about 30 minutes before serving.
Reheating: There’s no need to reheat these treats; enjoy them chilled for the best texture and flavor experience!
Helpful Tricks for Butterfinger Balls
-
Check Consistency: Use a good quality peanut butter for a smooth and creamy texture; avoid overly oily natural varieties to maintain the right consistency in your Butterfinger Balls.
-
Avoid Lumps: Sift the powdered sugar before adding it to the mixture to ensure a lump-free dough; proper mixing is crucial for a smooth finish.
-
Chill Properly: Don’t skip the chilling step! It’s essential for firming up the balls, making them easier to coat in chocolate and ensuring they hold their shape.
-
Perfect Chocolate Melting: Melt chocolate slowly at medium heat using a microwave or double boiler; this prevents seizing and gives a perfect glossy finish for your Butterfinger Balls.
-
Mind the Coating: Allow excess chocolate to drip off after coating to avoid clumps; a consistent layer of chocolate enhances both taste and appearance.
-
Creative Garnishing: Feel free to experiment with additional toppings such as crushed nuts or festive sprinkles; they can elevate your Butterfinger Balls and impress your guests!
Make Ahead Options
These Butterfinger Balls are perfect for meal prep enthusiasts! You can prepare the mixture and form the balls up to 24 hours in advance, storing them in an airtight container in the refrigerator to maintain their freshness. If you’d like to prep even further ahead, freeze the balls for up to 3 months before coating them in chocolate. To maintain quality, ensure they are well-wrapped or placed in an airtight container to prevent freezer burn. When you’re ready to enjoy, just dip them in melted chocolate, add your favorite toppings, and allow them to set. This way, you can have delicious, no-bake treats ready for any occasion with minimal effort!
Butterfinger Balls Customization Ideas
Feel encouraged to mix and match flavors and ingredients to make these treats your own!
-
Dairy-Free: Substitute use coconut oil for a dairy-free coating; it will still provide a delicious taste and silky texture.
-
Nut-Free: Opt for sunbutter in place of peanut butter to keep the nutty flavor without the nuts. This opens up the treat to those with nut allergies!
-
Low-Sugar: Swap out powdered sugar for a sugar substitute like erythritol, keeping sweetness while lowering the sugar content for a healthier option.
-
Flavor Boost: Add a touch of sea salt to the melted chocolate for a delightful sweet-and-salty balance that resonates with gourmet flair.
-
Alternative Texture: Swap graham cracker crumbs with crushed cookies like Oreos or chocolate wafers for an entirely new crunchy element. Imagine the rich chocolate flavor complementing the peanut butter!
-
Chocolate Twist: Use white chocolate or butterscotch chips instead of dark chocolate for a sweeter, creatively colorful finish that will surely intrigue guests.
-
Coconut Lovers: Roll the balls in shredded coconut after coating them in chocolate for an extra layer of texture and flavor. It brings a tropical vibe to this delightful treat!
Looking for other tasty treats to satisfy your sweet tooth? Don’t forget to try my delightful Pumpkin Cheesecake Balls or indulge in the loveliness of life with crispy treats like Rice Krispies Treats. Enjoy experimenting!
Butterfinger Balls Recipe FAQs
What kind of peanut butter should I use for Butterfinger Balls?
Absolutely! It’s best to use a conventional creamy peanut butter for this recipe, as it provides the perfect texture and richness. I recommend avoiding all-natural or organic varieties, as they can be too oily, making it harder for the ingredients to bind well. Stick with a classic brand for optimal results.
How should I store Butterfinger Balls after making them?
You can store your delicious Butterfinger Balls in an airtight container in the refrigerator for up to 3-4 weeks. This way, they’ll stay fresh and ready for whenever you crave a sweet treat! If you’ve made a big batch, storing them this way is a great option for snacking.
Can I freeze Butterfinger Balls, and if so, how?
Yes, you can absolutely freeze Butterfinger Balls for longer enjoyment! To do this, first place them in a single layer on a baking sheet and freeze them until solid, which usually takes about 1-2 hours. After they’re frozen, transfer them to a freezer-safe container or bag. They can last up to 5-6 months in the freezer. When you’re ready to indulge, just thaw them in the fridge overnight or at room temperature for about 30 minutes.
What if my mixture is too crumbly for shaping?
If the mixture is too crumbly and not holding together well, you’ve got a couple of options. First, you can add a little more peanut butter, a tablespoon at a time, to help bind it together more effectively. Alternatively, if it’s too dry, you might mix in a bit of softened butter or even a splash of milk to get the desired consistency for rolling into balls. Just remember, the key is to ensure everything is evenly combined.
Are Butterfinger Balls suitable for children or those with nut allergies?
Keep in mind that since Butterfinger Balls contain peanut butter and crushed Butterfinger bars, they are not suitable for anyone with nut allergies. However, you can easily modify the recipe! Consider using sun butter as an excellent nut-free alternative for the peanut butter, ensuring it’s safe for all to enjoy. Just be sure to check labels for other potential allergens if you’re accommodating specific dietary needs.
Decadent Butterfinger Balls: Quick No-Bake Bliss for All
Ingredients
Equipment
Method
- In a mixing bowl, combine softened butter and peanut butter using an electric mixer until creamy, about 2 minutes.
- Stir in vanilla extract into the mixture and scrape down the sides to ensure it is well incorporated.
- Gradually sift in powdered sugar while mixing on low speed until fully combined and resembling cookie dough.
- Gently fold in graham cracker crumbs and crushed Butterfinger bars until evenly distributed.
- Using a small cookie scoop, roll the mixture into 1 to 1½ inch balls and place them on a lined cookie sheet.
- Cover the cookie sheet and freeze the balls for about 30 minutes until solid.
- Melt chocolate bark or chocolate chips in a microwave-safe bowl, stirring in between until smooth.
- Dip each ball into the melted chocolate, allowing excess to drip off, then place back on the lined cookie sheet.
- Before the chocolate sets, sprinkle extra crushed Butterfinger or a pinch of coarse sea salt on top.
- Let the coated balls sit at room temperature until the chocolate hardens, about 30 minutes.
Leave a Reply