
As I stood in my kitchen, the aroma of marinating chicken wafted through the air, whisking me back to a small izakaya in Tokyo. It’s amazing how a simple dish like Crispy Japanese Karaage Chicken can evoke such vivid memories. This delightful recipe highlights the magic of double frying to achieve an irresistible crunch while keeping the chicken juicy and succulent. Not only is karaage bursting with umami flavors from soy sauce, mirin, and ginger, but it’s also quick to prepare, making it perfect for weeknight dinners or when you want to impress guests. Plus, with easy ingredient substitutions, you can customize it to your liking. Are you ready to discover the secrets to achieving restaurant-quality Japanese fried chicken at home? Let’s dive into this culinary adventure together!
Why is Korean fried chicken so popular?
Flavor Explosion: The harmonious mix of soy sauce, mirin, and ginger creates an unforgettable taste that dances on your palate.
Crispy Perfection: Achieved through the art of double frying, each bite offers an irresistible crunch that complements the juicy chicken.
Quick & Easy: This recipe is designed for busy weeknights, allowing you to whip up a flavorful meal in no time.
Versatile Cooking: Customize your chicken with easy substitutions, whether you prefer thighs over breasts or different marinades.
Crowd-Pleasing Delight: Perfect for sharing; your family will be asking for seconds and guests will be raving about your cooking. For a delightful pairing, try serving Karaage Chicken with a refreshing side like daikon salad or some comforting miso soup!
Japanese Fried Chicken Ingredients
• Let’s gather everything we need for that unbeatable flavor!
For the Chicken
- Chicken Thigh Fillets – Juicy and flavorful, thighs stay tender during frying; skinless can also work in a pinch.
- Soy Sauce – Delivers a rich umami flavor that enhances the marinade beautifully.
- Cooking Sake – Adds depth and helps tenderize the chicken, making every bite succulent.
- Mirin – Sweetens the marinade and adds a complex flavor, perfect for balance.
Substitution Note: If you don’t have mirin, simply use a bit of sugar for a sweetness boost.
For the Coating
- Corn Flour (Cornstarch) – Key for that delightful crispy texture; it creates the perfect light coating.
Substitution Note: You can also use plain flour or a combination of both for a unique crunch. - Freshly Grated Ginger – Imparts a fragrant, zesty kick that elevates the overall flavor experience.
For Frying & Serving
- Vegetable Oil – Essential for deep frying; ensure there’s enough for a perfect fry—about 3-4 cm in the pot.
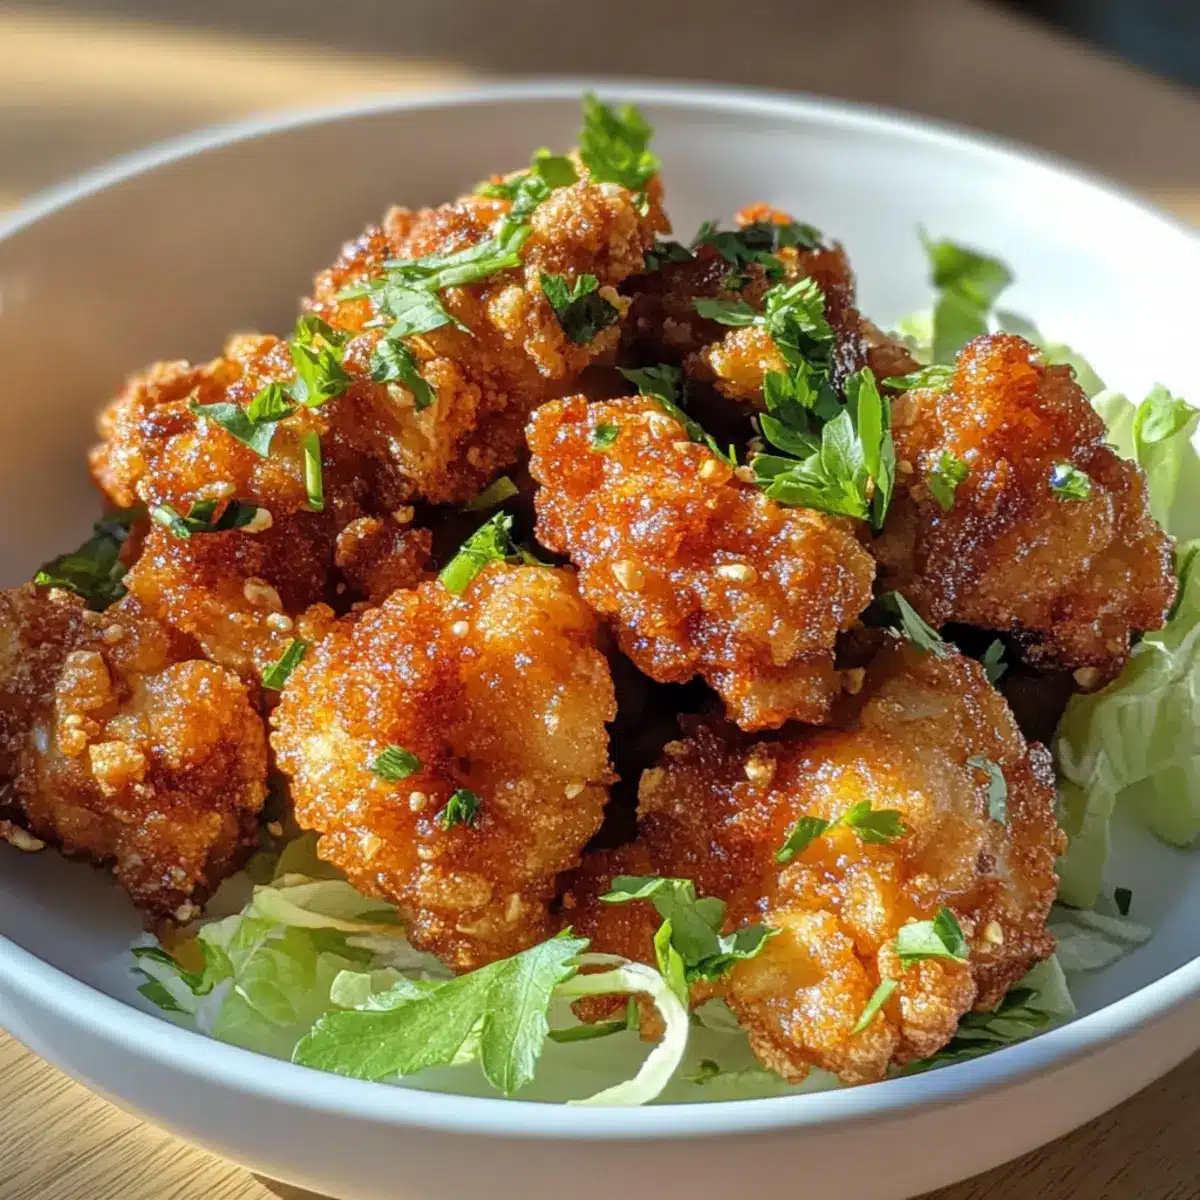
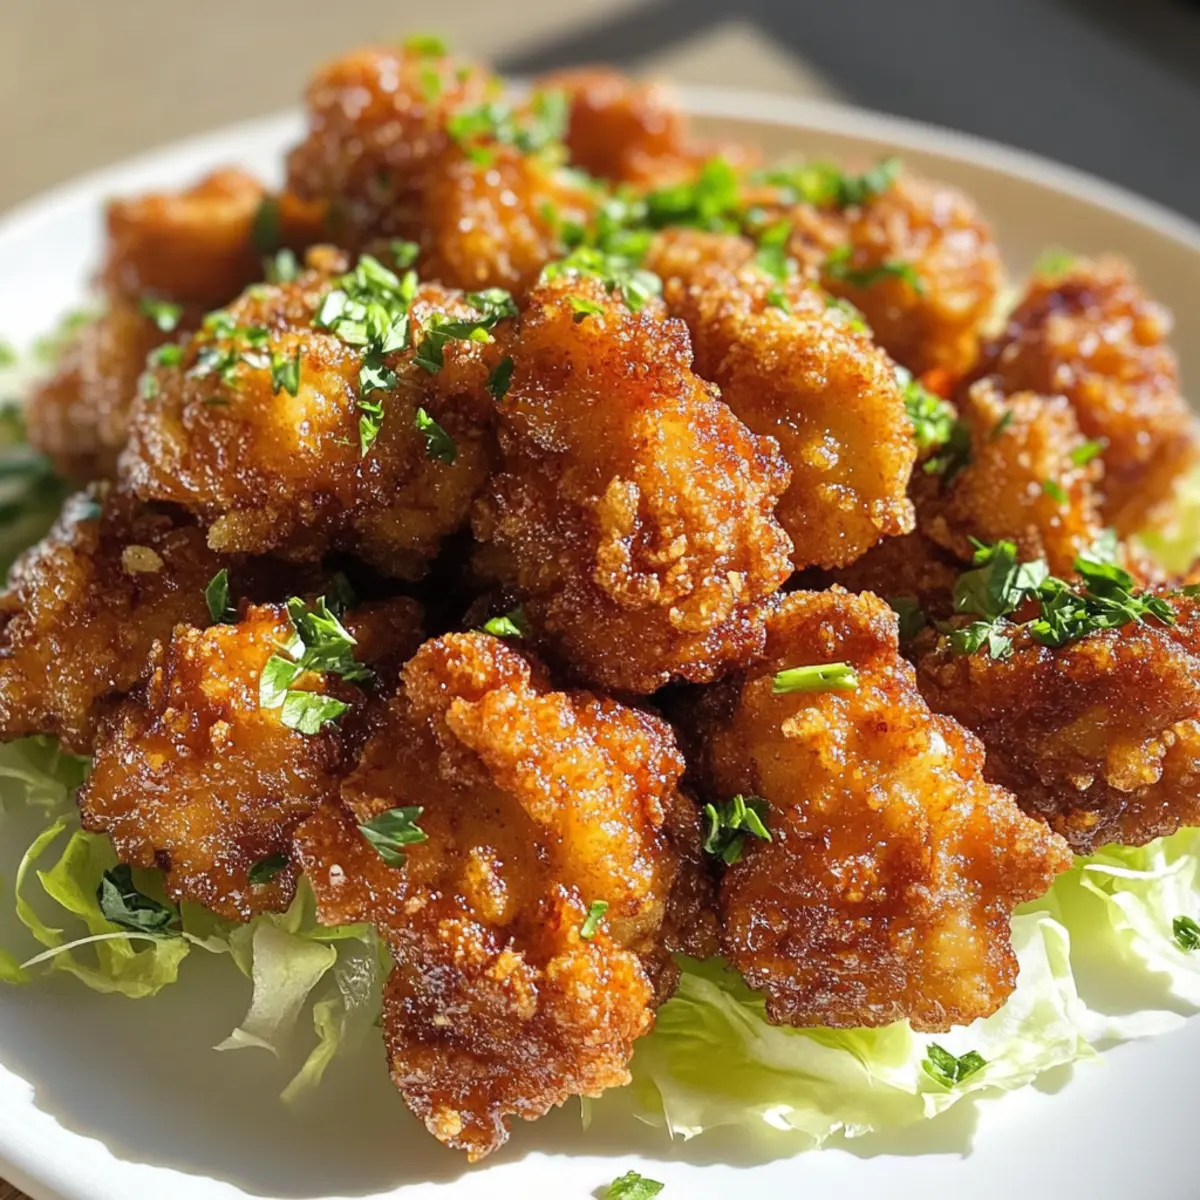
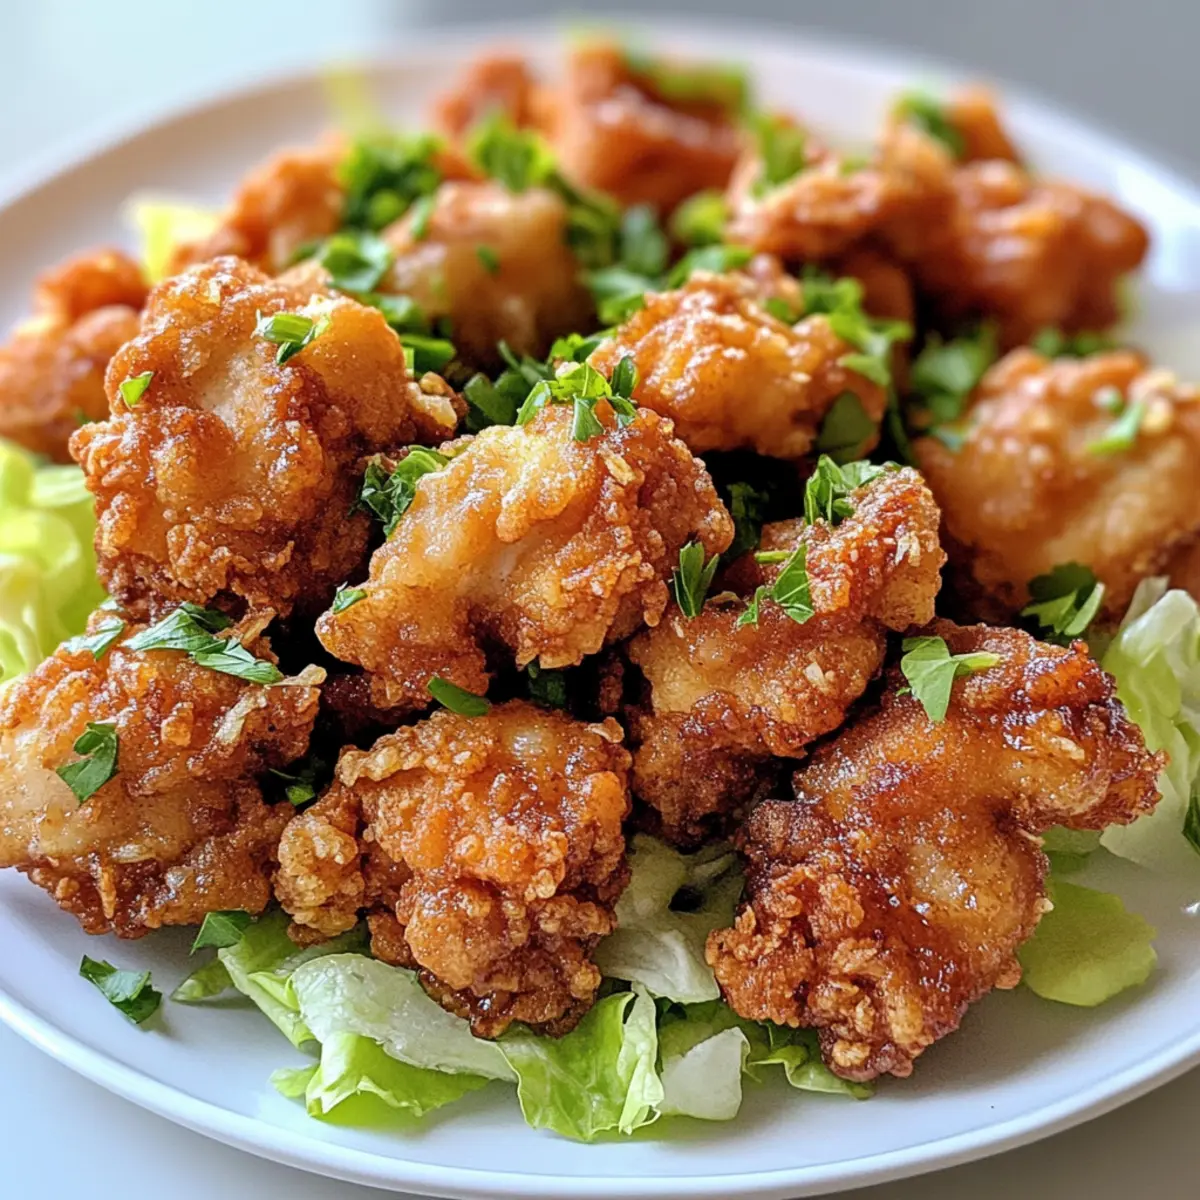
- Shredded Lettuce or Cabbage – Serves as a crunchy side that freshens up your dish and enhances presentation.
- Sprigs of Parsley – An optional garnish to give your dish a beautiful touch before serving.
With these ingredients, you’re well on your way to creating a feast of delightful Japanese Fried Chicken that your friends and family are sure to love!
Step‑by‑Step Instructions for Crispy Japanese Karaage Chicken
Step 1: Prep Chicken
Begin by patting the chicken thigh fillets dry with paper towels to ensure the marinade clings well. Place the chicken in a bowl or ziplock bag, then add the soy sauce, cooking sake, mirin, and freshly grated ginger. Massage the marinade into the chicken, ensuring every piece is coated. Let it marinate for 30 minutes to 1 hour while you prepare the rest of your ingredients.
Step 2: Prepare Oil
In a deep pot, pour enough vegetable oil to create a depth of about 3-4 cm, ensuring there’s plenty for proper frying. Heat the oil to 160°C (320°F). You can test the temperature by dipping the end of a wooden chopstick into the oil; if small bubbles form around it, the oil is ready. Keep a close eye on the temperature to maintain optimal frying conditions.
Step 3: Coat Chicken
Once marinated, drain the excess marinade and place the chicken on a clean plate lined with paper towels to remove excess liquid. Sprinkle corn flour evenly over the chicken, tossing it gently to ensure each piece is well coated. This coating is crucial for achieving the signature crunch of Japanese Fried Chicken, so make sure to cover all sides thoroughly.
Step 4: First Fry
Carefully add the coated chicken to the hot oil in small batches, ensuring not to overcrowd the pot. Fry the chicken for about 2.5 to 3 minutes, or until they turn lightly golden. Use a slotted spoon to remove the chicken and place it on a plate lined with paper towels to drain any excess oil. Let the chicken rest for 3-4 minutes; this resting period is essential for perfect texture.
Step 5: Increase Oil Temperature
With the first batch resting, remove any floating crumbs from the oil to maintain clarity. Increase the heat to raise the oil temperature to 190-200°C (374-392°F). It’s important to monitor the temperature closely as it helps create that deep, crispy exterior when frying the second batch of chicken.
Step 6: Second Fry
Now, return the rested chicken to the hot oil, also in batches, and fry for an additional 30 seconds to 1 minute. This second frying is vital for achieving that deeply golden-brown and crunchy texture that defines Karaage Chicken. As you remove each batch from the oil, let it drain again on paper towels to absorb any excess oil, ensuring the final product remains crispy.
Step 7: Serve and Garnish
Once all batches are fried, arrange the crispy Japanese Karaage Chicken on a serving platter atop a bed of shredded lettuce or cabbage for a refreshing crunch. Optionally, garnish with sprigs of parsley for a colorful touch. Serve immediately while hot, and enjoy the delightful burst of flavors that this homemade dish brings to your table!
What to Serve with Crispy Japanese Karaage Chicken
Pairing your incredible Karaage Chicken with the right sides can elevate your meal into a culinary delight that everyone will savor.
-
Shredded Cabbage Salad: This refreshing salad adds a crisp texture that perfectly complements the crunchy chicken, balancing richness with freshness. A light dressing keeps things vibrant without overpowering the dish.
-
Miso Soup: A warm bowl of miso soup provides comforting flavors and an umami kick that harmonizes beautifully with the savory notes of the chicken, enhancing the overall experience.
-
Daikon Salad: This refreshing salad, typically featuring grated or julienned daikon radish, brings a zingy crunch that contrasts wonderfully with the succulent chicken for a balanced meal.
-
Japanese Rice: Fluffy, steamed white rice serves as a neutral base, soaking up the delicious juices from the chicken while providing a satisfying heartiness to the plate.
-
Edamame Beans: Lightly salted edamame is a delightful finger food that adds a pop of color and texture, making it the perfect appetizer to enjoy alongside your fried chicken.
-
Green Tea: A steaming cup of green tea serves as a wonderfully light beverage, offering an earthy flavor that brings balance to the flavors of your Japanese Fried Chicken.
-
Tempura Vegetables: The lightness of tempura-battered vegetables offers a delightful crunch that complements the Karaage and elevates your dish with an additional layer of flavor and texture.
With these pairings, your meal featuring Crispy Japanese Karaage Chicken will be a memorable feast for friends and family!
Make Ahead Options
These Crispy Japanese Karaage Chicken pieces are perfect for meal prep enthusiasts! You can marinate the chicken thighs up to 24 hours in advance, ensuring they soak up all the flavorful goodness of soy sauce, mirin, and ginger. Simply follow the marinating instructions, then cover the bowl or seal the ziplock bag, and refrigerate. To maintain that irresistible crunch, fry the chicken just before serving; you can even complete the first fry earlier in the day and allow the chicken to rest—just perform the second fry for 30 seconds to 1 minute to achieve that golden, crispy finish. Enjoy the time-saving benefits of having a delicious meal ready to go!
Storage Tips for Japanese Fried Chicken
- Room Temperature: Enjoy your Japanese Fried Chicken fresh for the best flavor. If you’ve got leftovers, they should be consumed within 2 hours to ensure safety.
- Fridge: Store leftover chicken in an airtight container in the fridge for up to 3 days. To maintain flavor, reheat before serving.
- Freezer: For longer storage, freeze the fried chicken in a single layer, then transfer to a freezer bag for up to 3 months. Reheat directly from frozen for a quick meal.
- Reheating: For the best results, reheat your karaage in an air fryer or a hot oven for about 10 minutes to restore that crispy texture.
Japanese Fried Chicken Variations
Feel free to personalize your dish and make it your own with these delightful swaps and twists!
-
Thighs vs. Breasts: Use chicken breast for a leaner option, but remember it may turn out drier.
Consider mixing and matching to see which you prefer—both options have their charm! -
Flour Alternatives: Try using rice flour or a gluten-free blend instead of corn flour for a unique texture.
This variation will still give you that crunch while catering to gluten-sensitive friends or family! -
Extra Crispy: Add a bit of panko breadcrumbs to your corn flour for an additional layer of crunch.
You’ll find that this simple tweak can elevate the crispiness to an entirely new level! -
Spicy Kick: Incorporate a splash of sriracha or chili oil into the marinade for a zesty heat.
Adjust the spice level according to your taste, and your family will enjoy an exciting twist! -
Different Proteins: Swap chicken for fish or crispy tofu to cater to varying dietary preferences.
Remember to adjust cooking times accordingly to achieve that perfect golden-brown finish! -
Herb Infusion: Try infusing the marinade with fresh herbs like basil or cilantro for a fresh twist.
This not only brightens the flavor profile but also adds a beautiful touch to your presentation! -
Garlic Lovers: Mix minced garlic into the marinade for an extra depth of savory flavor.
Garlic and chicken are a match made in heaven; it’s a small twist that adds big satisfaction!
For even more inspiration, don’t forget to try serving your Japanese Fried Chicken alongside some delightful Cheesy Garlic Chicken or enjoy it with a refreshing daikon salad for a complete meal.
Expert Tips for Japanese Fried Chicken
- Marinate Properly: Ensure to marinate the chicken for at least 30 minutes to enhance flavor. Don’t rush this step; deeper flavors develop over time.
- Oil Temperature Precision: Use a thermometer for accuracy. Too low leads to greasy chicken; too high causes burning. Optimal temperature is key for perfect Japanese fried chicken.
- Batch Frying: Fry in small batches to maintain oil temperature. Overcrowding can result in uneven cooking and soggy chicken.
- Double Fry It: Never skip the second frying! This crucial step guarantees an irresistible crunch and a beautifully golden color.
- Freshness is Key: For the best taste, serve immediately after frying. Leftovers are still good but may lose some crunch. Enjoy freshly made Karaage!

Crispy Japanese Karaage Chicken Recipe FAQs
What type of chicken should I use for karaage?
I recommend using chicken thigh fillets for the juiciest results, as they stay tender during frying. If you’re opting for chicken breasts, just know they might turn out drier. Whatever you choose, make sure the chicken is fresh and free from any dark spots.
How do I store leftovers of karaage chicken?
To store, place any leftover karaage chicken in an airtight container and refrigerate for up to 3 days. For optimal flavor, reheat before serving. I suggest using an air fryer or hot oven to re-crisp the coating.
Can I freeze karaage chicken?
Absolutely! For longer storage, freeze the karaage chicken in a single layer on a baking sheet. Once frozen, transfer the pieces into a freezer bag, squeezing out as much air as possible. It can be stored for up to 3 months. Reheat directly from frozen, cooking in an air fryer or oven until hot.
What should I do if my karaage chicken is greasy?
If you find your chicken greasy, it’s likely due to the oil not being hot enough during frying. Ensure you maintain the right frying temperatures of 160°C (320°F) for the first fry and 190-200°C (374-392°F) for the second fry. Also, avoid overcrowding the pot, as this lowers the oil temperature.
Is there a gluten-free option for this karaage recipe?
Yes, you can easily make this recipe gluten-free by using tamari instead of soy sauce and substituting cornstarch with a gluten-free flour blend. Just check that all ingredients, especially sauces, are certified gluten-free.
Crispy Japanese Fried Chicken for a Flavorful Feast
Ingredients
Equipment
Method
- Begin by patting the chicken thigh fillets dry with paper towels to ensure the marinade clings well. Place the chicken in a bowl or ziplock bag, then add the soy sauce, cooking sake, mirin, and freshly grated ginger. Massage the marinade into the chicken, ensuring every piece is coated. Let it marinate for 30 minutes to 1 hour.
- In a deep pot, pour enough vegetable oil to create a depth of about 3-4 cm, ensuring there’s plenty for proper frying. Heat the oil to 160°C (320°F).
- Drain the excess marinade from the chicken and place it on a clean plate lined with paper towels. Sprinkle corn flour evenly over the chicken, tossing it gently to ensure each piece is well coated.
- Carefully add the coated chicken to the hot oil in small batches, frying for about 2.5 to 3 minutes, or until lightly golden. Remove and place on a plate lined with paper towels.
- Remove any floating crumbs from the oil and increase the temperature to 190-200°C (374-392°F) for the second fry.
- Return the rested chicken to the hot oil in batches and fry for an additional 30 seconds to 1 minute until deeply golden-brown.
- Arrange the crispy Japanese Karaage Chicken on a serving platter atop a bed of shredded lettuce or cabbage. Optionally garnish with sprigs of parsley.
Leave a Reply