
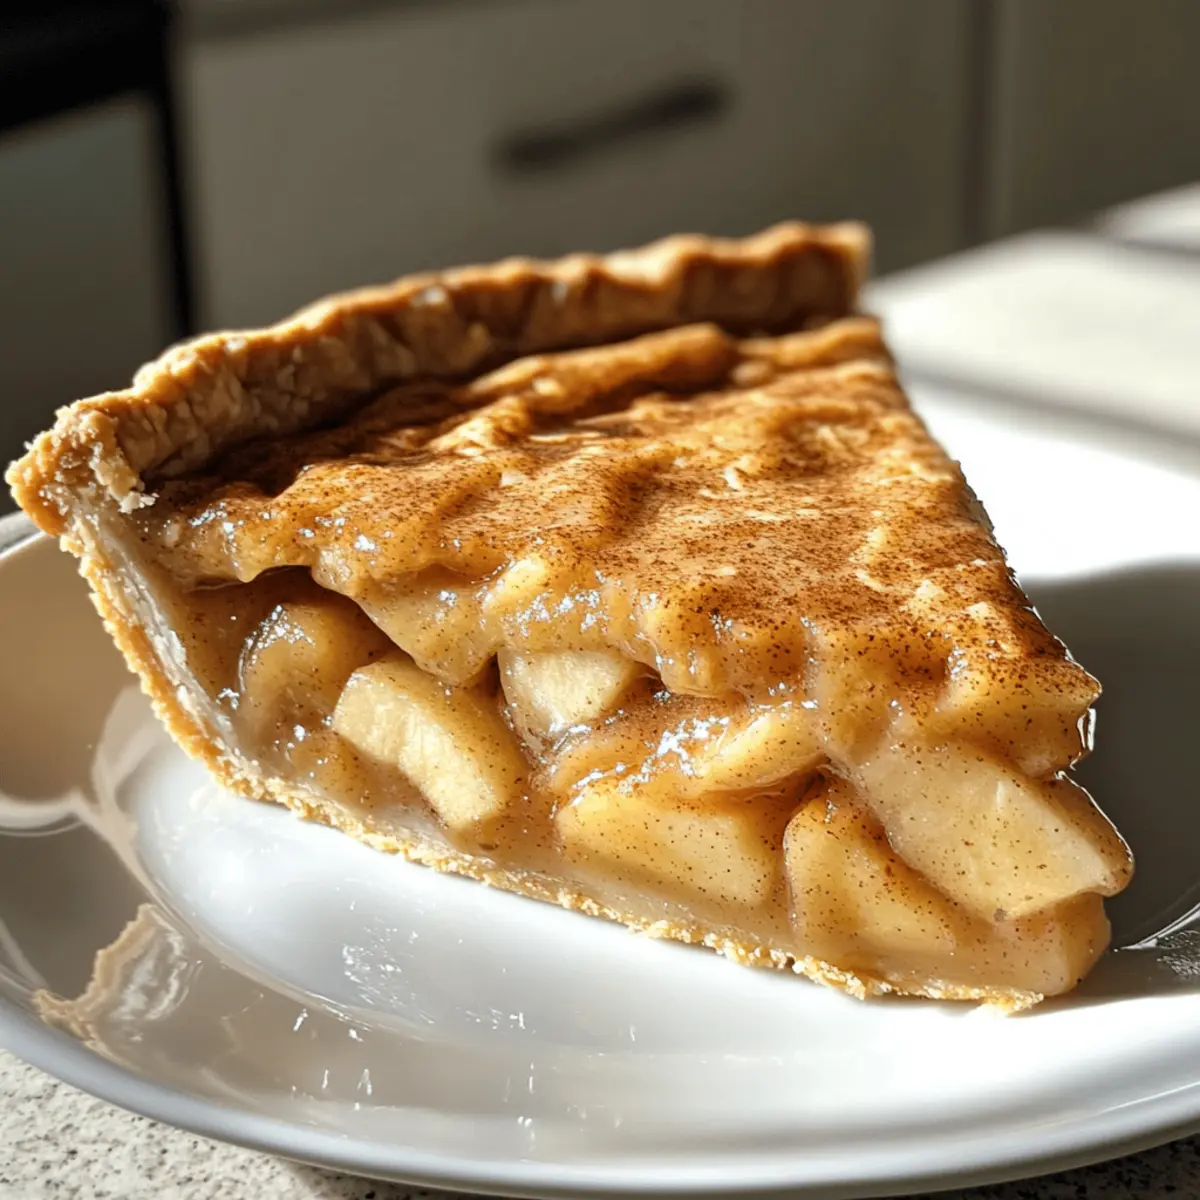
As the crisp autumn air fills our homes with a sense of comfort, I find myself reaching for my favorite flavors of the season. This Creamy Apple Butter Pie is my go-to dessert; its silky-smooth filling marries the warm essence of apple butter with familiar spices like cinnamon and nutmeg. Best of all, it’s easy to make and perfect for sharing at fall gatherings. The wholesome spelt crust adds a delightful twist, inviting you to savor each bite. Whether you’re reminiscing about family dinners or simply craving something sweet, this custard pie is sure to become a beloved favorite. Curious how to whip up this seasonal sensation? Let’s dive into the recipe!
Why is this Apple Butter Pie a must-try?
Simplicity at Its Best: This Apple Butter Pie requires just a handful of ingredients and straightforward steps, making it accessible for bakers of all skill levels.
Warm, Cozy Flavors: The rich apple butter filling combined with fragrant spices like cinnamon and nutmeg creates a homey aroma that fills your kitchen with fall warmth.
Unique Spelt Crust: The wholesome spelt crust offers a hearty texture that stands out from traditional pie crusts, adding an extra layer of deliciousness.
Versatile Toppings: Whether topped with maple whipped cream or seasonal fruits, this pie allows for fun customizations to suit your taste.
Crowd-Pleasing Dessert: Perfect for Thanksgiving or autumn gatherings, this pie is sure to impress family and friends, leaving them asking for seconds or even thirds!
For more fantastic fall dessert inspiration, don’t miss my Cinnamon Apple Cider Cupcakes or the delightful Apple Cider Whoopie treats!
Apple Butter Pie Ingredients
For the Filling
- Apple Butter – This key ingredient brings a rich sweetness and unmistakable apple flavor; feel free to use homemade for an authentic touch.
- Eggs – Essential for binding the filling and ensuring a custard-like consistency; room temperature eggs blend better for a silky texture.
- Heavy Cream – Adds luxurious creaminess to the pie, but can be swapped with half-and-half if you’re looking for a lighter option.
- Cinnamon – Infuses your pie with warm, comforting notes; adjust according to your spice preference for a perfect cozy vibe.
- Nutmeg – Complements the cinnamon beautifully, enhancing the pie’s warmth; a little goes a long way!
- Sugar – Balances the flavors in the filling; consider replacing some with maple syrup for a unique twist.
- Salt – A pinch helps to enhance the flavors and balance the sweetness.
For the Crust
- Spelt Flour – Offers a hearty and nutty base for the crust; substitute with all-purpose flour if needed for a different texture.
- Butter – Traditional ingredient for a flaky crust; use unsalted for better control over the pie’s overall flavor.
- Ice Water – Helps to bind the dough without warming it; always use cold water for the best crust.
Optional Toppings
- Maple Whipped Cream – A delightful topping that adds a touch of sweetness and a seasonal flair; easily made by whipping cream with a hint of maple syrup.
- Baked Pie Crust Cut-Outs – Fun, decorative pieces that make your pie presentation pop; use leftover crust for an easy embellishment!
This Apple Butter Pie is not only easy to make but is bound to become a fall favorite around your table. Enjoy every delicious bite!
Step‑by‑Step Instructions for Apple Butter Pie
Step 1: Prepare the Crust
Begin by preheating your oven to 375°F (190°C). In a mixing bowl, combine the spelt flour and cold butter, mixing until crumbly. Add ice water gradually, just until the dough holds together. Roll out the dough and fit it into a pie dish. Blind bake for about 15–20 minutes, or until lightly golden. Once done, remove from the oven and allow it to cool completely.
Step 2: Mix the Filling
In a large mixing bowl, whisk together the apple butter, eggs, heavy cream, sugar, cinnamon, nutmeg, and salt until the mixture is completely smooth. This step is essential for the delectable filling of your Apple Butter Pie. Aim to achieve a consistent texture, which will ensure beautiful slices once it’s baked. Set this mixture aside for the next step.
Step 3: Bake the Pie
Reduce the oven temperature to 350°F (175°C). Carefully pour the apple butter filling into the cooled spelt crust, ensuring it’s evenly distributed. Bake for 45–55 minutes or until the edges are puffed but the center is slightly wobbly. Keep an eye on it towards the end to prevent over-baking, which can affect the pie’s custard-like texture.
Step 4: Cool & Chill
Once baked, remove the pie from the oven and allow it to cool at room temperature for about 1 hour. This cooling period allows the filling to set properly. Afterward, cover the pie and refrigerate it for at least 6 hours, or preferably overnight, to enhance the flavors and structure.
Step 5: Serve
To serve your delightful Apple Butter Pie, gently slice it and consider topping it with a dollop of maple whipped cream for an added treat. For a creative touch, decorate with baked pie crust cut-outs for a festive appearance. This pie makes the perfect centerpiece for fall gatherings and seasonal celebrations.
What to Serve with Creamy Apple Butter Pie
As the leaves change and the air turns crisp, it’s time to complement your dessert with some delightful side dishes that whisk you into the warm embrace of autumn.
- Maple Whipped Cream: This airy topping adds a sweet, creamy finish that’s simply irresistible next to the rich apple butter filling.
- Vanilla Ice Cream: A scoop of creamy vanilla ice cream creates a beautiful contrast, melting delightfully over the warm pie.
- Candied Pecans: Sweet, crunchy pecans add a delightful textural contrast while enhancing the nutty flavors of the spelt crust.
- Caramel Sauce: Drizzling warm caramel over each slice introduces a rich sweetness that deepens the flavor experience.
- Cinnamon Spiced Apples: Freshly sautéed apples sprinkled with cinnamon bring a fruity brightness that beautifully complements the pie’s flavors.
- Hot Apple Cider: Sip on this warm beverage infused with spices, perfect for cozying up alongside your dessert.
- Ginger Snap Cookies: Crunchy and spicy, these cookies offer a delightful texture, making for a lovely pairing with the creamy custard.
- Autumn Salad: A fresh salad with mixed greens, dried cranberries, and candied walnuts adds a refreshing burst of flavor before digging into the pie.
- Pumpkin Spice Latte: The cozy flavors of this classic drink echo the warmth of fall, inviting you to savor every bite of your pie.
Storage Tips for Apple Butter Pie
-
Fridge: Store your Apple Butter Pie in the refrigerator, where it will stay fresh for up to 5 days. Cover it with plastic wrap or a pie dome to keep it moist.
-
Freezer: Freezing is not recommended due to the custard texture, which may change when thawed. Enjoy the pie fresh for the best experience.
-
Make-Ahead: You can prepare the pie a day in advance. Just make sure to cover it well in the refrigerator to enhance the flavors before serving.
-
Reheating: If you prefer a warm slice, gently warm individual pieces in the oven at 175°F (80°C) for about 10-15 minutes, being careful not to overheat and affect the custard quality.
Make Ahead Options
These Apple Butter Pie preparations are perfect for busy weeknights and holiday gatherings! You can prepare the spelt crust and chill it up to 24 hours in advance, helping to save precious time when you’re ready to bake. Additionally, the filling can be mixed and refrigerated for up to 3 days before pouring it into the crust to bake. Just make sure to cover the filling tightly to avoid any absorption of odors from the fridge. When you’re ready to enjoy this delicious Apple Butter Pie, simply pour the chilled filling into the pre-baked crust and follow the baking instructions; the flavors will be just as delightful as if made fresh!
Apple Butter Pie Variations & Substitutions
Feel free to explore these delightful twists on your classic Apple Butter Pie to make it truly your own!
- Gluten-Free: Use a gluten-free flour blend for the crust to cater to gluten sensitivities without losing texture.
- Dairy-Free: Substitute heavy cream with coconut cream or almond milk for a lighter, plant-based filling.
- Spiced-Up: Add a pinch of ginger or cloves alongside the cinnamon and nutmeg to kick the flavor up a notch.
- Nutty Crunch: Stir in crushed walnuts or pecans into the filling for added texture and nutty richness.
- Caramel Drizzle: Drizzle homemade or store-bought caramel sauce over the top just before serving for an extra treat.
- Fruit Medley: Mix in some pear or peach butter with apple butter for a deliciously fruity twist.
- Sweetener Swap: Replace sugar with honey or agave syrup for a natural sweetness that uniquely complements the apple flavor.
- Choco-Licious: Blend in some cocoa powder for a chocolatey take that pairs surprisingly well with the apple flavor.
For more seasonal delights, you might want to check out my Cinnamon Apple Cider Cupcakes or the delicious Apple Cider Whoopie treats! Enjoy getting creative in the kitchen!
Expert Tips for Apple Butter Pie
-
Perfect Temperature: Use room temperature eggs to ensure they blend smoothly, creating a creamy filling for your Apple Butter Pie.
-
Prevent Over-baking: Monitor the pie closely; it should be set around the edges but still slightly wobbly in the center for that custard-like texture.
-
Chill Time Matters: Allow the pie to cool for at least 6 hours in the refrigerator; this step is crucial for achieving the perfect slice.
-
Flavor Flexibility: Don’t hesitate to adjust spice levels—cinnamon and nutmeg can be tailored to your personal taste, enhancing the overall flavor profile.
-
Crust Substitutions: If spelt flour isn’t available, all-purpose flour can work well, just be sure to maintain the balance of texture and flavor in your crust.
Apple Butter Pie Recipe FAQs
What kind of apple butter should I use?
Absolutely! You can use store-bought apple butter for convenience, but I highly recommend making your own if you have the time. Homemade apple butter gives a richer flavor and allows you to control the sweetness and spices to your liking!
How should I store the Apple Butter Pie?
Your Apple Butter Pie can be stored in the refrigerator for up to 5 days. Just cover it well with plastic wrap or place it under a pie dome to keep it fresh. If space permits, refrigerating it helps maintain its creamy texture and flavor.
Can I freeze Apple Butter Pie?
It’s best to avoid freezing this pie since the custard filling can change texture when thawed. If you need to make it ahead, stick to refrigerating it for optimal taste. I often prep mine a day in advance to let the flavors meld beautifully!
What should I do if my filling doesn’t set properly?
If you find that your filling is too runny, it’s likely due to undercooking. Make sure to bake it until the edges puff and the center is just a little wobbly, as it will firm up while chilling. Always monitor the pie closely during baking—better to under-bake than over-bake!
Can I make this pie gluten-free?
Very! You can substitute the spelt flour in the crust with a gluten-free flour blend. The texture may vary slightly, but it’s a fantastic alternative if you have gluten sensitivities. Just ensure your blend is suitable for baking to achieve the right result!
What toppings pair well with Apple Butter Pie?
The more the merrier! I often top mine with maple whipped cream for an extra touch of sweetness that complements the pie’s flavors perfectly. You can also garnish with baked pie crust cut-outs, spiced nuts, or even a drizzle of caramel for added indulgence!
Delightful Apple Butter Pie with Creamy Spelt Crust
Ingredients
Equipment
Method
- Preheat your oven to 375°F (190°C). Combine spelt flour and cold butter until crumbly; add ice water until dough holds together. Fit into pie dish and blind bake for 15–20 minutes until lightly golden. Cool completely.
- Whisk together apple butter, eggs, heavy cream, sugar, cinnamon, nutmeg, and salt until smooth. Set aside.
- Reduce oven temperature to 350°F (175°C). Pour the filling into the cooled crust. Bake for 45–55 minutes until edges are puffed and the center is slightly wobbly.
- Let the pie cool at room temperature for 1 hour, then refrigerate for at least 6 hours or overnight.
- Slice and serve with maple whipped cream and optional baked pie crust cut-outs.
Leave a Reply