
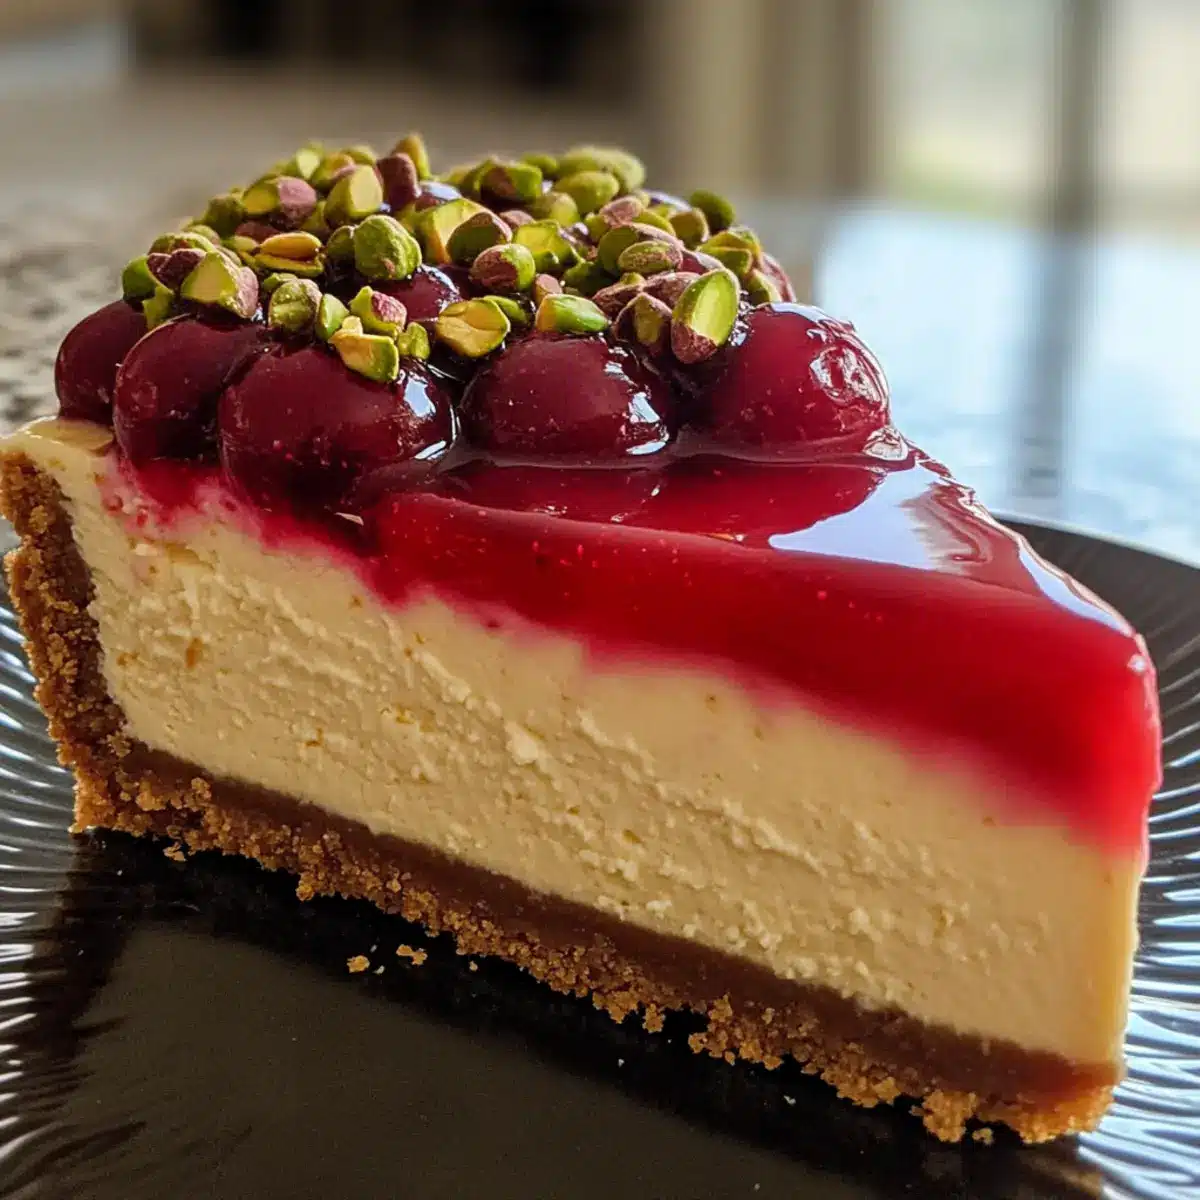
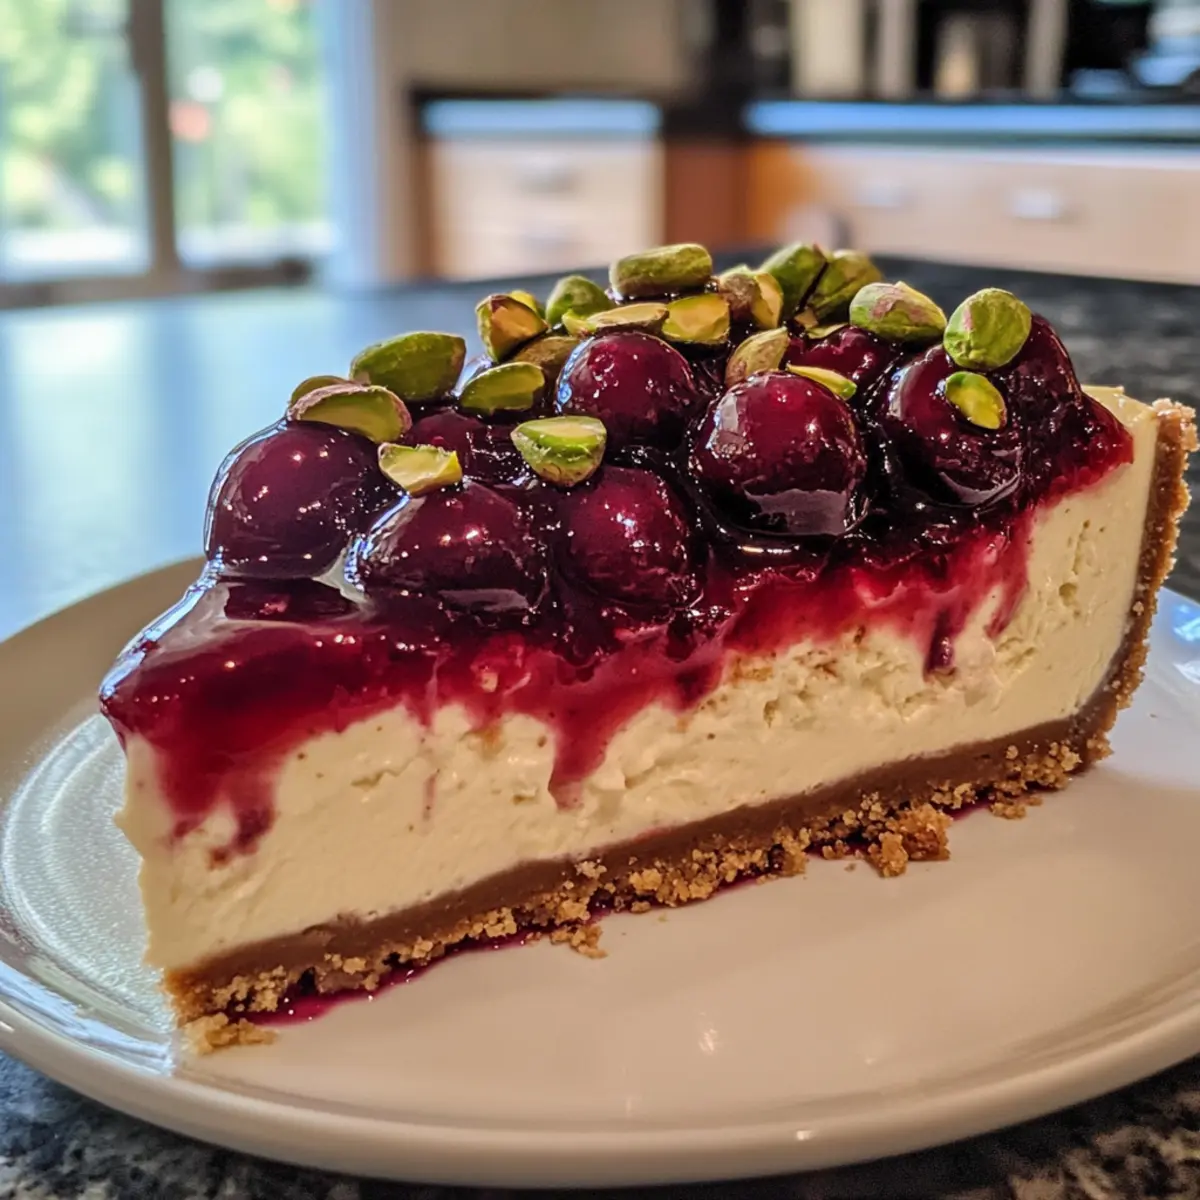
As I stood in the kitchen, the intoxicating aroma of baking cheesecake wafted through the air, instantly transforming my space into a haven of comfort. This Cherry Pistachio Cheesecake is not just a show-stopping dessert; it’s a celebration of flavors that harmonize beautifully, from the creamy texture of the filling to the delightful crunch of pistachios and the vibrant sweetness of cherries. With a delightful hint of citrus woven throughout, this festive dessert is perfect for gatherings or a cozy indulgence after dinner. Plus, it’s surprisingly simple to whip up, ensuring you impress your guests without feeling frazzled. Are you ready to dive into a slice of this creamy, dreamy cheesecake?

Why is This Cheesecake a Must-Try?
Decadent Delight: This Cherry Pistachio Cheesecake is a luxurious dessert that combines creamy richness with delightful crunch, making it irresistible for any palate.
Fresh Flavor: With vibrant hints of citrus and the sweet-tart cherry topping, it’s a festive treat perfect for celebrations or just a cozy weekend indulgence.
Effortless Elegance: The straightforward instructions allow anyone to create this impressive cheesecake, ensuring you can wow guests without complicated techniques.
Versatile Serving Options: Serve it with fresh whipped cream or mint leaves, or try a fun twist by creating mini cheesecakes in a muffin tin—adaptable for any occasion!
Meal Prep Friendly: This cheesecake keeps well in the fridge for up to five days, or freeze it for longer storage, allowing you to prep ahead for your next gathering.
Cherry Pistachio Cheesecake Ingredients
For the Crust
- Graham Cracker Crumbs – Provides a sweet and buttery base for the crust. Substitution: Digestive biscuits can be used for a different flavor.
- Ground Pistachios – Adds nutty flavor and richness to the crust. Tip: Use roasted, unsalted pistachios for the best results.
- Granulated Sugar – Sweetens both the crust and cheesecake filling. Substitution: Use brown sugar for a deeper flavor in the crust.
- Melted Butter – Binds the crust ingredients together while adding richness. Note: Coconut oil can be a dairy-free substitute.
For the Filling
- Cream Cheese – Creates a creamy and smooth texture for the filling. Tip: Ensure it’s at room temperature to avoid lumps.
- Eggs – Provides structure and stability to the cheesecake. Note: Beating in one at a time helps prevent cracking.
- Sour Cream – Adds additional creaminess and moisture to the filling. Substitution: Plain yogurt can be used for a lower-fat option.
- Pistachio Pudding Mix (dry) – Enhances the pistachio flavor profile in the filling. Note: For a natural flavor, consider using ground pistachios instead.
- Vanilla Extract – Introduces a warm, sweet aroma to the filling. Substitution: Almond extract can amplify nutty flavors.
For the Topping
- Cherry Pie Filling – Creates a sweet-tart topping that complements the cheesecake. Note: Use fresh cherries if preferred; drain excess juice.
Step‑by‑Step Instructions for Cherry Pistachio Cheesecake
Step 1: Preheat the Oven
Begin by preheating your oven to 325°F (160°C). While it heats, prepare a 9-inch springform pan by greasing it with butter or lining the bottom with parchment paper. This will ensure your Cherry Pistachio Cheesecake comes out easily once it’s baked and cooled.
Step 2: Make the Crust
In a mixing bowl, combine graham cracker crumbs, ground pistachios, granulated sugar, and melted butter. Stir the mixture until all ingredients are evenly coated. Press this mixture firmly into the bottom of the prepared springform pan, creating a compact crust. Bake for 8 minutes, then let it cool completely before adding the filling.
Step 3: Prepare the Filling
In a large bowl, beat the room-temperature cream cheese and granulated sugar together until the mixture is smooth and creamy. Gradually add the eggs one at a time, mixing well after each addition to avoid lumps. Incorporate the sour cream, dry pistachio pudding mix, and vanilla extract, stirring until the filling is completely smooth and well-blended.
Step 4: Bake the Cheesecake
Pour the creamy filling over the cooled crust, smoothing the top with a spatula. Place the pan in the preheated oven and bake for 45-50 minutes. The cheesecake should look set around the edges but still slightly jiggly in the center. Turn off the oven and leave the door slightly ajar, allowing the cheesecake to cool gradually.
Step 5: Chill the Cheesecake
After the cheesecake has cooled in the oven, transfer it to the refrigerator. Allow it to chill for at least 4 hours, but preferably overnight. This chilling time helps the flavors meld beautifully and gives the cheesecake its perfect firm texture, making each slice a delightful experience.
Step 6: Top and Serve
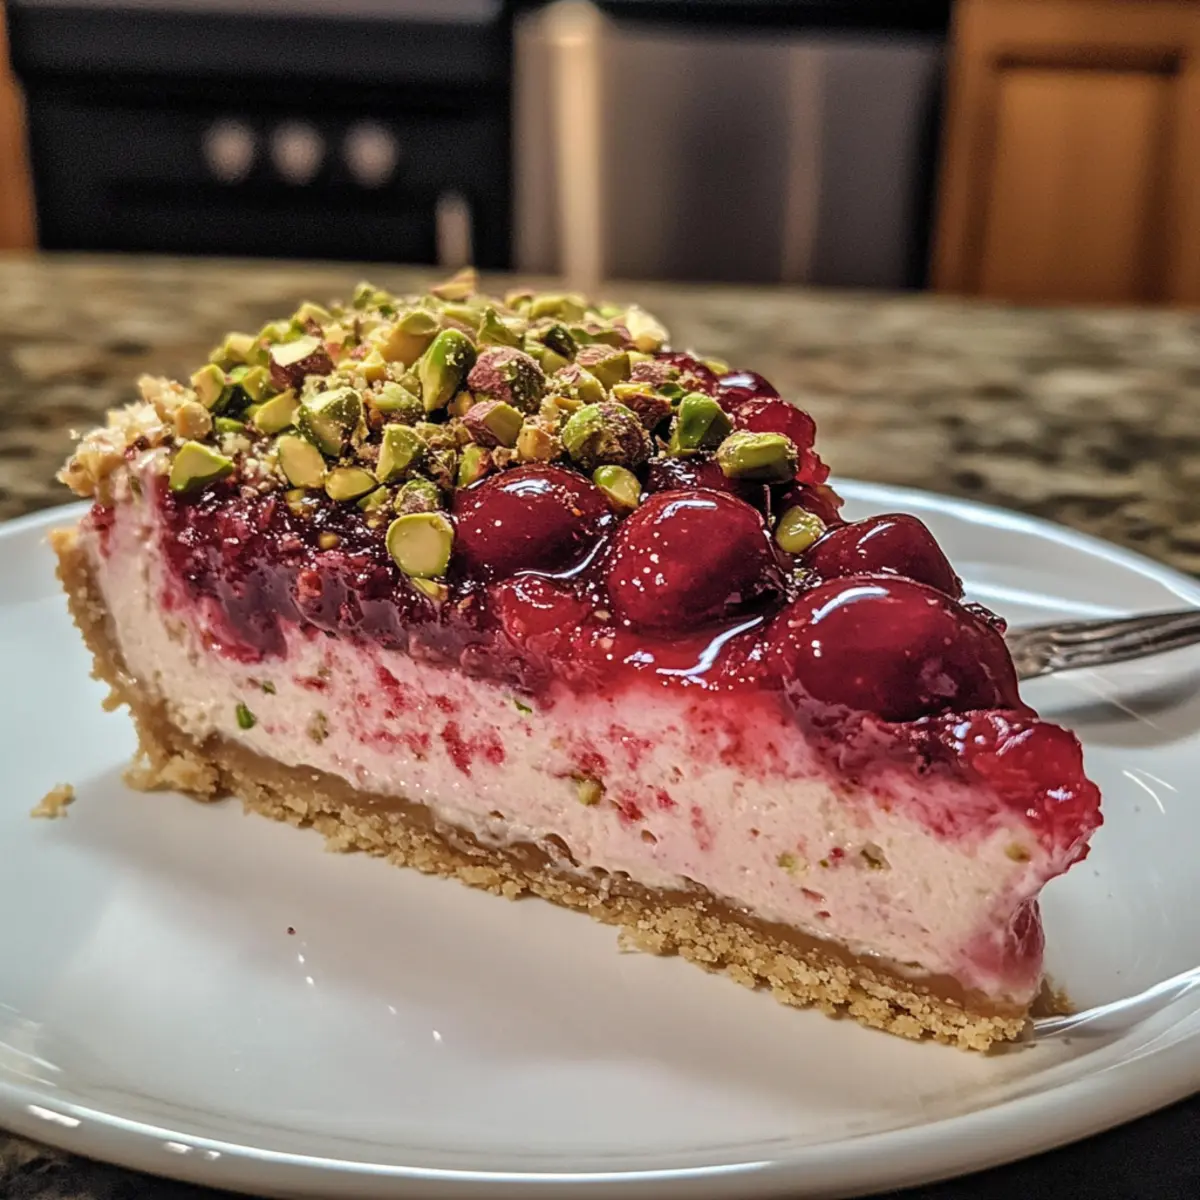
Once chilled, carefully remove the sides of the springform pan. Spread the cherry pie filling evenly over the top of the cheesecake, allowing the vibrant red cherries to glisten. For a decorative touch, sprinkle a handful of chopped pistachios over the cherry topping. Slice and serve your spectacular Cherry Pistachio Cheesecake to friends and family!
Cherry Pistachio Cheesecake Variations
Feel free to make this delicious Cherry Pistachio Cheesecake your own by exploring these creative variations!
-
Fresh Cherries: Swap the cherry pie filling for fresh or frozen cherries for a more natural taste that bursts with flavor. Simply pit and slice fresh cherries or heat thawed frozen cherries to create a fresh topping.
-
Almond Extract: Use almond extract instead of vanilla to amplify the rich nutty notes of the pistachios in the filling. The nutty essence will elevate the entire cheesecake experience.
-
Mini Cheesecakes: Create individual servings by using a muffin tin instead of a springform pan. Adjust the baking time to 18-22 minutes for delightful mini cheesecakes—perfect for gatherings or as personal treats!
-
Citrus Zest: Add lemon or lime zest to the filling for an extra zing of brightness that complements the cherries beautifully. The touch of citrus will enhance the overall flavor profile.
-
No-Bake Version: For a quicker option, turn this cheesecake into a no-bake treat by using whipped cream instead of eggs and skipping the oven. Chill until set for a refreshing dessert.
-
Chocolate Drizzle: Drizzle melted dark or white chocolate over the cherry topping for a decadent twist that adds a layer of sweetness and richness. The contrast will create a stunning finish.
-
Nutty Crust: Instead of graham cracker crumbs, make a nut-based crust with ground almonds and pistachios for an extra crunchy texture filled with nutty goodness. This change adds a delightful flavor that enhances the cheesecake.
By introducing these variations, you can create a unique Cherry Pistachio Cheesecake that perfectly suits your taste or occasion! And if you’re in the mood for more sweet treats, consider trying out these lovely options: Chocolate Chip Cheesecake or Pumpkin Cheesecake Truffles.
Make Ahead Options
This Cherry Pistachio Cheesecake is perfect for meal prep, making it easier for busy cooks to delight their family and friends without the last-minute rush! You can prepare the cheesecake filling and crust up to 24 hours in advance; simply wrap the cooled crust and filling separately in plastic wrap and refrigerate. Additionally, the cheesecake can chill in the fridge for up to 3 days before serving. To maintain its creamy texture, be sure to keep it covered to prevent drying out. When you’re ready to serve, just top the cheesecake with cherry pie filling and chopped pistachios, slice, and enjoy a show-stopping dessert with minimal effort!
Helpful Tricks for Cherry Pistachio Cheesecake
-
Crust Consistency: Ensure your graham cracker crust is compact by pressing it firmly into the pan. A loose crust can crumble when sliced.
-
Room Temperature Ingredients: Always use room temperature cream cheese and eggs. This prevents lumps in your filling, ensuring a smooth and creamy Cherry Pistachio Cheesecake.
-
Avoid Cracking: To prevent cracks, add eggs one at a time to the mixture, blending gently. Overmixing can introduce air, leading to cracks during baking.
-
Cooling Method: After baking, let the cheesecake cool slowly in the oven with the door ajar. This gradual cooling stops sudden temperature changes, which can cause cracking.
-
Perfect Slices: For clean slices, dip your knife in warm water and wipe it dry between cuts. This keeps the cheesecake pretty as you serve!
What to Serve with Cherry Pistachio Cheesecake
A delightful Cherry Pistachio Cheesecake deserves the perfect companions to create a memorable meal experience.
- Creamy Mashed Potatoes: Their buttery texture pairs beautifully with any meal, offering a comforting contrast to the cheesecake’s richness.
- Garlic Roasted Asparagus: The bright flavor and crunch of asparagus provide a fresh element that lightens the palate before dessert.
- Citrus Salad: A vibrant mix of oranges and grapefruits adds a refreshing zing that balances the sweetness of the cheesecake.
- Honey-Glazed Carrots: Their natural sweetness complements the cherry topping while providing a sumptuous flavor contrast to savory dishes.
- Sparkling White Wine: A light, bubbly wine enhances the festive spirit of the cheesecake and helps to cleanse the palate after every bite.
- Chocolate-Dipped Strawberries: A luscious dessert pairing that adds an explosive sweetness, perfect for those who can’t resist a little chocolate.
- Coconut Macaroons: These chewy treats add a welcoming chewy texture and an extra layer of sweetness that harmonizes with the pistachio flavors.
- Mint Tea: A soothing beverage that rounds out the meal, offering a refreshing cleanse to accompany the decadent cheesecake.
- Dark Chocolate Shavings: Sprinkled on top of servings, these chocolate notes add a rich flavor contrasting beautifully with the cheesecake’s silky texture.
How to Store and Freeze Cherry Pistachio Cheesecake
Fridge: Store leftovers covered in the refrigerator for up to 5 days. This helps maintain the creamy texture and flavors of your Cherry Pistachio Cheesecake.
Freezer: For longer storage, freeze the cheesecake without toppings for up to 2 months. Wrap it tightly in plastic wrap and aluminum foil to prevent freezer burn.
Thawing: When ready to enjoy, thaw the cheesecake overnight in the fridge. This gentle thawing process keeps it creamy and delicious.
Reheating: Enjoy this cheesecake cold or let it come to room temperature. Refrain from microwaving, as this could compromise its texture.
Cherry Pistachio Cheesecake Recipe FAQs
How do I choose cherries for the topping?
Absolutely! When selecting cherries, look for plump, smooth-skinned varieties without any dark spots. If using fresh cherries, ensure they’re sweet and firm to the touch. This will make your cheesecake topping extra flavorful and appealing.
How should I store my Cherry Pistachio Cheesecake?
You can store your cheesecake wonderfully! Cover leftovers and refrigerate, where they will stay fresh for up to 5 days. For better longevity, wrap the cheesecake tightly in plastic wrap and aluminum foil and place it in the freezer, where it can last for up to 2 months.
Can I freeze Cherry Pistachio Cheesecake?
Absolutely! For freezing, it’s best to do it without the toppings. Wrap the cheesecake tightly in plastic wrap and then in aluminum foil to keep it fresh. When you’re ready to enjoy, transfer it to the refrigerator and thaw overnight. This will ensure it retains its creamy texture.
What can I do if my cheesecake cracks while baking?
Very good question! To avoid cracking, be sure to mix the eggs in one at a time and avoid overmixing your batter. Another key tip is to let it cool gradually in the oven with the door slightly ajar after baking, which helps prevent those temperature shocks that can cause cracks.
Is this cheesecake safe for people with nut allergies?
It’s important to be cautious! Since this Cherry Pistachio Cheesecake contains ground pistachios, it’s not suitable for those with nut allergies. For a nut-free alternative, consider using a regular graham cracker crust without nuts and leave out the pistachio pudding mix.
What’s the best way to cut the cheesecake for perfect slices?
For clean, beautiful slices, I recommend using a sharp knife dipped in warm water. This technique helps maintain the integrity of each slice while preventing smearing of the filling. Just remember to wipe the knife clean between cuts for the best results!
Creamy Cherry Pistachio Cheesecake You Can't Resist
Ingredients
Equipment
Method
- Preheat your oven to 325°F (160°C). Prepare a 9-inch springform pan by greasing it with butter or lining with parchment paper.
- In a mixing bowl, combine graham cracker crumbs, ground pistachios, granulated sugar, and melted butter. Stir until evenly coated. Press firmly into the bottom of the springform pan. Bake for 8 minutes, then cool completely.
- In a large bowl, beat cream cheese and granulated sugar until smooth. Gradually add eggs one at a time, mixing well after each. Incorporate sour cream, dry pistachio pudding mix, and vanilla extract until smooth.
- Pour the filling over the cooled crust, smoothing the top. Bake for 45-50 minutes until set around edges but slightly jiggly in the center. Turn off the oven and let it cool with the door ajar.
- Transfer to the refrigerator and chill for at least 4 hours, preferably overnight.
- Remove the sides of the springform pan. Spread cherry pie filling over the cheesecake and sprinkle with chopped pistachios. Slice and serve.
Leave a Reply