
As I stood in my kitchen, the enticing aroma of sizzling chicken wafted through the air, instantly transporting me to my favorite late-night ramen shop. The star of today’s culinary adventure is none other than Chicken Onigiri, a delightful Japanese snack that combines seasoned, juicy teriyaki chicken with perfectly sticky sushi rice. Not only is this recipe a protein-rich marvel, making it a healthy alternative to fast food, but it’s also incredibly quick to prepare, perfect for busy weeknights or fun family lunches. Imagine wrapping each bite in a crisp nori that adds an extra layer of flavor, creating a portable meal that’s satisfying and full of love. Ready to dive into creating these delectable rice triangles that will impress everyone? Let’s get started!
Why is Chicken Onigiri a Must-Try?
Flavorful Fusion: The rich taste of teriyaki chicken melds perfectly with the sticky sushi rice, creating a delicious bite that will have your taste buds singing.
Quick & Easy: With minimal prep time, this recipe is designed for busy people who still want a satisfying homemade meal.
Family-Friendly Fun: Involve the kids in shaping the onigiri! It’s a delightful way to introduce them to Japanese cuisine while making mealtime memorable.
Portable Snack: Perfect for picnics or as a lunchbox treat, these onigiri are easy to grab and go, ensuring you and your family stay nourished throughout the day.
Versatile Options: Feeling adventurous? Switch up the filling with shrimp or tofu and explore different flavors like spicy mayo for a unique twist.
For more delicious chicken ideas, don’t miss out on these Garlic Parmesan Chicken or Sweet Chili Chicken recipes!
Chicken Onigiri Ingredients
• Get ready to make delicious onigiri!
For the Rice
- Sushi Rice – The essential base for onigiri; choose short-grain for the perfect sticky texture.
- Salt – Boosts the rice flavor; fine salt works best for even mixing.
- Furikake (optional) – A delightful sprinkle to enhance flavor before serving.
For the Chicken Filling
- Boneless Skinless Chicken – Main protein; drumsticks are juicier, but thighs or ground chicken work well too.
- Soy Sauce – Adds a deep umami flavor in both marinade and sauce.
- Sake – Used in marinade for an authentic taste; water can be substituted if needed.
- Baking Soda – Helps tenderize the chicken while marinating.
- Cornstarch – Creates a tender, crispy texture when cooking chicken.
- Mirin – Sweet rice wine that amplifies the teriyaki flavor; sugar can replace it if unavailable.
- Brown Sugar – Provides sweetness to the teriyaki sauce.
- Oil – For cooking the chicken; a neutral oil is ideal.
- Minced Garlic – Infuses flavorful depth to the chicken filling.
For Assembly
- Nori – Seaweed strips wrap the onigiri, adding a savory crunch with each bite.
You’re all set to create these delightful Chicken Onigiri that are perfect for any snack time or meal!
Step‑by‑Step Instructions for Chicken Onigiri
Step 1: Prepare the Sushi Rice
Rinse 2 cups of sushi rice under cold water until the water runs clear, then cook it according to package instructions, typically using a rice cooker. Once cooked, transfer the warm rice to a bowl and sprinkle with 1 teaspoon of salt, mixing gently. Optionally, add furikake for extra flavor, then let the rice cool slightly until it is manageable for shaping.
Step 2: Marinate the Chicken
While the rice cooks, chop 1 pound of boneless, skinless chicken into small bite-sized pieces. In a bowl, combine the chicken with soy sauce, sake, baking soda, and cornstarch, stirring well to coat. Refrigerate the mixture for 30 minutes to allow the flavors to meld and the chicken to tenderize, ensuring a savory filling for your Chicken Onigiri.
Step 3: Make the Teriyaki Sauce
In a small saucepan over medium heat, whisk together ¼ cup of soy sauce, 2 tablespoons of mirin, and 2 tablespoons of brown sugar. Allow the mixture to simmer for about 5–7 minutes, stirring occasionally, until the sauce thickens slightly and has a glossy appearance. This delightful teriyaki sauce will add a sweet and umami punch to your onigiri filling.
Step 4: Cook the Chicken
Heat 2 tablespoons of oil in a large skillet over medium-high heat. Add the marinated chicken pieces and stir-fry for about 2–3 minutes until they turn golden brown and are cooked through. Add 1 tablespoon of minced garlic to the pan and cook for another 30 seconds until fragrant. Pour the prepared teriyaki sauce over the chicken, letting it bubble and thicken for another minute.
Step 5: Shape the Onigiri
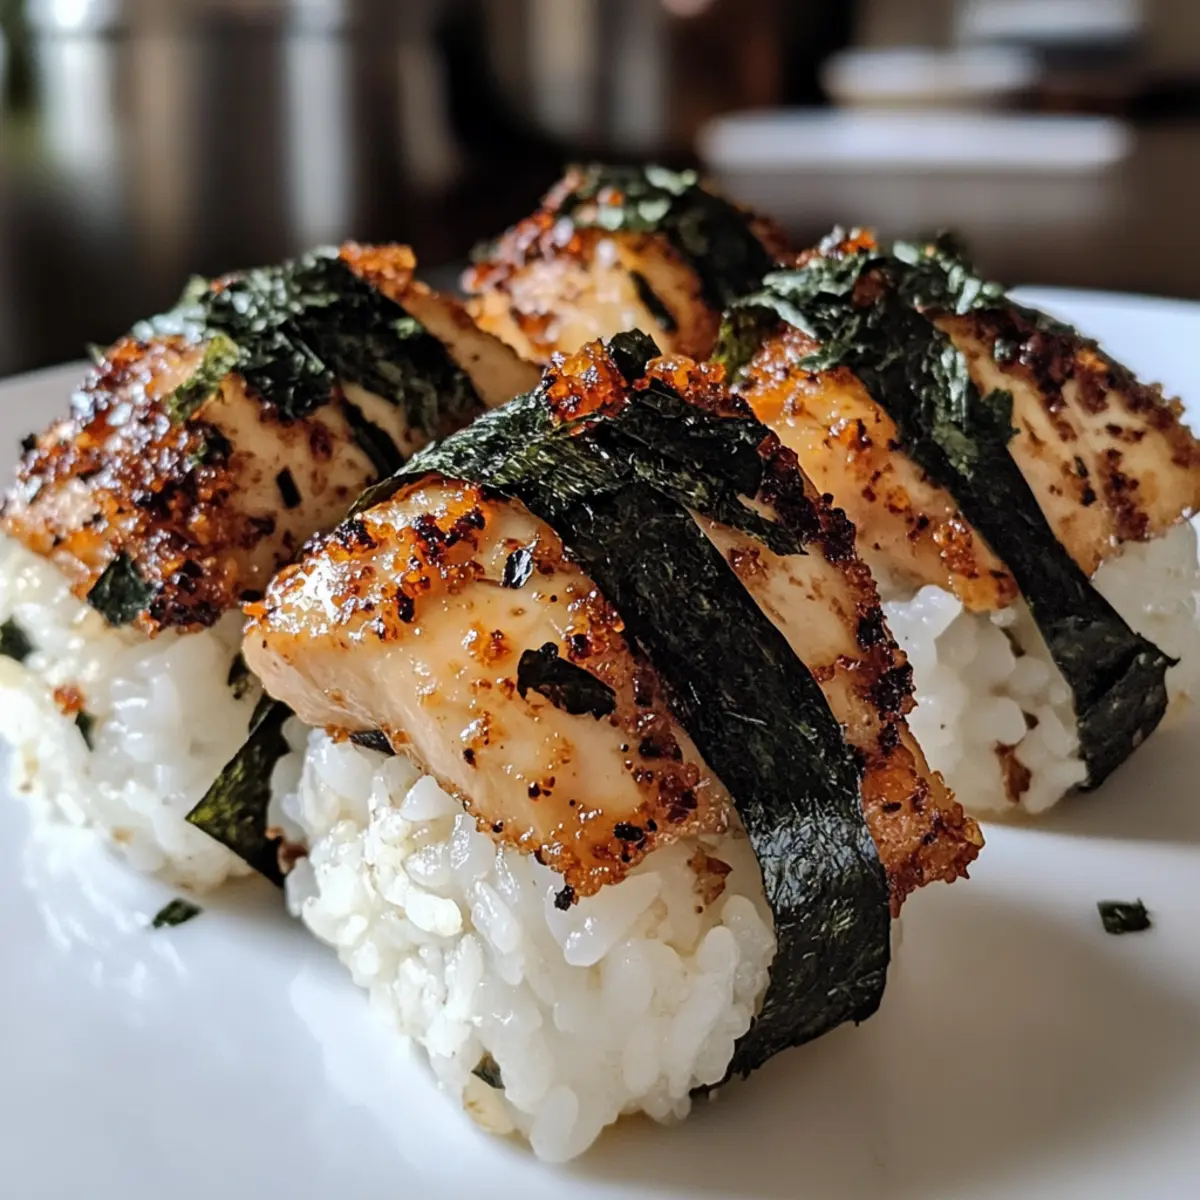
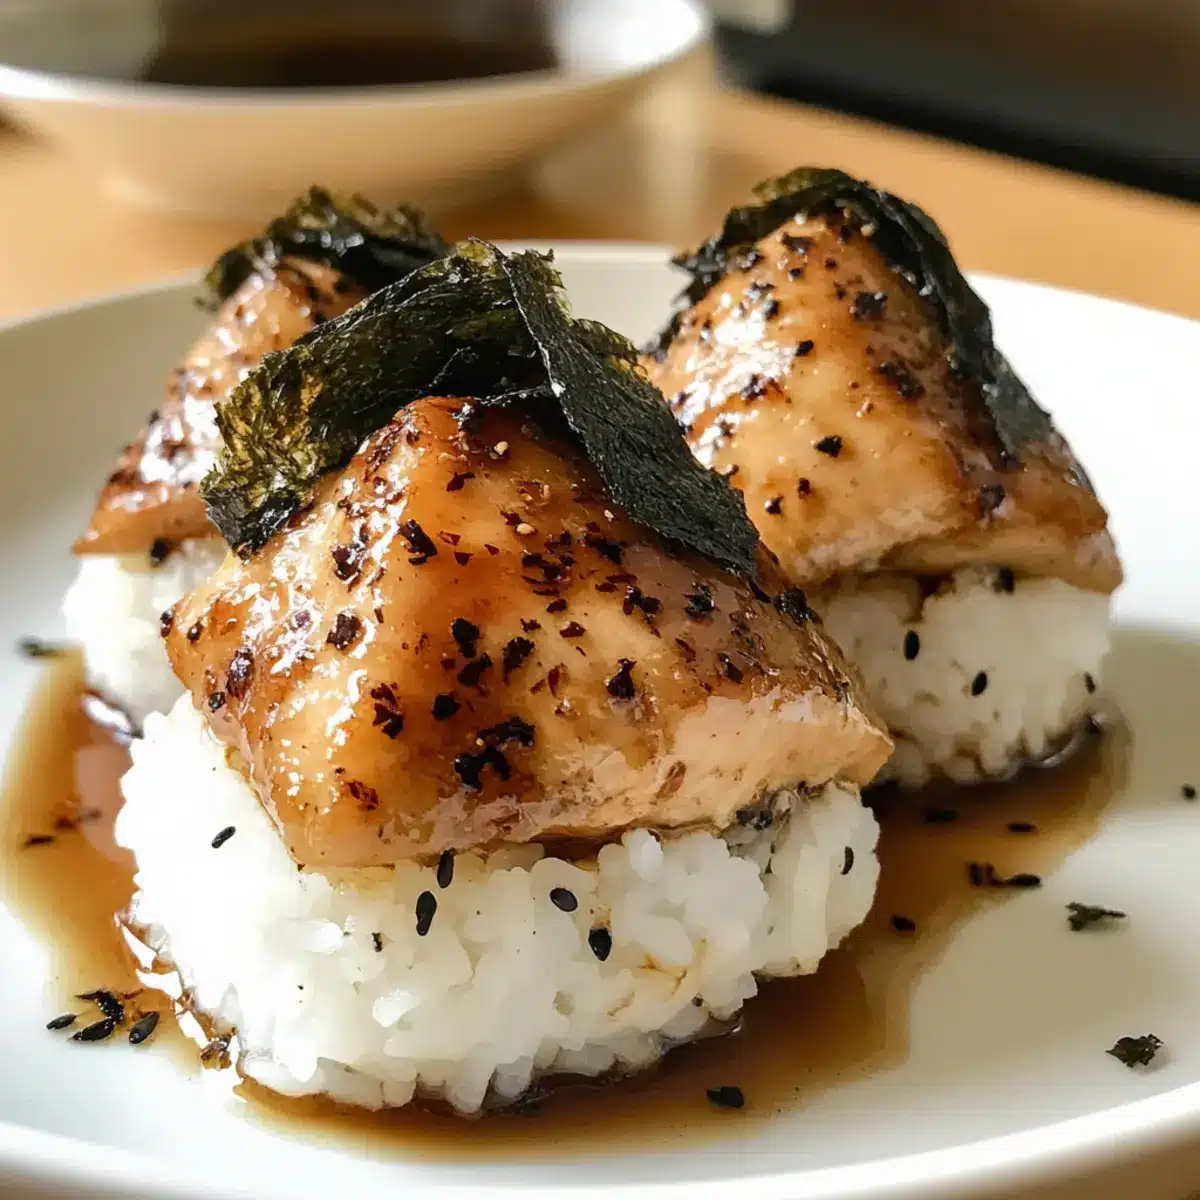
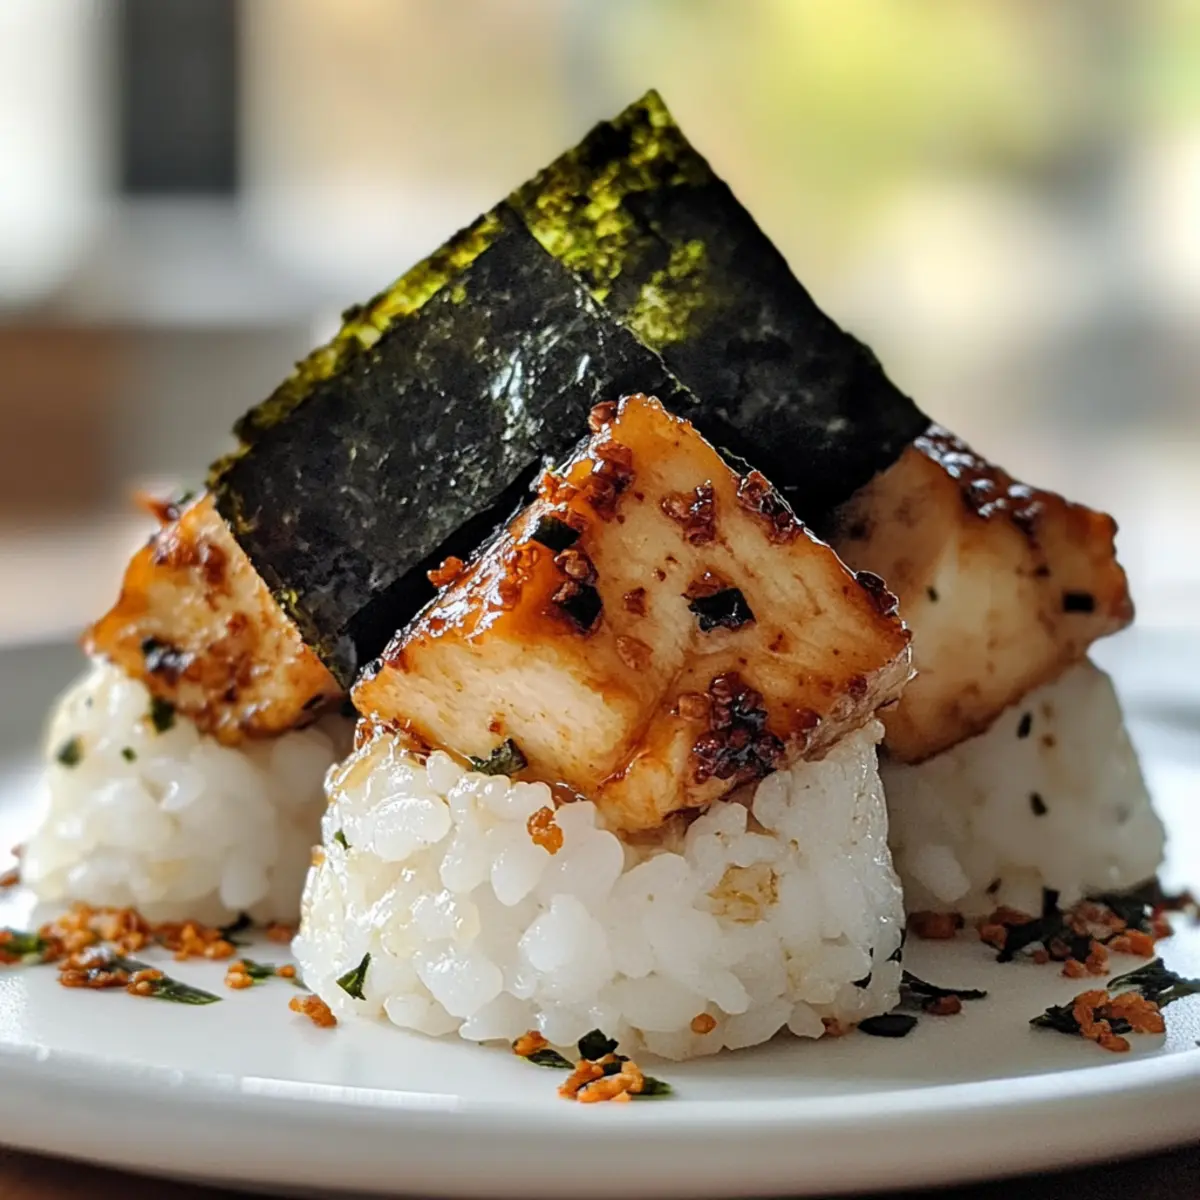
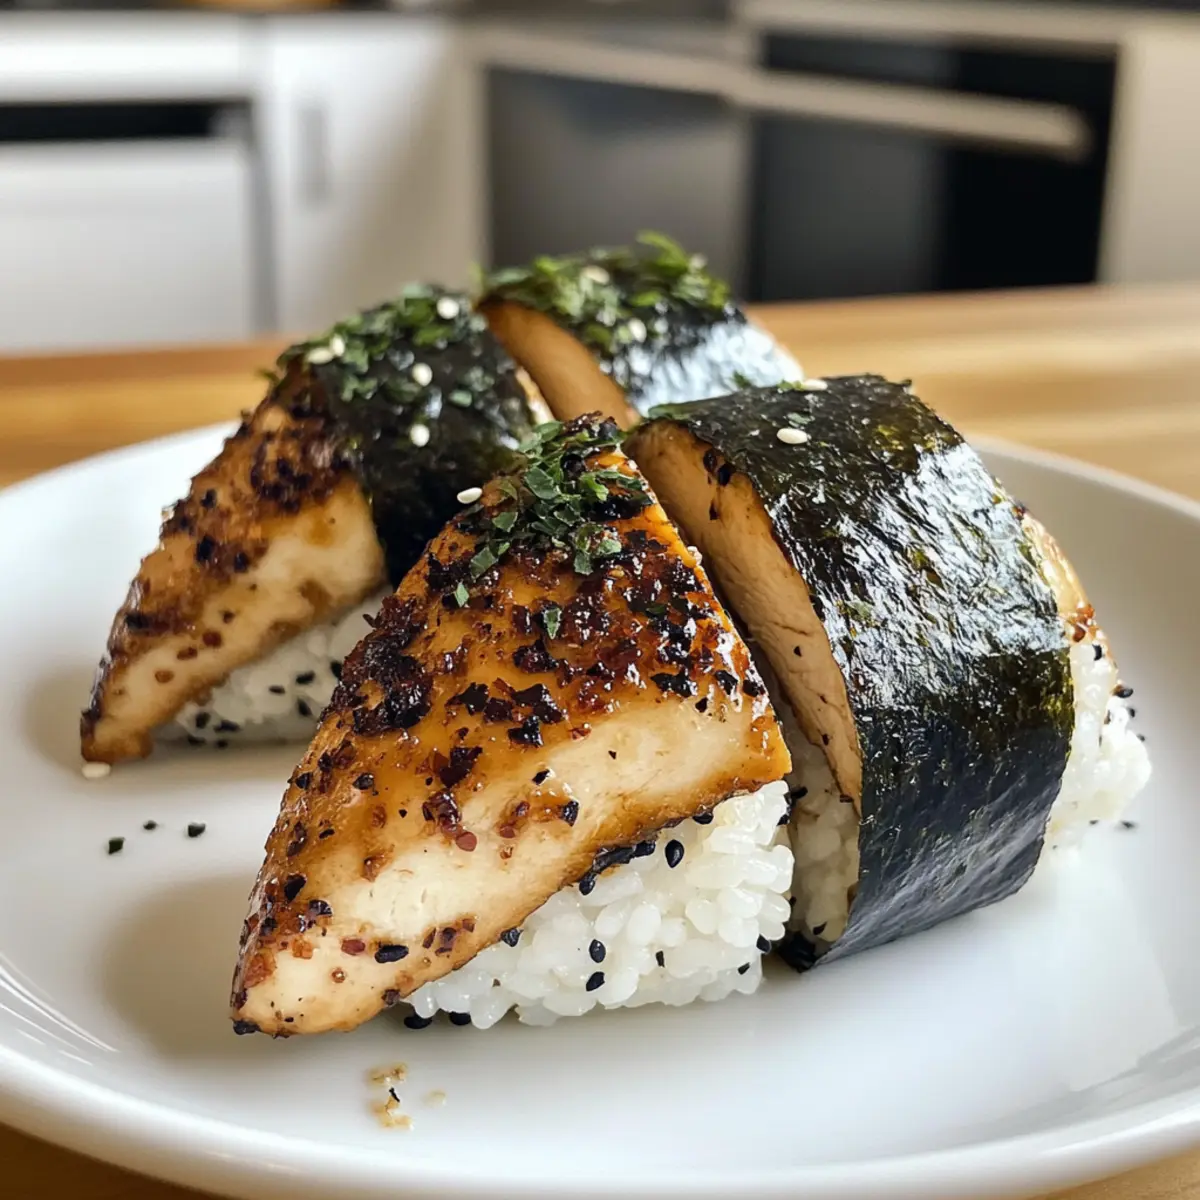
Wet your hands with water to prevent sticking, then take a handful of sushi rice and scoop it into the palm of your hand. Press down gently to create a well in the center, add a spoonful of the teriyaki chicken filling, and top with more rice, firmly pressing it into a triangle shape. Repeat with the remaining rice and filling.
Step 6: Wrap with Nori
Once all the Chicken Onigiri are shaped, take nori sheets and cut them into strips. Gently wrap a strip around the base of each onigiri for an added crunch and flavor contrast. Arrange your onigiri on a plate, and they are ready to be served as a delicious snack or meal!
What to Serve with Teriyaki Chicken Onigiri
Transform your meal into a delightful feast with these perfect pairings that resonate with the flavors of your onigiri.
- Soy Sauce Dipping: Enhance each bite with a drizzle of soy sauce, elevating the umami flavor profile of the chicken onigiri.
- Pickled Ginger: The zesty crunch of pickled ginger cleanses the palate and provides a refreshing contrast to the savory filling.
- Miso Soup: A comforting bowl of miso soup adds warmth and depth, making it a classic companion for Japanese cuisine lovers.
- Edamame: These steamed green soybeans offer a protein-packed, creamy chew that complements the onigiri’s texture beautifully.
- Japanese Cucumber Salad: A light, tangy cucumber salad adds crispness and freshness, balancing the richness of the teriyaki chicken.
- Green Tea: Sip on calming green tea, which not only cleanses your palate but also harmonizes with the flavors of the meal.
- Fried Tempura Vegetables: Crispy tempura vegetables introduce a delightful crunch and variety of textures to your meal.
- Fruit Mochi: For dessert, these chewy little rice cakes filled with sweet fruit bring a perfect closure to a flavorsome dinner, enticing your sweet tooth.
Imagine serving a vibrant table filled with these delightful accompaniments to enhance every comforting bite of your chicken onigiri!
Expert Tips for Chicken Onigiri
-
Rice Selection: Use short-grain sushi rice for the best consistency and sticky texture; this prevents your Chicken Onigiri from falling apart.
-
Marination Matters: Don’t rush the marination! Let your chicken soak up the flavors for at least 30 minutes to achieve a juicy filling.
-
Hand Wetting: Keep your hands wet while shaping the onigiri; this helps the rice slide smoothly without sticking, making the process much easier.
-
Uniform Shaping: Make sure to press the rice firmly into triangles for a sturdy shape. Loose rice can lead to messy bites, so take your time!
-
Nori Crispness: Wrap the onigiri with nori just before serving to keep it crispy. If you prepare them ahead of time, store the nori separately.
-
Flavor Variations: Feel free to mix up the fillings! Besides the teriyaki chicken, try incorporating veggies or even different meats to create exciting Chicken Onigiri variations.
Make Ahead Options
These Chicken Onigiri are a fantastic choice for meal prep, allowing you to save precious time during busy weeknights! You can cook the sushi rice and marinate the chicken up to 24 hours in advance. Simply store the cooled rice in an airtight container in the refrigerator, and keep the marinated chicken covered until you’re ready to cook. To maintain quality, ensure the rice is properly sealed to prevent drying out, and cook the chicken fresh to retain its tender texture. When you’re ready to serve, quickly stir-fry the marinated chicken and assemble your onigiri, and you’ll enjoy a delicious homemade snack that’s just as delightful as if it were freshly made!
Storage Tips for Chicken Onigiri
Room Temperature: Best enjoyed fresh; however, if left out, consume within 2 hours to ensure optimal flavor and safety.
Fridge: Store Chicken Onigiri in an airtight container; they will last for up to 2 days. Keep in mind that the rice may lose some texture.
Freezer: For longer storage, place onigiri in a freezer-safe container or wrap individually in plastic wrap; they can be frozen for up to 1 month.
Reheating: To warm, microwave for 30-60 seconds, covered, to retain moisture. Enjoy your Chicken Onigiri warm for the best experience!
Chicken Onigiri Variations & Substitutions
Feel free to get creative as you make this Chicken Onigiri your own with these fun twists and substitutes!
-
Vegetarian Option: Substitute chicken with flavored tofu for a meat-free delight. Tofu absorbs flavors beautifully, making it a great filling choice.
-
Shrimp Swap: Replace chicken with shrimp for a seafood twist, marinating and cooking them just like the chicken for a zesty alternative.
-
Spicy Kick: Add sriracha or chili paste to the teriyaki sauce for an extra kick of heat. It’s a simple change that will tantalize your taste buds!
-
Different Sauces: Experiment with sauces! Try using spicy mayo or a hoisin glaze to keep things exciting. Each sauce brings its unique flavor profile.
-
Veggie Filled: Incorporate finely chopped vegetables like steamed spinach, carrots, or avocado into the filling for added nutrition and crunch. It’s an easy way to sneak in some greens!
-
Seaweed Crunch: Switch out traditional nori for toasted sesame sheets for a nutty flavor twist. This can enhance the overall taste and texture of your onigiri.
-
Crispy Texture: Add a sprinkle of panko breadcrumbs to the chicken filling before shaping the onigiri for an unexpected crispy layer inside.
-
Sweet Touch: For a more robust flavor, mix in a little pineapple or mango into the teriyaki sauce. This sweet fruit complements the savory chicken perfectly.
Looking for more delicious chicken recipes? Check out these mouthwatering ideas: Jalapeno Popper Chicken or Hot Honey Chicken. Each provides a unique spin on the classic you’ll adore!
Chicken Onigiri Recipe FAQs
How do I choose the best sushi rice for my Chicken Onigiri?
Absolutely! For the utmost success in your Chicken Onigiri, opt for short-grain sushi rice. This type of rice is key in achieving that sticky texture essential for shaping the onigiri. Look for packages labeled “sushi rice” or “short-grain rice” to ensure you get the right consistency that holds together beautifully when molded.
How should I store leftover Chicken Onigiri?
Very! Your Chicken Onigiri is best enjoyed fresh, but if you have extras, store them in an airtight container in the refrigerator for up to 2 days. Although the rice may lose some of its original texture, they still make for a tasty snack! If you plan to keep them longer, I recommend freezing them for up to 1 month.
Can I freeze Chicken Onigiri? If so, how?
Absolutely! Freezing Chicken Onigiri is a great way to extend their shelf life. After shaping, place them in a single layer on a baking sheet and freeze until solid. Then, transfer the frozen onigiri to a freezer-safe container or wrap each piece in plastic wrap. This method prevents them from sticking together. To reheat, you can microwave them for 30–60 seconds, covered, for the best results.
What should I do if my Chicken Onigiri is falling apart?
Oh no! If your Chicken Onigiri isn’t holding together, it might be due to using the wrong rice type or insufficient pressure when shaping. Make sure to use short-grain sushi rice and wet your hands to help manage the rice as you form it. Press firmly when shaping each triangle to ensure they stick together well. If your rice is too dry, try adding a bit of water or adjusting the cooking method next time to achieve the right consistency.
Are there any dietary considerations I should keep in mind?
Very! If you or someone you’re serving has dietary restrictions, it’s crucial to consider the ingredients. This recipe contains gluten due to soy sauce; be sure to use gluten-free soy sauce if necessary. For a lower-sodium option, you can look for reduced-sodium soy sauce. If you’re serving this to children or pets, be cautious with the added salt and seasonings. As always, it’s best to consult with a doctor or nutritionist if there are any concerns about allergies or dietary needs.
Chicken Onigiri: Irresistibly Tasty Japanese Snack at Home
Ingredients
Equipment
Method
- Rinse sushi rice under cold water until clear and cook according to package instructions.
- Transfer warm rice to a bowl, mix in salt and optionally furikake, and let cool.
- Chop chicken into bite-sized pieces and marinate in soy sauce, sake, baking soda, and cornstarch.
- Refrigerate chicken for 30 minutes.
- In a saucepan, whisk soy sauce, mirin, and brown sugar; simmer until thickened.
- Fry marinated chicken until golden, add minced garlic, and pour teriyaki sauce over.
- Wet hands and form rice into triangles, adding chicken filling in the center.
- Wrap with nori strips and serve.
Leave a Reply