
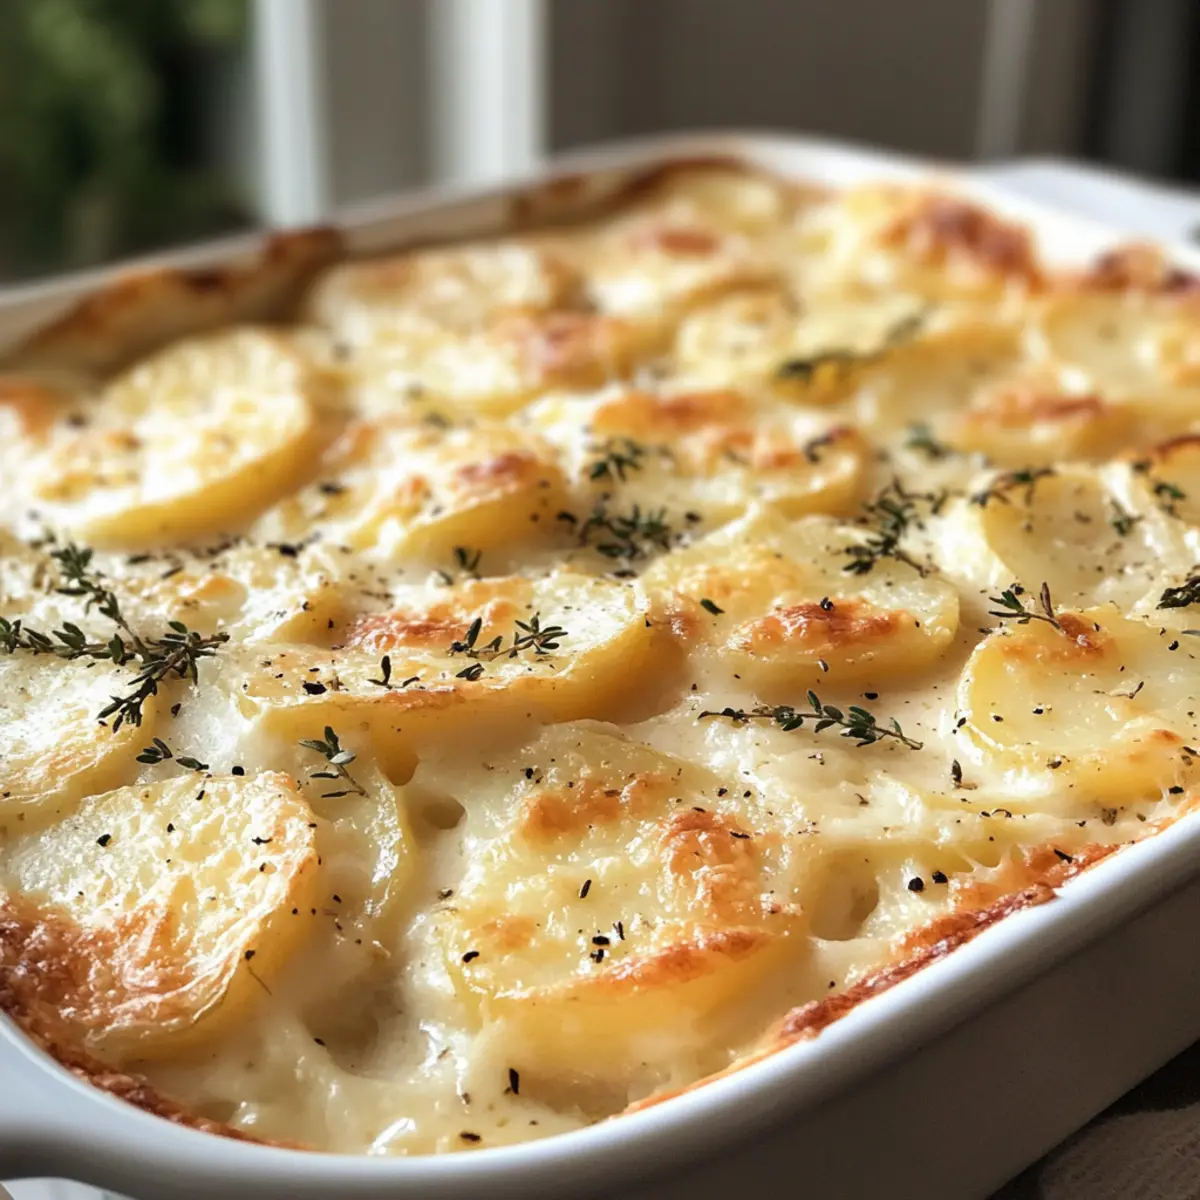
As I stood in my kitchen the other day, the aromatic whirl of garlic and thyme took me back to childhood family dinners where comfort food ruled the table. It was then that I decided to recreate one of my all-time favorites: Easy Creamy Scalloped Potatoes. This dish is an absolute staple, showcasing tender Yukon gold potatoes slathered in a luscious garlic-thyme cream sauce and topped with a golden layer of Parmesan. With its rich flavors and smooth textures, it’s not just a side dish, but a memory-maker for every gathering, whether it’s a cozy family meal or a festive holiday feast. What’s even better? It accommodates dietary choices with simple swaps, making it a versatile crowd-pleaser. Ready to discover how to whip up this delightful creamy scalloped potatoes recipe? Let’s dive in!
Why Are These Scalloped Potatoes So Special?
Comforting Delight: These creamy scalloped potatoes bring warmth and nostalgia to your table, making them the ultimate comfort food.
Versatile Options: With easy swaps, you can customize them to fit any dietary preference, whether you’re looking for dairy-free or gluten-free options.
Easy to Make Ahead: Simply assemble before your gathering, bake on the day, and impress your guests without the stress. Plus, they pair wonderfully with dishes like Garlic Parmesan Chicken or Smothered Chicken Rice for a complete meal!
Rich Flavors: The garlic-thyme cream sauce and a crisp Parmesan topping create a robust flavor that enhances every bite.
Guaranteed Crowd-Pleaser: Perfect for potlucks or family dinners, these scalloped potatoes promise to be the star of any meal. Kids and adults alike won’t be able to resist!
Creamy Scalloped Potatoes Ingredients
These easy creamy scalloped potatoes come together with just the right ingredients for a delicious side dish!
For the Potatoes
- Yukon gold potatoes – They provide a velvety texture when baked; you can substitute with russets for a fluffier finish.
- Kosher salt – Essential for seasoning; adjust according to your taste preference.
- Black pepper – Adds a touch of warmth; freshly cracked is best.
For the Cream Sauce
- Unsalted butter – Nurtures flavor in the roux; olive oil works well for a dairy-free option.
- Garlic – Provides aromatic depth; use fresh garlic for the best flavor.
- All-purpose flour – Thickens the cream sauce; cornstarch or rice flour makes it gluten-free!
- Heavy cream – Offers a rich, creamy base; try almond milk thickened with cornstarch for a dairy-free alternative.
- Parmesan cheese – Gives a delicious cheesy flavor and a crispy topping; cheddar or Gruyère can be swapped in for a twist.
- Fresh thyme – Introduces an herbal note; dried thyme can be a suitable substitute in a hurry.
With these ingredients, you’re one step closer to crafting the perfect creamy scalloped potatoes that everyone will love!
Step‑by‑Step Instructions for Easy Creamy Scalloped Potatoes
Step 1: Preheat the Oven
Begin by preheating your oven to 400°F (200°C). While it heats, lightly grease a ceramic baking dish with butter or cooking spray, ensuring an easy release for your creamy scalloped potatoes once baked. Set the baking dish aside, ready to hold all the delicious layers of this comforting dish.
Step 2: Slice the Potatoes
Carefully peel and thinly slice the Yukon gold potatoes, aiming for 1/8-inch thickness using a mandoline or a sharp knife. The uniformity of the slices will help them cook evenly, becoming tender and creamy. Place the sliced potatoes in a large bowl and set them aside to prevent browning.
Step 3: Make the Garlic Sauce
In a large pot, melt 3 tablespoons of unsalted butter over medium heat. Once the butter is melted and bubbling, add minced garlic and sauté for about 1 minute, until fragrant but not browned. This aromatic foundation is crucial to creating that rich flavor in your creamy scalloped potatoes.
Step 4: Create the Roux
Stir in 3 tablespoons of all-purpose flour with the garlic-butter mixture, cooking for 1-2 minutes until it turns a light golden color. This roux will thicken your cream sauce beautifully, so give it a good stir to combine, allowing the flour to absorb the butter and garlic flavor.
Step 5: Add the Cream
Gradually whisk in 2 cups of heavy cream while continuing to stir to prevent lumps from forming. Cook over medium heat for about 5 minutes, until the mixture thickens slightly and coats the back of a spoon. This step is essential for achieving that luxurious, creamy consistency in your scalloped potatoes.
Step 6: Incorporate Cheese and Season
Remove the pot from heat, then add 1 cup of grated Parmesan cheese, 1 teaspoon of fresh thyme, and season with kosher salt and black pepper to taste. Stir until the cheese melts completely, resulting in a smooth and cheesy sauce that will envelop your potato slices in rich flavor.
Step 7: Coat the Potatoes
Gently add the sliced potatoes to the creamy sauce, carefully tossing them to ensure that every slice is evenly coated. This step is key to infusing every bite of your creamy scalloped potatoes with lovely garlic and thyme flavors, making each layer even more delicious.
Step 8: Layer in the Dish
Arrange the coated potato slices upright in the prepared baking dish, creating a beautiful layered effect. Pour any remaining cream sauce over the top, ensuring that it seeps into the base. This will keep your potatoes moist and flavorful throughout the baking process, ensuring an irresistible dish.
Step 9: Add Extra Cheese
Sprinkle a little extra Parmesan cheese on top of the arranged potatoes for that delightful, crispy crust. This cheese will melt and bubble as it bakes, creating a golden layer that adds both flavor and texture to the final dish of creamy scalloped potatoes.
Step 10: Bake to Perfection
Cover the baking dish with foil and bake in the preheated oven for 30 minutes. After this time, remove the foil and bake for an additional 30 minutes or until the top is golden brown and the sauce is bubbling. This method ensures a lovely contrast between the crispy top and the creamy layers below.
Step 11: Rest and Serve
Once baked, allow the creamy scalloped potatoes to rest for about 10 minutes before serving. This resting period helps the layers set slightly, making it easier to serve portions. Each slice should reveal beautifully melted cheese and tender potatoes, ready to be enjoyed by family and friends.
Make Ahead Options
These creamy scalloped potatoes are perfect for meal prep enthusiasts looking to save time on busy weeknights! You can assemble the dish up to 24 hours in advance; simply layer the sliced Yukon gold potatoes in the prepared baking dish and pour the rich garlic-thyme cream sauce over them. To maintain quality, cover the dish tightly with foil and refrigerate; this will keep the potatoes from browning and absorbing too much moisture. When you’re ready to serve, just pop the dish into a preheated oven and bake as directed, adding an extra few minutes if needed to ensure everything is bubbly and golden—resulting in a comforting side dish that tastes just as delicious as when freshly made!
Storage Tips for Creamy Scalloped Potatoes
Fridge: Store leftover creamy scalloped potatoes in an airtight container for up to 3 days. Ensure they are fully cooled before placing them in the fridge to maintain freshness.
Freezer: For longer storage, freeze the unbaked, assembled dish for up to 2 months. Wrap tightly in plastic wrap and foil to prevent freezer burn.
Reheating: When ready to enjoy, thaw in the fridge overnight. Reheat in the oven at 350°F (175°C) for about 25-30 minutes or until heated through to keep the creamy texture.
Make-Ahead: This recipe is perfect for making ahead. Assemble your creamy scalloped potatoes a day prior and store in the fridge, then bake on the day of your gathering for an easy, delicious side.
Creamy Scalloped Potatoes Variations & Substitutions
Feel free to get creative and adapt these creamy scalloped potatoes to make them truly yours!
-
Dairy-Free: Replace heavy cream with almond milk thickened with cornstarch for a creamy texture without dairy.
-
Gluten-Free: Substitute all-purpose flour with cornstarch or rice flour to ensure everyone can enjoy this dish without worry.
-
Cheese Swap: Swap Parmesan for cheddar or Gruyère to introduce different flavor profiles and a delightful sharpness.
-
Herbal Twist: Experiment with rosemary or Italian seasoning instead of thyme for a fresh herbaceous taste that updates the classic recipe beautifully.
-
Protein Boost: For a heartier meal, layer in cooked chicken or turkey slices between the potatoes, making this dish a complete comfort dish on its own.
-
Spicy Kick: Add a pinch of red pepper flakes or diced jalapeños to the cream sauce for a zesty heat that elevates the flavor wonderfully.
-
Veggie Addition: Toss in some sautéed mushrooms or spinach to bring extra nutrition and a burst of color to your creamy potatoes.
-
Make-Ahead: Assemble your scalloped potatoes the day before and refrigerate. Baking them on the day of your gathering allows flavors to meld while saving you time. Pair them easily with recipes like Crack Chicken Gnocchi, and you’ll impress your guests with minimal effort!
What to Serve with Easy Creamy Scalloped Potatoes
As you prepare this creamy delight, think about the perfect complementary dishes that will elevate your meal.
-
Roasted Chicken: A classic pairing, the succulent flavors of roasted chicken harmonize beautifully with the creamy scalloped potatoes, creating a comforting plate.
-
Grilled Vegetables: The charred, smoky essence of grilled veggies adds a fresh crunch, balancing the richness of the potatoes while bringing vibrant colors to your table.
-
Honey-Glazed Carrots: Sweet and tender, these carrots bring a lovely pop of flavor. Their natural sweetness complements the savory creaminess of the scalloped potatoes wonderfully.
-
Steak or Beef Tenderloin: Juicy steak provides a hearty touch, and its robust flavors contrast beautifully with the smooth garlic-thyme cream sauce.
-
Garden Salad: A light, crisp salad with seasonal greens and tangy vinaigrette offers a refreshing palate cleanser against the richness of the potatoes.
Consider pairing these sides to create a memorable meal that appeals to both family and friends. Each option adds a unique twist, making your table feel inviting and delicious!
Expert Tips for Creamy Scalloped Potatoes
- Pre-thicken Sauce: Ensure the cream sauce thickens adequately before adding the potatoes to avoid curdling and achieve the perfect creaminess in your creamy scalloped potatoes.
- Uniform Slices: Aim for consistent 1/8-inch potato slices to ensure even cooking and optimal tenderness throughout the dish.
- Layering Technique: For the best texture, layer the potato slices upright in the baking dish, allowing the sauce to seep in for a delightful creamy experience with every bite.
- Cheese Variations: Don’t hesitate to experiment with different cheeses like cheddar or Gruyère to elevate flavor; just ensure they melt well for that golden crust!
- Make-Ahead Advantage: Assemble the dish up to a day in advance and refrigerate before baking. This not only saves time but also enhances the flavors before serving.
Creamy Scalloped Potatoes Recipe FAQs
What type of potatoes are best for creamy scalloped potatoes?
Absolutely! Yukon gold potatoes are the star, offering a creamy texture when baked. If you prefer a fluffier finish, russet potatoes can be a delightful substitute. Just remember, uniform slicing is key to even cooking!
How should I store leftover creamy scalloped potatoes?
You can store any leftovers in an airtight container for up to 3 days in the fridge. Make sure they are cooled completely before sealing; this maintains their freshness. To reheat, pop them back in the oven at 350°F (175°C) for about 25-30 minutes until they’re warmed through.
Can I freeze creamy scalloped potatoes?
Yes, you can! For freezing, assemble the dish (without baking) and wrap it tightly with plastic wrap and foil. It can be kept in the freezer for up to 2 months. When you’re ready to cook, thaw the dish in the fridge overnight, then bake per the original instructions.
What should I do if the cream sauce is too thin?
If your cream sauce isn’t thickening as expected, you can mix 1 tablespoon of cornstarch with a little cold water to create a slurry, then slowly whisk it into the sauce. Continue cooking over medium heat until it thickens, which usually takes a couple of minutes. This helps achieve that luscious consistency!
Are there any dietary modifications for creamy scalloped potatoes?
Very! If you need a dairy-free option, simply substitute heavy cream with almond milk thickened with cornstarch. Use olive oil instead of butter and select a dairy-free cheese for a delicious twist! For gluten-free needs, just swap the all-purpose flour with cornstarch or rice flour when making the sauce.
How can I enhance the flavor of the creamy scalloped potatoes?
To elevate the flavors, try experimenting with different cheeses like sharp cheddar or Gruyère, which melt beautifully and add depth. Fresh herbs, such as rosemary or oregano, can also be incorporated into the cream sauce for a unique flavor profile. Remember, tasting as you go is a great way to personalize the dish!
Creamy Scalloped Potatoes: The Ultimate Comfort Side Dish
Ingredients
Equipment
Method
- Preheat your oven to 400°F (200°C) and grease a ceramic baking dish with butter or cooking spray.
- Peel and thinly slice the Yukon gold potatoes to 1/8-inch thickness. Set them aside.
- Melt 3 tablespoons of butter over medium heat. Add minced garlic and sauté for 1 minute until fragrant.
- Stir in 3 tablespoons of flour and cook for 1-2 minutes until golden.
- Gradually whisk in 2 cups of heavy cream and cook for about 5 minutes until slightly thickened.
- Remove from heat and add 1 cup of Parmesan, 1 teaspoon of thyme, kosher salt and black pepper to taste. Stir until melted.
- Add the sliced potatoes into the creamy sauce and toss gently to coat.
- Layer the coated potato slices in the baking dish and pour any remaining cream sauce over the top.
- Sprinkle extra Parmesan cheese on top for a crispy crust.
- Cover with foil and bake for 30 minutes, then remove foil and bake for an additional 30 minutes until golden brown.
- Allow to rest for 10 minutes before serving.
Leave a Reply