
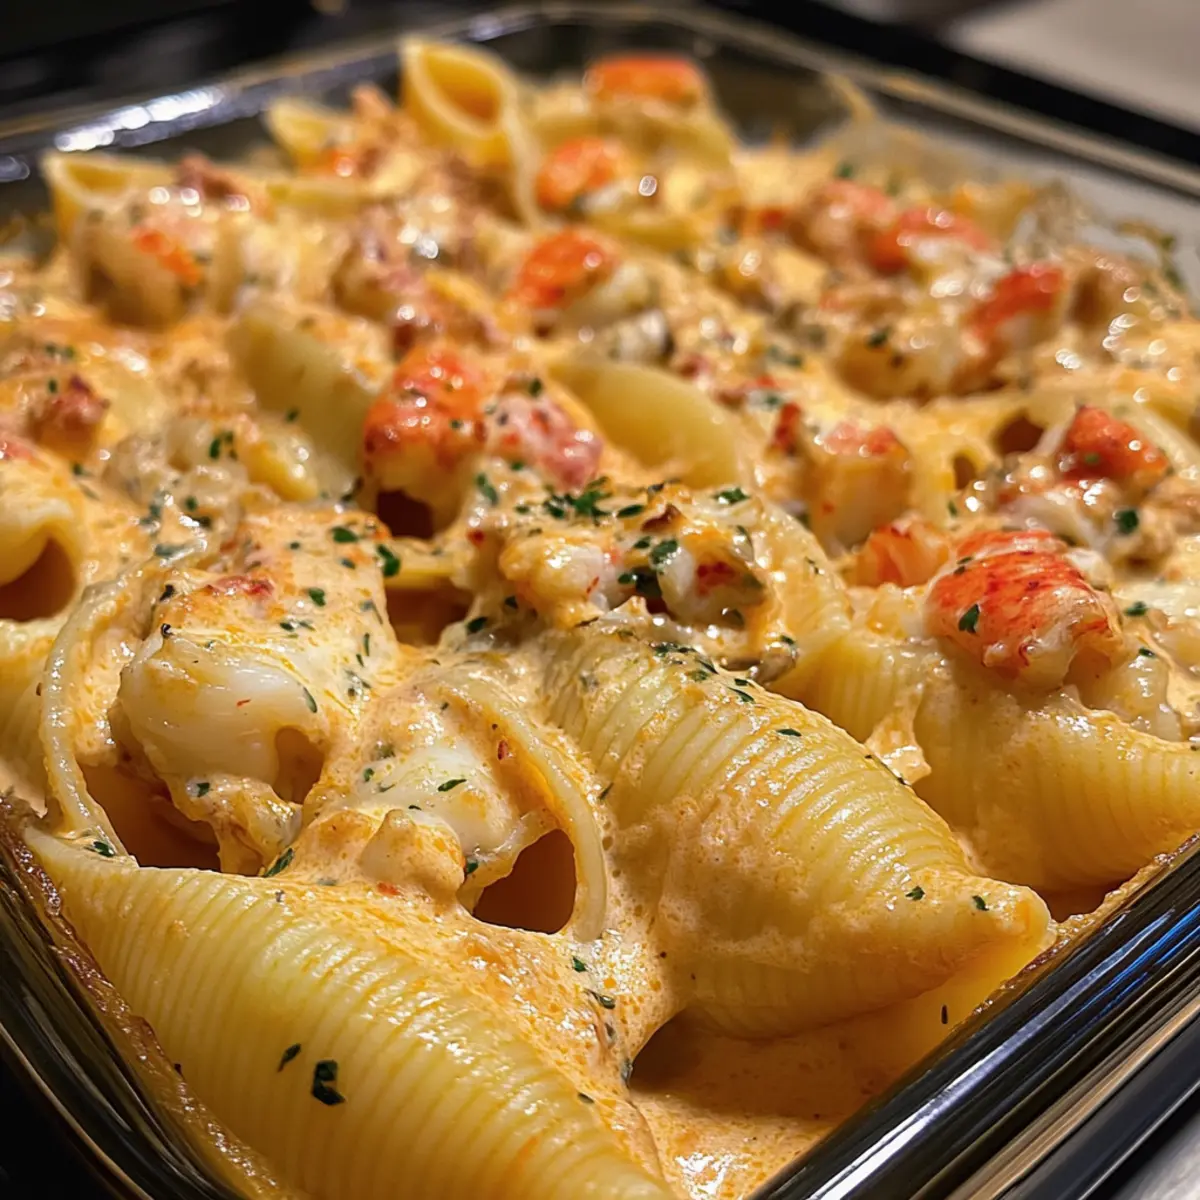
As I stood in my kitchen, the aroma of garlic sizzling in butter swept me back to cherished family dinners, where laughter mingled with the tantalizing smell of rich comfort food. Today, I’m excited to share my recipe for Creamy Seafood Stuffed Shells, a dish that perfectly blends tenderness and flavor in every bite. With a customizable filling of succulent lobster, crab, and shrimp enveloped in a decadent creamy sauce, this recipe not only transforms any weeknight into a special occasion but also makes meal prep a delightful experience. Plus, it’s incredibly adaptable—feel free to swap in your favorite seafood or cheeses for a personal touch! Ready to dive into a comforting culinary adventure that will impress your loved ones? Let’s get cooking!
Why Are These Shells So Irresistible?
Luxurious and comforting: Creamy Seafood Stuffed Shells are the dish that turns any ordinary evening into a culinary delight. Customizable to your taste: Swap out seafood or cheese based on what you love. Quick prep make-ahead option: Assemble and refrigerate to save time. Crowd-pleaser for gatherings: Everyone will be asking for seconds! Perfect pairings: Complement with a fresh salad or warm garlic bread for a complete meal, just like you’d find in my other favorites, like Smothered Chicken Rice or Chicken Ramen Garlic. This recipe is your ticket to gourmet at home!
Creamy Seafood Stuffed Shells Ingredients
For the Filling
- Jumbo Pasta Shells – Provides the structure to hold the creamy filling.
- Lobster Meat – Adds a luxurious, tender flavor; fresh is preferred for the best taste.
- Crab Meat – Enhances richness; using fresh is optimal for a more decadent dish.
- Shrimp – Contributes a mild seafood flavor; can be replaced with other seafood as per preference.
- Cream Cheese – Adds a creamy texture; may substitute with light cream cheese for a lighter option.
- Mozzarella Cheese – Delivers a melty consistency; freshly shredded offers the best results.
For the Sauce
- Butter – Serves as the base fat for both the filling and sauce.
- Flour – Thickens the sauce; gluten-free options also work well.
- Heavy Cream – Provides creaminess in the sauce; half-and-half can serve as a lighter alternative.
- Parmesan Cheese – Adds a savory note to the sauce and enhances flavor.
- Garlic – Enhances flavor; fresh minced garlic is recommended for the best aroma and taste.
- Salt & Pepper – Essential for seasoning; adjust these to your taste preferences.
Feel free to embrace the versatility of this Creamy Seafood Stuffed Shells recipe by mixing up your fillings and sauces to suit your family’s favorites!
Step‑by‑Step Instructions for Creamy Seafood Stuffed Shells
Step 1: Prepare Seafood
In a skillet over medium heat, melt 2 tablespoons of butter and sauté 2 minced garlic cloves until fragrant, about 1 minute. Add 1 cup of lobster and 1 cup of crab meat, cooking for 2-3 minutes until heated through. Remove from heat, allowing the seafood to cool while you prepare the filling.
Step 2: Mix Filling
In a mixing bowl, combine the sautéed seafood mixture with 8 ounces of softened cream cheese, 1 cup of shredded mozzarella cheese, and a pinch of salt and pepper. Use a spatula to blend the ingredients until smooth and creamy. Set aside, giving the flavors a moment to meld while you cook the pasta.
Step 3: Cook Pasta
Bring a large pot of salted water to a boil. Carefully add the jumbo pasta shells and cook according to the package instructions until al dente, typically around 10-12 minutes. Once cooked, drain the shells and let them cool slightly, as you’ll be stuffing them soon.
Step 4: Make Sauce
In the same skillet used for the seafood, melt another 2 tablespoons of butter over medium heat. Whisk in 2 tablespoons of flour to create a roux, cooking for 1 minute. Gradually stir in 1 cup of heavy cream and ½ cup of grated Parmesan cheese, whisking until the sauce is creamy and smooth, about 3-4 minutes.
Step 5: Assemble Dish
Preheat your oven to 375°F (190°C). Spread a thin layer of the creamy sauce in the bottom of a baking dish. Take the cooled pasta shells and generously stuff them with the seafood filling, placing them in the dish. Cover the shells with the remaining sauce, ensuring they’re well coated.
Step 6: Bake
Cover the baking dish with aluminum foil and bake for 20 minutes. Afterward, remove the foil and bake for an additional 10 minutes until the top is bubbly and golden brown. The aroma of the Creamy Seafood Stuffed Shells will fill your kitchen, signaling that dinner is almost ready.
Step 7: Serve
Once finished baking, let the dish cool for a few minutes to set. Garnish with extra Parmesan cheese or fresh herbs, if desired. Serve the Creamy Seafood Stuffed Shells warm and watch everyone enjoy this luxurious comfort food delight!

What to Serve with Creamy Seafood Stuffed Shells
Enhance your dining experience with delightful pairings that complement the rich flavors of your creamy seafood creation.
-
Fresh Green Salad: A light, vibrant salad with mixed greens, cherry tomatoes, and a citrus vinaigrette balances the richness beautifully. Every bite of salad adds a refreshing crunch to your meal.
-
Garlic Bread: The crispy, buttery texture of warm garlic bread is perfect for soaking up any remaining sauce—a comforting classic that never disappoints.
-
Steamed Asparagus: Tender asparagus drizzled with lemon creates a light, earthy flavor that pairs well with the creamy shells, adding a pop of color to your plate.
-
Chardonnay: A chilled glass of Chardonnay enhances the seafood flavors with its crisp acidity, making it a perfect match for this luxurious dish.
-
Roasted Vegetables: A medley of seasonal roasted vegetables provides a hearty, caramelized sweetness, creating a lovely contrast to the creamy filling of the shells.
-
Lemon Sorbet: For dessert, a scoop of lemon sorbet is a refreshing way to cleanse the palate after this rich main course. Its brightness adds a delightful finish.
-
Garlic Mashed Potatoes: Creamy garlic mashed potatoes offer a satisfying texture, pairing perfectly for those who crave extra comfort on the plate.
-
Baked Zucchini Stacks: Layered zucchini baked with cheese makes a delicious and healthy side that adds variety to your meal while staying in tune with the seafood theme.
Expert Tips for Creamy Seafood Stuffed Shells
-
Gentle Handling: Handle jumbo shells with care when cooking and filling. Overcooking can make them too soft and prone to breaking.
-
Fresh Ingredients: Use fresh seafood whenever possible for the best taste in your Creamy Seafood Stuffed Shells; frozen substitutes may compromise flavor.
-
Sauce Coating: Ensure your sauce coats the shells thoroughly. A lack of moisture can lead to dry stuffed shells, so be generous!
-
Cheese Variations: Feel free to experiment with different cheeses like Gouda or Gruyère for a unique twist in flavor and texture.
-
Make-Ahead Magic: For easy meal prep, assemble the shells up to 24 hours in advance. Simply cover and refrigerate until you’re ready to bake!
Make Ahead Options
These Creamy Seafood Stuffed Shells are perfect for meal prep enthusiasts! You can assemble the entire dish up to 24 hours in advance, covering it tightly with plastic wrap to keep it fresh in the refrigerator. Before serving, let it rest at room temperature while preheating your oven to 375°F (190°C). Bake covered for 20 minutes, then uncover and bake for another 10 minutes until bubbly and golden. This preparation not only saves you valuable time on busy weeknights but also allows the flavors to meld beautifully, ensuring that every bite is just as delicious as if made fresh that day. Enjoy this gourmet comfort food experience with minimal effort!
Creamy Seafood Stuffed Shells Variations
Feel free to personalize your Creamy Seafood Stuffed Shells with exciting twists to suit your tastes!
-
Seafood Swap: Choose scallops, crab, or even a white fish for varied flavors. Mixing seafood can create a delightful new taste profile!
-
Cheese Change: Try Gouda or Gruyère instead of mozzarella for an extra layer of rich flavor. Each cheese brings its own unique twist to this comforting dish.
-
Dairy-Free: Substitute cream cheese and heavy cream with plant-based alternatives like cashew cream or vegan cream cheese. Enjoy the same creamy texture without the dairy!
-
Gluten-Free: Use gluten-free jumbo pasta shells for those who need to avoid gluten. You’ll maintain the deliciousness without compromising your dietary needs.
-
Herb-Infused: Mix in some fresh herbs like dill or parsley into the seafood filling for a bright, aromatic kick. They add a lovely freshness that complements the creamy sauce beautifully.
-
Heat It Up: For a spicy twist, add a pinch of red pepper flakes to the sauce or some diced jalapeños into the filling. Spice lovers will enjoy this fiery upgrade!
-
Vegetable Boost: Incorporate spinach or sautéed bell peppers in the filling for added texture and nutrients. A veggie blend can make the dish even more wholesome and colorful.
-
Saucy Variation: Swap the heavy cream for a homemade marinara sauce for a zesty twist. It’ll balance the richness with a tangy flavor that adds another dimension to your dinner!
No matter how you decide to modify your Creamy Seafood Stuffed Shells, these variations will keep every meal fresh and exciting, just like my beloved High Protein Beef or the comforting Crack Chicken Gnocchi. Dive into these creative options, and enjoy custom feeding your loved ones flavorful goodness!
How to Store and Freeze Creamy Seafood Stuffed Shells
Fridge: Store leftovers in an airtight container for up to 3 days. Reheat in the oven at 350°F (175°C) until heated through for the best texture.
Freezer: For longer storage, freeze assembled but unbaked stuffed shells in a tightly sealed container for up to 3 months. Thaw overnight in the fridge before baking.
Reheating: If already baked, reheat in the oven at 350°F (175°C) covered with foil for about 20 minutes or until hot throughout.
Airtight Seal: Ensure airtight wrapping for optimal freshness and flavor retention when storing your Creamy Seafood Stuffed Shells.

Creamy Seafood Stuffed Shells Recipe FAQs
What type of seafood is best for these stuffed shells?
Absolutely! Fresh lobster, crab, and shrimp bring deliciously rich flavors and textures to the filling. However, if you have personal preferences or availability issues, feel free to substitute with scallops, prawns, or even white fish. Just be sure to cook any substitutes to the same tender finish for the best results.
How should I store leftovers of my creamy seafood stuffed shells?
Leftovers can be stored in an airtight container in the fridge for up to 3 days. To maintain their deliciousness, reheat them in the oven at 350°F (175°C) until heated through, which helps preserve that creamy texture you’ll love.
Can I freeze my creamy seafood stuffed shells?
Yes, you can! To freeze, assemble the shells but avoid baking them first. Place them in a tightly sealed container or wrap them tightly with foil. They can be frozen for up to 3 months. When you’re ready to enjoy, thaw them overnight in the fridge, then bake as directed, adding a few extra minutes if straight from the freezer.
What should I do if my pasta shells break while cooking?
Very! If your shells break, don’t worry! You can use the pieces to create a delicious layered pasta bake. Just fill them the same way and layer with sauce in a baking dish. The key is to handle the shells gently while boiling; cooking them al dente helps their structure hold up better.
Any dietary considerations for my creamy seafood stuffed shells?
Of course! For a gluten-free option, use gluten-free pasta shells and flour when making the sauce. Additionally, if anyone has seafood allergies, you can make a vegetarian version by stuffing the shells with ricotta, spinach, and some herbs. It’s equally comforting and delightful!
Can I prepare these shells ahead of time?
Absolutely! You can assemble the creamy seafood stuffed shells and refrigerate them for up to 24 hours before baking. This allows the flavors to meld beautifully and offers a convenient meal option without compromising on quality. When you’re ready, just pop them into preheated oven for a lovely dinner!

Creamy Seafood Stuffed Shells: A Cozy Dinner to Impress
Ingredients
Equipment
Method
- In a skillet over medium heat, melt 2 tablespoons of butter and sauté 2 minced garlic cloves until fragrant, about 1 minute. Add 1 cup of lobster and 1 cup of crab meat, cooking for 2-3 minutes until heated through. Remove from heat, allowing the seafood to cool while you prepare the filling.
- In a mixing bowl, combine the sautéed seafood mixture with 8 ounces of softened cream cheese, 1 cup of shredded mozzarella cheese, and a pinch of salt and pepper. Use a spatula to blend the ingredients until smooth and creamy. Set aside, giving the flavors a moment to meld while you cook the pasta.
- Bring a large pot of salted water to a boil. Carefully add the jumbo pasta shells and cook according to the package instructions until al dente, typically around 10-12 minutes. Once cooked, drain the shells and let them cool slightly, as you'll be stuffing them soon.
- In the same skillet used for the seafood, melt another 2 tablespoons of butter over medium heat. Whisk in 2 tablespoons of flour to create a roux, cooking for 1 minute. Gradually stir in 1 cup of heavy cream and ½ cup of grated Parmesan cheese, whisking until the sauce is creamy and smooth, about 3-4 minutes.
- Preheat your oven to 375°F (190°C). Spread a thin layer of the creamy sauce in the bottom of a baking dish. Take the cooled pasta shells and generously stuff them with the seafood filling, placing them in the dish. Cover the shells with the remaining sauce, ensuring they’re well coated.
- Cover the baking dish with aluminum foil and bake for 20 minutes. Afterward, remove the foil and bake for an additional 10 minutes until the top is bubbly and golden brown. The aroma of the Creamy Seafood Stuffed Shells will fill your kitchen, signaling that dinner is almost ready.
- Once finished baking, let the dish cool for a few minutes to set. Garnish with extra Parmesan cheese or fresh herbs, if desired. Serve the Creamy Seafood Stuffed Shells warm and watch everyone enjoy this luxurious comfort food delight!
Leave a Reply