
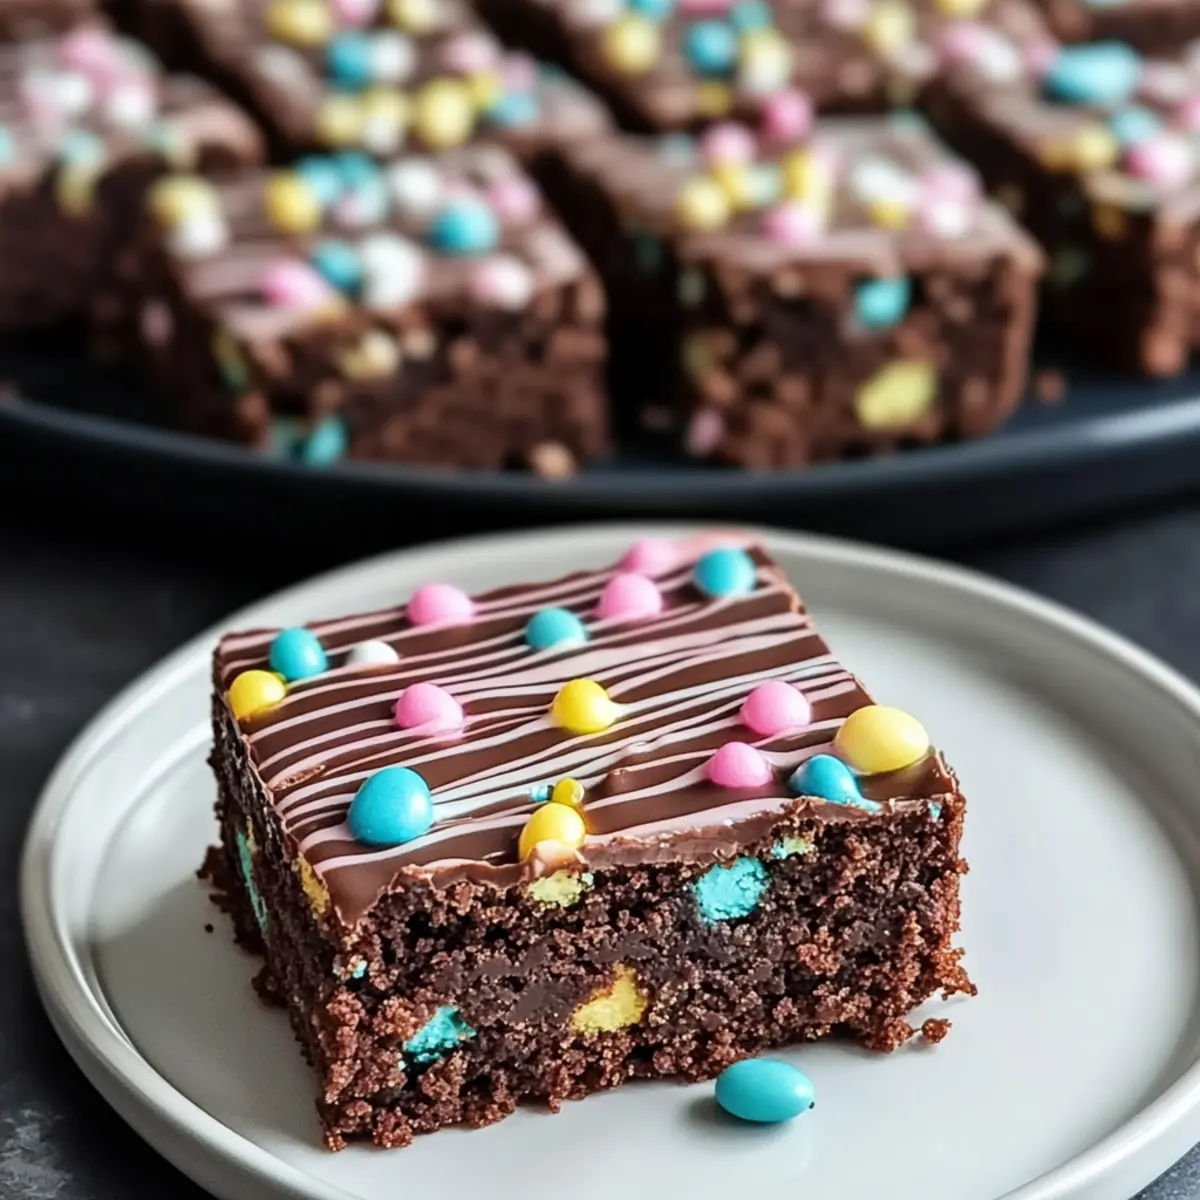
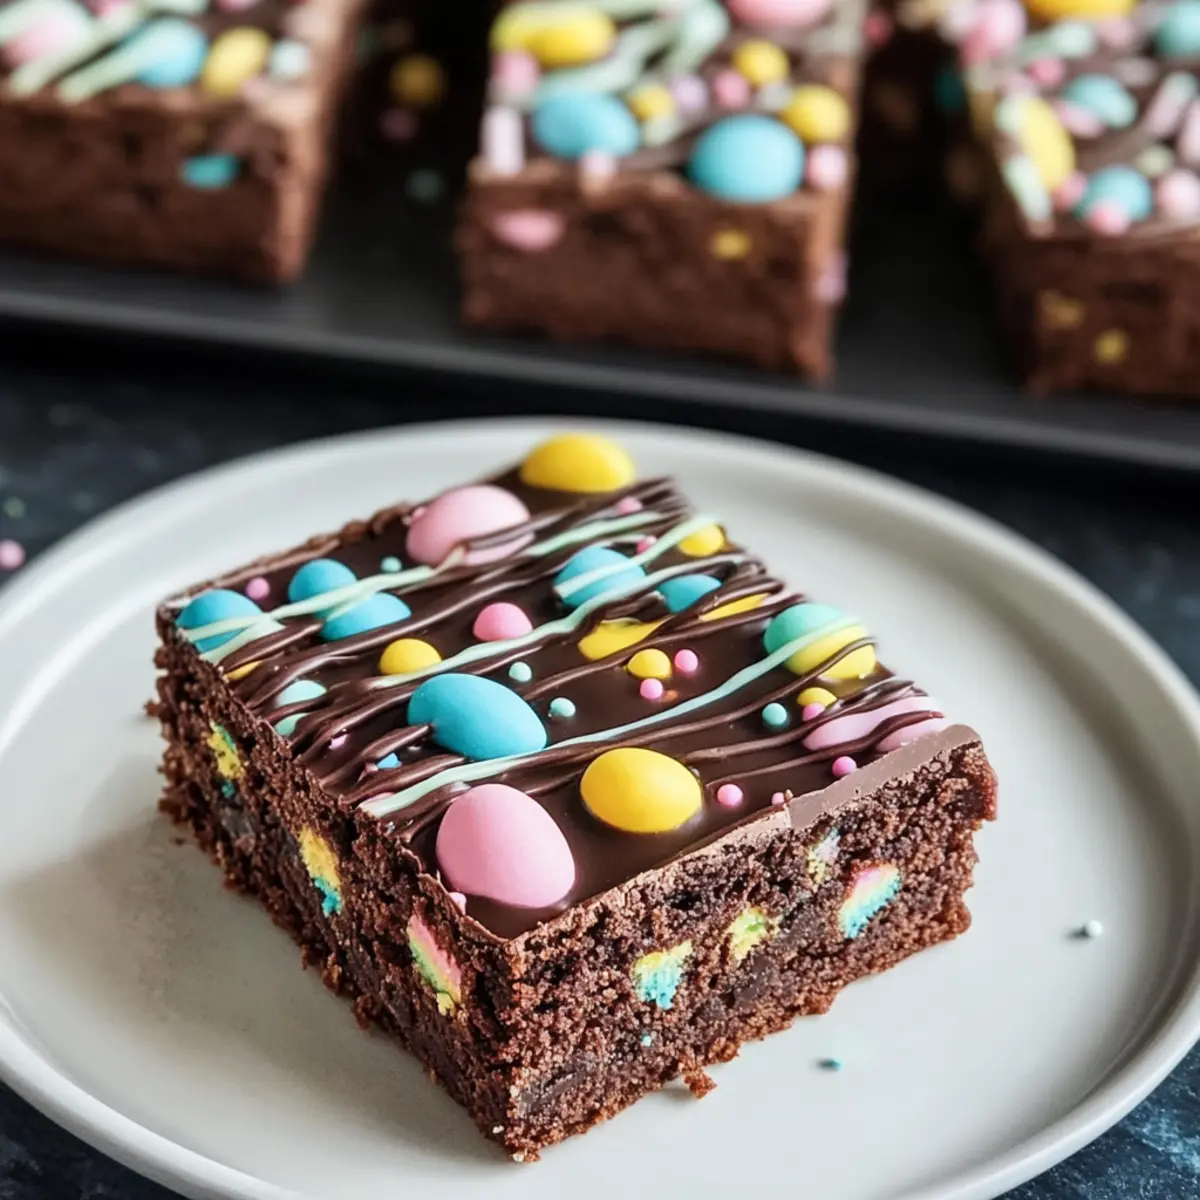
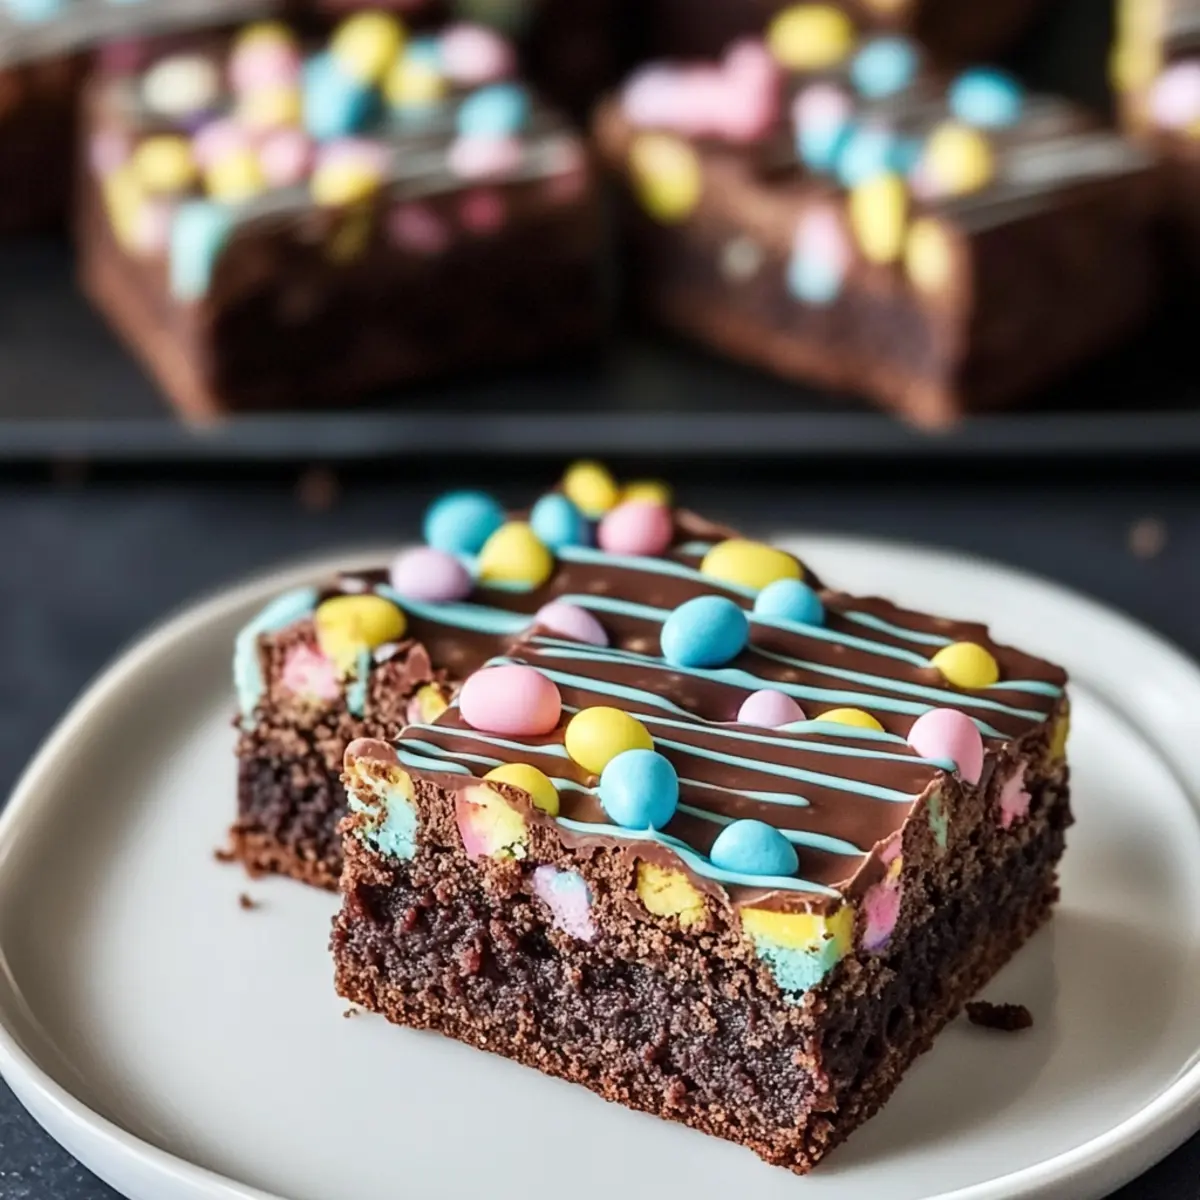
As I sifted flour and cocoa powder, the sweet aroma of chocolate filled my kitchen, instantly transporting me to the joyful spirit of Easter. These Easter brownies offer a delightful chocolatey goodness, elevating your holiday gatherings with their vibrant pastel decorations. Perfectly chewy and infused with a subtle hint of coffee, this Easter brownies recipe not only pleases the taste buds but also doubles as an eye-catching centerpiece for your festive table. Whether you’re sharing them at a family celebration or enjoying a cozy evening at home, these brownies are incredibly quick to whip up and endlessly customizable. What toppings will you choose to make them uniquely yours?

Why Are These Easter Brownies Irresistible?
Chewy Texture: Each bite of these brownies offers a delightful chewiness that rivals your favorite chocolate cake.
Festive Appeal: Topped with vibrant pastel colors, these brownies are as lovely to look at as they are to taste, making them perfect for your Easter celebrations.
Endless Customization: Feel free to play around with toppings; swap in dark chocolate or add a sprinkle of nuts for extra crunch!
Quick and Easy: With a simple recipe that comes together in just a few steps, these brownies will save you time in the kitchen.
Crowd-Pleasing Treat: Whether you’re at a family gathering or simply enjoying a night in, these brownies are guaranteed to win over hearts. You might also want to try Bacon Cheeseburger Meatball for another delicious addition to your meal rotation!
Easter Brownies Recipe Ingredients
For the Brownies
- Granulated Sugar – Adds sweetness and forms a crisp top layer.
- Brown Sugar – Introduces moisture and chewiness for a rich center.
- Butter – Provides a satisfying richness; melted for smooth incorporation.
- Eggs – Binds the mixture, ensuring a thick, fudgy texture.
- Vanilla Extract – Enhances flavors and aroma for a warm touch.
- All-Purpose Flour – Offers the necessary structure to these delightful Easter brownies.
- Cocoa Powder – The core flavor component, balancing sweet and bitter notes.
- Salt – Enhances flavor and contributes to overall balance.
- Chocolate Chips – Infuses the brownies with delicious pockets of melty chocolate.
For the Topping
- Coconut Oil – Achieves a glossy finish when melting chocolate for the topping.
- White Chocolate (optional) – Can be tinted with gel food coloring for lovely decorative swirls.
- Coffee or Espresso (optional) – Deepens the chocolate flavor without imparting a strong coffee taste.
These Easter brownies are not just a treat; they are a way to celebrate the joy of the season. Happy baking!
Step‑by‑Step Instructions for Easter Brownies Recipe
Step 1: Preheat the Oven
Begin by preheating your oven to 350°F (175°C). This essential step ensures even baking and helps the Easter brownies rise beautifully. While the oven heats up, prepare a 9×13 inch baking pan by lining it with parchment paper; this makes for easy removal and clean-up later on.
Step 2: Melt the Butter
In a medium saucepan over low heat, melt the butter until it’s completely liquid, stirring occasionally to avoid burning. Once melted, remove it from the heat and add both granulated sugar and brown sugar. Use a whisk to combine them thoroughly, creating a smooth mixture that will give your brownies that chewy texture.
Step 3: Incorporate the Eggs and Vanilla
Next, add the eggs one at a time to the butter-sugar mixture. Beat well after each addition to ensure they are fully incorporated, which is crucial for that dense fudgy goodness. Follow this with the vanilla extract, stirring until everything is blended beautifully and the mixture is glossy.
Step 4: Sift Dry Ingredients
In a separate bowl, sift together the all-purpose flour, cocoa powder, and salt. Sifting helps to aerate the dry ingredients and eliminates any lumps, contributing to the smoothness of your Easter brownies. Gradually fold this dry mixture into the wet ingredients, being careful not to overmix; the goal is to combine them just until no streaks remain.
Step 5: Add Chocolate Chips
Once your batter is well-combined, gently stir in the chocolate chips, ensuring they are evenly distributed throughout the brownie mixture. This step adds delightful pools of melted chocolate to your Easter brownies. Pour the finished batter into the prepared baking pan, smoothing the top for an even finish.
Step 6: Bake the Brownies
Place the baking pan in the preheated oven and bake for 30 to 35 minutes. To test for doneness, insert a toothpick into the center—look for moist crumbs clinging to the toothpick, which indicates that the brownies are perfectly fudgy. Avoid overbaking to maintain their rich texture.
Step 7: Cool the Brownies
After baking, remove the pan from the oven and allow the brownies to cool completely in the pan on a wire rack. This cooling time is vital as it lets the brownies set up properly, making them easier to cut later on. Patience here will reward you with beautifully fudgy pieces.
Step 8: Prepare the Topping
In a microwave-safe bowl, combine chocolate chips and coconut oil. Microwave them in 30-second intervals, stirring between each session until completely smooth and glossy. This chocolate mix will serve as the luscious topping for your Easter brownies, elevating both flavor and visual appeal.
Step 9: Decorate the Brownies
Once the brownies are completely cool, pour the melted chocolate topping over them, spreading it evenly with a spatula. If using white chocolate, drizzle it over the top and feel free to swirl it with a toothpick or knife for a festive design. Top with colorful sprinkles to bring the Easter spirit to life!
Step 10: Slice and Serve
Allow the decorated brownies to set at room temperature until the topping hardens slightly. To slice them, use a sharp knife warmed under hot water and dried off; this will ensure clean edges. Cut into squares and serve these delightful Easter brownies at your spring gatherings for everyone to enjoy!
Expert Tips for Easter Brownies
-
Mind the Butter Temperature: Ensure your melted butter is warm but not hot when mixing with sugars to prevent cooking the eggs, leading to a perfect brownie texture.
-
Cooling is Key: Let the brownies cool completely in the pan to make slicing easier and avoid uneven edges in your delicious Easter brownies.
-
Sift for Smoothness: Always sift the dry ingredients together for a lump-free batter, ensuring a rich and fudgy brownie, full of flavor without any grainy bits.
-
Use Gel Colors: For vibrant pastel decorations, opt for gel food coloring rather than liquid; this keeps the topping’s consistency just right while adding beautiful hues.
-
Warm Knife Trick: When it’s time to slice, a warm, dry knife will help you achieve clean cuts, so each piece looks as good as it tastes!
Storage Tips for Easter Brownies
-
Room Temperature: Keep your Easter brownies in an airtight container at room temperature for up to 3 days to maintain their chewy texture and chocolatey goodness.
-
Fridge: For longer freshness, refrigerate the brownies for up to a week. Just be sure to cover them well to prevent them from drying out.
-
Freezer: If you’d like to store your Easter brownies for an extended period, freeze them wrapped tightly in plastic wrap and placed in a freezer bag for up to 3 months.
-
Reheating: To enjoy them warm, simply thaw the brownies at room temperature, then microwave for 10-15 seconds before serving for that freshly baked taste!
Easter Brownies Recipe Variations
Feel free to unleash your creativity with these delightful brownie variations that will elevate your Easter celebration!
-
Nutty Delight: Add chopped walnuts or pecans for an extra crunch and depth of flavor. The nuts perfectly complement the rich chocolate base and add a delightful contrast to the fudginess.
-
Chocolate Swap: Switch out the white chocolate topping for dark or milk chocolate for a twist on flavor. This small change can add a delightful richness that can balance the sweetness from the brownie itself.
-
Ultimate Fudge: Double the chocolate chips for an incredibly gooey texture that chocolate lovers will adore. Rich, fudgy brownies topped with even more melted chocolate are sure to be a hit!
-
Sassy Spice: Include a pinch of cinnamon or a splash of chili powder for a surprising warm kick that contrasts beautifully with the sweetness. This subtle heat can make every bite feel extra special!
-
Flavor Infusion: Experiment with flavored extracts such as almond or mint instead of vanilla for a unique flavor profile. Just a little change can take your brownies on a delightful flavor adventure.
-
Festive Decorations: Top with seasonal sprinkles or edible glitter to celebrate various occasions. Why stop at Easter? These brownies can be customized for birthdays or other holidays too!
-
Healthier Twist: Substitute coconut oil for butter and use whole wheat flour to create a slightly healthier version without compromising too much on taste. The swaps add some nutritional value while maintaining the treat factor.
These Easter brownies are perfect for sharing, and if you’re looking for more delicious ideas, you might enjoy trying Apple Brownies Moist or a comforting Dumpling Ramen Bowl. Enjoy customizing!
Make Ahead Options
These Easter brownies are a great choice for busy home cooks looking to save time! You can prepare the brownie batter up to 24 hours in advance and store it in the refrigerator in an airtight container. When you’re ready to bake, simply take it out and proceed with pouring it into the lined baking pan and baking as directed. The brownies can also be topped with melted chocolate up to 3 days ahead; just refrigerate them after decorating. For optimum freshness, allow them to come to room temperature before serving. This way, you can enjoy perfect, fudgy Easter brownies with minimal effort on the day of your gathering!
What to Serve with Easter Brownies
These luscious treats will brighten your celebration and leave your guests wanting more. Pair them with delightful sides and drinks to create a memorable feast!
-
Vanilla Ice Cream: A classic pairing, the creamy texture of vanilla ice cream balances the rich chocolate flavors, creating a delightful contrast.
-
Fresh Berries: Serve with a medley of strawberries, blueberries, and raspberries. Their tangy sweetness enhances the fudgy brownies while adding a burst of color.
-
Mint Chocolate Chip Milkshake: The cool mint gives a refreshing zing that complements the chocolatey goodness beautifully. Perfect for a festive twist!
-
Coconut Whipped Cream: Light and airy, this topping adds a tropical flair that pairs wonderfully with the chocolate while maintaining a festive essence.
-
Chocolate Milk: Nothing beats a comforting glass of chocolate milk when indulging in brownies. This sweet beverage brings an extra layer of chocolatey delight!
-
Caramel Sauce: Drizzle warm caramel over the brownies for a salted sweetness that elevates the overall chocolate experience into something truly decadent.
-
Coffee or Espresso: Serving a side of coffee or a rich espresso enhances the brownies’ flavors, bringing out the secret hint of coffee in the recipe.
-
Rainbow Fruit Skewers: Bright, colorful fruit skewers can refresh your palate and provide a sweet, crunchy contrast to the chewy brownies.
-
Lemonade: The refreshing citrusy zing of lemonade cuts through the richness, making it a great beverage choice for spring gatherings.
-
Cheesecake Bites: These creamy bites offer a delightful textural contrast that pairs well with the dense Easter brownies, creating a variety of treats at your dessert table.
Easter Brownies Recipe FAQs
How do I choose the right ripeness for my eggs?
Absolutely! When selecting eggs for your Easter brownies, go for large, fresh eggs. Fresh eggs have a tight albumen, which contributes to lift and structure in your brownies. Check the expiration date and choose eggs that are not past it for the best quality.
What’s the best way to store leftover brownies?
Very simple! Store your Easter brownies in an airtight container at room temperature for up to 3 days for the best texture. If you want to keep them longer, refrigerate them for up to a week; just make sure they’re well covered to prevent them from drying out.
Can I freeze Easter brownies?
Absolutely! To freeze your Easter brownies, wrap them tightly in plastic wrap and place them in a freezer-safe bag or container. They can be stored this way for up to 3 months. When you’re ready to enjoy them, simply thaw them in the refrigerator overnight and warm them in the microwave for a few seconds to bring back their fudgy texture.
What if my brownies turn out too dry?
No worries! If your brownies come out dry, it could be due to overbaking or using too much flour. Make sure to perform the toothpick test and aim for moist crumbs. If they do come out dry, you can try serving them with a scoop of ice cream or a drizzle of syrup to bring back some moisture!
Are these brownies safe for children and pets?
While these Easter brownies are delicious for people, they contain ingredients like chocolate, which can be harmful to pets. Always keep your treats out of reach from furry friends! As for children, just be mindful of any allergens or sensitivities they may have to ingredients like eggs or gluten.
Can I customize toppings for these Easter brownies?
The more the merrier! You can customize your Easter brownies by swapping out the white chocolate for dark or milk chocolate, adding nuts for crunch, or experimenting with different sprinkles or themed decorations. Personalizing them can make your treats even more delightful and festive!
Easter Brownies Recipe: Easy, Fudgy Treats for Spring Celebrations
Ingredients
Equipment
Method
- Preheat your oven to 350°F (175°C) and line a 9x13 inch baking pan with parchment paper.
- Melt the butter in a medium saucepan over low heat, then stir in granulated sugar and brown sugar.
- Incorporate the eggs one at a time, mixing well after each addition, then add vanilla extract.
- Sift together flour, cocoa powder, and salt; gradually fold into wet ingredients until just combined.
- Gently stir in chocolate chips, then pour the batter into the prepared baking pan.
- Bake for 30-35 minutes; test with a toothpick for moist crumbs.
- Cool completely on a wire rack in the pan.
- Melt chocolate chips and coconut oil in a microwave-safe bowl, stirring until smooth.
- Pour the melted topping over cooled brownies and optionally drizzle white chocolate.
- Let the topping set, then slice into squares for serving.
Leave a Reply