
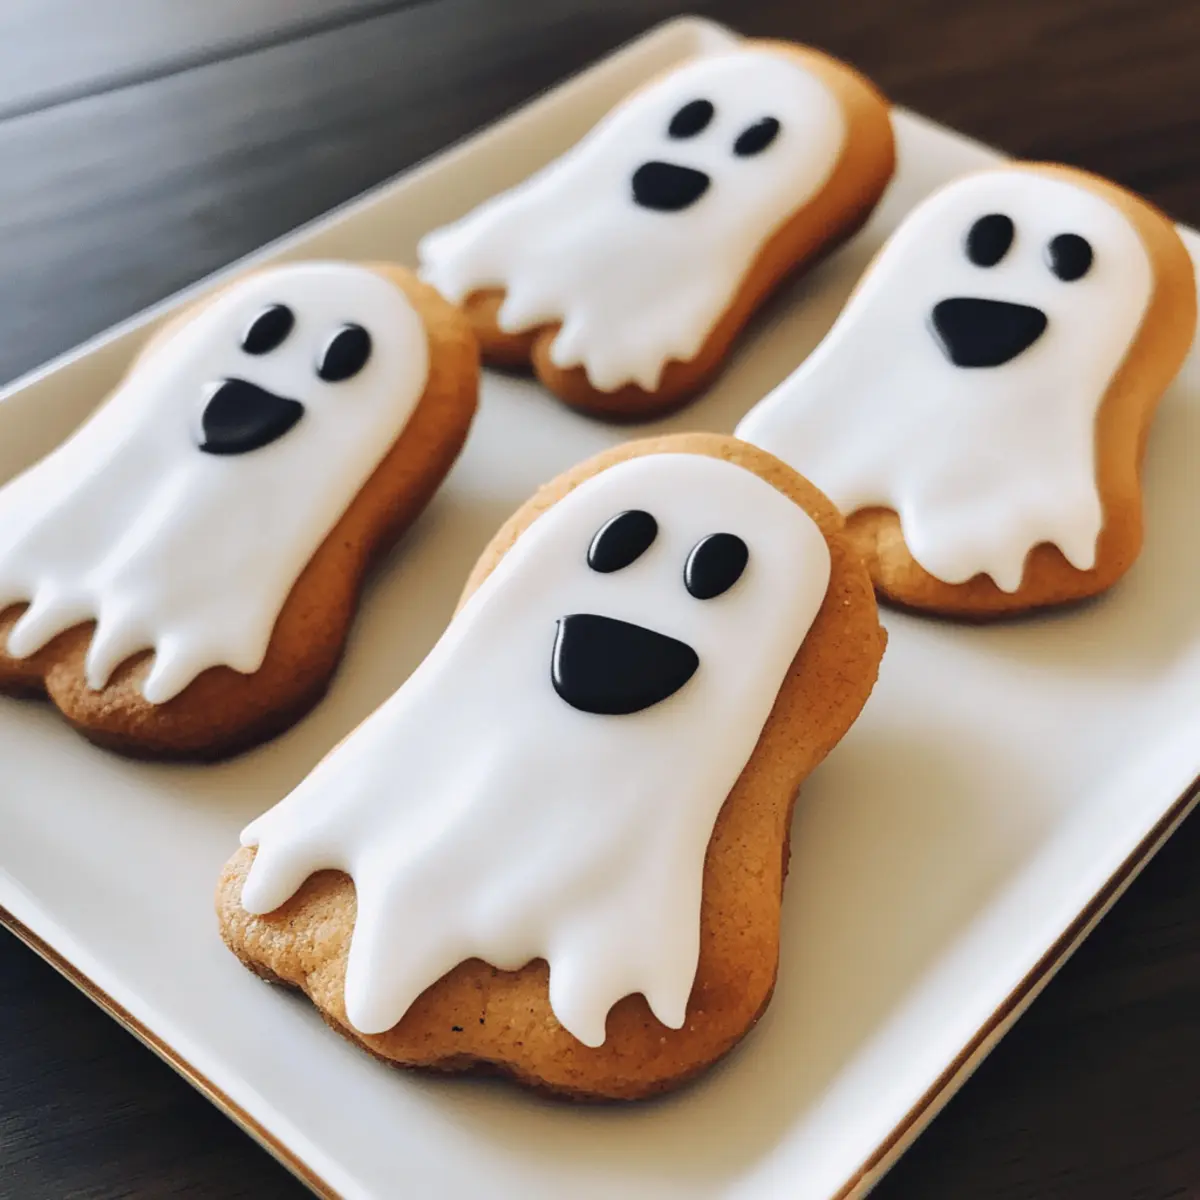
As the leaves turn and the air fills with a hint of chill, an unexpected conversation caught my ear while I was stirring a pot of simmering cider: “What’s more fun than baking ghosts?” That got me thinking about Halloween treats that evoke joy and laughter, like my delightful Ghost Cookies. Not only are these easy-to-make Halloween desserts perfect for festive gatherings, but they also bring a magical touch to your kitchen with their adorable shapes and sweet, creamy icing. You’ll love how this simple recipe allows you to whip up a batch of soft, chewy cookies that the whole family can enjoy. So, are you ready to create these spooktacular delights that will put a smile on everyone’s face? Let’s get started!
Why Are Ghost Cookies a Must-Bake?
Unmatched Fun: These fun Ghost Cookies add a festive touch to your Halloween festivities, making baking an enjoyable activity for everyone.
Simple Process: The easy recipe requires minimal fuss and common ingredients, so you can create these spooky treats effortlessly, even if you’re short on time.
Ideal for Sharing: Their crowd-pleasing appeal makes them perfect for parties, school events, or family gatherings—everyone will love these delightful cookies!
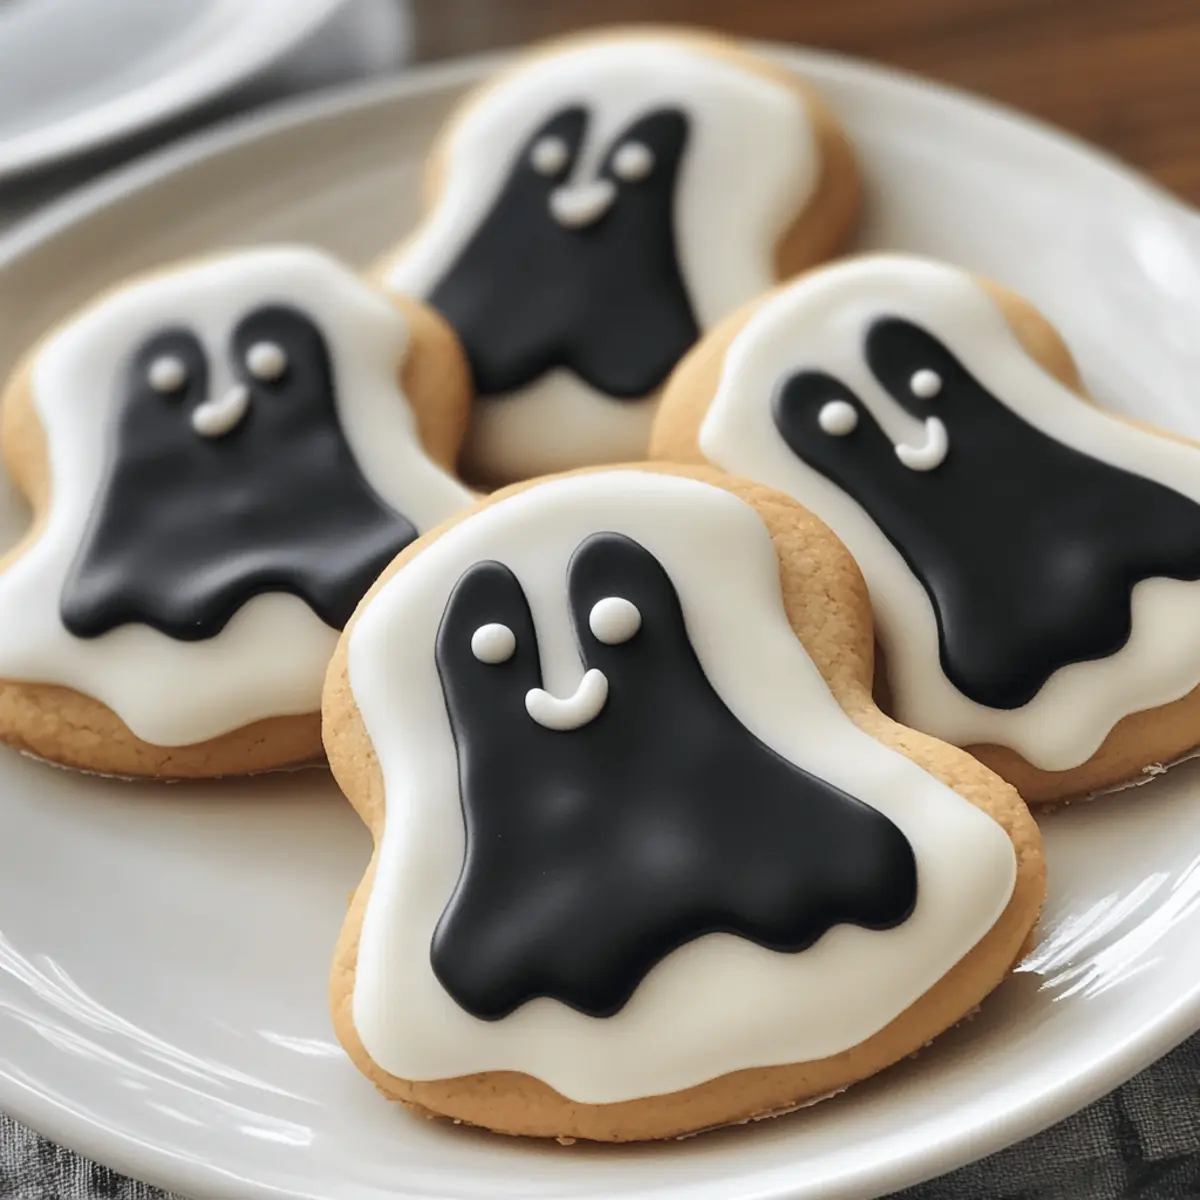
Endless Creativity: With various decoration options, you can customize your ghostly creations. Try adding sprinkles or even making other shapes like pumpkins for an extra festive flair!
Make sure to check out my other delicious recipes like these Pecan Pie Cookies or Chip Cheesecake Cookies for more festive fun!
Ghost Cookies Ingredients
For the Cookie Dough
- All-Purpose Flour – Creates structure in the cookies; ensure to have extra for dusting surfaces.
- Baking Powder – Helps the cookies rise for that wonderfully soft interior.
- Kosher Salt – Balances sweetness and enhances overall flavor.
- Butter (2 sticks, softened) – Adds richness and the desired texture; ensure it’s softened for easy creaming.
- Granulated Sugar – Sweetens the dough, resulting in a balanced flavor that makes these Ghost Cookies even more delightful.
- Large Egg – Binds ingredients together and adds moisture to keep cookies tender.
- Milk (1 Tbsp plus more for thinning) – Helps combine ingredients and adjust icing consistency to perfection.
- Pure Vanilla Extract – Enhances flavor with a hint of sweetness for the cookies.
For the Icing
- Powdered Sugar (3 cups) – Sweetens the icing, providing a smooth texture when thinned.
- Light Corn Syrup (1/4 cup) – Adds shine and a silky texture to the icing for that professional finish.
- Almond (or Vanilla) Extract (1/4 tsp) – Gives the icing an additional flavor boost.
- Black Food Coloring – Use to create spooky ghost faces that make these treats irresistible!
Feel ready to embark on a fun-filled baking adventure with my Ghost Cookies? Gather these ingredients and let’s conjure up some deliciously spooky treats!
Step‑by‑Step Instructions for Ghost Cookies
Step 1: Prepare the Dough
In a large mixing bowl, whisk together 2 cups of all-purpose flour, 1 teaspoon of baking powder, and ½ teaspoon of kosher salt until evenly combined. In another bowl, cream together 2 sticks of softened butter and 1 cup of granulated sugar until light and fluffy, about 3 minutes. Then, mix in 1 large egg, 1 tablespoon of milk, and 1 teaspoon of pure vanilla extract. Gradually add the flour mixture until a soft dough forms.
Step 2: Chill the Dough
Once your dough is ready, wrap it in plastic wrap and place it in the refrigerator. Chill the dough for at least 30 minutes to ensure the cookies maintain their shape while baking. When properly chilled, it should feel firmer and easier to handle, preventing any spreading during the baking process.
Step 3: Cut and Bake Cookies
Preheat your oven to 350°F (175°C) while you prepare your dough. Lightly flour a clean work surface and roll out the chilled dough to about ¼-inch thickness. Use a ghost-shaped cookie cutter to cut out your cookies and place them on a parchment-lined baking sheet. For best results, freeze the cut-out ghost shapes for 10 minutes before baking, helping to preserve their edges. Bake in the preheated oven for 8-10 minutes or until the edges are lightly golden.
Step 4: Make the Icing
In a mixing bowl, combine 3 cups of powdered sugar, ¼ cup of light corn syrup, and 1 tablespoon of milk. Mix until smooth and the icing reaches a thick yet spreadable consistency that can hold its shape. If the icing is too thick, gradually add a bit more milk. For a more flavorful icing, stir in ¼ teaspoon of almond (or vanilla) extract.
Step 5: Decorate
Once the Ghost Cookies have cooled completely, it’s time to decorate! Using a piping bag with a small round tip, outline the cookies with a thicker consistency of icing. Next, flood the outlined areas with the thinned icing to create a smooth and glossy finish. Allow the icing to set for about 30 minutes, then use black food coloring to draw spooky ghost faces with thinned icing. Let the decorated cookies dry completely before serving.

Ghost Cookies: Fun Recipe Variations
Feel free to get creative and customize your Ghost Cookies to suit your taste or dietary needs—these twists are sure to delight!
-
Dairy-Free: Replace butter with coconut oil or a dairy-free margarine to keep these cookies creamy and dreamy without dairy. The flavor remains light, and they maintain that delightful texture.
-
Gluten-Free: Use a 1:1 gluten-free flour blend in place of all-purpose flour for a cookie that’s perfectly tender and tasty. Ensure you check for certified gluten-free ingredients for safety!
-
Pumpkin Spice: Add 2 teaspoons of pumpkin spice to the dough for a seasonal twist that brings warmth and richness—a perfect pairing with the sweetness of the icing.
-
Sprinkle Fun: Before baking, add colorful Halloween-themed sprinkles on top of your cut-out shapes for an extra festive touch that makes everyone smile—consider candy corn or spooky shapes!
-
Chocolate Drizzle: Melt some chocolate and drizzle it over the finished and cooled cookies for a deliciously rich contrast to the sweetness of the icing.
-
Shape Variations: Use different cookie cutters to make pumpkins, bats, or even skulls. Your creativity knows no bounds—this is a fun way to add variety and surprise!
-
Nutty Flavor: Mix in chopped nuts, like almonds or pecans, to the dough for a delightful crunch and added flavor that pairs perfectly with the sweetness of the cookie.
-
Spicy Kick: If you’re feeling daring, add a pinch of cayenne pepper to the dough for a surprising heat that beautifully intensifies the sweetness—it’s a festival of flavors!
While you’re at it, don’t miss out on other festive favorites like my Pumpkin Pie Cookies or the delectable Chocolate Oat Cookies for more baking inspiration!
How to Store and Freeze Ghost Cookies
Airtight Container: Store your Ghost Cookies in an airtight container at room temperature for up to 3-4 days to keep them fresh and delicious.
Fridge: If you prefer, you can refrigerate the cookies for a week, but be sure to keep them in an airtight container to avoid drying out.
Freezer: Keep any leftover cookies in the freezer for up to 3 months. Place them in a single layer on a baking sheet until frozen, then transfer to a freezer-safe bag.
Reheating: For a warm treat, simply thaw at room temperature or microwave in short bursts of 10-15 seconds, ensuring not to overheat and soften the icing.
What to Serve with Ghost Cookies
These festive treats are the perfect centerpiece for a Halloween gathering, and pairing them with delightful accompaniments enhances the spooky fun.
-
Pumpkin Spice Latte: A warm, comforting drink that mirrors the cozy fall flavors, creating an inviting atmosphere as you indulge in your ghostly sweets.
-
Crispy Apple Slices: Fresh, crisp apples add a refreshing crunch, balancing the sweetness of the cookies with a delightful contrast.
-
Chocolate Dipped Pretzels: The combination of salty and sweet brings an exciting flavor twist that your guests will adore alongside their spooky snacks.
-
Witch’s Brew Punch: This vibrant and fruity beverage is perfect for the occasion, offering a refreshing sip to wash down the festive cookies.
-
Caramel Sauce: A rich, gooey drizzle over the cookies can elevate each bite, pairing beautifully with the soft texture of your Ghost Cookies.
-
Autumn Spice Cake: A slice of moist and fragrant spice cake complements the cookies while enhancing the seasonal theme of your gathering.
For a well-rounded Halloween feast, combine these treats to create a delightful experience that everyone will remember!
Expert Tips for Ghost Cookies
-
Chill Before Baking: Always chill your dough for at least 30 minutes; this keeps your Ghost Cookies from spreading and maintains their fun shapes.
-
Proper Icing Thickness: When making your icing, aim for a consistency that is thick enough to hold a shape but can flood the cookie without running over.
-
Don’t Rush Cooling: Allow your cookies to cool completely before decorating to prevent the icing from melting or sliding off, which can ruin the look of your Ghost Cookies.
-
Test Your Cutters: Ensure your ghost-shaped cookie cutter is sharp and distinct; this helps achieve clear edges that make your cookies more visually appealing.
-
Storage Matters: Place your decorated cookies in an airtight container at room temperature to keep them fresh for 3-4 days. If you can, layer them with parchment paper to prevent sticking.
Make Ahead Options
Making these Ghost Cookies ahead of time is a fantastic way to streamline your baking for Halloween! You can prepare the cookie dough up to 24 hours in advance by wrapping it tightly in plastic wrap and refrigerating it until you’re ready to bake. Additionally, consider baking the cookies in bulk and storing them in an airtight container for up to 3 days at room temperature. For the icing, mix it the day before as well and refrigerate it in a sealed container; just remember to bring it to room temperature before use. When you’re ready to decorate, simply ice the cookies, and you’ll enjoy glowing results that are just as delicious as fresh-baked!

Ghost Cookies Recipe FAQs
What should I look for when selecting ingredients?
For the best Ghost Cookie results, use high-quality butter as it greatly affects the flavor and texture. Ensure your all-purpose flour is freshly opened; old flour can lead to dry cookies. For the icing, opt for pure vanilla extract rather than imitation for a richer taste.
How should I store leftover Ghost Cookies?
Store your Ghost Cookies in an airtight container at room temperature for up to 3-4 days. If you enjoy a softer cookie, consider refrigerating them in a sealed container, which can keep them fresh for about a week without drying out.
Can I freeze Ghost Cookies?
Absolutely! To freeze your Ghost Cookies, place them in a single layer on a baking sheet until they are frozen solid. Then transfer them to a freezer-safe bag or container, stacking them with parchment paper in between if necessary. They can last in the freezer for up to 3 months. When ready to enjoy, thaw at room temperature or microwave briefly in short bursts.
What if my icing is too thick or too thin?
If your icing is too thick, gradually add more milk, a teaspoon at a time, until you reach the desired consistency. If it’s too thin, add a little more powdered sugar to thicken it up. Always mix well between adjustments to see how the consistency changes and ensure it can hold a shape while flooding the cookies without running over the edges.
Are there any dietary considerations I should keep in mind?
Definitely! If you’re making Ghost Cookies for someone with allergies, substitute the butter with a dairy-free alternative like coconut oil and use egg replacers such as flaxseed meal mixed with water. For gluten-free options, consider using a 1:1 gluten-free flour blend, but make sure to check the labels for any potential cross-contamination with allergens.
Ghost Cookies: Fun and Easy Halloween Treats for Everyone
Ingredients
Equipment
Method
- Prepare the Dough: In a large mixing bowl, whisk together the flour, baking powder, and salt. In another bowl, cream together butter and sugar. Mix in egg, milk, and vanilla extract. Gradually add flour mixture until soft dough forms.
- Chill the Dough: Wrap dough in plastic wrap and refrigerate for at least 30 minutes to maintain shape.
- Cut and Bake Cookies: Preheat oven to 350°F (175°C). Roll out dough to ¼-inch thickness, cut ghost shapes, and freeze for 10 minutes prior to baking. Bake for 8-10 minutes until edges are golden.
- Make the Icing: Combine powdered sugar, corn syrup, and milk until smooth. Adjust thickness as needed. Stir in extract.
- Decorate: Outline cooled cookies with thicker icing and flood with thinner icing. Use food coloring for designs and allow to dry.
Leave a Reply