
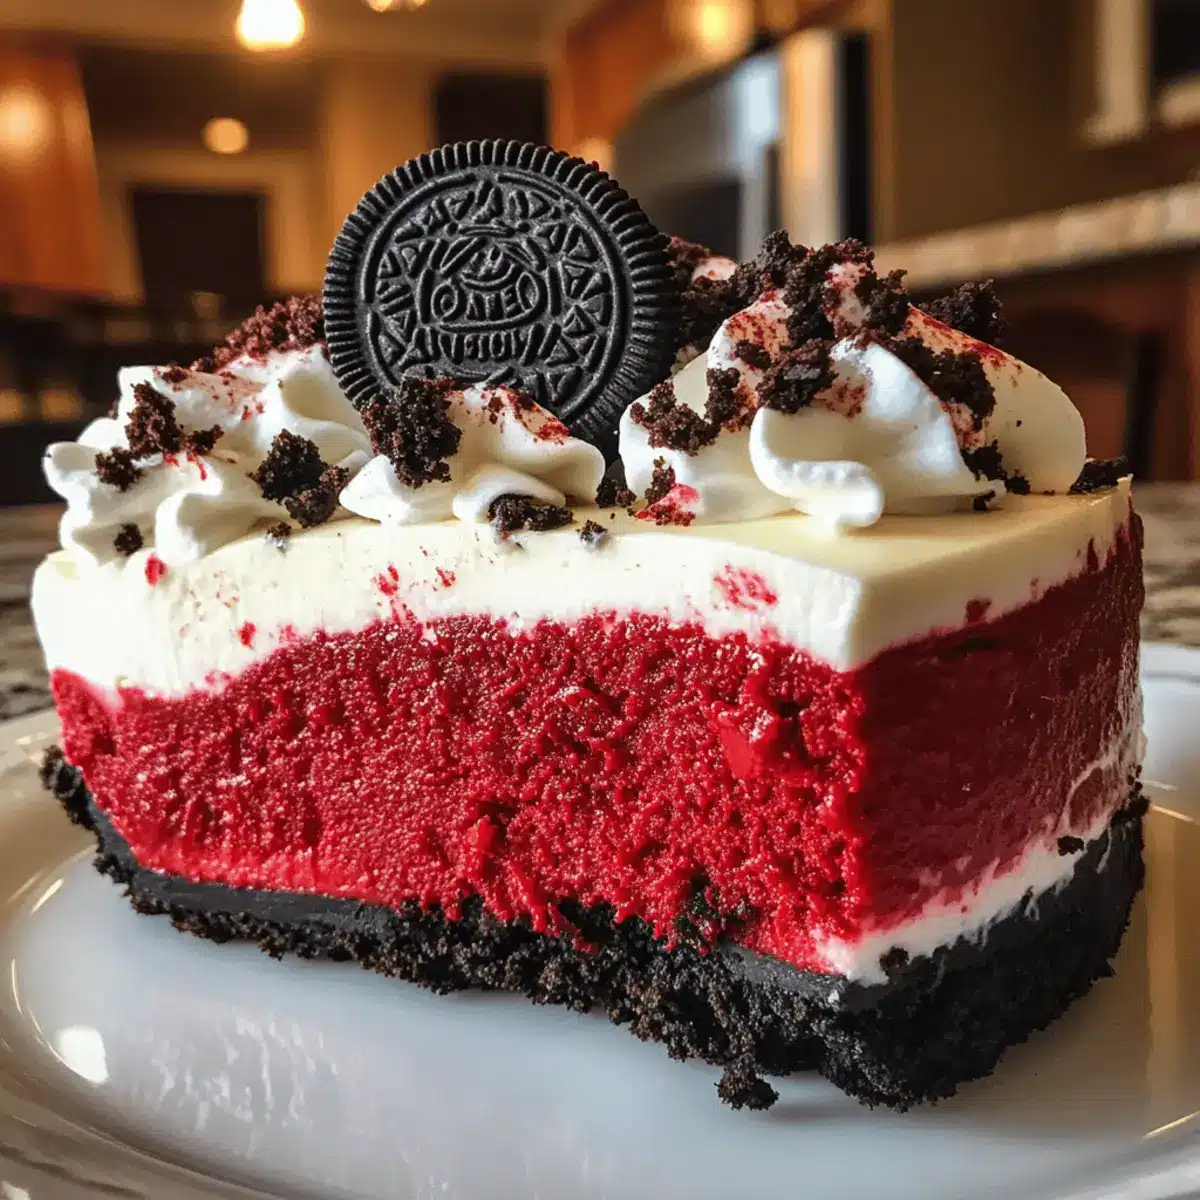
As I rummaged through my pantry searching for a sweet way to impress my friends, I stumbled upon a forgotten bag of red velvet cake mix and a few leftover Oreos. Instantly inspired, I set out to create something truly sensational: a Red Velvet Oreo Cheesecake. This delightful dessert marries the velvety richness of cheesecake with the nostalgic crunch of Oreos, instantly elevating any gathering or cozy night in. Not only is it incredibly easy to whip up, but the flavors meld beautifully over time, offering an even more indulgent treat the next day. Whether you’re celebrating a special occasion or simply seeking a comforting dessert to satisfy your craving, this cheesecake delivers in taste and presentation. Are you ready to dive into this luscious creation?
Why Is This Cheesecake So Irresistible?
Decadent, this Red Velvet Oreo Cheesecake is a showstopper that impresses at every gathering. Unforgettable flavor comes from the perfect blend of rich cheesecake and crunchy Oreos, creating an indulgent experience. Easy to make, the straightforward process requires minimal time and skills, letting you enjoy the results without stress. Versatile options allow you to transform it into cheesecake bars or adjust for dietary needs, ensuring everyone can savor it. Plus, make-ahead magic means the flavors deepen overnight, making it the ideal dessert for any occasion. Dive into a slice today and pair it with a scoop of ice cream for that extra touch! For more delightful options, check out these Cheesecake Stuffed Baked apples and the Smothered Chicken Rice.
Red Velvet Oreo Cheesecake Ingredients
For the Crust
- Oreo cookie crumbs – The foundation for the crust that adds a delicious chocolate flavor; can be replaced with gluten-free cookies for a gluten-free version.
- Granulated sugar – Provides sweetness to balance the richness of the cheesecake; consider using coconut sugar for a less processed alternative.
- Salted butter – Binds the crust together and enhances its flavor; you can opt for unsalted butter if you’re watching your salt intake.
For the Cheesecake Filling
- Full-fat cream cheese – The star ingredient that ensures a creamy and rich texture; swap with Neufchâtel cheese for a lower-fat option if desired.
- Granulated sugar – Sweetens the filling and complements the other flavors; Stevia or another sweetener can be used for a low-calorie version.
- Full-fat sour cream – Adds creaminess and a hint of tang; Greek yogurt makes for a higher protein substitute.
- Vanilla extract – Enhances the overall flavor of the cheesecake; use vanilla bean paste for a more intense flavor kick.
- Heavy whipping cream – Contributes to the richness of the filling; you can omit it for a lighter option.
- Cornstarch – Acts as a stabilizer, ensuring a smooth and creamy texture; flour can serve as an alternative if needed.
- Red gel food coloring – Adds that signature vibrant color to the cheesecake; consider using natural beet powder for a healthier coloring option.
- Large eggs – Provide structure and bind the ingredients together; replace with flax eggs for a vegan alternative.
- Chopped Oreos – Infuses additional Oreo flavor throughout the cheesecake; feel free to substitute with any favorite cookie for variety.
For the Garnish
- Dark chocolate, melted – Offers a beautiful decorative touch and rich flavor; milk chocolate can be used for a sweeter option.
- Whipped cream – Adds a delightful creamy topping and enhances the presentation; coconut whipped cream is perfect for a dairy-free choice.
There you have it! Gather these ingredients and get ready to create a stunning Red Velvet Oreo Cheesecake that will leave everyone impressed!
Step‑by‑Step Instructions for Red Velvet Oreo Cheesecake
Step 1: Prepare the Crust
Preheat your oven to 350°F (175°C). In a medium bowl, combine Oreo cookie crumbs, granulated sugar, and melted salted butter until well mixed. Press this mixture evenly into the bottom of an 8-inch springform pan, creating a firm base. Bake for 9-10 minutes until set, then remove and let cool. While the crust is cooling, reduce the oven temperature to 300°F (150°C).
Step 2: Make Cheesecake Filling
In a large mixing bowl, use an electric mixer to beat full-fat cream cheese until smooth and fluffy. Gradually add granulated sugar, full-fat sour cream, and vanilla extract, mixing on low. Slowly pour in heavy whipping cream and sprinkle in cornstarch along with a few drops of red gel food coloring. Mix gently until completely combined, then add in the large eggs one at a time, blending briefly just until smooth.
Step 3: Layer and Bake
Pour half of the red velvet cheesecake filling into the cooled Oreo crust, smoothing the surface. Sprinkle the chopped Oreos evenly over the layer, then pour the remaining cheesecake batter on top. Bake in the preheated oven at 300°F for 12 minutes. Afterward, reduce the temperature to 225°F (110°C) and continue baking for another 110-115 minutes or until the edges are set and the center appears slightly jiggly.
Step 4: Cooling
Once the baking is complete, turn off the oven and let the cheesecake cool inside with the door closed for 1 hour. Afterward, crack the oven door open and allow it to cool for an additional hour. Then, transfer the cheesecake to room temperature for about 2 hours before refrigerating for at least 3-4 hours, or ideally overnight, to allow the flavors to meld beautifully.
Step 5: Serve
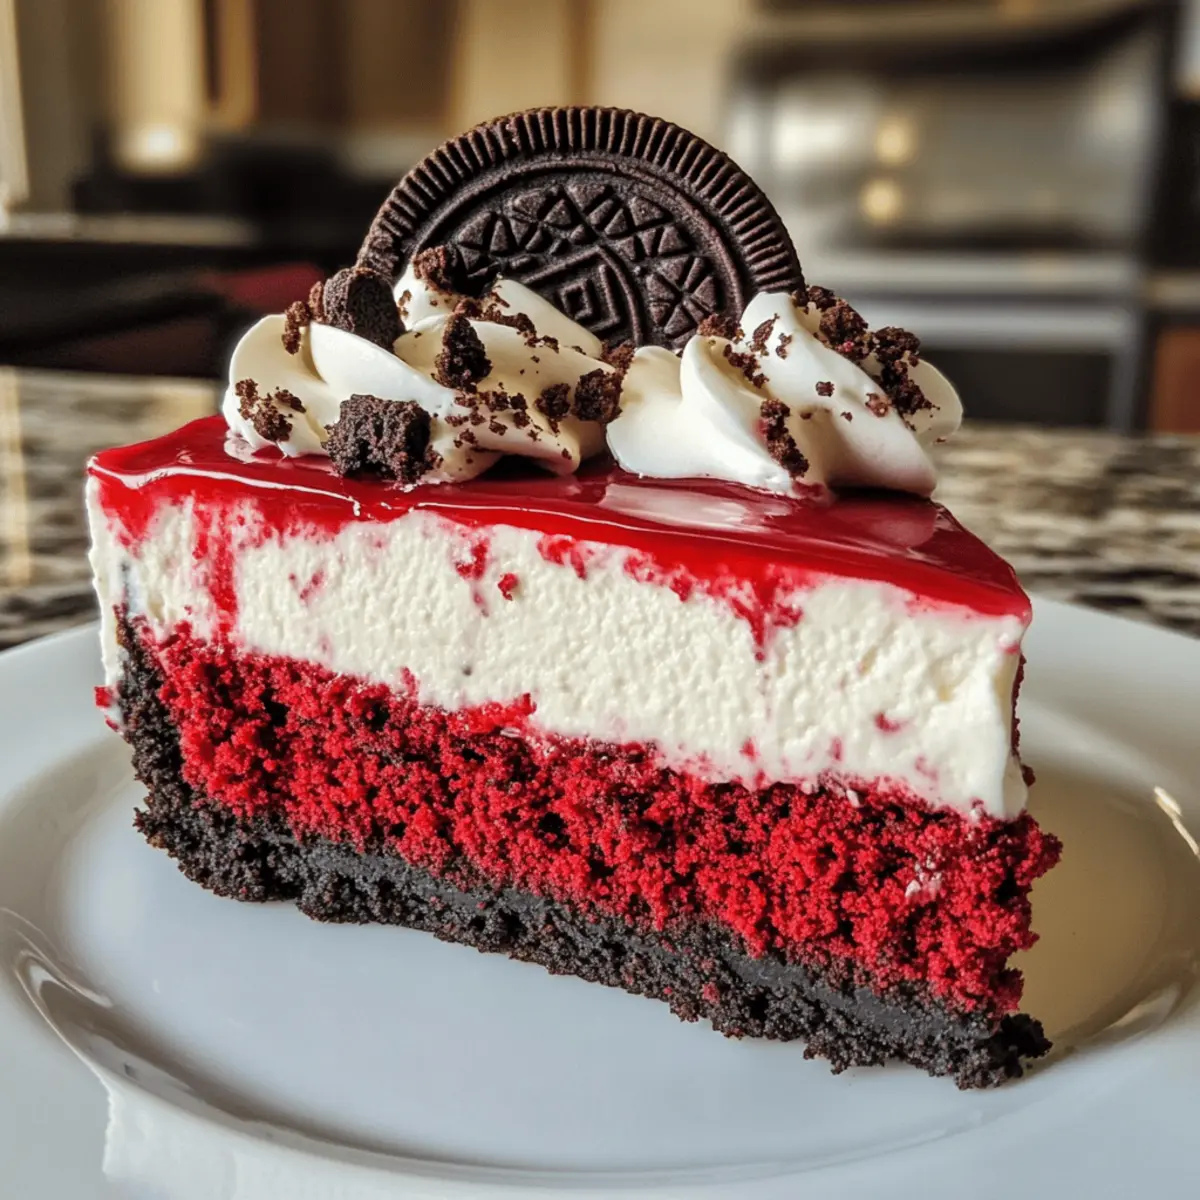
When you’re ready to serve your Indulgent Red Velvet Oreo Cheesecake, remove it from the fridge. Garnish with melted dark chocolate drizzled over the top and dollops of whipped cream for an elegant touch. Use a warm knife to slice through the cheesecake for clean edges, ensuring each slice showcases the stunning layers that make this dessert truly irresistible.
Make Ahead Options
These indulgent Red Velvet Oreo Cheesecake treats are perfect for busy home cooks who want to save time without compromising on flavor! You can prepare the Oreo cookie crust up to 24 hours in advance by baking and then sealing it tightly in plastic wrap to maintain its crunchiness. Additionally, the cheesecake filling can be mixed the night before and stored in the refrigerator, allowing the flavors to deepen. When you’re ready to bake, simply assemble the layers and follow the baking instructions, ensuring the center jiggles slightly when finished. This way, you’ll enjoy a delicious dessert with minimal effort on the day of your gathering!
Expert Tips for Red Velvet Oreo Cheesecake
- Room Temperature Ingredients: Ensure all your ingredients, especially cream cheese and eggs, are at room temperature. This promotes better mixing and a smoother texture.
- Gentle Mixing: Avoid over-mixing, especially after adding eggs, to prevent cracking. Mix just until combined and use a spatula to scrape down the bowl.
- Proper Cooling: Follow the cooling instructions diligently. Sudden temperature changes can lead to cracks in your cheesecake. Let it cool gradually in the oven before refrigerating.
- Slicing Technique: Use a warm knife to cut the cheesecake, cleaning it between slices for tidy edges. This will present your Red Velvet Oreo Cheesecake beautifully!
- Optional Flavor Enhancements: Feel free to experiment with flavorings like almond extract or a touch of cocoa to create a unique twist on this classic recipe.
What to Serve with Indulgent Red Velvet Oreo Cheesecake
Imagine the sweet aroma of a delightful dessert wafting through your home, inviting everyone to gather around the table.
- Vanilla Ice Cream: The creamy texture of vanilla ice cream complements the rich cheesecake beautifully, creating a delightful contrast that’s simply irresistible.
- Fresh Berries: Juicy strawberries or raspberries add a splash of freshness and vibrant color, cutting through the richness of the cheesecake while enhancing its visual appeal.
- Chocolate Drizzle: A drizzle of warm chocolate sauce adds decadence and a touch of elegance, taking your dessert experience to new heights.
- Whipped Cream: Fluffy whipped cream provides a light, airy balance, making each bite feel indulgently fluffy and sweet.
- Espresso or Coffee: A bold cup of coffee provides a satisfying contrast to the dessert’s sweetness and is perfect for those who enjoy a pick-me-up after a rich meal.
- Red Wine: Pairing with a glass of sweet red wine highlights the flavors of the red velvet while adding a sophisticated touch to your dessert table.
- Chocolate-Covered Strawberries: Offering a playful twist, these treats elevate your dessert platter while complementing the Oreo and cream cheese flavors beautifully.
- Caramel Sauce: Drizzling caramel over individual slices enriches the cheesecake with an extra layer of flavor, making each bite a little more indulgent.
- Mint Leaves: Fresh mint leaves make a lovely garnish that adds a pop of color and a refreshing contrast to the rich flavors, perfect for presentation.
With these delightful options, your Indulgent Red Velvet Oreo Cheesecake will shine even brighter, making your gathering unforgettable!
Red Velvet Oreo Cheesecake Variations
Feel free to let your creativity shine as you customize this delightful cheesecake!
- Cheesecake Bars: Transform this dessert into Red Velvet Oreo Cheesecake Bars by using a 9×13-inch pan. Adjust baking time to around 32-35 minutes for a perfect cut.
- Different Extracts: Experiment with flavoring swaps by using almond or mint extract for a unique twist in the cheesecake filling. Each option adds a surprise element!
- Gluten-Free Delight: Substitute gluten-free cookie crumbs for the crust to cater to those with dietary restrictions without sacrificing taste. Everyone deserves a slice of cheesecake bliss!
- Dairy-Free Option: For a dairy-free version, swap out full-fat cream cheese and sour cream for coconut yogurt and dairy-free alternatives, maintaining creaminess while making it accessible.
- Mini Cheesecakes: Make mini cheesecakes in muffin tins for bite-sized treats. Adjust baking time to about 18-20 minutes for these adorable versions that are perfect for parties.
- Chocolate Drizzle: Add a touch of decadence with a chocolate ganache drizzle on top, intensifying the flavor profile of your cheesecake. A spoonful of this ganache elevates every bite!
- Nutty Texture: Mix in some chopped nuts (walnuts or pecans) into the cheesecake for a crunchy texture contrast. It gives a delightful bite that complements the creamy filling beautifully.
- Berry Topping: Top with a layer of fresh mixed berries or a fruity compote for a refreshing burst of flavor that contrasts the richness of the cheesecake. This gives a lovely color pop too!
Feel free to explore these ideas, and make this Red Velvet Oreo Cheesecake truly your own! And if you’re looking for other delectable dessert options, consider trying these 4-Ingredient No-Bake Peanut Butter Chocolate Bars for a quick treat or the Cheesecake Stuffed Baked apples for a fruity twist!
How to Store and Freeze Red Velvet Oreo Cheesecake
Fridge: Store the cheesecake in the fridge for up to 1 week. Cover it tightly with plastic wrap or place it in an airtight container to keep it fresh.
Freezer: If you want to keep it longer, freeze the Red Velvet Oreo Cheesecake for up to 3 months. Wrap it securely in layers of plastic wrap and aluminum foil to prevent freezer burn.
Thawing: To enjoy your frozen cheesecake, transfer it to the fridge for 24 hours to thaw. This allows it to regain its creamy texture without losing flavor.
Reheating: It’s best served cold straight from the fridge, but if you prefer it slightly warmer, let it sit at room temperature for 15-20 minutes before serving.
Red Velvet Oreo Cheesecake Recipe FAQs
What type of Oreos should I use for the crust?
Absolutely, regular Oreo cookie crumbs work perfectly as the base for the crust! If you’re looking for a gluten-free option, you can easily substitute with gluten-free chocolate sandwich cookies. Just make sure they have a similar texture to maintain the crunch and flavor.
How should I store leftovers?
Very simple! You can store your Red Velvet Oreo Cheesecake in the refrigerator for up to 1 week. Just make sure to cover it tightly with plastic wrap or place it in an airtight container to keep it fresh and flavorful.
Can I freeze the cheesecake?
Yes! To freeze your Red Velvet Oreo Cheesecake, wrap it tightly in layers of plastic wrap and then aluminum foil to prevent freezer burn. It can be stored in the freezer for up to 3 months.
What should I do if my cheesecake cracks while baking?
If you notice cracks forming, don’t worry too much; it happens even to the best of us! To prevent this next time, make sure to use room temperature ingredients for smooth mixing, and avoid over-mixing after adding the eggs. Also, follow the cooling method closely, allowing it to gradually cool in the oven.
Can I use a different type of food coloring?
Certainly! While red gel food coloring helps achieve that vibrant hue, you can opt for natural beet powder as a healthier alternative. Just keep in mind that it may alter the flavor slightly, but it’ll still enrich the cake with warmth and beauty.
Is this cheesecake suitable for special dietary needs?
Absolutely! You have lots of flexible options here. For a lower-fat version, substitute full-fat cream cheese with Neufchâtel or use Greek yogurt instead of sour cream. For a vegan option, you can replace eggs with flax eggs and use dairy-free cream cheese and whipped cream alternatives. Enjoy experimenting!
Decadent Red Velvet Oreo Cheesecake That Will Wow Everyone
Ingredients
Equipment
Method
- Preheat your oven to 350°F (175°C). Combine Oreo cookie crumbs, granulated sugar, and melted salted butter in a bowl. Press into the bottom of an 8-inch springform pan and bake for 9-10 minutes. Let cool.
- In a large bowl, beat full-fat cream cheese with an electric mixer until smooth. Gradually add granulated sugar, sour cream, and vanilla extract. Slowly mix in heavy whipping cream, cornstarch, and red gel food coloring. Blend until combined, then add eggs one at a time, mixing briefly.
- Pour half the cheesecake filling into the cooled crust, smoothing the top. Sprinkle chopped Oreos over the filling, then pour remaining cheesecake batter on top. Bake for 12 minutes at 300°F (then reduce to 225°F and bake for another 110-115 minutes).
- After baking, turn off the oven and let the cheesecake cool inside for 1 hour. Then crack the door and let cool for another hour. Transfer to room temperature for 2 hours before refrigerating for at least 3-4 hours, ideally overnight.
- Serve the cheesecake by garnishing with melted dark chocolate and whipped cream. Use a warm knife to slice for clean edges.
Leave a Reply