
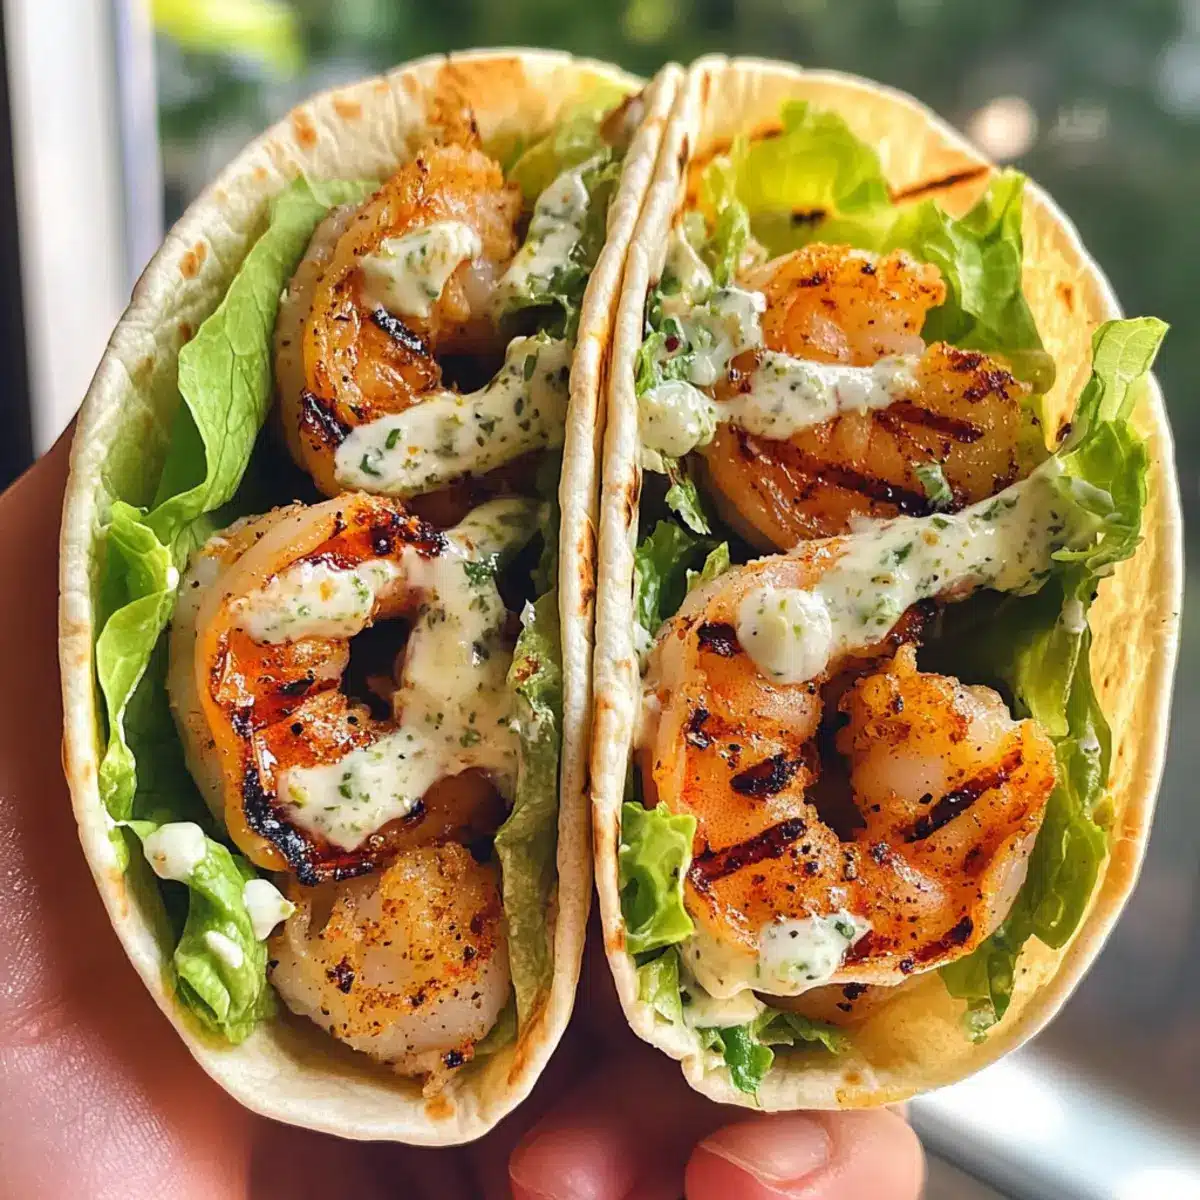
As I stood over the grill, the smoky scent of shrimp sizzling filled the air, instantly making my mouth water. These Grilled Shrimp Caesar Wraps offer a delightful twist on the classic Caesar salad, turning it into a quick and healthy meal that’s perfect for any day. Whether you’re racing against the clock for lunch or looking to impress at dinner, this high-protein recipe combines the freshness of romaine lettuce with the creamy tang of Caesar dressing—all wrapped up in a cozy tortilla. Plus, they’re versatile enough that you can easily add your favorite ingredients, making meal prep a breeze. Are you ready to savor the taste of summer, all wrapped up in one delicious bite? Let’s dive in!
Why You’ll Crave These Wraps!
Quick and Easy: With a cooking time of just 6 minutes, these wraps are perfect for busy weeknights.
Flavorful Fusion: Combining smoky grilled shrimp with creamy Caesar dressing creates an irresistible taste!
Nutrient-Packed: Enjoy a high-protein meal with fresh romaine lettuce that supports your healthy lifestyle.
Endless Versatility: Feel free to swap shrimp for chicken or tofu and adjust flavors to fit your cravings. For a delightful twist, try adding spicy seasonings!
Crowd-Pleasing: Whether for a family dinner or a gathering, these wraps will satisfy everyone. Pair them with a light side salad or garlic butter potatoes for a complete meal. You’ll find more great wrap ideas with our Garlic Chicken Wraps!
Grilled Shrimp Caesar Wraps Ingredients
For the Wraps
• Shrimp – the star of the show, packed with omega-3 fatty acids for health and flavor; frozen shrimp works just as well!
• Tortillas – the perfect base for your delicious wrap; try whole wheat for a nutritious boost.
• Romaine Lettuce – adds a fresh, crunchy bite that complements the richness of the shrimp; feel free to substitute with your favorite greens.
For the Dressing
• Caesar Dressing – provides creamy, tangy goodness to each bite; opt for a lighter version if you’re looking to cut calories.
• Parmesan Cheese – sprinkle for that savory, cheesy flavor; can be exchanged for nutritional yeast to keep it dairy-free.
Optional Add-Ins
• Bacon Bits/Croutons – toss in for added crunch and flavor; omit for a lighter wrap that focuses on the shrimp.
Step‑by‑Step Instructions for Grilled Shrimp Caesar Wraps
Step 1: Prepare the Shrimp
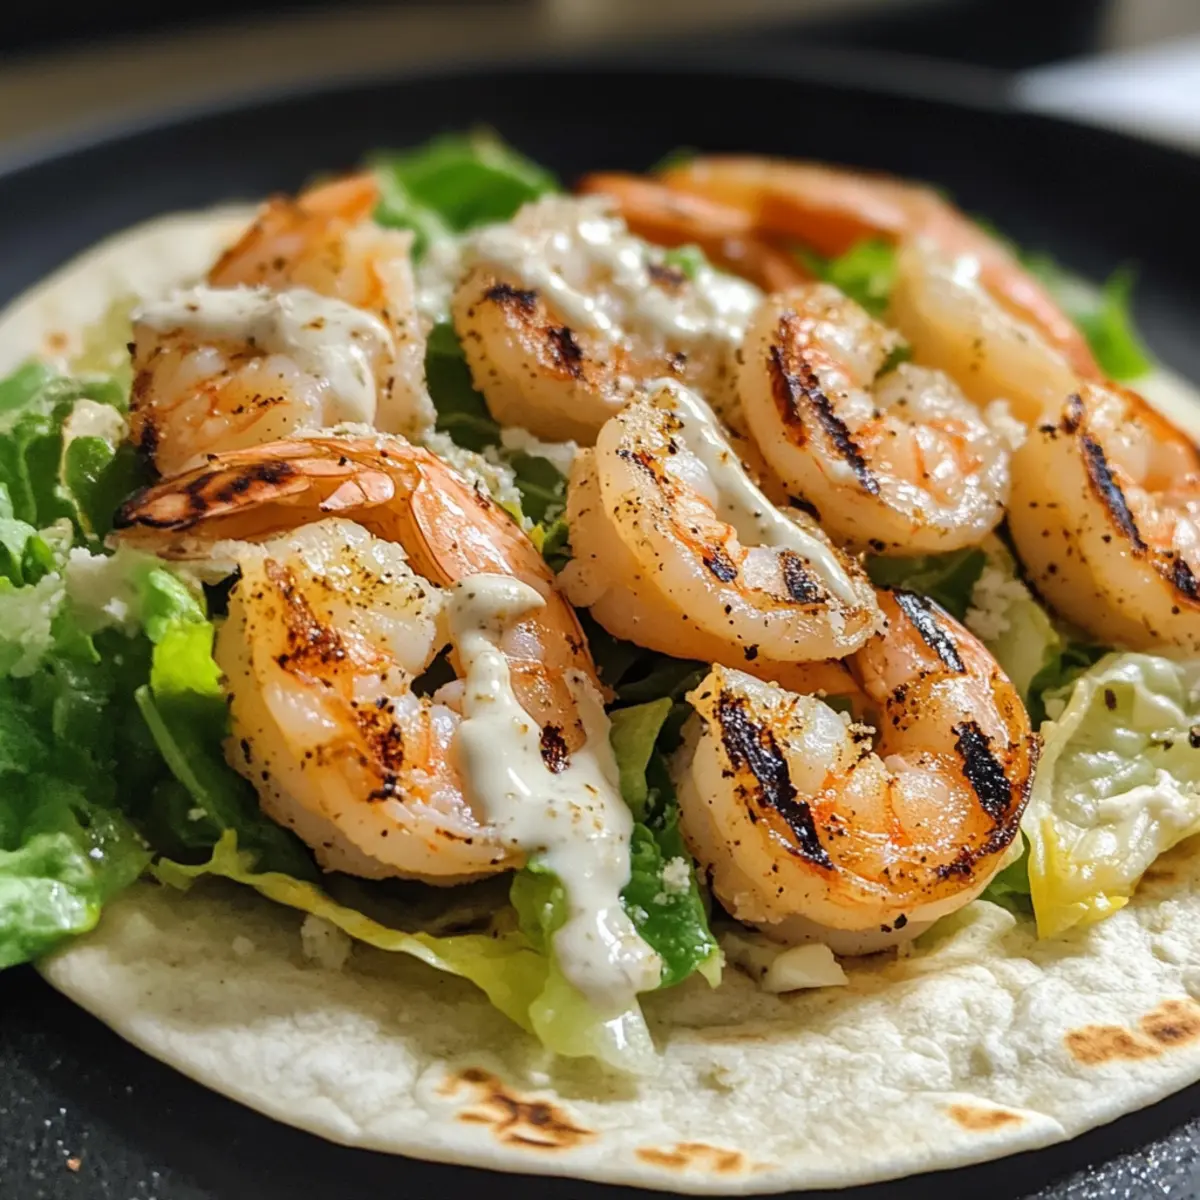
Start by thawing your shrimp if frozen, then pat them dry with a paper towel. In a bowl, season them with salt, pepper, and any preferred spices. Preheat your grill to medium-high heat, around 400°F. Cook the shrimp for about 2-3 minutes on each side until they turn opaque and have a lovely char. This step creates the flavorful base for your Grilled Shrimp Caesar Wraps.
Step 2: Set Up Your Tortillas
While the shrimp are grilling, lay your tortillas flat on a clean surface. Consider warming them briefly in a microwave (10-15 seconds) to make them more pliable. This small step ensures that your Grilled Shrimp Caesar Wraps are easy to fold without tearing, giving you the perfect base for all the delicious fillings to come.
Step 3: Layer the Ingredients
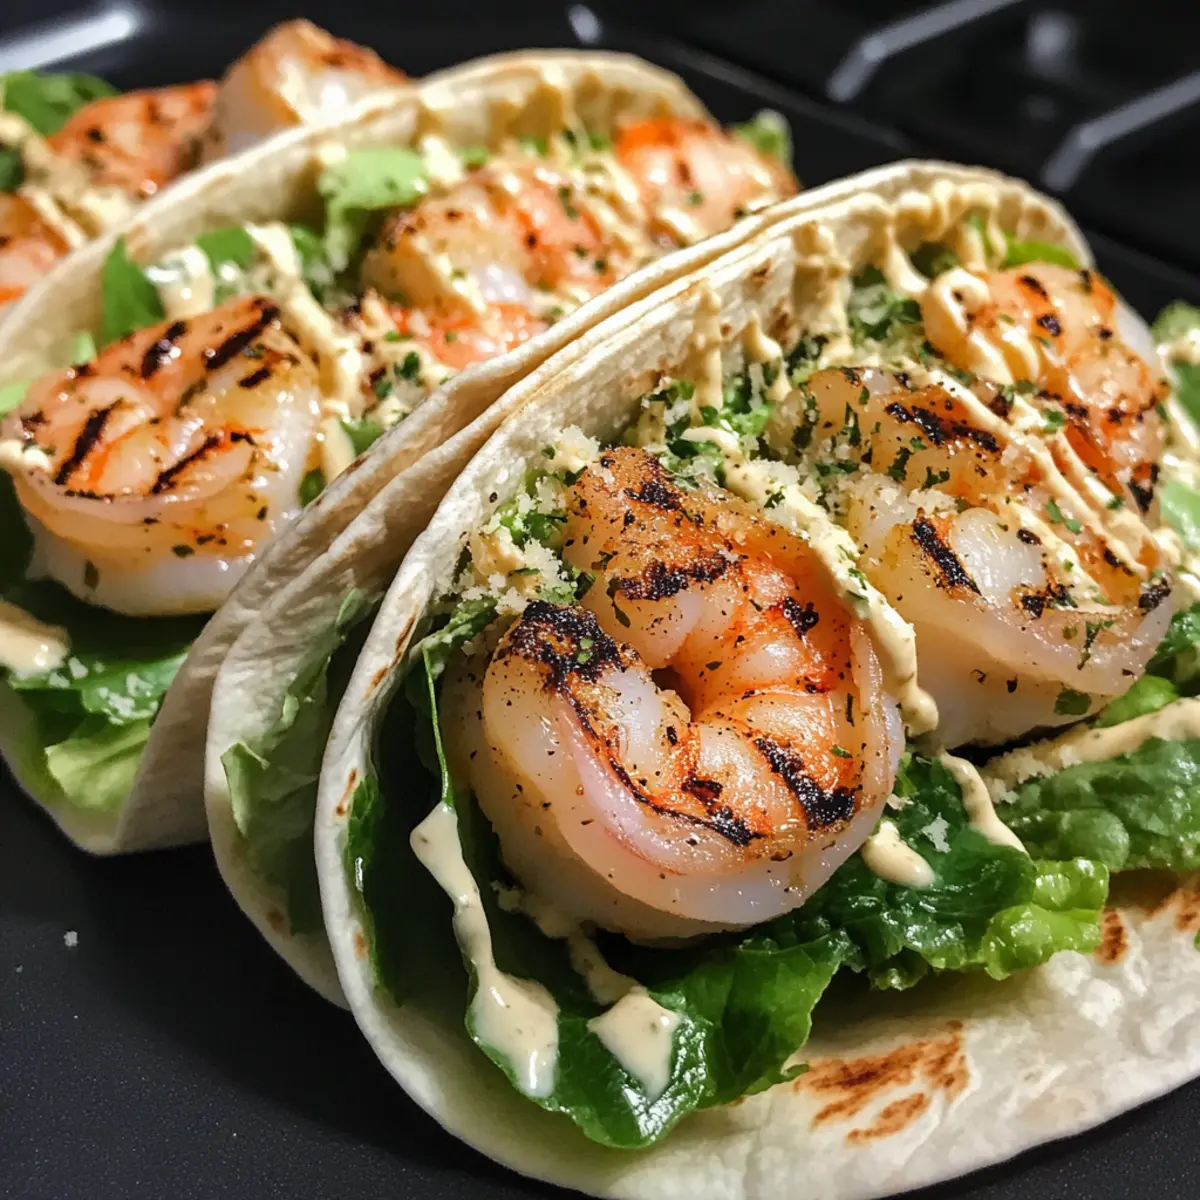
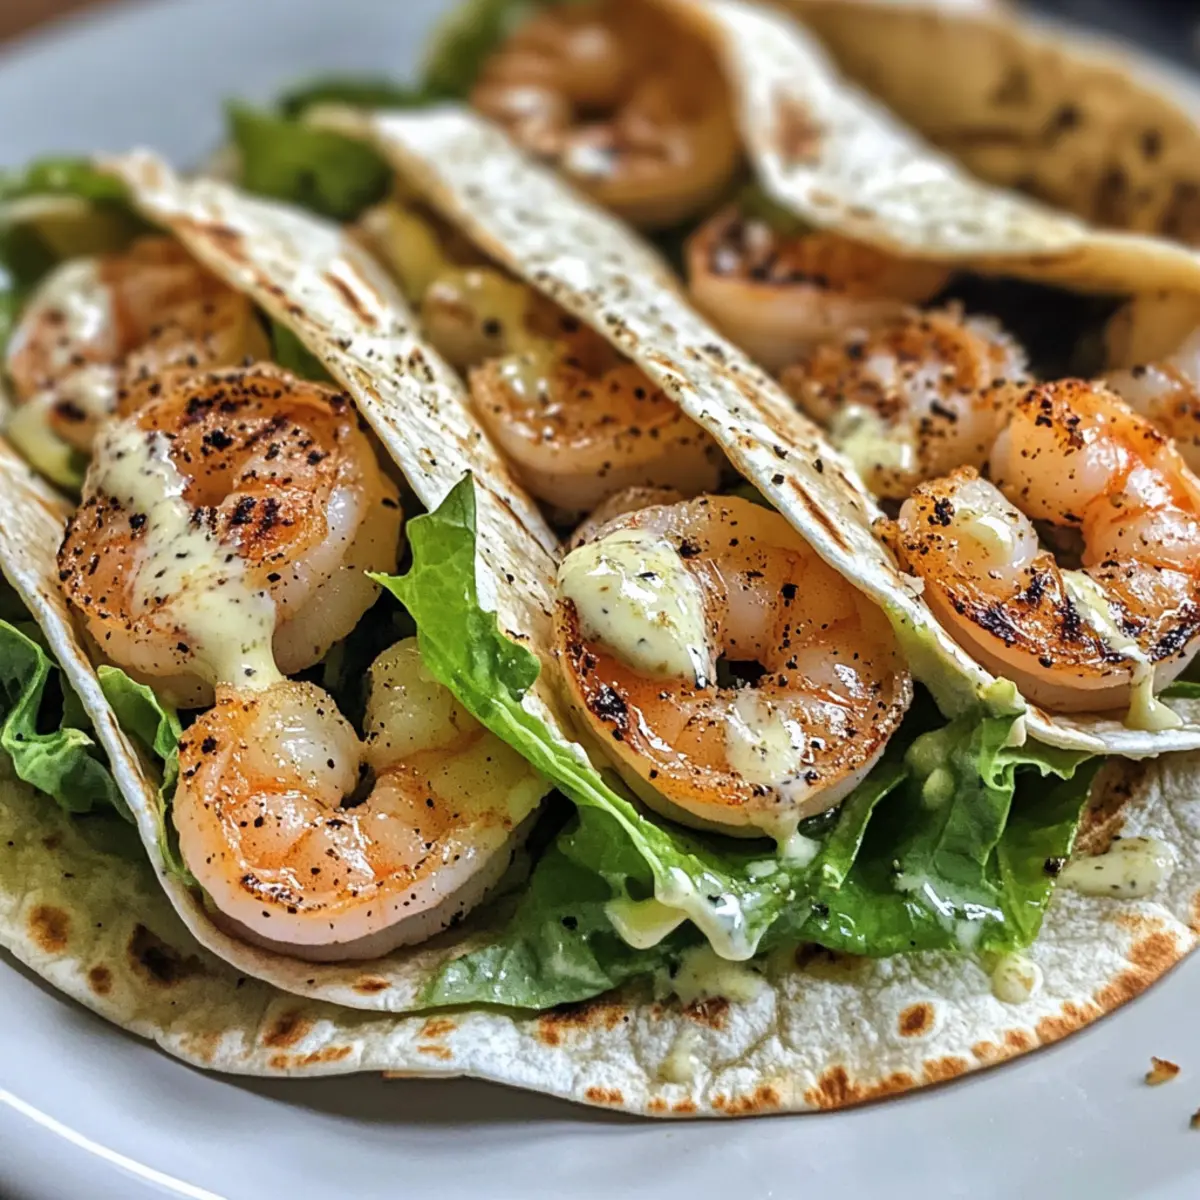
Once the shrimp are perfectly grilled, begin assembling your wraps. Start with a generous layer of fresh romaine lettuce, spreading it evenly across each tortilla. Next, add a portion of your charred shrimp, followed by a drizzle of Caesar dressing for that rich flavor. Sprinkle with Parmesan cheese to enhance the taste, ensuring each bite is balanced and satisfying.
Step 4: Add Optional Crunch
For an extra layer of texture in your Grilled Shrimp Caesar Wraps, consider adding croutons or bacon bits at this stage. This will provide that delightful crunch that contrasts wonderfully with the creamy dressing and juicy shrimp. Distribute them evenly so every bite is packed with flavor, adding that delightful twist.
Step 5: Roll and Secure the Wraps
To finish, carefully fold in the sides of the tortilla, then roll it tightly from the bottom up to enclose all the ingredients. Ensure everything stays inside by pressing gently as you roll. Once wrapped, cut each one in half diagonally for easy serving. This method not only looks appealing but also allows all the delicious components of your Grilled Shrimp Caesar Wraps to show through!
Step 6: Serve with a Smile
Now that your Grilled Shrimp Caesar Wraps are ready, serve immediately! Arrange them on a plate and offer a side of extra Caesar dressing for dipping if desired. These wraps are fulfilling and pack a flavor punch that’s sure to impress. Enjoy the delightful combination of textures and tastes, perfect for a busy lunch or a light dinner!
Make Ahead Options
These Grilled Shrimp Caesar Wraps are a fantastic choice for meal prep enthusiasts! To save time during busy weeknights, you can prep the shrimp, lettuce, and dressing up to 3 days in advance. Simply grill the shrimp, let them cool, and store them in an airtight container in the refrigerator. Keep the romaine lettuce and Caesar dressing in separate containers to maintain freshness and prevent wilting. When you’re ready to enjoy, just assemble the wraps by layering the components on warmed tortillas and rolling them up. This way, you’ll savor the same deliciousness without the fuss, making your meals just as enjoyable, even when time is short!
Grilled Shrimp Caesar Wraps Variations
Feel free to unleash your creativity and make these wraps your own with simple swaps and additions!
-
Chicken Swap: Replace shrimp with grilled chicken for a classic twist; it’s equally satisfying and delicious.
-
Vegan Alternative: Use grilled tofu marinated in soy sauce for a plant-based option high in protein.
-
Spicy Kick: Add Cajun seasoning to the shrimp before grilling for a fiery flavor that will tantalize your taste buds.
-
Cheesy Delight: Swap Parmesan for feta cheese to add a tangy twist that complements the fresh ingredients beautifully.
-
Crunchy Texture: Toss in crushed tortilla chips for an extra crunch that elevates each bite, wonderful alongside the creamy dressing.
-
Herb Infusion: Incorporate fresh herbs like basil or cilantro into the wrap for a refreshing burst of flavor that brightens up the dish.
-
Wrap It Up: Want more handheld goodness? Try using pita pockets instead of tortillas for a unique take; it adds a delightful texture!
-
Zesty Dressing: Experiment with a homemade avocado ranch dressing instead of Caesar for a creamy yet healthier choice that pairs perfectly.
You might also enjoy our Garlic Chicken Wraps for another delicious wrap idea!
Storage Tips for Grilled Shrimp Caesar Wraps
Room Temperature: Enjoy your Grilled Shrimp Caesar Wraps fresh for the best taste. If left unrefrigerated, consume them within 2 hours to ensure food safety.
Fridge: Store uneaten wraps in an airtight container in the refrigerator for up to 3 days. However, keep components separate (shrimp, lettuce, dressing) for optimal freshness before assembly.
Freezer: For longer storage, wrap individual components separately and freeze. The grilled shrimp can be stored in the freezer for up to 2 months, while the tortillas and other ingredients should ideally be consumed fresh.
Reheating: To reheat grilled shrimp, thaw in the fridge overnight, then warm gently in a skillet over low heat, just until heated through. Assemble wraps fresh for the best texture and flavor.
Expert Tips for Grilled Shrimp Caesar Wraps
- Perfectly Cooked Shrimp: Avoid overcooking—keep grilling time to 2-3 minutes per side for tender, juicy shrimp in your wraps.
- Tortilla Tricks: Warm your tortillas briefly in the microwave to prevent tearing when wrapping, ensuring a neat and delicious Grilled Shrimp Caesar Wrap.
- Layering Wisely: Start with romaine lettuce to prevent the tortilla from getting soggy; this keeps your wraps crispy and enjoyable right until the last bite.
- Freshness First: Store each component separately and assemble just before serving to maintain the freshness and crunch of your Grilled Shrimp Caesar Wraps.
- Dressing Decisions: Use a lighter Caesar dressing for a healthier option, or add an extra sprinkle of Parmesan for more savory flavor without overwhelming calories.
What to Serve with Grilled Shrimp Caesar Wraps
Elevate your dining experience with delightful sides that balance flavors and textures, making every bite memorable.
-
Garlic Butter Potatoes: The creamy garlic flavor pairs beautifully with grilled shrimp, adding a rich and hearty element to your meal.
-
Crisp Side Salad: A light mix of greens and vegetables provides a refreshing contrast, enhancing the wrap’s taste without overwhelming it.
-
Roasted Asparagus: Tender asparagus spears add a subtle crunch and earthy flavor, complementing the smoky shrimp and creamy dressing.
-
Coconut Rice: This fragrant and slightly sweet rice offers a unique twist that balances the savory flavors of the wraps.
-
Lemonade or Iced Tea: A cold, refreshing drink enhances the meal’s summery feel, wonderfully cutting through the richness of the Caesar dressing.
-
Cheesecake Bites: Indulge in these rich, creamy desserts for a sweet finale that echoes summer flavors, leaving everyone satisfied.
With these delicious pairings, your Grilled Shrimp Caesar Wraps will not just be a meal but a delightful feast!
Grilled Shrimp Caesar Wraps Recipe FAQs
How do I select the best shrimp?
Absolutely! When choosing shrimp, look for those that are firm and moist, without any dark spots all over. If you’re opting for frozen shrimp, ensure they are individually quick frozen (IQF) for better quality. The shrimp should smell like the ocean—fresh and briny, but not fishy.
What is the best way to store leftover wraps?
For maximum freshness, I recommend storing each component separately in airtight containers in the refrigerator. The grilled shrimp and romaine lettuce can be stored for up to 3 days. Just remember to assemble your Grilled Shrimp Caesar Wraps just before eating for a crunchy texture!
Can I freeze the assembled wraps?
Yes, but with caution! If you wish to freeze them, I suggest wrapping each component separately before freezing. The grilled shrimp can last up to 2 months in the freezer. When ready to enjoy, thaw everything in the fridge overnight, and then assemble your wraps fresh. This ensures the best taste and texture!
What should I do if my shrimp are overcooked?
Oh no! If you find your shrimp tough and rubbery, next time, be mindful to grill them for no more than 6 minutes total—2-3 minutes on each side should do the trick! This keeps them tender and juicy. For added flavor, consider marinating shrimp beforehand to enhance moisture and texture.
Are there any dietary considerations I should keep in mind?
Very! If you’re prepping these wraps for someone with dairy allergies, simply swap the Parmesan cheese for nutritional yeast or leave it out entirely. Additionally, if making this meal for pets or young kids, it’s always best to ensure there are no components that could pose a choking hazard (like croutons). Enjoy this versatile recipe healthily!
Grilled Shrimp Caesar Wraps for a Quick, Flavorful Meal
Ingredients
Equipment
Method
- Thaw shrimp if frozen, then pat them dry. Season with salt, pepper, and spices. Preheat grill to medium-high heat (400°F). Cook shrimp for about 2-3 minutes on each side until opaque and charred.
- Lay tortillas flat on a clean surface. Warm briefly in a microwave (10-15 seconds) for pliability.
- Layer a generous amount of romaine lettuce on each tortilla, add charred shrimp, drizzle with Caesar dressing, and sprinkle with Parmesan cheese.
- Add optional croutons or bacon bits before rolling.
- Fold in sides of the tortilla, then roll tightly from the bottom up. Cut each wrap in half diagonally for easy serving.
- Serve immediately with a side of extra Caesar dressing for dipping.
Leave a Reply