
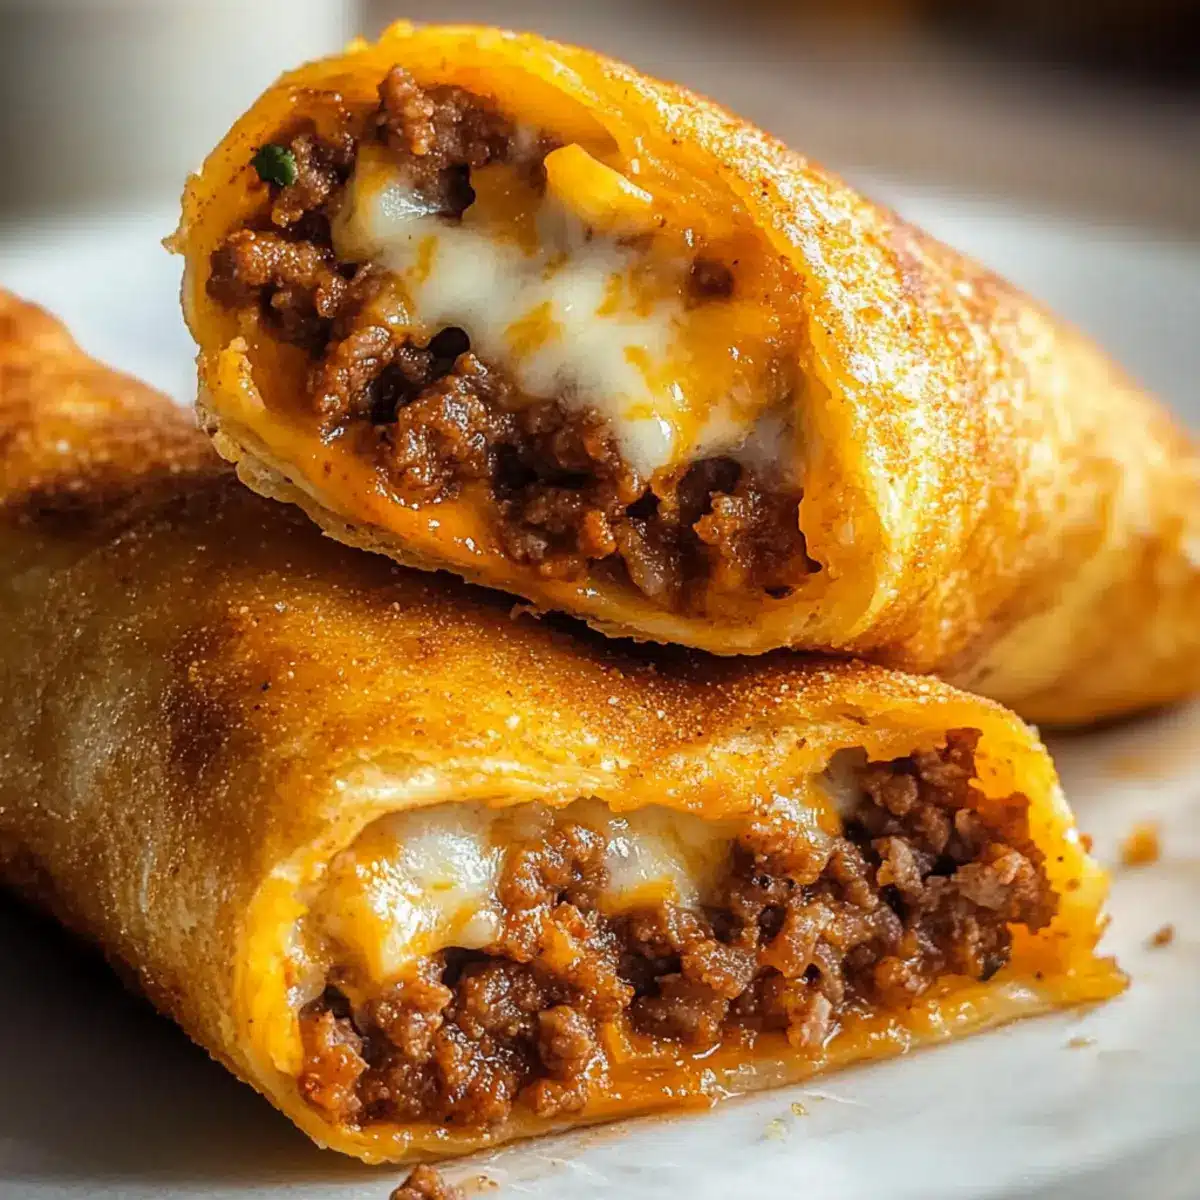
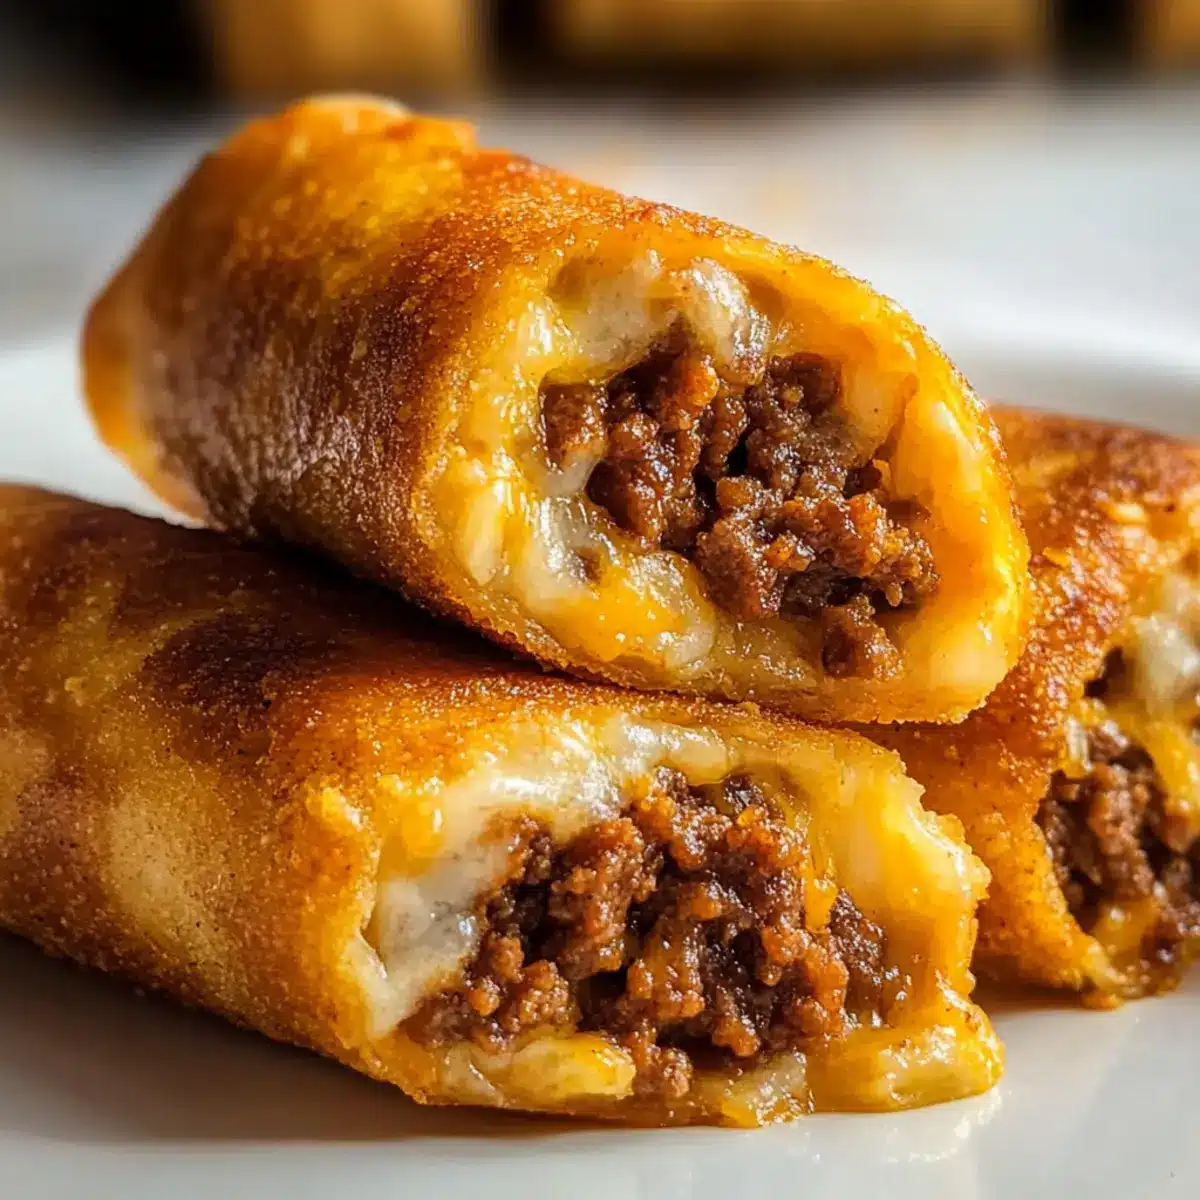
As I stood in my kitchen, the enticing aroma of seasoned beef mingled with the warm scent of dough, instantly transporting me to cozy family gatherings and vibrant taco nights. These Cheesy Taco Sticks are my go-to recipe when I’m looking for a fun twist that never fails to impress. They’re not just kid-friendly and packed with gooey cheese; these baked delights are also customizable, making them perfect for any taste preference. Whether you’re whipping them up for a busy weeknight dinner or dazzling guests at your next gathering, these easy-to-make Cheesy Taco Sticks promise to bring smiles around the table. So, what will you stuff yours with? Let’s dive in and discover the delicious possibilities!
Why are Cheesy Taco Sticks a must-try?
Kid-friendly, these Cheesy Taco Sticks are sure to be a hit at the dinner table, making them a fantastic addition to your family meals. Customizable to your taste, feel free to swap in ground chicken for a lighter option or load them with veggies for a fun vegetarian twist. Quick and easy to prepare, they take just 30 minutes from prep to plate, perfect for busy weeknights. Baked, not fried, you can indulge without the guilt. Plus, they pair beautifully with your favorite dips like salsa or guacamole, making every bite a delight!
Cheesy Taco Sticks Ingredients
• Note: Gather these flavorful ingredients for the ultimate Cheesy Taco Sticks experience!
For the Filling
- Ground Beef – A rich protein base that gives depth; swap for ground turkey for a lighter option.
- Onion (finely diced) – Adds a sweet flavor boost; sauté for extra caramelization if desired.
- Garlic (minced) – Fresh garlic works wonders for enhancing aroma and taste.
- Olive Oil – Essential for cooking the filling, providing moisture for a juicy texture.
- Chili Powder – This spice brings warmth and color; adjust to fit your heat tolerance.
- Ground Cumin – An integral seasoning that imparts that classic taco flavor.
- Smoked Paprika – Introduces a hint of smokiness; regular paprika can be a substitute.
- Salt & Black Pepper – Essential for elevating flavors; season to taste.
- Water – Helps bind and cook the filling down to the right texture.
For the Dough
- Refrigerated Pizza Dough/Crescent Dough – Forms the tasty outer layer; choose based on your preferred texture.
For the Cheese Filling
- Shredded Mozzarella & Cheddar Cheese – Offers an irresistible gooiness; mix in your favorite melty cheese varieties.
- Cream Cheese (optional) – Adds creamy richness, ensuring the filling holds together beautifully.
For Finishing Touches
- Egg Wash (made from egg with a splash of water) – Gives the finished sticks a glossy, golden appearance.
- Melted Butter – Brushed on before baking for a rich flavor and perfect browning.
- Garlic Powder & Dried Parsley – Optional sprinkles to amp up the flavor and aesthetics.
Now that you have all the delightful ingredients ready, let’s turn up the heat in the kitchen and make those tasty Cheesy Taco Sticks!
Step‑by‑Step Instructions for Cheesy Taco Sticks
Step 1: Cook the Filling
In a large skillet, heat 1 tablespoon of olive oil over medium heat. Sauté the finely diced onion for about 3-4 minutes until soft and translucent. Add minced garlic and cook for an additional minute until fragrant. Then, add 1 pound of ground beef, breaking it apart as it browns. Cook until fully browned, around 5-7 minutes, and drain the excess fat.
Step 2: Season
Stir in 1 tablespoon of chili powder, 1 teaspoon of ground cumin, 1 teaspoon of smoked paprika, along with salt and black pepper to taste. Add ¼ cup of water to the skillet and allow the mixture to simmer for about 5 minutes until thickened. Remove from heat and let the filling cool slightly while you prepare the dough.
Step 3: Prepare the Dough
Preheat your oven to 375°F (190°C). On a clean surface, roll out the refrigerated pizza dough into a rectangular shape. Using a pizza cutter or knife, cut the dough into strips approximately 1-2 inches wide. Arrange them on a baking sheet lined with parchment paper, keeping some space in between for easy handling.
Step 4: Assemble the Sticks
Take a generous spoonful of the seasoned filling and place it in the center of each dough strip. Top with a mix of shredded mozzarella and cheddar cheese, along with a dollop of cream cheese if using. Fold the dough over the filling, pressing it down to seal the edges firmly, ensuring they won’t leak during baking.
Step 5: Brush and Bake
Place the assembled Cheesy Taco Sticks seam-side down on the prepared baking sheet. Brush the tops generously with melted butter and use a mixture of garlic powder and dried parsley for added flavor if desired. Bake them in the preheated oven for 12–15 minutes until they are golden brown and slightly puffed up.
Step 6: Serve
Once baked, remove the Cheesy Taco Sticks from the oven and let them cool for a couple of minutes. Serve warm with your choice of dipping sauces like salsa, sour cream, or guacamole. Enjoy your homemade, cheesy goodness with family and friends for a delightful snack!
Storage Tips for Cheesy Taco Sticks
-
Room Temperature: Cheesy Taco Sticks can be kept at room temperature for up to 2 hours. After that, they should be refrigerated to maintain freshness.
-
Fridge: Store leftovers in an airtight container in the fridge for up to 3 days. To keep them from becoming soggy, separate layers with parchment paper.
-
Freezer: For longer storage, freeze the assembled but uncooked Cheesy Taco Sticks on a baking sheet before transferring to a freezer-safe container. They can last up to 3 months.
-
Reheating: Reheat leftovers in the oven or air fryer at 350°F (175°C) for about 10 minutes, or until warmed through and crispy again. Avoid microwaving to maintain texture.
Expert Tips for Cheesy Taco Sticks
-
Perfect Filling Proportions: Keep your filling to a generous spoonful per dough strip. Overfilling can lead to leaks and messy sticks.
-
Cool Before Assembly: Let the filling cool slightly before placing it on the dough. This prevents the dough from becoming soggy during baking.
-
Diverse Cheese Options: Don’t hesitate to mix different cheeses for unique flavors. Incorporate pepper jack for a spicy kick or fontina for creaminess in your Cheesy Taco Sticks.
-
Even Baking: Space the taco sticks apart on your baking sheet to ensure they bake evenly; this will give all sides a beautiful golden crust.
-
Egg Wash Matters: Using an egg wash gives your Cheesy Taco Sticks a glossy finish and a lovely color—don’t skip this step for an appetizing look!
Make Ahead Options
These Cheesy Taco Sticks are perfect for busy meal-prep enthusiasts! You can assemble the entire batch up to 24 hours in advance; simply prepare the filling and fill the dough strips, but don’t bake them yet. Once assembled, place the sticks in an airtight container and refrigerate to keep them fresh. This method ensures that they’re just as delicious when baked later. When you’re ready to enjoy, preheat your oven to 375°F (190°C) and bake the sticks directly from the fridge for 12–15 minutes until golden brown and crispy. This way, you save precious time during the week while still delivering a tasty, homemade snack that everyone will love!
Cheesy Taco Sticks Variations & Substitutions
Feel free to explore new tastes and textures with these delightful Cheesy Taco Sticks variations!
-
Spicy Cheesy: Add diced jalapeños or hot sauce to the filling for an extra kick. The heat balances beautifully with the creamy cheese, creating a dynamic flavor profile.
-
Chicken Taco: Swap ground beef for shredded or ground chicken for a lighter option. This swap welcomes a new taste while keeping the essence of taco night alive!
-
Vegetarian Delight: Replace the meat with seasoned black beans or lentils. Not only does this option cater to veggie lovers, but it also packs a hearty punch of protein.
-
Breakfast Taco Sticks: Incorporate scrambled eggs and breakfast sausage for a fun morning twist. These breakfast bites are sure to brighten your brunch spread!
-
Mini Taco Sticks: Cut dough into smaller strips for bite-sized appetizers. Perfect for parties, these mini delights are easy to pop in your mouth and share with friends!
-
Low-Carb Option: Use low-carb dough or cheese wraps for a keto-friendly version. They stay true to the delicious flavors while catering to dietary preferences.
-
Cheesy Variations: Feel free to mix in different cheeses like pepper jack or gouda for added flavors and textures. Cheese lovers will rejoice at this gooey option!
And if you want to try more taco-inspired recipes, check out our Chicken Street Tacos or explore our delicious Cheesy Cajun Garlic options for more fun in the kitchen!
What to Serve with Cheesy Taco Sticks
These Cheesy Taco Sticks make for a fun and savory centerpiece—let’s elevate your meal experience with perfect pairings!
-
Salsa: A zesty, vibrant salsa adds a fresh kick that complements the melted cheesiness beautifully. The tangy flavors balance out the richness of the taco filling.
-
Guacamole: Creamy and smooth, guacamole’s rich texture is an ideal match for the crunchy taco sticks. The avocado brings a velvety contrast that makes every bite delightful.
-
Sour Cream: Cool and refreshing, sour cream’s tang provides a creamy contrast to the warm and cheesy sticks. It’s the classic pairing that never disappoints.
-
Queso Dip: For cheese enthusiasts, a smooth queso dip takes indulgence to the next level. This comforting blend of melted cheese enhances your cheesy taco experience.
-
Simple Green Salad: A light, crisp salad adds a refreshing element alongside the richness of the taco sticks. Tossing in some avocado and tomatoes brings a fresh splash of color.
-
Roasted Vegetables: Roasted veggies, sprinkled with spices, offer a warm, hearty side option that harmonizes wonderfully with the flavor profile of the tacos.
-
Fresh Fruit Salsa: Bright, fruity salsa with mango or pineapple gives your meal a sweet twist. The sweetness contrasts nicely with the savory taco flavors.
-
Lemonade or Iced Tea: Light beverages like lemonade or iced tea provide a refreshing contrast. Their bright acidity cuts through the richness, making them perfect companions.
-
Chocolate Chip Cookies: End on a sweet note with warm chocolate chip cookies. The comforting sweetness is a delightful finish to a fun meal!
Cheesy Taco Sticks Recipe FAQs
How do I select ripe ingredients for this recipe?
Absolutely! For the best flavor, choose a firm onion that feels heavy for its size and has a dry, papery skin. Look for lean ground beef with a bright red color; avoid any that show dark spots. Fresh garlic cloves should be firm with no sprouting.
What’s the best way to store leftovers?
Very! After enjoying your Cheesy Taco Sticks, store any leftovers in an airtight container in the refrigerator. They’ll stay fresh for up to 3 days. To prevent sogginess, it’s a good idea to separate layers with parchment paper.
Can I freeze Cheesy Taco Sticks?
Absolutely! To freeze, arrange the assembled but uncooked Cheesy Taco Sticks on a baking sheet in a single layer. Once they’re frozen solid after about 1-2 hours, transfer them to a freezer-safe bag or container. They can last up to 3 months. When ready to bake, you can cook them straight from frozen, just add a few extra minutes to the baking time.
What should I do if my sticks leak during baking?
Oh no! If your sticks leak, it likely means they were overfilled. In the future, use a generous spoonful, but avoid overpacking them. Additionally, make sure to pinch the seams securely; this will help keep the filling inside. If you have leftovers that leaked, they can still be delicious!
Are there any dietary considerations for Cheesy Taco Sticks?
Very! If you’re making these for kids or guests with allergies, you can easily swap out ingredients. Use gluten-free dough for those with gluten sensitivities and opt for dairy-free cheese alternatives for dairy allergies. Always double-check labels to ensure the selections fit everyone’s dietary needs.
Can I prepare Cheesy Taco Sticks ahead of time?
Absolutely! You can assemble the Cheesy Taco Sticks ahead of time and refrigerate them. Just cover them well with plastic wrap or foil to keep them fresh. Bake them just before serving to enjoy that fresh-out-of-the-oven taste!
Cheesy Taco Sticks: The Ultimate Family-Friendly Snack!
Ingredients
Equipment
Method
- In a large skillet, heat 1 tablespoon of olive oil over medium heat. Sauté the finely diced onion for about 3–4 minutes until soft and translucent. Add minced garlic and cook for an additional minute until fragrant. Then, add 1 pound of ground beef, breaking it apart as it browns. Cook until fully browned, around 5–7 minutes, and drain the excess fat.
- Stir in 1 tablespoon of chili powder, 1 teaspoon of ground cumin, 1 teaspoon of smoked paprika, along with salt and black pepper to taste. Add ¼ cup of water to the skillet and allow the mixture to simmer for about 5 minutes until thickened. Remove from heat and let the filling cool slightly while you prepare the dough.
- Preheat your oven to 375°F (190°C). On a clean surface, roll out the refrigerated pizza dough into a rectangular shape. Using a pizza cutter or knife, cut the dough into strips approximately 1-2 inches wide. Arrange them on a baking sheet lined with parchment paper, keeping some space in between for easy handling.
- Take a generous spoonful of the seasoned filling and place it in the center of each dough strip. Top with a mix of shredded mozzarella and cheddar cheese, along with a dollop of cream cheese if using. Fold the dough over the filling, pressing it down to seal the edges firmly, ensuring they won't leak during baking.
- Place the assembled Cheesy Taco Sticks seam-side down on the prepared baking sheet. Brush the tops generously with melted butter and use a mixture of garlic powder and dried parsley for added flavor if desired. Bake them in the preheated oven for 12–15 minutes until they are golden brown and slightly puffed up.
- Once baked, remove the Cheesy Taco Sticks from the oven and let them cool for a couple of minutes. Serve warm with your choice of dipping sauces like salsa, sour cream, or guacamole. Enjoy your homemade, cheesy goodness with family and friends for a delightful snack!
Leave a Reply