
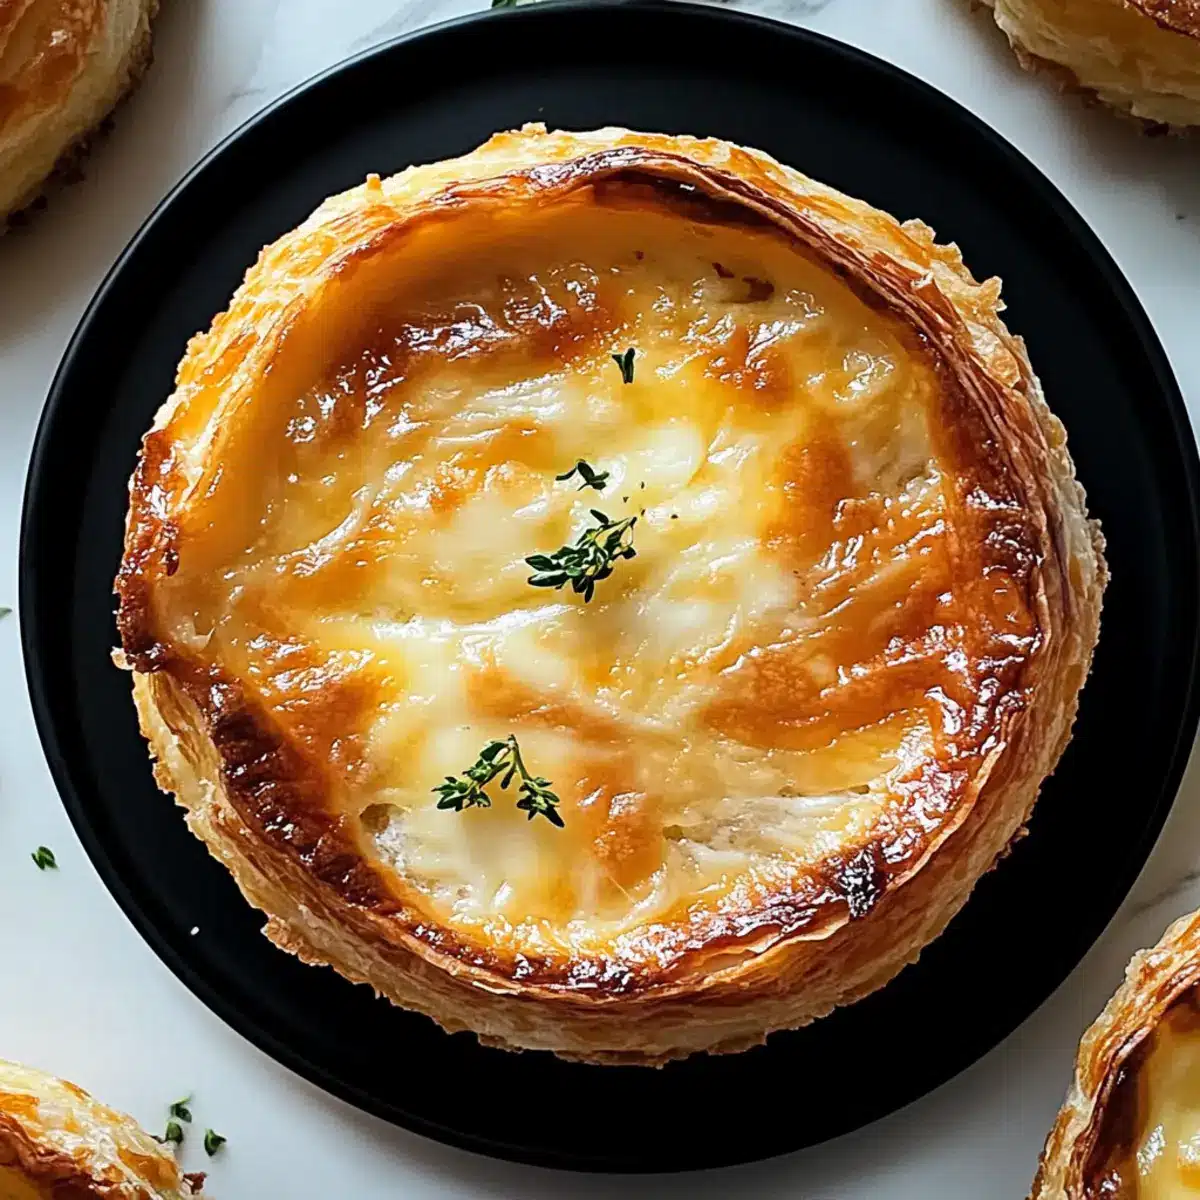
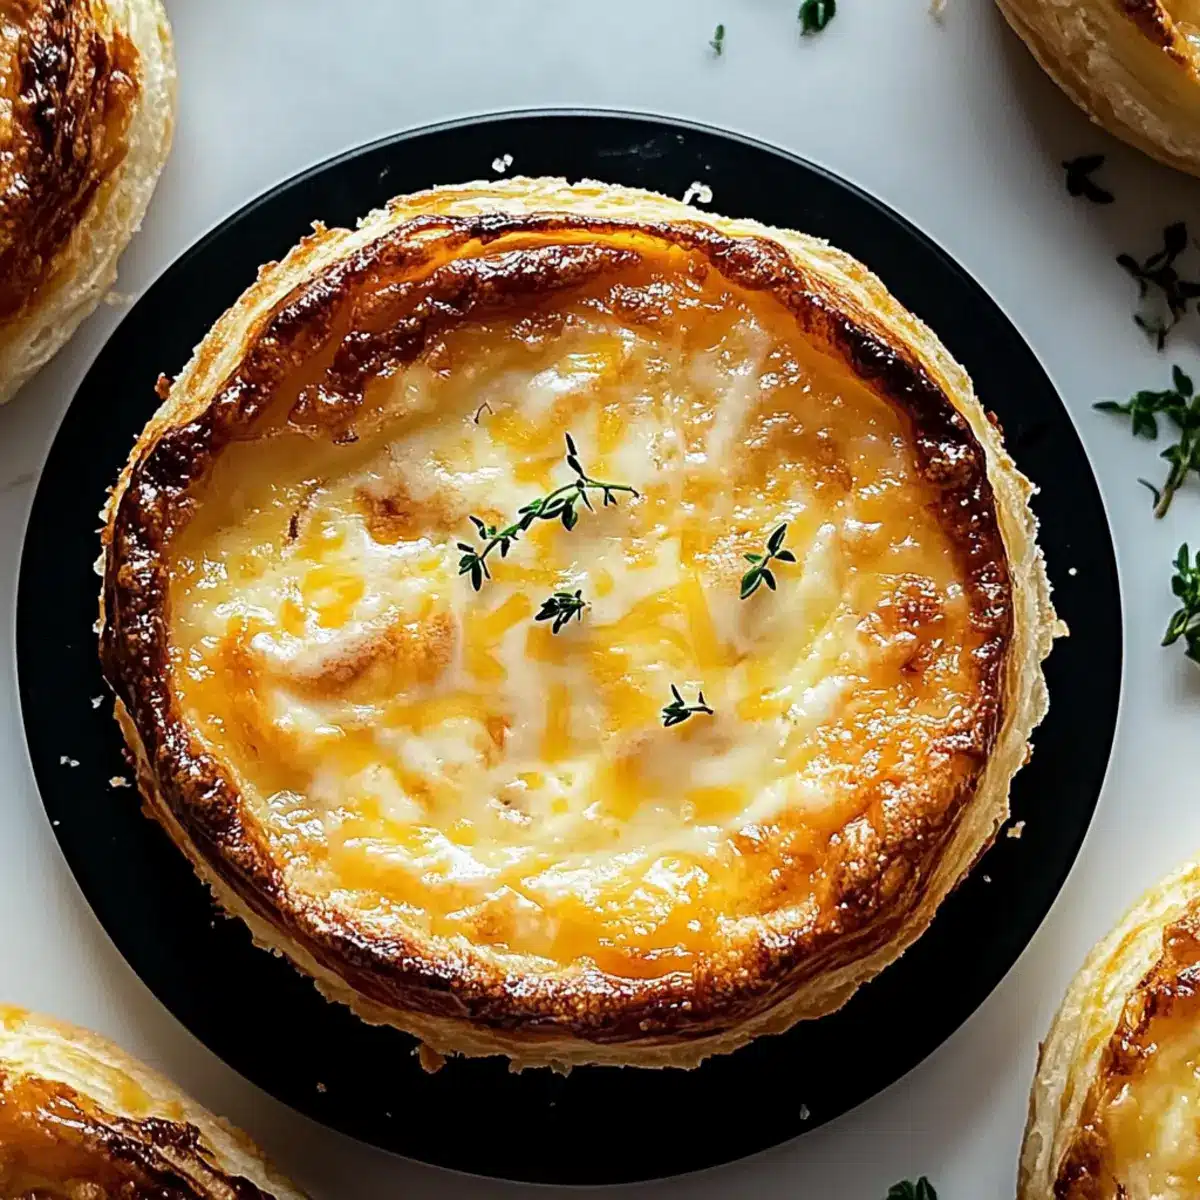
The aroma wafting from the oven is pure magic: warm, buttery notes mingling with savory garlic promising bliss in every bite. These Cheesy Garlic Cruffins are not just a treat but a journey into comfort food heaven—flaky and indulgent, they make a perfect snack or lunch option any day of the week. Imagine the delight as rich, melted cheese oozes from the layers, providing a gooey texture that feels like a hug on a plate. Quick to whip up and easy to make ahead, these cruffins are great for both impromptu gatherings and satisfying your personal cravings. Ready to discover how they come together? Let’s dive into this delightful recipe!

Why Are Cheesy Garlic Cruffins Irresistible?
Flaky, Buttery Layers: Each bite reveals a beautiful contrast between crispiness and softness that will have you coming back for more.
Cheesy Goodness: The gooey melted cheese is a mouthwatering surprise, creating a delightful pull that enhances every cruffin.
Garlic Infusion: Enjoy a rich garlic flavor that adds warmth and character, making these cruffins the ultimate savory indulgence.
Versatile Snack: Perfect for on-the-go lunches or as a satisfying side with soups, like Garlic Soup Comfort, these cruffins fit any occasion!
Easy Prep: With straightforward ingredients and clear steps, even less experienced bakers will find joy in making these cruffins.
Make-Ahead Friendly: Prep a batch at the beginning of the week and enjoy them throughout—just reheat for that fresh-baked taste!
Cheesy Garlic Cruffin Ingredients
Unlock the secret to flaky, buttery perfection with these cruffins!
For the Dough
- All-Purpose Flour – Provides structure; substitute with gluten-free flour blend for a gluten-free version.
- Granulated Sugar – Enhances flavor balance; no substitutions recommended.
- Salt – Brings out flavors; use kosher or sea salt for the best taste.
- Instant Yeast – Leavens dough for fluffiness; active dry yeast can be used if activated in warm water first.
- Warm Milk – Adds richness and aids yeast activation; plant-based milk can be substituted.
- Unsalted Butter (melted) – Adds richness and flavor; use margarine or vegan butter as alternatives.
- Warm Water – Activates yeast; ensure it’s not too hot to avoid killing the yeast.
- Large Egg – Binds ingredients and adds moisture; for a vegan option, use a flaxseed egg.
For the Filling
- Parmesan Cheese (grated) – Adds sharpness and depth; substitute with pecorino or omit for dairy-free.
- Mozzarella Cheese (shredded) – Provides a stretchy, gooey texture; alternate with cheddar or gouda.
- Garlic (minced) – Delivers the crucial garlic flavor; increase amount for a stronger taste.
- Unsalted Butter (softened) – Used in garlic filling; no substitutions suggested.
- Fresh Parsley (chopped) – Adds freshness; can be omitted or replaced with dried parsley.
Indulge in the magic of Cheesy Garlic Cruffins with this delightful combination of ingredients to create a mouthwatering experience!
Step‑by‑Step Instructions for Cheesy Garlic Cruffin
Step 1: Combine Dry Ingredients
In a large mixing bowl, whisk together 4 cups of all-purpose flour, 2 tablespoons of granulated sugar, 1 teaspoon of salt, and 2 teaspoons of instant yeast. This creates the foundation for your Cheesy Garlic Cruffins. Ensure everything is well combined, so the flavors distribute evenly for a delicious outcome!
Step 2: Mix Wet Ingredients
Pour in 1 cup of warm milk (about 110°F), add 1/2 cup of melted unsalted butter, and 1/2 cup of warm water. Make a well in the center, crack in 1 large egg, and gently mix until combined. The dough will be sticky—don’t worry; this is the perfect starting point for flaky layers.
Step 3: Knead the Dough
Transfer the dough onto a lightly floured surface and knead for about 8-10 minutes until it becomes smooth and elastic. As you knead, you’ll notice a delightful texture developing, perfect for your Cheesy Garlic Cruffins. Shape it into a ball and place it in a greased bowl, covering it with a warm towel.
Step 4: Let It Rise
Allow the dough to rise in a warm environment for about 1 hour, or until it has doubled in size. This is crucial for creating fluffy layers in your cruffins, so keep an eye on it for that beautiful expansion that signals readiness.
Step 5: Prepare Garlic Filling
While the dough rises, mix together 3 tablespoons of softened unsalted butter, 4 cloves of minced garlic, and 2 tablespoons of chopped fresh parsley in a small bowl. This fragrant filling is key to that robust flavor inside your Cheesy Garlic Cruffins.
Step 6: Preheat & Prepare Muffin Tin
Preheat your oven to 375°F (190°C). Meanwhile, grease a muffin tin with butter or cooking spray to prevent sticking. This preparation ensures that when your cruffins are ready to bake, they will release easily and maintain their glorious shape.
Step 7: Roll Out the Dough
Once the dough has risen, punch it down gently and roll it out on a floured surface into a large rectangle, approximately 12×16 inches. Spread the garlic filling evenly over the surface, then generously sprinkle 1 cup of grated Parmesan and 1 cup of shredded mozzarella cheese on top, creating an irresistible layer of gooey goodness.
Step 8: Form the Cruffins
Starting from one long side, carefully roll the dough into a tight log. Once rolled, slice the log into 8-10 equal pieces, which will become your cruffins. The layers should glisten with the filling, ready to be baked into crispy, cheesy delights.
Step 9: Assemble and Rest
Place each slice into the prepared muffin cups. Cover them with a towel and allow to rest for another 20 minutes, letting the cruffins rise slightly. This step develops more texture and ensures they are light and airy when baked.
Step 10: Bake Until Golden
Bake the Cheesy Garlic Cruffins in the preheated oven for 20-25 minutes, or until they are golden brown and the cheese is bubbling. Their tempting aroma will fill your kitchen—watch for that perfect golden hue to know they’re ready!
Step 11: Cool and Serve
Once baked, let the cruffins cool in the muffin tin for about 5 minutes before carefully transferring them to a wire rack. Allow them to cool slightly, then serve warm. Enjoy these delightful Cheesy Garlic Cruffins fresh for a comforting treat that everyone will love!
Make Ahead Options
These Cheesy Garlic Cruffins are perfect for busy home cooks looking to save time! You can prepare the dough up to 24 hours in advance by covering it tightly in plastic wrap and refrigerating. For even more convenience, assemble the cruffins (step 8) and refrigerate them overnight; this allows the flavors to meld beautifully. Just remember to let them rest at room temperature for 20 minutes before baking. To keep them fresh, store baked cruffins in an airtight container at room temperature for up to 2 days, or freeze them for longer storage. Simply reheat at 350°F (175°C) until warmed through, and you’ll enjoy delightful, warm treats just as if they were fresh out of the oven!
What to Serve with Cheesy Garlic Cruffins
Delightful accompaniments elevate your Cheesy Garlic Cruffins into a satisfying, comforting meal.
- Fresh Green Salad: A light, zesty salad brightens each bite, balancing the richness of the cruffins while adding a crunch.
- Tomato Basil Soup: The warm, hearty soup brings a rustic quality that pairs beautifully with the cheesy goodness of the cruffins. Each spoonful complements the flavors and textures perfectly.
- Garlic Roasted Vegetables: Serve alongside a medley of garlic-roasted veggies for a savory contrast, enhancing the garlic flavor while adding a healthy touch.
- Creamy Coleslaw: The creamy, crunchy slaw offers a refreshing side that cuts through the buttery richness of the cruffins, creating a delightful harmony of flavors.
- Sparkling Lemonade: A chilled glass of sparkling lemonade is a refreshing drink that balances the savory garlic tones and brings a touch of brightness to your meal.
- Herbed Goat Cheese Spread: A tangy goat cheese spread with fresh herbs adds an intriguing layer of flavor, ideal for dipping your cruffin into for an extra creamy delight.
- Fruity Dessert: Complete your meal with a light, fruity dessert, like a berry parfait, offering a sweet contrast that rounds out the savory experience beautifully.
How to Store and Freeze Cheesy Garlic Cruffin
Room Temperature: Keep cruffins in an airtight container at room temperature for up to 2 days for optimal taste and texture.
Fridge: If not consumed within 2 days, wrap your Cheesy Garlic Cruffins tightly in plastic wrap or foil and store in the refrigerator for up to a week.
Freezer: For longer storage, freeze individually wrapped cruffins in freezer bags for up to 3 months. When you’re ready to enjoy, simply thaw overnight in the fridge.
Reheating: To restore that comforting freshness, reheat cruffins in the oven at 350°F (175°C) for about 10 minutes, allowing the cheese to melt perfectly and the crust to crisp up again.
Cheesy Garlic Cruffin Variations & Substitutions
Feel free to customize your Cheesy Garlic Cruffins for even more deliciousness and delight!
-
Gluten-Free: Use a gluten-free flour blend to make these cruffins accessible for gluten-sensitive friends.
-
Vegan Delight: Substitute non-dairy milk and use a flaxseed egg for a vegan-friendly cruffin that everyone can enjoy.
-
Cheese Swap: Try replacing mozzarella and Parmesan with a blend of cheddar and gouda for a different cheesy flavor profile. Each type brings its own unique creaminess.
-
Herb Boost: Add fresh herbs like thyme or chives to the filling. This twist adds a delightful freshness that elevates the flavor.
-
Veggie Addition: Sautéed spinach or finely chopped bell peppers mixed into the cheese filling can provide a nutritious and colorful surprise in each bite.
-
Bacon Lovers: Mix in crispy bacon bits to the filling to take your cheesy goodness to the next level—because who doesn’t love a savory twist?
-
Spice It Up: Incorporate a pinch of red pepper flakes for a subtle heat, creating a tantalizing flavor boost that spice lovers will adore.
-
Sourdough Base: Substitute part of the all-purpose flour with sourdough starter for a tangy flavor and added depth, enhancing the overall taste experience.
As you embark on this cruffin adventure, consider pairing them with a warm bowl of Garlic Soup Comfort or a fresh salad to create a satisfying meal. Each variation you try will redefine your Cheesy Garlic Cruffins experience!
Expert Tips for Cheesy Garlic Cruffins
• Active Yeast Check: Always ensure your yeast is fresh and bubbly before adding to the dough. If it doesn’t foam, start with new yeast for the best Cheesy Garlic Cruffin results.
• Dough Temperature: When mixing ingredients, make sure the warm milk and water are not too hot. Excessive heat can kill the yeast, preventing rising.
• Kneading Tips: Knead the dough until it’s smooth and elastic. Proper kneading develops the gluten needed for flaky layers that are key to a great cruffin.
• Filling Distribution: Spread the garlic filling evenly across the dough to guarantee every bite is packed with flavor. Uneven distribution can lead to bland bites.
• Resting Time Reminder: Let the sliced cruffins rise again before baking. This step creates a fluffier texture, ensuring your cruffins are light and airy.

Cheesy Garlic Cruffin Recipe FAQs
How do I choose the right garlic for my cruffins?
Absolutely! When selecting garlic for your Cheesy Garlic Cruffins, look for bulbs that are firm and have no dark spots or sprouting. Fresh garlic should also have a strong aroma, indicating its potency. Avoid any garlic that feels soft or has mold, as it won’t provide the rich flavor you desire.
What’s the best way to store my Cheesy Garlic Cruffins?
Very! Store your cruffins in an airtight container at room temperature for up to 2 days for optimal taste. If you plan to keep them longer, wrap each cruffin tightly in plastic wrap and place them in the refrigerator for up to a week. Always remember to reheat them gently to maintain their flaky texture.
Can I freeze Cheesy Garlic Cruffins, and how do I do it?
Absolutely! To freeze your Cheesy Garlic Cruffins, wrap each one individually in plastic wrap and place them in a freezer bag. They can be frozen for up to 3 months. When you’re ready to enjoy them, simply transfer them to the fridge to thaw overnight. For the best results, reheat the thawed cruffins in the oven at 350°F (175°C) for about 10 minutes to bring back that delightful warmth and crispiness.
What if my dough doesn’t rise properly?
Oh no! If your dough doesn’t rise, there could be a few reasons. First, ensure your yeast is fresh and active! If it doesn’t foam in warm water or milk, it’s time to get new yeast. Also, make sure your proofing environment is warm; if necessary, place the dough in an oven with the light on or a slightly warmed area. Kneading the dough too little can also prevent proper development; it should be smooth and elastic before the rise.
Are there any dietary considerations for the Cheesy Garlic Cruffins?
Definitely! If someone has a dairy allergy, you can substitute the dairy ingredients with plant-based options like almond or coconut milk and vegan butter. Additionally, for those who follow a gluten-free diet, a gluten-free flour blend can be used in place of all-purpose flour. Always remember to double-check ingredient labels to ensure they meet dietary needs!
How can I tell when my Cheesy Garlic Cruffins are properly baked?
Absolutely! Your cruffins are ready when they turn a golden brown color and the cheese is bubbling. As they bake, the delightful aroma will fill your kitchen, guiding you to that moment of perfect delight. You can also gently tap the top; if it sounds hollow, that’s a great indicator they’re baked to perfection!
Cheesy Garlic Cruffin: Flaky Bites of Heaven Awaits
Ingredients
Equipment
Method
- Combine Dry Ingredients: In a large mixing bowl, whisk together flour, granulated sugar, salt, and instant yeast.
- Mix Wet Ingredients: Pour in warm milk, melted butter, and warm water. Make a well in the center, crack in the egg, and mix until combined.
- Knead the Dough: Transfer the dough onto a floured surface and knead for about 8-10 minutes until smooth and elastic.
- Let It Rise: Allow the dough to rise in a warm environment for about 1 hour, or until it has doubled in size.
- Prepare Garlic Filling: Mix together softened butter, minced garlic, and chopped parsley in a small bowl.
- Preheat & Prepare Muffin Tin: Preheat your oven to 375°F (190°C) and grease a muffin tin.
- Roll Out the Dough: Roll the dough into a large rectangle, spread the garlic filling, and sprinkle with Parmesan and mozzarella.
- Form the Cruffins: Roll the dough into a log and slice into 8-10 pieces.
- Assemble and Rest: Place each slice into the prepared muffin cups and allow to rest for another 20 minutes.
- Bake Until Golden: Bake the cruffins for 20-25 minutes, or until golden brown.
- Cool and Serve: Let them cool in the tin for 5 minutes before transferring to a wire rack.
Leave a Reply