
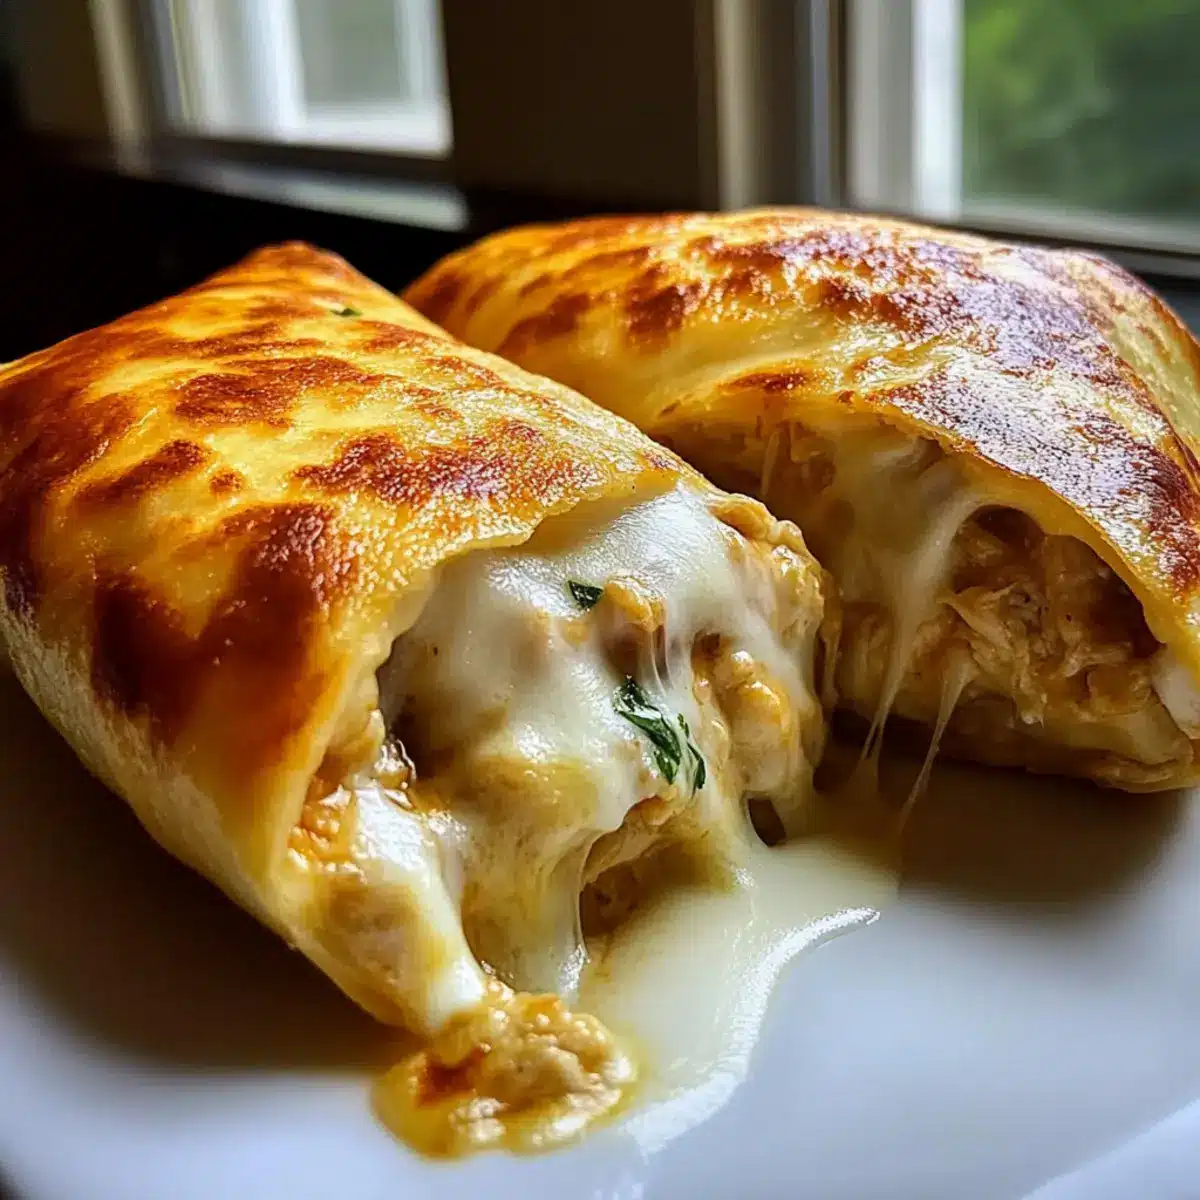
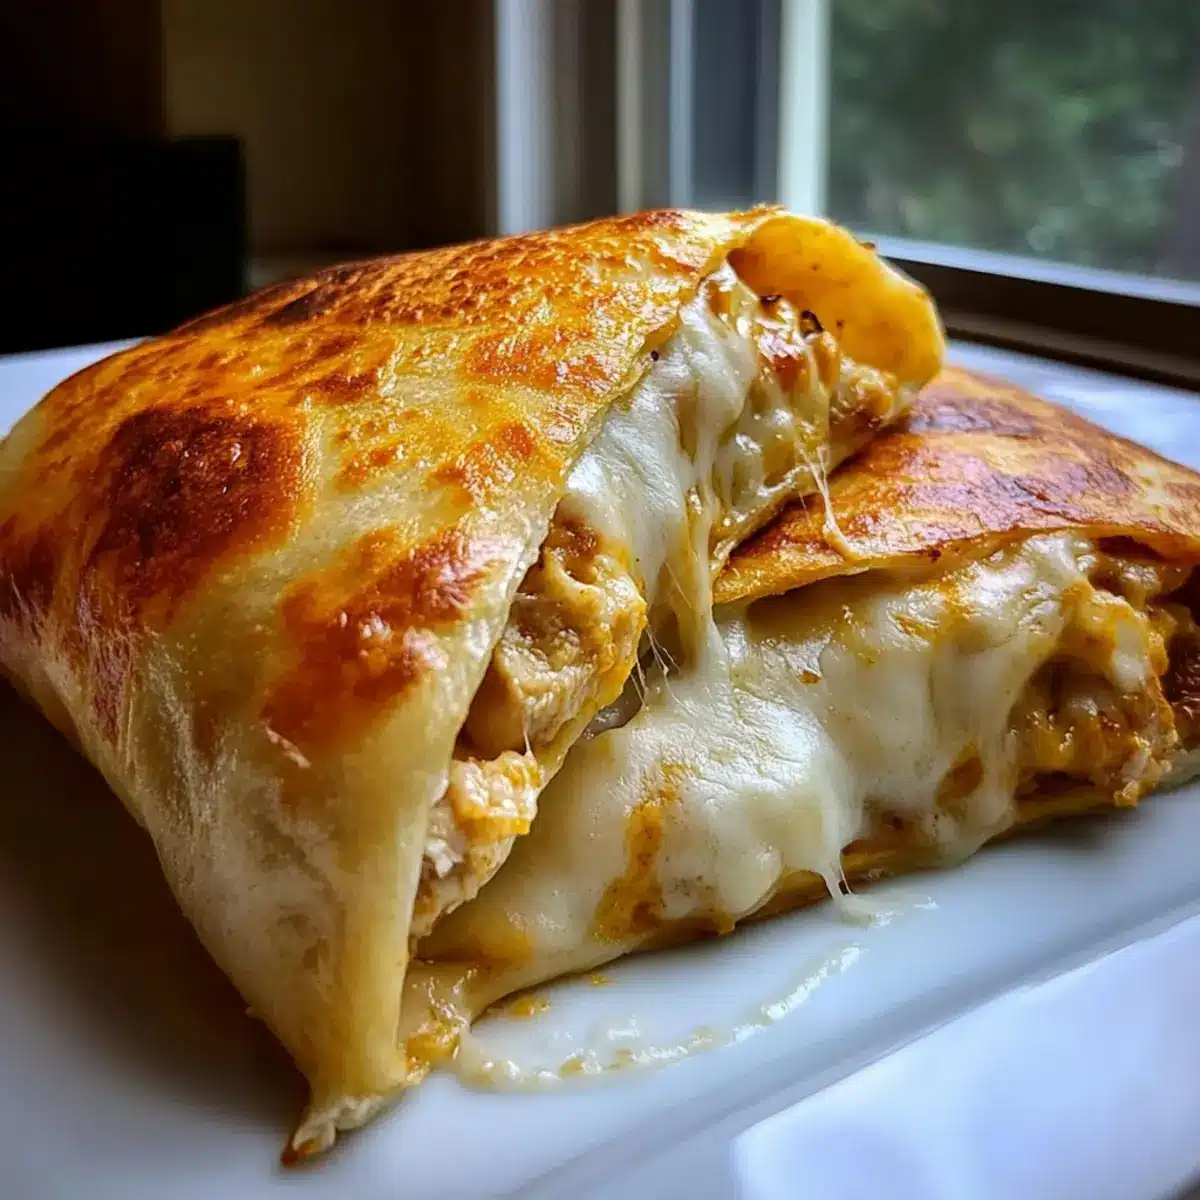
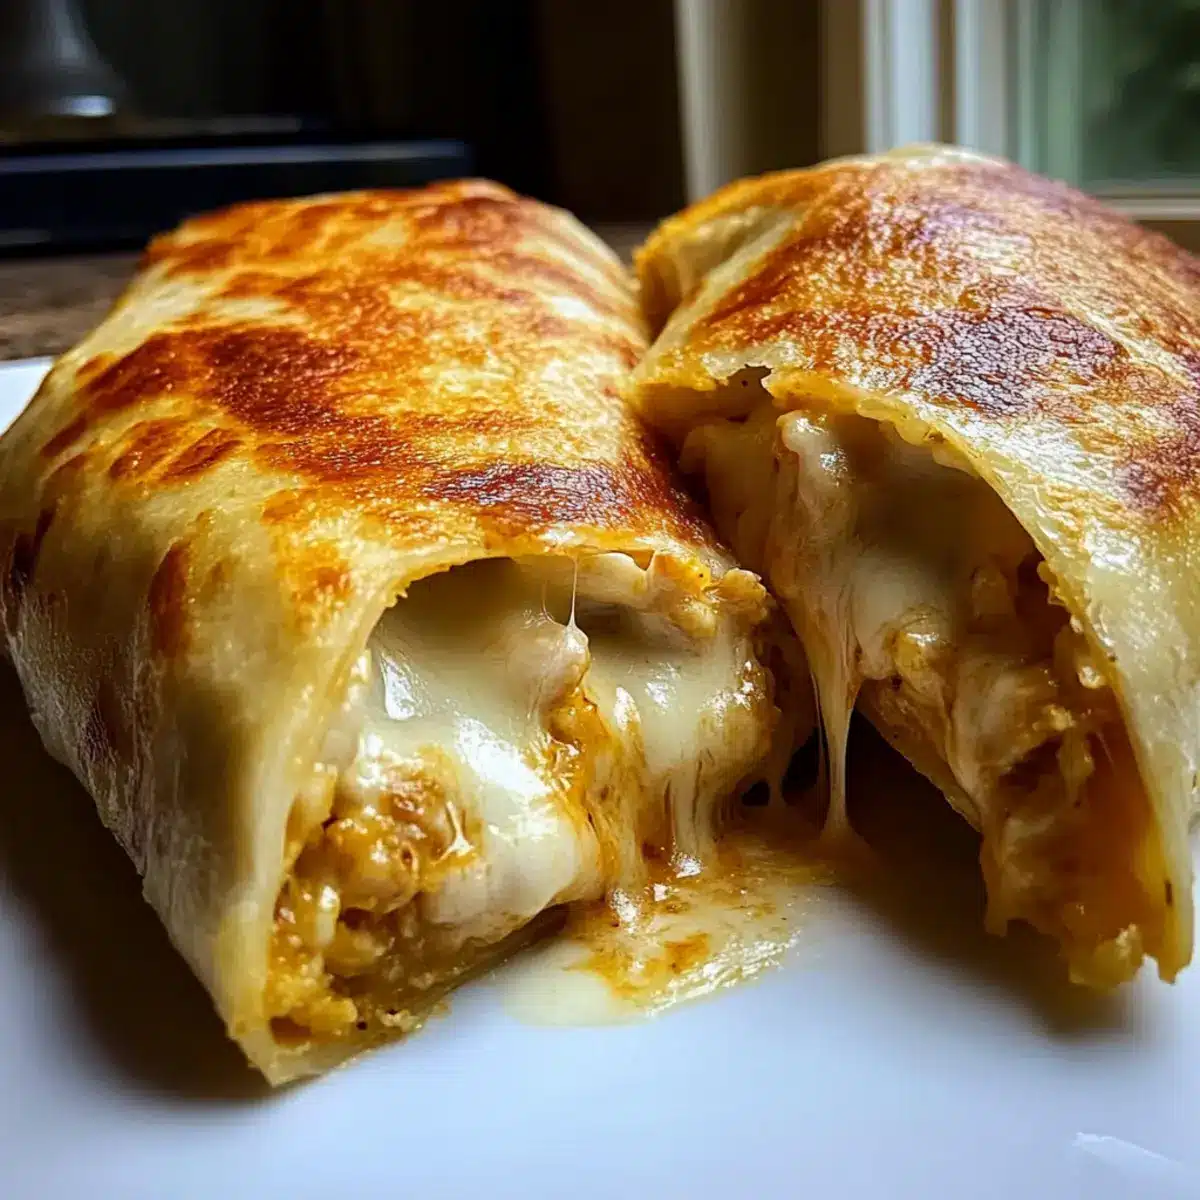
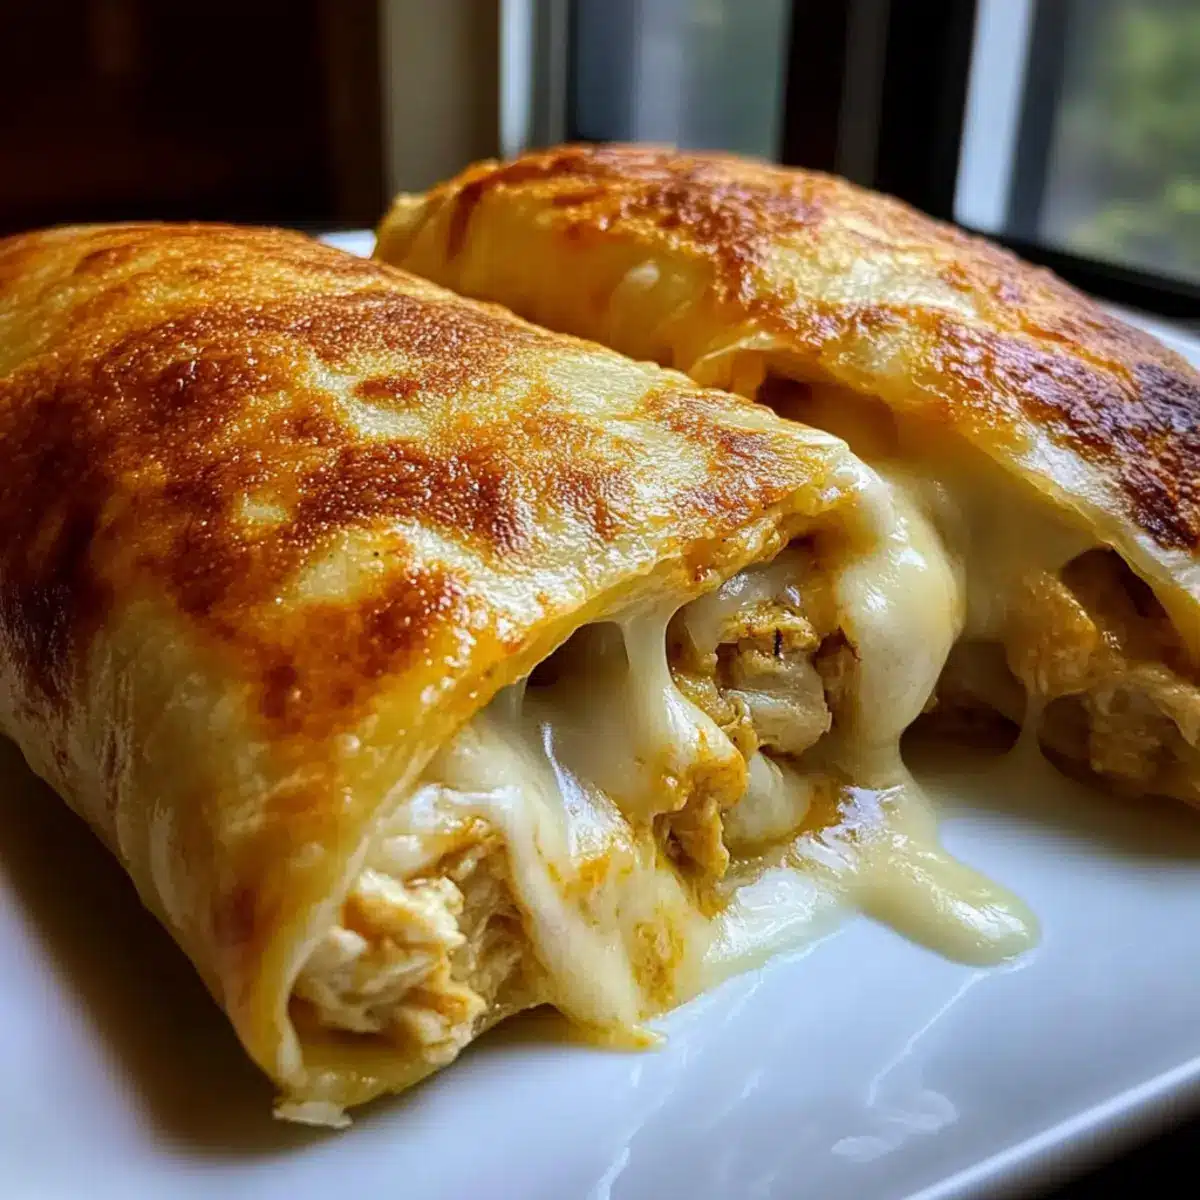
The tantalizing aroma wafting through my kitchen immediately transports me to a sun-soaked fiesta! My Ultimate Crispy Baked Chicken and Cheese Chimichangas embody everything I love about Tex-Mex comfort food: a crunchy, golden exterior wrapped around a cheesy, savory filling that makes every bite a delight. This recipe is your ticket to a quick weeknight dinner that doesn’t skimp on flavor, perfect for satisfying cravings without the hassle. Not only are these chimichangas oven-baked for a lighter twist, but they also make an effortless crowd-pleaser your family will adore. Imagine indulging in these delectable treats, whether you’re enjoying a casual weeknight or hosting friends. Curious to find out how to whip up this irresistible dish? Let’s get started!
What Makes Chimichangas So Irresistible?
Crispy Crunch: These chimichangas deliver a satisfying crunch that will keep you coming back for more, giving you that perfect texture contrast with every bite.
Flavorful Filling: Packed with savory chicken, melty cheese, and fragrant spices, they bring a delightful burst of Tex-Mex flair right to your dinner table.
Quick & Easy: With straightforward steps and simple ingredients, you can prepare this dish in under an hour, making it a lifesaver for busy weeknights.
Versatile Options: Feel free to switch up the protein or add beans and corn for a unique twist, just like my Blueberry Grilled Cheese offers a fun flavor combination!
Crowd-Pleasing Delight: Perfect for family dinners or casual gatherings, everyone will rave about these cheesy delights, making them a guaranteed hit at your next get-together.
Crispy Chimichangas Ingredients
• Discover the delightful components of these savory bites!
For the Filling
- Olive Oil – Adds moisture and flavor during cooking; can substitute with canola oil.
- Yellow Onion – Provides sweetness and depth; substitute with shallots if necessary.
- Garlic – Enhances the aroma and taste; fresh is preferred but garlic powder works in a pinch.
- Cooked Shredded Chicken – Main protein for heartiness; use rotisserie chicken for quick prep.
- Mild Red Enchilada Sauce – Adds spice and moisture; substitute with green enchilada sauce for a different flavor.
- Chili Powder – Provides depth and heat; can be substituted with paprika for a milder touch.
- Ground Cumin – Contributes an earthy flavor; omit if unavailable, and use more chili powder as a substitute.
- Dried Oregano – Adds herbal notes; Italian seasoning can be a good alternative.
- Salt and Black Pepper – Enhances overall flavor; adjust based on personal taste preferences.
- Monterey Jack Cheese – Melts beautifully for creamy texture; substitute with cheddar or spicy pepper jack for extra flavor.
- Large Flour Tortillas – Encases the filling; opt for fresh, pliable tortillas for best results.
For Serving
- Salsa – Bright and zesty, perfect for dipping these crispy chimichangas.
- Guacamole – Creamy and rich, offering a delicious contrast to the crunchiness.
- Sour Cream – Adds a cool, tangy element that enhances the overall flavor experience.
Step‑by‑Step Instructions for Ultimate Crispy Baked Chicken and Cheese Chimichangas
Step 1: Sauté Aromatics
Heat a tablespoon of olive oil in a large skillet over medium heat. Add the diced yellow onion and sauté for about 5 minutes until it becomes translucent and fragrant. Then, stir in the minced garlic and cook for an additional minute, watching for it to turn golden. This aromatic base sets up the flavor for your crispy chimichangas.
Step 2: Prepare Filling
Stir the cooked shredded chicken into the skillet along with the mild red enchilada sauce, chili powder, ground cumin, dried oregano, salt, and pepper. Allow this mixture to simmer for about 5 to 7 minutes until the sauce reduces and becomes thicker. Once ready, remove from heat and let it cool slightly before mixing in the Monterey Jack cheese, creating a creamy filling.
Step 3: Warm Tortillas
To ensure your tortillas are pliable for easy rolling, warm them up. You can microwave them for about 20–30 seconds wrapped in a damp paper towel or heat them in a dry skillet over low heat for about 15 seconds on each side. This step is crucial for making your ultimate crispy chimichangas without tearing the tortillas.
Step 4: Assemble Chimichangas
Place a generous scoop of the filling onto the lower third of each warm tortilla. Fold the sides in over the filling and then roll it tightly from the bottom to the top, securing the filling neatly inside. Be sure to keep everything tightly wrapped to avoid spills during baking. This assembly technique ensures every bite is packed with flavor in your chimichangas.
Step 5: Bake
Preheat your oven to 400°F (200°C) while you prepare the chimichangas for baking. Place them seam-side down on a greased baking sheet, ensuring they’re spaced out evenly. Lightly spray the tops with cooking oil to achieve a golden color. Bake for about 15–20 minutes, flipping halfway through, until the chimichangas turn a beautiful golden brown and look irresistibly crispy.
Step 6: Serve
Once baked to perfection, remove your ultimate crispy baked chicken and cheese chimichangas from the oven. Allow them to cool for a few minutes before serving. Pair them with salsa, guacamole, and sour cream for dipping, enhancing the delicious Tex-Mex experience of each crispy chimichanga. Enjoy the crunchy outer shell and gooey filling that everyone will love!
What to Serve with Ultimate Crispy Baked Chicken and Cheese Chimichangas
Imagine a table adorned with vibrant colors and flavors, complementing the crispy perfection of your chimichangas.
- Salsa: A bright, zesty salsa adds freshness and a touch of acidity, balancing the richness of the cheesy filling beautifully.
- Guacamole: Creamy and rich, guacamole offers a delicious contrast to the crunchy chimichangas, making each bite satisfying.
- Sour Cream: Adds a cool, tangy touch that enhances the overall flavor experience, cutting through the bold spices effortlessly.
Pairing these delightful sides will elevate your Tex-Mex night into a true feast that excites your taste buds!
Make Ahead Options
These Ultimate Crispy Baked Chicken and Cheese Chimichangas are perfect for busy weeknights! You can prepare the filling and assemble the chimichangas up to 24 hours in advance. Simply follow the steps to sauté the aromatics and mix in the chicken and cheese filling. Once assembled, wrap each chimichanga tightly in plastic wrap and refrigerate. To maintain their crispiness, avoid baking them until just before serving. When you’re ready to enjoy, preheat the oven to 400°F and bake the chimichangas for 15-20 minutes, flipping halfway through, for a golden and delicious result that feels freshly made with minimal effort.
Crispy Chimichangas: Flavorful Twists Await
Feel free to make this recipe your own by incorporating these delicious variations that inspire creativity in the kitchen!
-
Ground Beef: Swap out shredded chicken for 1 pound of browned ground beef for a hearty alternative. This classic combo is sure to please meat lovers!
-
Black Beans: Add a can of drained black beans to the filling for an extra protein boost and delightful creaminess. This will not only enhance the taste but also create a wonderful texture.
-
Pepper Jack Cheese: Use pepper jack cheese instead of Monterey Jack for an exciting kick of spice. Each bite will bring a new level of flavor that spice enthusiasts will adore.
-
Corn Medley: Mix in a cup of frozen corn with your filling. The sweet burst of corn alongside the savory chicken makes for a delightful contrast that elevates the chimichangas.
-
Spicy Enchilada Sauce: For a fiery twist, opt for a spicy enchilada sauce instead of the mild version. It adds just the right amount of heat to turn up the flavor.
-
Cream Cheese Filling: Blend in some cream cheese with the chicken mixture for a rich, creamy filling. It gives an indulgent touch that pairs beautifully with salsa and guacamole.
-
Zucchini: For extra veggies, grate in some zucchini to the filling. The moisture from the zucchini complements the flavors and keeps the filling light and fresh.
-
Taco Seasoning: Boost the flavor powerhouse by adding a tablespoon of taco seasoning to the filling for a zesty and aromatic profile. This will remind you of your favorite tacos!
And don’t forget, whether you’re looking to enhance your chimichangas with flavor or explore some refreshing options, these ideas can inspire exciting meals similar to my beloved Chicken Caesar Sandwich or the fun-filled Blueberry Grilled Cheese! Enjoy cooking and let your creativity shine!
Expert Tips for Crispy Chimichangas
-
Warm Tortillas First: Ensure you warm the tortillas before filling them; this prevents tearing and makes rolling easier for your crispy chimichangas.
-
Generous Oil Spray: Don’t skimp on the cooking oil spray; generously coat the tops before baking to achieve that irresistible golden brown finish.
-
Cool Filling Slightly: Let the chicken filling cool a bit before adding cheese; this keeps the cheese melty without it becoming rubbery inside the chimichangas.
-
View for Spilling: Keep the filling tightly rolled to avoid potential spills during baking. A well-rolled chimichanga is key to enjoying every delicious bite!
-
Experiment with Flavors: Feel free to play with different cheese varieties or spices; this will give your crispy chimichangas a unique twist that your family will love.
How to Store and Freeze Crispy Chimichangas
Fridge: Store leftover crispy chimichangas in an airtight container for up to 4 days. This ensures they stay fresh and flavorful, ready for a quick reheat.
Freezer: For longer storage, freeze unbaked chimichangas individually on a baking sheet, then transfer to a zip-top bag for up to 2 months. Bake directly from the freezer, adding a few extra minutes to the cooking time.
Reheating: To revive that crispy texture, reheat in an air fryer or oven at 375°F (190°C) for 10-15 minutes instead of using a microwave, which can make them soggy.
Wrap Carefully: If storing baked chimichangas, let them cool completely before wrapping in foil or parchment, making sure they’re tightly sealed to prevent freezer burn.
Ultimate Crispy Baked Chicken and Cheese Chimichangas Recipe FAQs
How do I select the right chicken for my chimichangas?
For the best flavor and texture, I recommend using cooked shredded chicken, such as rotisserie chicken, which saves a lot of time and adds delicious moisture. If you opt for raw chicken, cook and shred it first, ensuring it reaches an internal temperature of 165°F. Look for meat that is moist and has no dark spots to ensure freshness.
How should I store leftover chimichangas?
Store your leftover crispy chimichangas in an airtight container in the refrigerator. They’ll stay fresh for up to 4 days. Just be sure to let them cool to room temperature before sealing them up, as this will prevent moisture build-up, keeping them crispy when reheated.
Can I freeze assembled chimichangas?
Absolutely! To freeze unbaked chimichangas, assemble them as per the recipe, then place them on a baking sheet to freeze individually. Once solid, transfer them to a zip-top bag, and they can be stored for up to 2 months. When you’re ready to bake, preheat your oven and add a few extra minutes to the cooking time.
What should I do if my chimichangas burst open while baking?
If you run into bursting chimichangas, don’t worry! This can happen if they’re overfilled or not rolled tightly enough. Make sure you don’t overload the filling and roll them snugly, tucking in the sides. If they do burst, you can simply patch them up with cheese or top with sauce before serving to give that extra flavor boost!
Are these chimichangas suitable for guests with dietary restrictions?
Yes, these chimichangas can be tailored for various dietary needs! If someone is gluten-free, use corn tortillas instead of flour. For those with dairy allergies, you can substitute the cheese with a dairy-free alternative like cashew cheese. Always double-check your ingredients for allergens and consider making variations if needed, like swapping in black beans or other proteins.
How can I revive the crispy texture when reheating?
The best way to restore that wonderful crispy texture is by reheating your chimichangas in an air fryer or oven. Preheat the air fryer to 375°F (190°C) and cook for 10-15 minutes until they’re golden and crunchy again. Avoid the microwave, as it tends to make them soggy, sacrificing that delightful crunch!
Crispy Chimichangas: Your New Favorite Comfort Food Delight
Ingredients
Equipment
Method
- Heat olive oil in a skillet over medium heat. Add diced onion and sauté for 5 minutes until translucent. Stir in garlic and cook for another minute.
- Stir in cooked chicken, enchilada sauce, chili powder, cumin, oregano, salt, and pepper. Simmer for 5-7 minutes until thicker. Remove from heat and mix in cheese.
- Warm tortillas in microwave for 20–30 seconds or in a skillet for 15 seconds on each side.
- Place filling on the lower third of each tortilla, fold sides in and roll tightly from bottom to top.
- Preheat oven to 400°F. Place chimichangas seam-side down on greased baking sheet, spray tops with oil, and bake for 15–20 minutes until golden brown.
- Remove from oven and cool for a few minutes before serving with salsa, guacamole, and sour cream.
Leave a Reply