
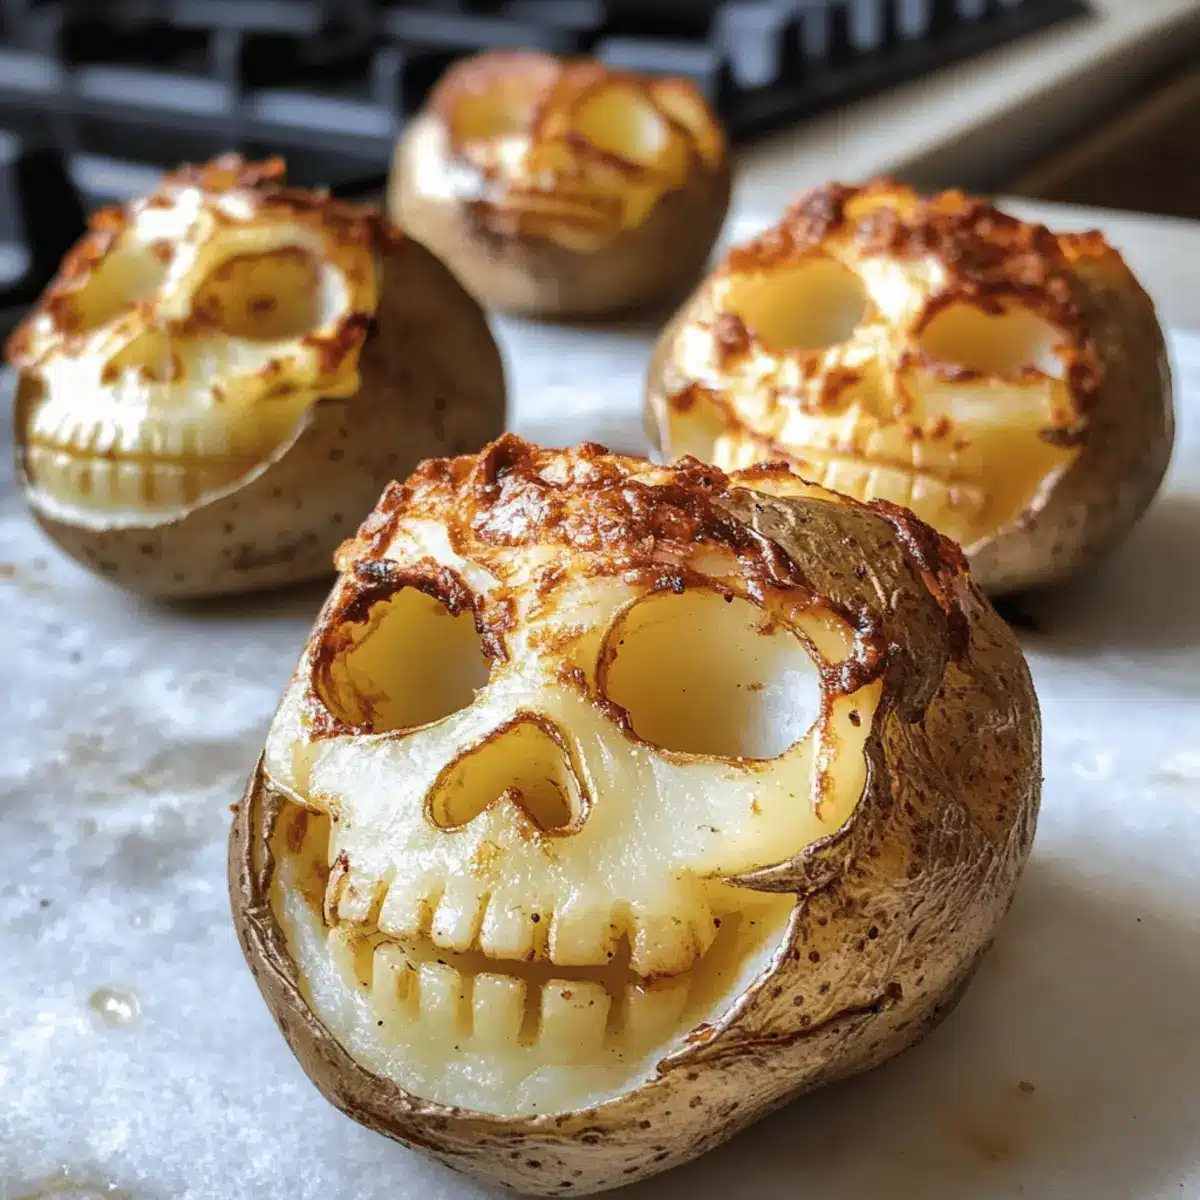
As the leaves turn crispy and the air gets a bit chillier, my thoughts drift to the fun and frolics of Halloween. This year, I’m swapping out the usual suspects for something that truly stands out—enter my Halloween Skull Potatoes! These spooky little snacks are not just a delightful feast for the eyes; they pack a punch with their crispy exterior and fluffy interior. Perfect for any Halloween gathering, they bring a touch of creativity to your dinner table while being incredibly easy to whip up. With endless variations in spooky expressions and the option to customize with fun toppings, I can guarantee these will become a staple in your Halloween dinner ideas. Are you ready to dive into this playful culinary adventure? Let’s carve out some memorable moments together!
Why Choose Halloween Skull Potatoes?
Uniquely Fun: These Halloween Skull Potatoes are not only visually captivating but also incredibly delicious, making them the perfect addition to your Halloween festivities.
Crispy & Fluffy: Enjoy a delightful contrast between the crispy exterior and the soft, fluffy inside, providing a texture that everyone will love.
Endless Creativity: Get creative while carving different spooky expressions that could even spark a family tradition for Halloween parties each year!
Quick Preparation: With simple ingredients and straightforward steps, you’re just 30–35 minutes away from a standout side dish that saves you time while impressing guests.
Crowd Pleaser: Whether as a fun appetizer or a side dish, these potatoes will steal the show and become the talk of your Halloween dinner ideas. Elevate your meal with fun accompaniments such as Garlic Parmesan Potatoes for even more savory goodness!
Halloween Skull Potatoes Ingredients
• Get ready to create spooky fun!
For the Potatoes
• Mini Creamer Potatoes or Baby Yukon Golds – These are perfect for carving and ensure an even roast; avoid larger potatoes to maintain the skull shape.
For the Seasoning
• Olive Oil – This adds richness and helps achieve that irresistible crispiness; feel free to swap in melted butter for a different flavor.
• Salt – Essential for enhancing the potato’s natural flavor; adjust to your taste preference.
• Pepper & Other Seasonings – Use freshly cracked pepper to add a little kick; consider garlic powder or paprika for added depth.
For Toppings (Optional)
• Melted Cheese – A delicious way to elevate flavor; sprinkle over potatoes just after baking for melty goodness.
• Fresh Herbs – Add a sprinkle of chopped herbs like parsley or chives for a fresh burst of flavor and a pop of color.
Let these Halloween Skull Potatoes star at your next gathering!
Step‑by‑Step Instructions for Halloween Skull Potatoes
Step 1: Preheat the Oven
Begin by preheating your oven to 425°F (220°C) to ensure it’s hot enough for achieving that desired crispiness. This temperature is crucial for roasting the potatoes evenly. Meanwhile, gather your baking sheet and line it with parchment paper to prevent any sticking and simplify cleanup.
Step 2: Wash and Prepare Potatoes
Thoroughly wash and dry your Mini Creamer Potatoes or Baby Yukon Golds to remove any dirt. Drying is essential as excess moisture can hinder the crispiness. Once clean, place them in a bowl to get ready for the fun carving process that transforms them into your spooky Halloween Skull Potatoes.
Step 3: Carve the Skull Faces
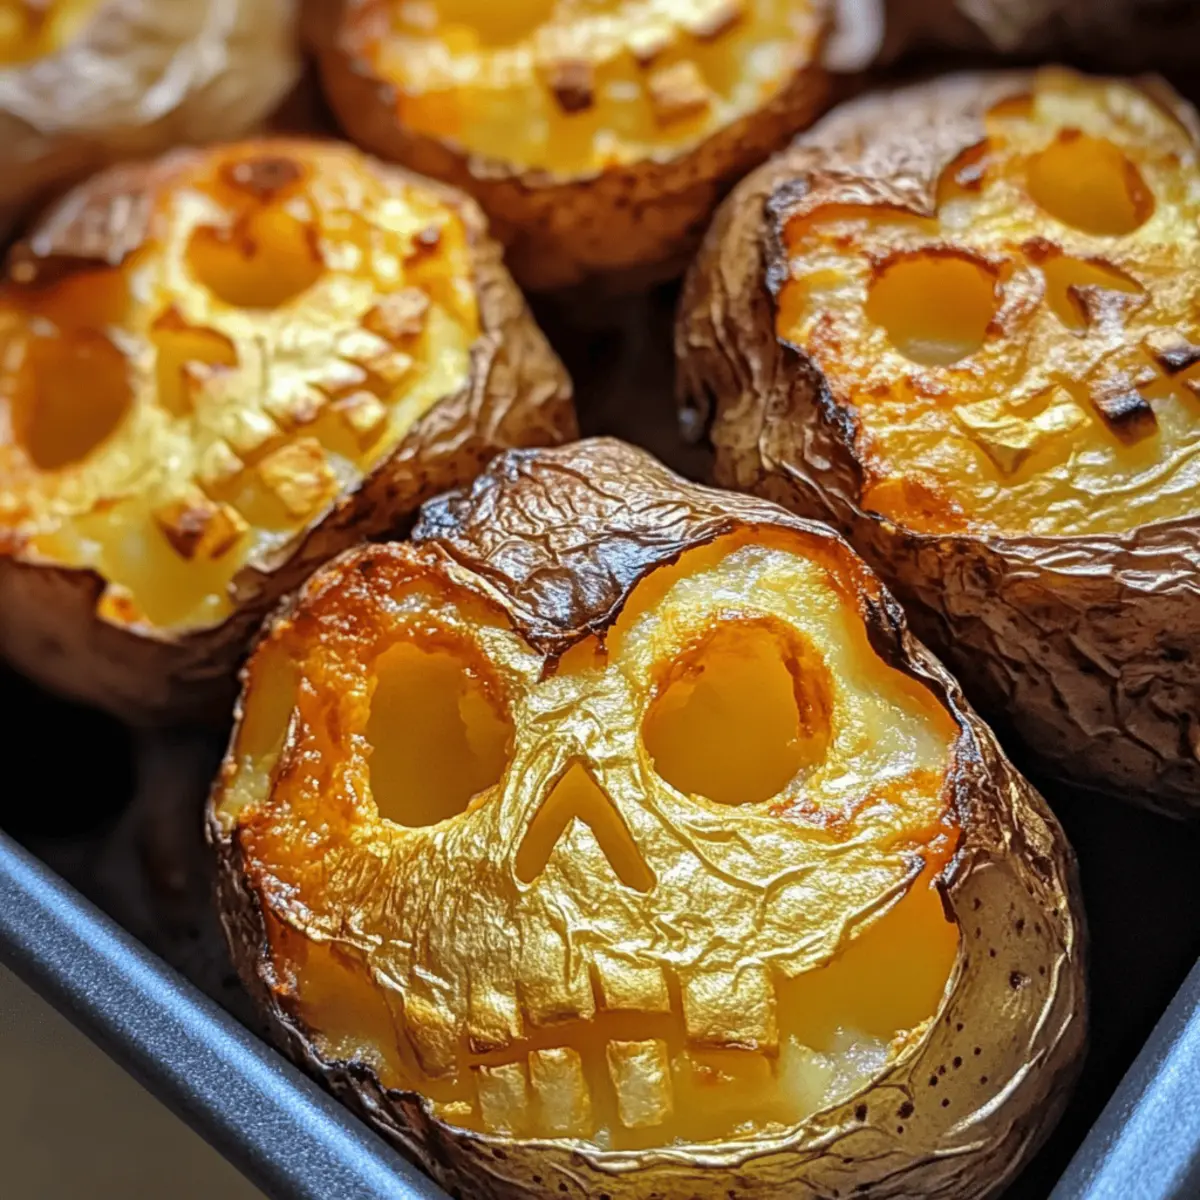
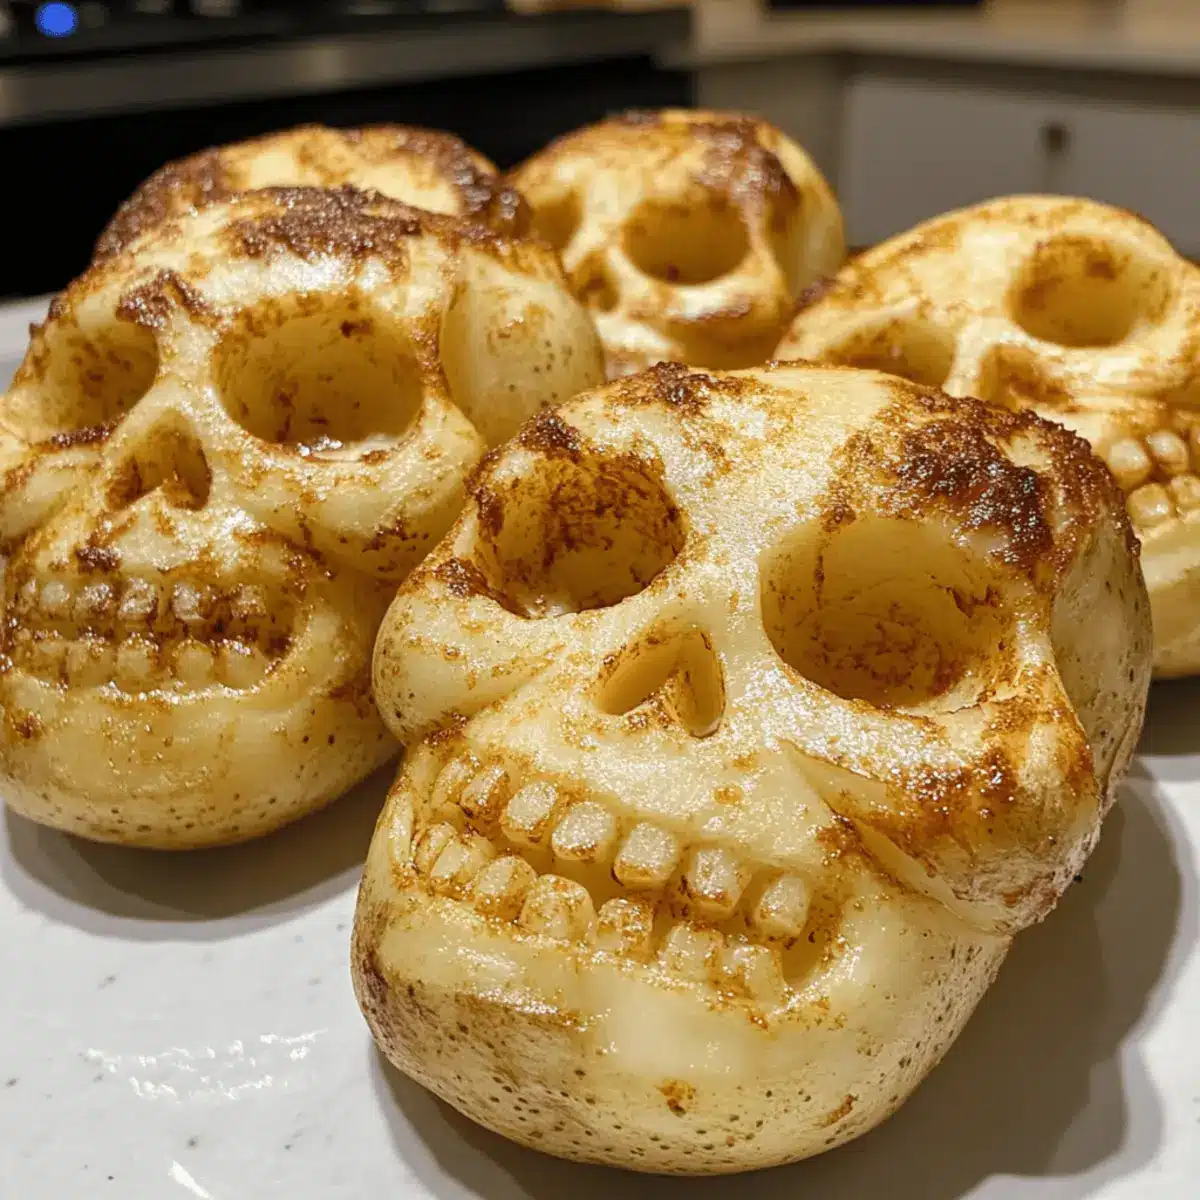
Using a sharp paring knife, carefully carve spooky skull faces onto each potato. Start by outlining the features gently before cutting deeper to reveal those chilling expressions. Take your time and ensure each potato showcases a unique design to enhance the festive vibe of your Halloween dinner.
Step 4: Season the Potatoes
In a large mixing bowl, toss the carved potatoes with olive oil, salt, and your choice of seasonings to coat them evenly. Aim for a glossy finish that signals they are well-prepared for the oven. The oils and seasonings will enhance the flavors of your Halloween Skull Potatoes while ensuring a crispy texture.
Step 5: Arrange on the Baking Sheet
Transfer the seasoned potatoes to your prepared baking sheet, making sure they have enough space between them. This prevents overcrowding, which could lead to steaming instead of crisping. Place them with the carved faces facing up for an appealing presentation, ready to transform in the oven.
Step 6: Bake to Perfection
Bake the Halloween Skull Potatoes in the preheated oven for 30-35 minutes. Halfway through the baking time, gently flip the potatoes to ensure even browning. They are ready when they turn golden brown and the exterior is crispy, creating that perfect contrast with the fluffy interior.
Step 7: Cool and Serve
Once baked to crispy perfection, remove the potatoes from the oven and let them cool for a few minutes. This resting period allows the skin to crisp up further. Present your spooky Halloween Skull Potatoes on a platter, ready to be admired and enjoyed by family and friends at your Halloween gathering.
Expert Tips for Halloween Skull Potatoes
-
Choose the Right Potatoes: Mini Creamer Potatoes or Baby Yukon Golds are ideal for carving; larger potatoes may not hold their spooky shape.
-
Carving Safety First: Always carve away from your hands to avoid accidents. A sharp knife is essential for clean cuts.
-
Season Generously: Don’t skimp on olive oil and seasonings for your Halloween Skull Potatoes; they enhance flavor and contribute to that delightful crispiness.
-
Avoid Overcrowding: Arrange potatoes with space in between on the baking sheet. This aids in crisping rather than steaming the potatoes.
-
Mix It Up: Experiment with different facial expressions when carving to keep the festive spirit alive and engage everyone in the fun.
-
Let Them Rest: Cooling the potatoes slightly after baking helps improve the crunchy texture, making them even more delicious!
What to Serve with Halloween Skull Potatoes?
A whimsical gathering isn’t complete without the perfect accompaniments to elevate your Halloween Skull Potatoes into a satisfying feast.
-
Crispy Garlic Bread:
The crunchy texture and rich garlic flavors beautifully complement the potatoes, making every bite a savory delight. -
Zesty Coleslaw:
This vibrant side adds a refreshing crunch that balances the richness of the potatoes and brings a burst of color to your plate. -
Roasted Brussels Sprouts:
With their slightly caramelized exterior and earthy flavor, these bite-sized greens create a delicious contrast alongside the crispy skulls. -
Pumpkin Soup:
A warm, velvety pumpkin soup adds warmth and creaminess to your meal, perfect for celebrating the cozy Halloween season. -
Spicy Hummus:
Serve this on the side with pita chips for a flavorful dip that resonates with a spicy kick, intriguing your taste buds. -
Herb-Infused Quinoa:
Light and fluffy quinoa dressed with fresh herbs offers a wholesome touch, making it a great partner to the seasoned potatoes. -
Apple Cider:
This refreshing, slightly sweet beverage enhances the festive spirit, making it an ideal drink pairing for your Halloween gathering. -
Chocolate Mousse:
For dessert, a rich chocolate mousse adds a decadent finish to your meal, delighting everyone after the spooky feast.
Halloween Skull Potatoes Variations & Substitutions
Get ready to unleash your inner chef with these fun twists that will elevate your Halloween Skull Potatoes to the next level!
-
Different Potatoes: Use red potatoes or baby potatoes for a colorful twist. Their natural sweetness adds a nice contrast to the savory flavors.
This can lead to a delightful surprise for your guests who expect the classic flavors! -
Spice Things Up: Add cayenne pepper for a spicy kick. Just a pinch can make these potatoes zing!
The heat will definitely capture the attention of thrill-seekers who cherish adventurous bites. -
Cheesy Delight: Top with shredded cheese like cheddar or mozzarella before baking for a gooey finish.
Who doesn’t love a bit of cheesy goodness to make these spooky treats even yummier? -
Vegan Option: Replace olive oil with coconut oil for a plant-based twist.
This adds a hint of sweetness while keeping those Halloween vibes alive, perfect for vegan gatherings! -
Herb Flavors: Add a sprinkle of fresh herbs like rosemary or thyme for aromatic flair.
These herby notes elevate the rustic charm of your potatoes, making them more aromatic and festive! -
Spooky Faces: Experiment with different carving shapes—try witch faces or pumpkin smiles for festive creativity.
Each potato can tell a unique story at your Halloween party, bringing a lively ambiance to the gathering! -
Dipping Sauce: Serve with a side of sour cream or spicy ketchup for an enjoyable dunking experience.
These tangy accompaniments perfectly complement the crispy bites, enhancing the overall flavor profile. -
Middle Eastern Twist: Sprinkle on za’atar spice for an exotic blend of flavors that bursts from every bite.
This unexpected twist will amaze your guests and introduce them to something refreshing yet familiar!
With all these delightful variations, your Halloween Skull Potatoes will be sure to impress. Don’t hesitate to elevate this dish with a side of Garlic Parmesan Potatoes for a more memorable feast!
Make Ahead Options
These Halloween Skull Potatoes are perfect for meal prep enthusiasts and busy home cooks! You can carve the skull shapes of the potatoes up to 24 hours in advance; simply place them in a bowl of water to prevent browning. When you’re ready to serve, drain and dry the potatoes, then toss them in olive oil, salt, and your favorite seasonings. Arrange them on a baking sheet and bake for 30-35 minutes at 425°F (220°C) for that crispy perfection. This simple prep tip ensures your Halloween Skull Potatoes will be just as delicious and spooky when it’s time to impress your guests!
How to Store and Freeze Halloween Skull Potatoes
Room Temperature: Store any leftover Halloween Skull Potatoes at room temperature for up to 2 hours; they’re best enjoyed fresh for optimal crispiness.
Fridge: If you have leftovers, place them in an airtight container in the fridge for up to 3 days. Reheat in the oven to restore crispiness before serving.
Freezer: For longer storage, freeze carved but uncooked potatoes in a single layer on a baking sheet, then transfer to a freezer bag for up to a month. Thaw and bake as directed when ready to eat.
Reheating: To reheat, bake in a preheated oven at 375°F (190°C) for about 10-15 minutes, until warmed through and crispy, ensuring your Halloween Skull Potatoes remain delightful!
Halloween Skull Potatoes Recipe FAQs
What type of potatoes should I use for Halloween Skull Potatoes?
Absolutely! Mini Creamer Potatoes or Baby Yukon Golds are perfect for carving spooky shapes. These smaller potatoes have a waxy texture that allows them to hold their shape, ensuring even roasting. Avoid larger waxy potatoes, as they may not carve as well.
How should I store leftover Halloween Skull Potatoes?
If you have any leftovers, store them in an airtight container in the fridge for up to 3 days. To maintain crispiness, reheat them in the oven, at about 375°F (190°C) for 10-15 minutes. This way, they regain their delightful crunch!
Can I freeze Halloween Skull Potatoes?
Yes, you can! For freezing, carve the potatoes but do not cook them first. Arrange the carved potatoes in a single layer on a baking sheet to freeze until solid, about 2-3 hours. Once frozen, transfer them to a freezer bag for up to 3 months. When ready to cook, thaw in the fridge overnight and bake as directed.
What if my potatoes aren’t crispy after baking?
If your potatoes aren’t as crispy as you’d like, check a few things! First, make sure you’ve preheated your oven adequately. Also, avoid overcrowding the baking sheet as this can lead to steaming instead of roasting. If they are already cooked, you can pop them back in the oven at a higher temperature, around 425°F (220°C), for a few more minutes to help them crisp up.
Are Halloween Skull Potatoes safe for pets?
Yes, plain potatoes can be safe for pets in moderation. However, avoid adding seasonings, especially garlic or onions, as they can be harmful to pets. Always check with your veterinarian if you’re unsure about feeding specific foods to your furry friends.
Can I prepare the skull shapes in advance?
Yes! You can carve the potatoes in advance to save time. Store them in water with a splash of lemon juice to prevent browning and refrigerate. Drain and pat dry before cooking for best results. This method keeps the potatoes fresh and ready for baking when you’re set to enjoy your Halloween feast!

Crispy Halloween Skull Potatoes That Steal the Show
Ingredients
Equipment
Method
- Preheat your oven to 425°F (220°C) and prepare a baking sheet with parchment paper.
- Wash and dry the Mini Creamer Potatoes to remove dirt and moisture.
- Carve spooky skull faces onto each potato with a sharp paring knife.
- Toss the carved potatoes with olive oil, salt, and your choice of seasonings.
- Arrange the seasoned potatoes on the baking sheet with carvings facing up.
- Bake the potatoes for 30-35 minutes, flipping them halfway through for even browning.
- Cool the potatoes for a few minutes before serving on a platter.
Leave a Reply