
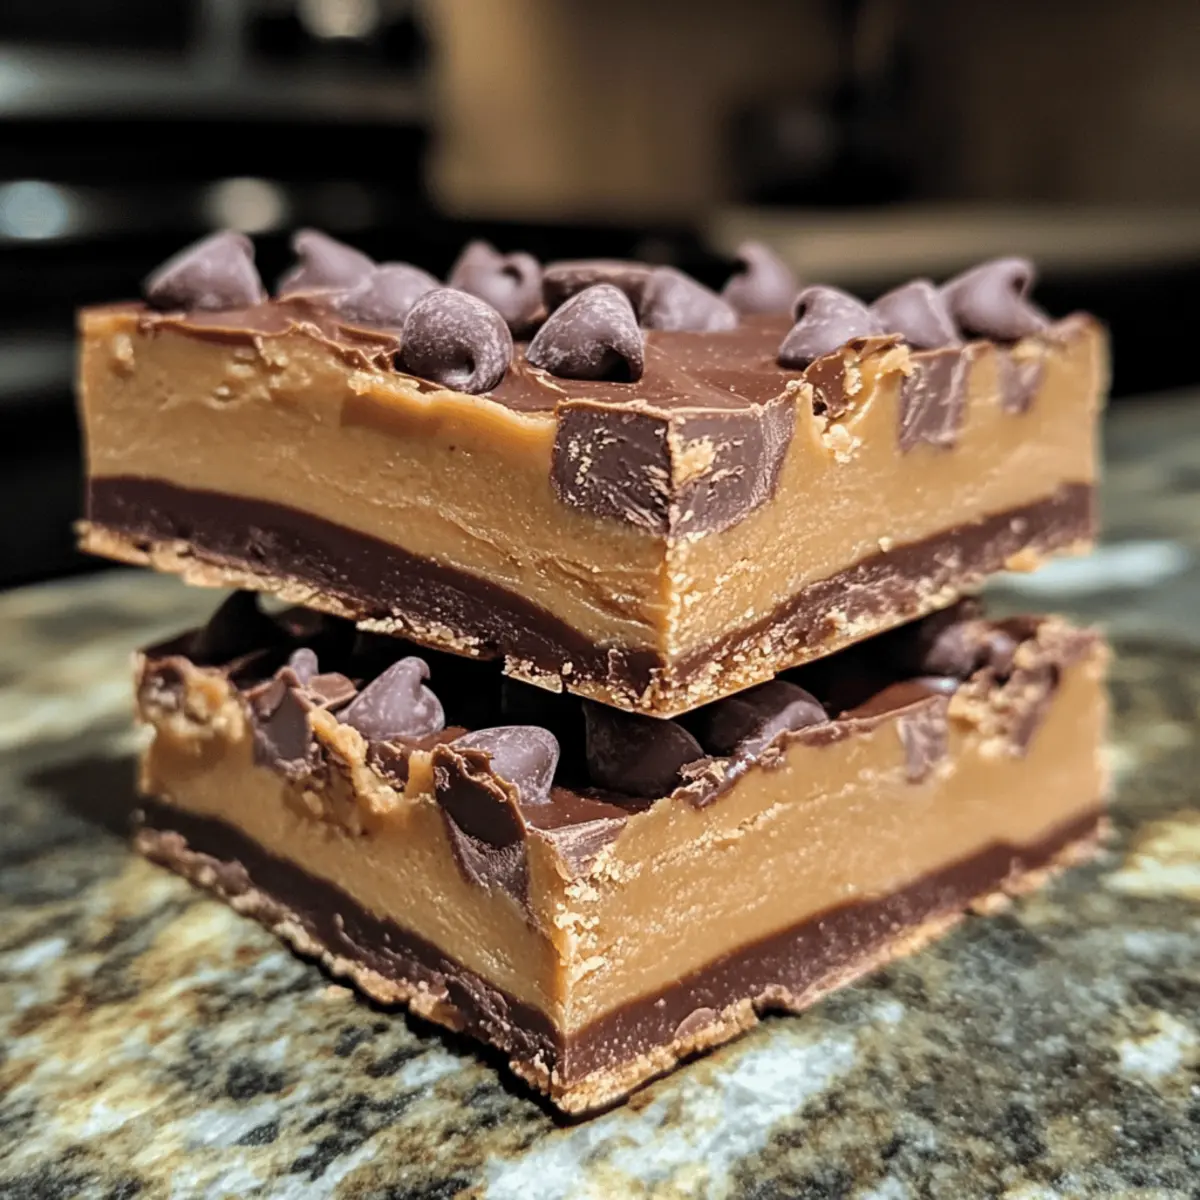
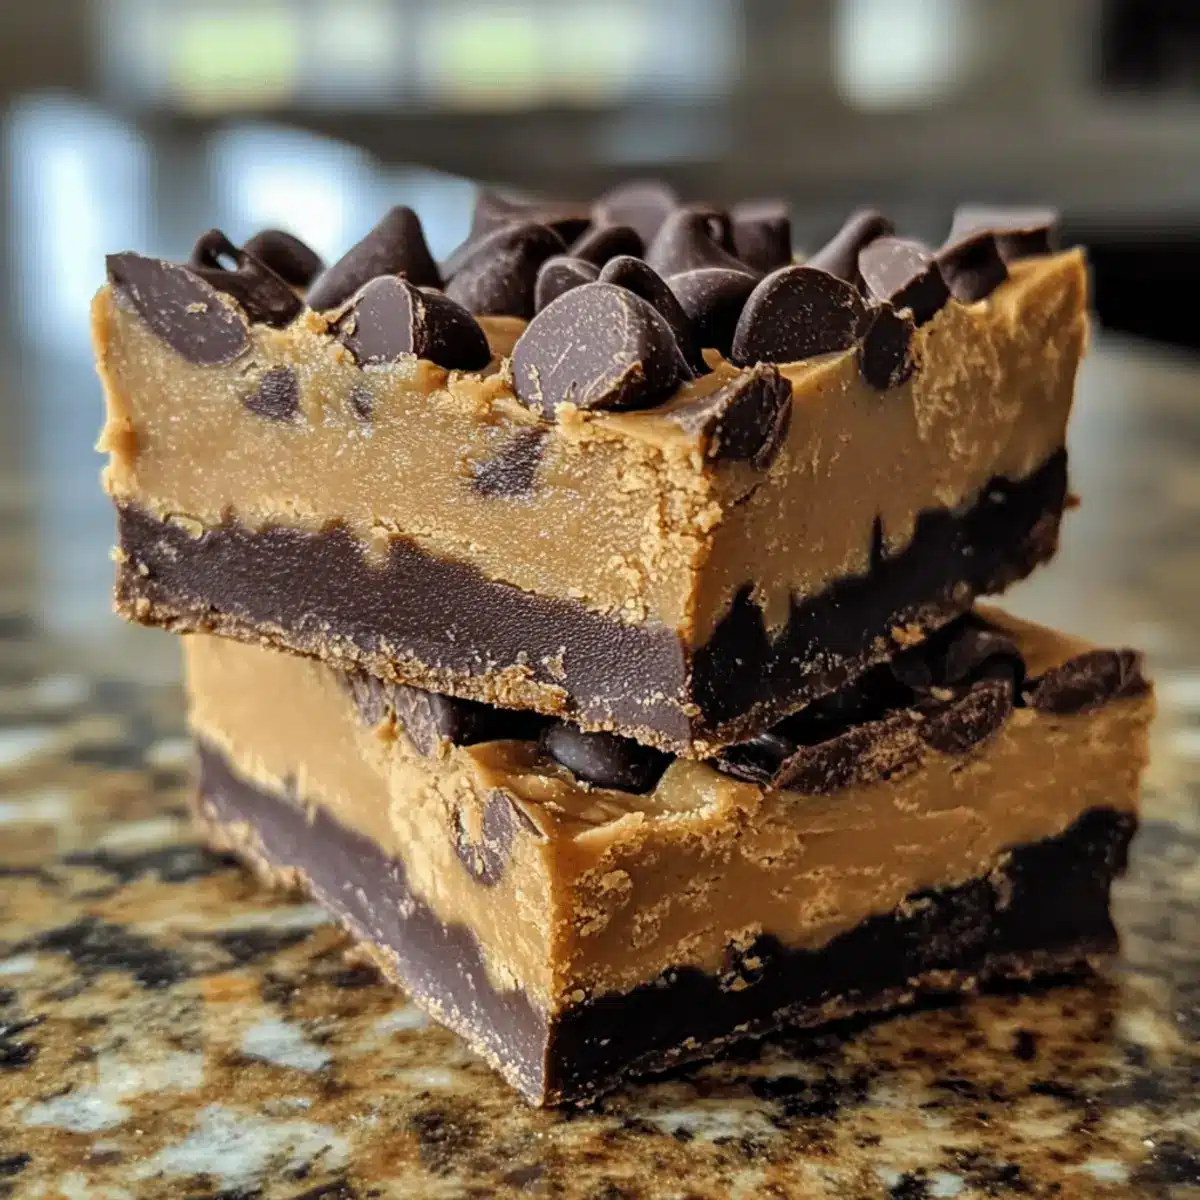
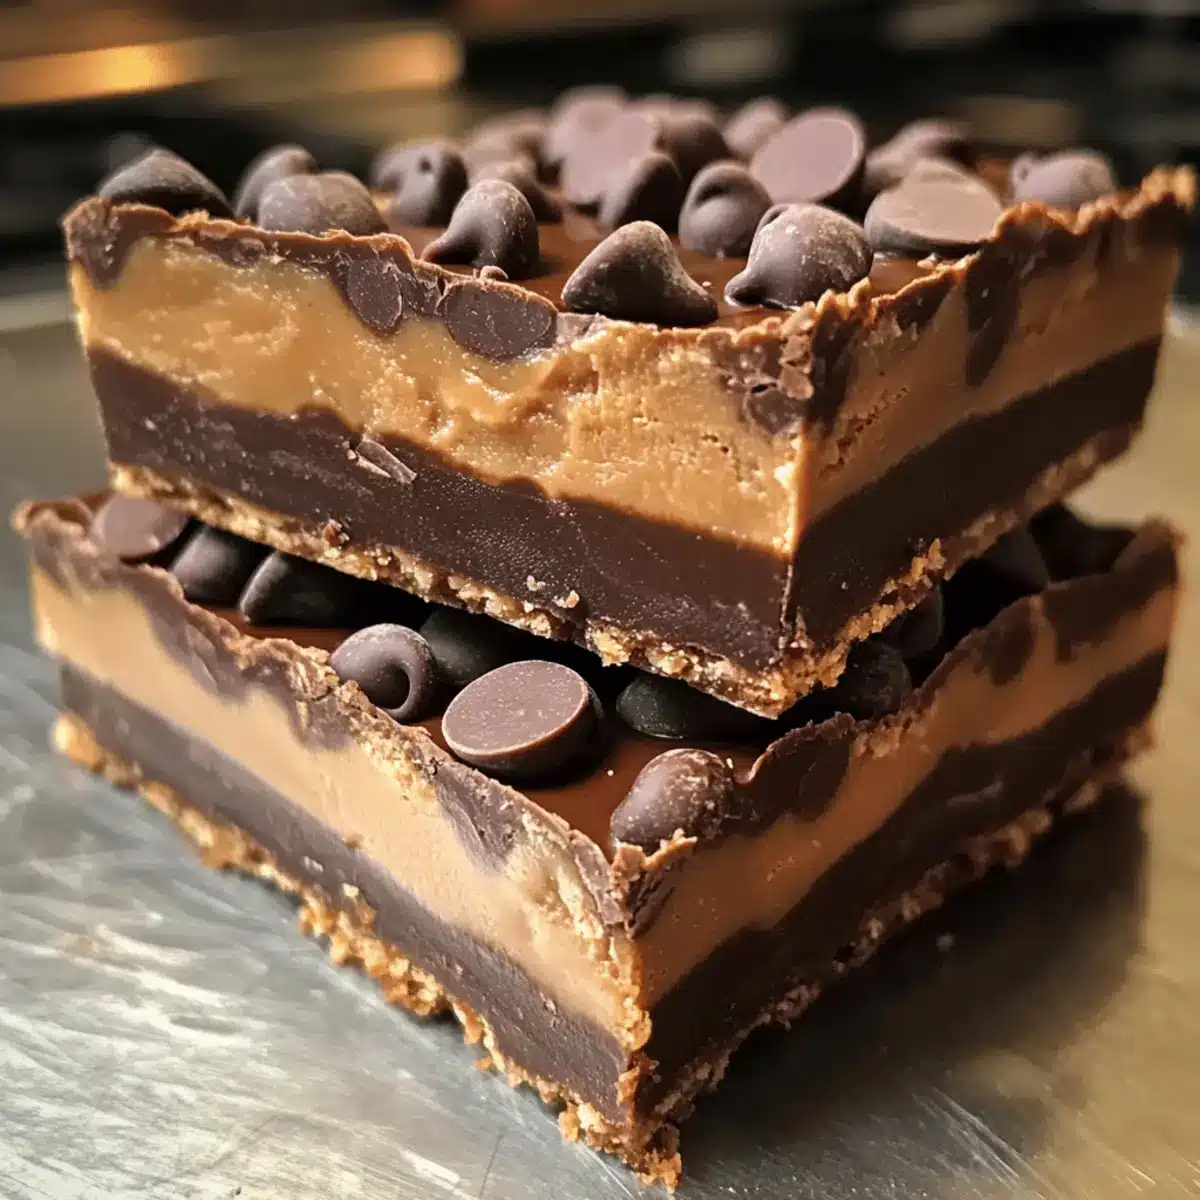
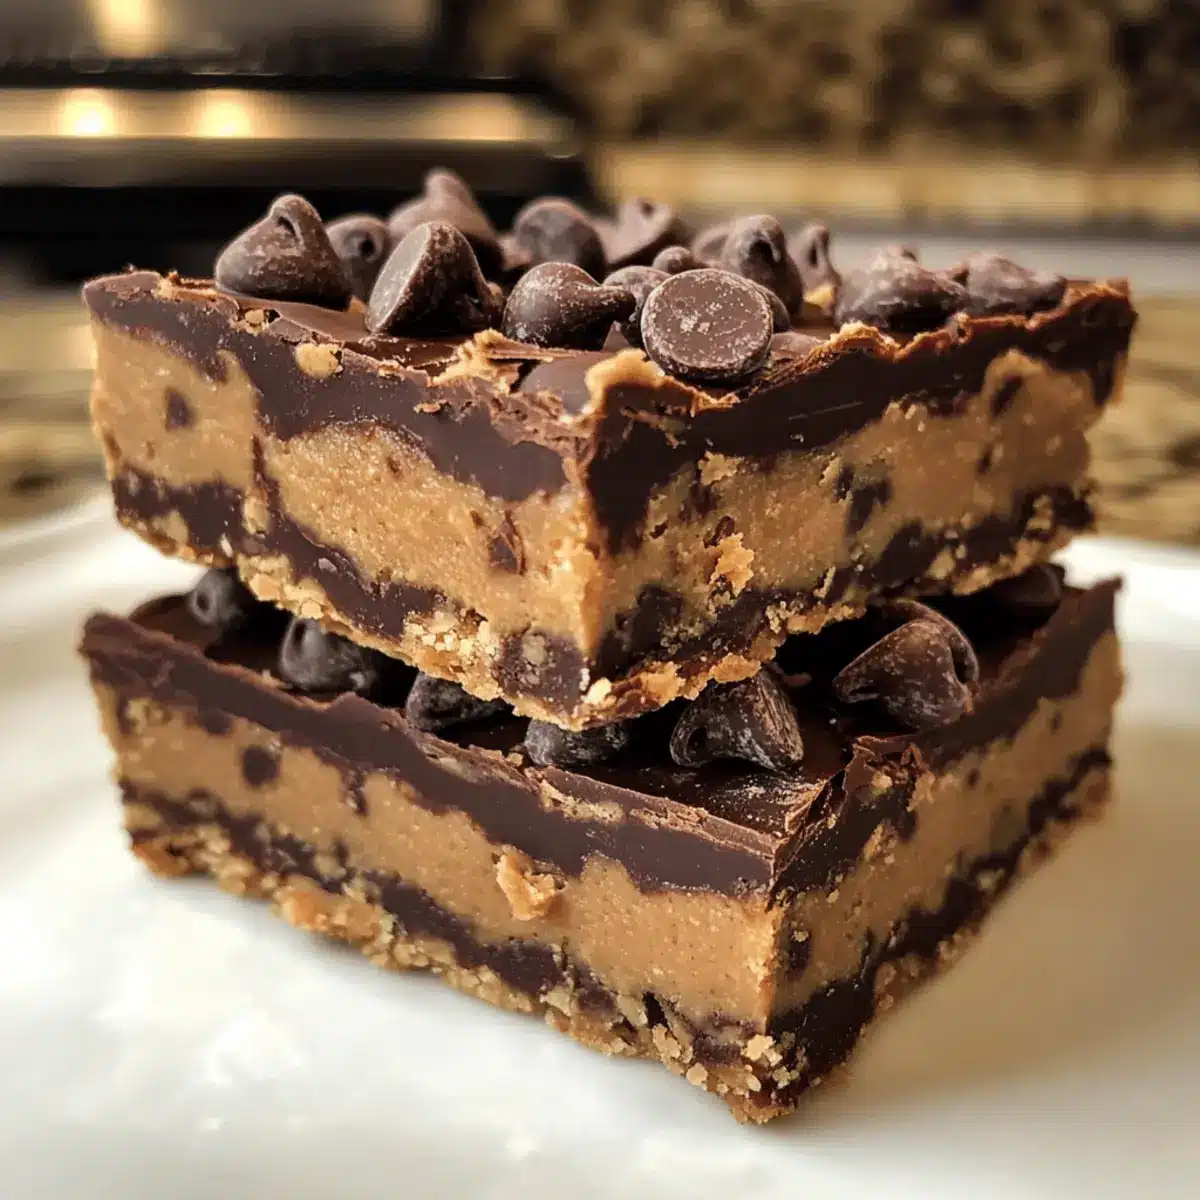
Standing in my kitchen, I can already smell the rich aroma of chocolate mingling with creamy peanut butter, and it instantly transports me to my childhood. These 4-Ingredient No-Bake Peanut Butter Chocolate Bars are my go-to for satisfying that sweet tooth without the hassle of baking. Best of all, they’re not just easy to whip up, but they’re also gluten-free, making them perfect for everyone. With a chewy texture and a delightful crunch from the oats, these bars are a dream come true for anyone tired of store-bought snacks. Plus, they’re a fantastic way to involve the kids in the kitchen—no oven required! So, who’s ready to take a walk down memory lane while enjoying a deliciously simple treat?
Why Are These Bars So Irresistible?
Simplicity at its finest: With only four ingredients, you can whip up these no-bake bars in no time—perfect for busy days or last-minute cravings!
Customizable to your taste: Feel free to experiment with different nut butters, sweeteners, or even add-ins like dried fruits or seeds. The variations are endless!
Guilt-free indulgence: They’re gluten-free, filling, and rich in protein, making them a snack you can feel good about.
Kid-friendly fun: These bars offer a great opportunity to involve your little ones in the kitchen—simple enough for them to help!
If you love quick, approachable recipes, check out my Garlic Parmesan Chicken or try the delightful Cheesy Garlic Chicken. Whether you need a pick-me-up after a long day or a quick treat for the kids, these bars won’t disappoint!
4-Ingredient No-Bake Peanut Butter Chocolate Bars
Ingredient Breakdown
• Here’s what you need to create these delightful bars!
For the Base
- Peanut Butter – Provides richness and creaminess; opt for natural peanut butter with no added sugars for a healthier option.
- Oats – Adds structure and a chewy texture; substitute with gluten-free oats if necessary.
For the Sweetness
- Chocolate Chips – Offers sweetness and is the main flavor component; dark chocolate chips can be swapped for milk chocolate or a dairy-free option for vegan bars.
- Honey or Maple Syrup – Acts as a binding agent and adds sweetness; agave syrup can serve as a vegan substitute, ensuring a delicious no-bake treat!
Step‑by‑Step Instructions for 4-Ingredient No-Bake Peanut Butter Chocolate Bars
Step 1: Prepare the Mixing Bowl
Gather your mixing bowl and measuring spoons. Start by adding 1 cup of creamy natural peanut butter and 1/2 cup of honey or maple syrup into the bowl. Mix thoroughly with a spatula until you achieve a smooth and well-combined consistency, which should take about 1-2 minutes. The mixture should be velvety with no lumps.
Step 2: Incorporate Oats and Chocolate Chips
Next, add 2 cups of rolled oats and 1 cup of chocolate chips to the peanut butter mixture. Stir gently, ensuring that the oats and chocolate chips are evenly distributed throughout the mixture. This step should take another 1-2 minutes, and you’ll know it’s ready when you see the oats and chocolate chips nicely coated in the peanut butter blend.
Step 3: Press into the Baking Dish
Line an 8×8-inch baking dish with parchment paper for easy removal. Using a spatula, transfer the mixture into the lined dish. With firm and even pressure, press the mixture down to create a level surface, smoothing out the top. Aim for a compact layer, as this will help the bars hold together well once set.
Step 4: Refrigerate
Cover the baking dish with plastic wrap or a lid and place it in the refrigerator. Allow the peanut butter chocolate bar mixture to chill for at least 30 minutes. This refrigeration time is crucial as it helps the bars to solidify and set properly, making them easier to slice.
Step 5: Cut and Serve
Once the bars have chilled and firmed up, remove them from the refrigerator. Lift the mixture out of the dish using the parchment paper. Cut into squares or rectangles with a sharp knife. For the best serving experience, keep these delicious 4-Ingredient No-Bake Peanut Butter Chocolate Bars chilled until ready to enjoy!
Make Ahead Options
These 4-Ingredient No-Bake Peanut Butter Chocolate Bars are perfect for meal prep enthusiasts who want to save time during busy weekdays! You can prepare the entire mixture up to 24 hours in advance. Simply combine the peanut butter, honey or maple syrup, oats, and chocolate chips as directed, and then press the mixture into the lined baking dish. After chilling for at least 30 minutes, cover the dish tightly with plastic wrap to maintain freshness. When you’re ready to serve, simply slice the bars and enjoy them cold, knowing they will be just as delicious and satisfying as when freshly made!
Variations & Substitutions for No-Bake Peanut Butter Chocolate Bars
Feel free to personalize these delightful bars with these tasty swaps and variations that cater to every palate!
-
Nut Butters: Swap peanut butter for almond or cashew butter for a new flavor twist. This simple change can make a huge difference in taste and texture and can be a great way to appeal to nut lovers!
-
Sweeteners: Use agave syrup instead of honey or maple syrup for a vegan-friendly alternative. The taste remains deliciously sweet while catering to different dietary needs.
-
Oat Varieties: Substitute rolled oats with quinoa flakes or puffed rice for an exciting crunch. This variation will add a delightful twist on texture, perfect for those seeking something different.
-
Chocolate Types: Switch dark chocolate chips with white chocolate or butterscotch chips for a sweeter treat. Not only does it change the flavor, but it also gives a visually appealing contrast when you slice them!
-
Texture Boost: Add chopped nuts, like walnuts or pecans, for an additional layer of crunch. This simple mix-in can elevate your bars while providing a satisfying bite.
-
Fruity Additions: Incorporate dried fruits such as cranberries or chopped apricots for a pop of natural sweetness and chewiness. The tartness from dried fruit balances beautifully with the creamy richness of the bars.
-
Flavor Enhancements: Sprinkle in a pinch of cinnamon or a teaspoon of vanilla extract to elevate the flavor profile. Just a hint of spice can transform these bars into an even more comforting treat.
Aren’t these variations just scrumptious? For more quick and easy meal ideas, don’t forget to check out my delightful Garlic Parmesan Chicken or indulge in the savory goodness of Jalapeno Popper Chicken! Each recipe provides more avenues for fun and creativity in the kitchen while keeping things stress-free and delicious.
Storage Tips for 4-Ingredient No-Bake Peanut Butter Chocolate Bars
Room Temperature: Store the bars at room temperature for up to 2 days, but they may soften. Use an airtight container to keep them fresh.
Fridge: These bars can be kept in the refrigerator for up to 1 week. Use an airtight container to maintain their chewy texture and flavor.
Freezer: If you want to prolong their shelf life, freeze the bars for up to 2 months. Wrap them individually in plastic wrap and place in a freezer-safe bag.
Reheating: For a delightful treat, let frozen bars thaw in the refrigerator overnight before enjoying, or simply enjoy them chilled right from the fridge!
What to Serve With 4-Ingredient No-Bake Peanut Butter Chocolate Bars
Pair these delectable bars with complementary delights to create a truly satisfying treat experience that fills your kitchen with warmth and joy.
-
Creamy Yogurt: A dollop of your favorite yogurt adds a refreshing tang to balance the sweetness of the bars. This combination makes for a delightful snack or breakfast option.
-
Fresh Fruit Salad: Juicy berries or sliced bananas bring a burst of freshness, enhancing the rich flavors of peanut butter and chocolate. Not only do they add brightness, but they also elevate the dish’s nutritional value.
-
Nutty Granola: Sprinkling some crunchy granola on top provides an extra layer of texture and nutty flavor, making each bite a delightful experience. It’s perfect for an afternoon pick-me-up along with a cup of tea.
-
Chocolate Dipping Sauce: Melted dark or milk chocolate can create an indulgent dip for added sweetness, making the bars extra special for dessert or a dinner party treat.
-
Cold Almond Milk: A glass of chilled almond milk not only complements the rich flavors of the bars but also offers a vegan-friendly pairing. It’s a great addition to your snack break, especially on warm days.
-
Dreamy Ice Cream: For the ultimate indulgence, serve these bars alongside a scoop of vanilla or chocolate ice cream. The creamy, cold dessert offers a heavenly contrast to the chewy texture of the bars, creating a symphony of flavors.
Expert Tips for Perfect No-Bake Bars
-
Room Temperature Peanut Butter: Ensure the peanut butter is at room temperature for easier mixing, leading to a smoother texture in your bars.
-
Firm Pressing: Press the mixture firmly into the pan to achieve cohesive bars; this helps them hold together and prevents crumbling after cutting.
-
Allow Enough Refrigeration: Don’t skip or shorten the refrigeration time! Letting the bars chill for at least 30 minutes is essential for them to set properly.
-
Mix Carefully: Avoid overmixing after adding oats and chocolate chips. This keeps your no-bake bars from becoming crumbly while ensuring an enjoyable texture.
-
Customize Wisely: Feel free to experiment with various nut butters or sweeteners, but keep track of liquid ratios to maintain the balance in your no-bake peanut butter chocolate bars.
4-Ingredient No-Bake Peanut Butter Chocolate Bars Recipe FAQs
What type of peanut butter is best for these bars?
Absolutely! I recommend using natural peanut butter without added sugars or oils for the best flavor and health benefits. Look for brands that list peanuts as the only ingredient. This ensures a creamy texture and a guilt-free indulgence!
How should I store the no-bake peanut butter chocolate bars?
Very! You can store the bars at room temperature for up to 2 days, but they may become softer. For optimal freshness, keep them in an airtight container in the refrigerator for up to 1 week. This will help maintain their chewy texture, and you can enjoy them chilled!
Can I freeze the peanut butter chocolate bars for later?
Yes, you can! To freeze these delicious bars, wrap each one individually in plastic wrap and place them in a freezer-safe bag. They can be stored in the freezer for up to 2 months. When you’re ready to enjoy, just let them thaw in the refrigerator overnight or enjoy them straight from the freezer!
What can I do if my mixture seems crumbly?
If you find that your bars are crumbly, it might be due to not enough binding ingredients. To fix this, return the mixture to the bowl and add a bit more peanut butter or honey/maple syrup—add just a tablespoon at a time. Mix gently until the mixture holds together nicely before pressing it back into the pan to chill.
Are these bars suitable for people with nut allergies?
No, they’re not! Since the primary ingredient is peanut butter, they are not safe for individuals with peanut allergies. If you’re looking for an alternative, you could substitute the peanut butter with sunbutter, made from sunflower seeds, to cater to nut-free dietary needs. Always check labels to ensure any added ingredients are safe for those with allergies.
What’s the best way to cut these bars?
I recommend using a sharp knife and cutting them while they are still chilled. This helps prevent the chocolate from melting and ensures clean cuts. You can even run the knife under warm water, then wipe it dry before making your cuts for perfectly neat squares!
Mouthwatering Slow Cooker Butter Chicken in Just 30 Minutes
Ingredients
Equipment
Method
- Gather your mixing bowl and measuring spoons. Start by adding 1 cup of creamy natural peanut butter and 1/2 cup of honey or maple syrup into the bowl. Mix thoroughly with a spatula until you achieve a smooth and well-combined consistency.
- Next, add 2 cups of rolled oats and 1 cup of chocolate chips to the peanut butter mixture. Stir gently.
- Line an 8x8-inch baking dish with parchment paper. Transfer the mixture into the lined dish and press down to create a level surface.
- Cover the baking dish and place it in the refrigerator. Allow to chill for at least 30 minutes.
- Once chilled, cut into squares or rectangles with a sharp knife. Serve chilled.
Leave a Reply