
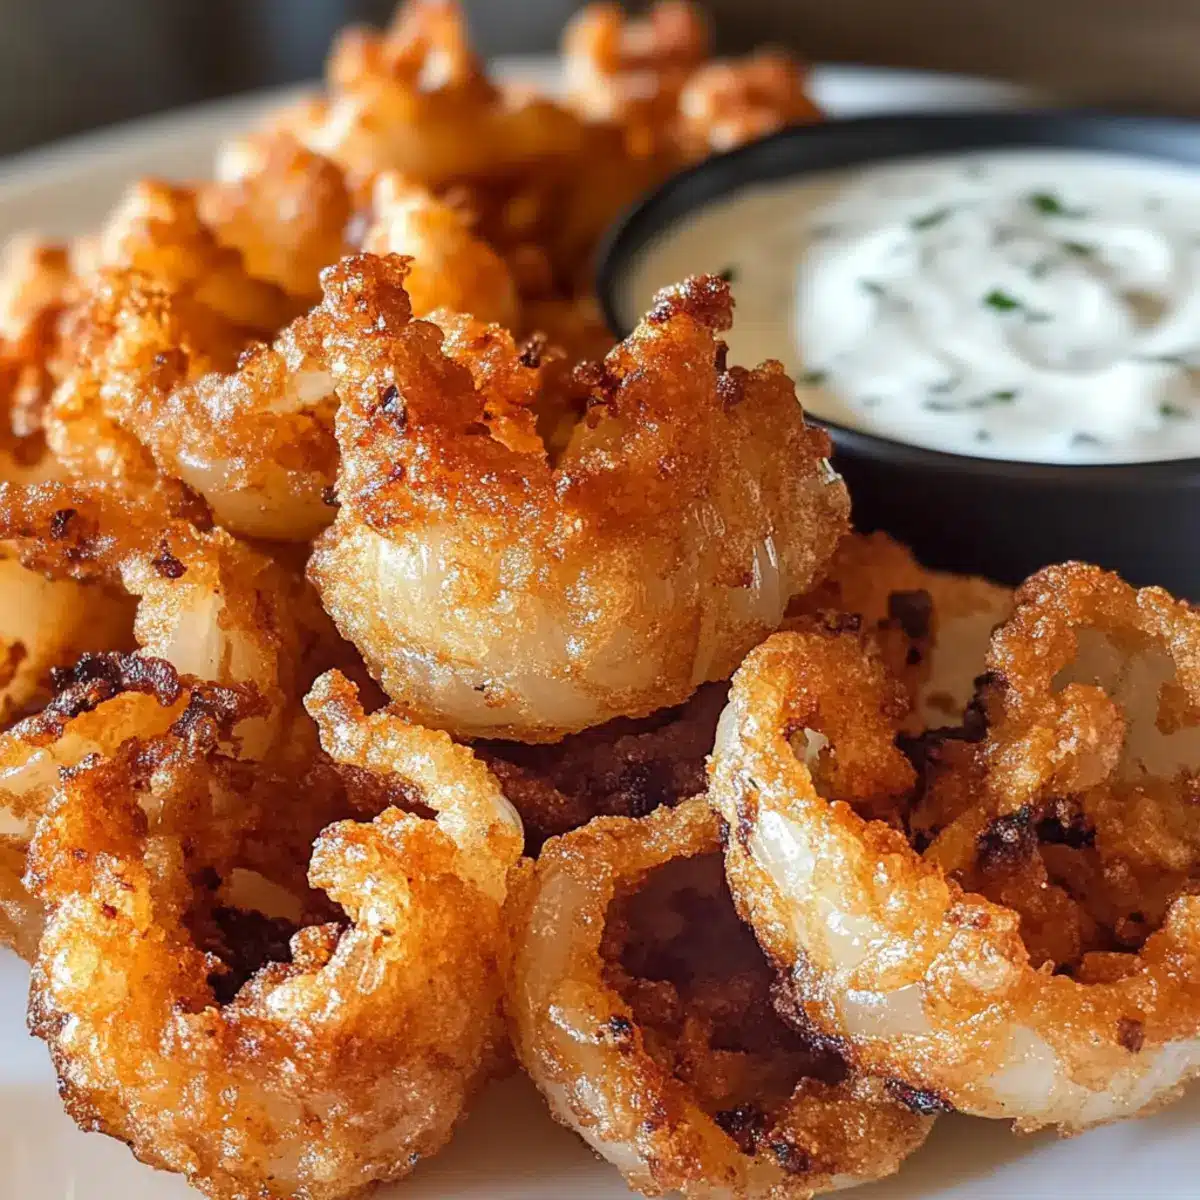
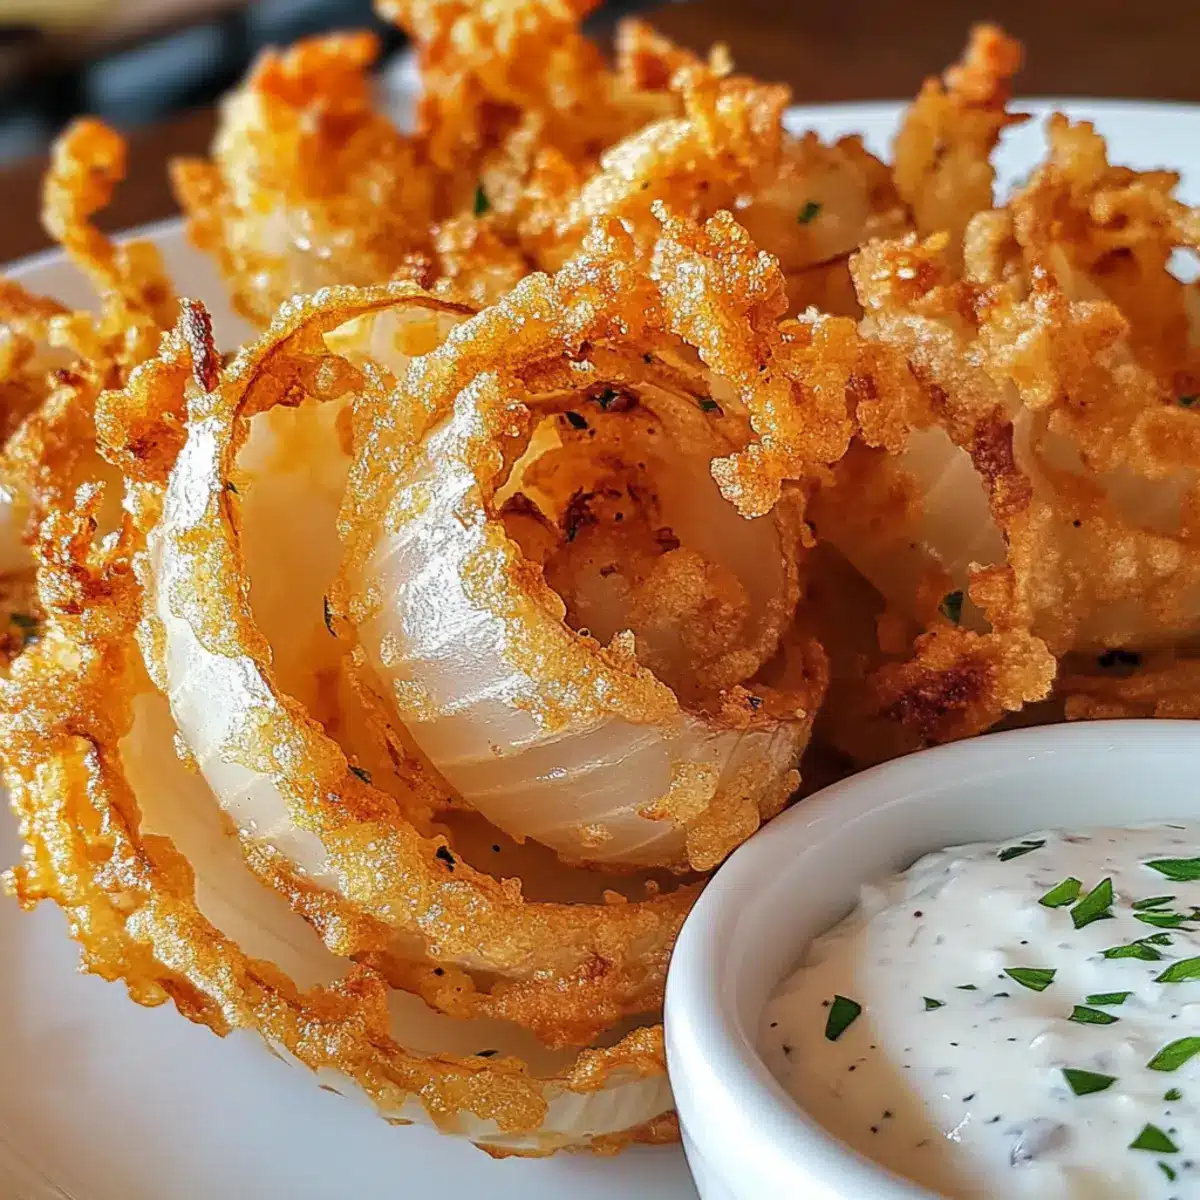
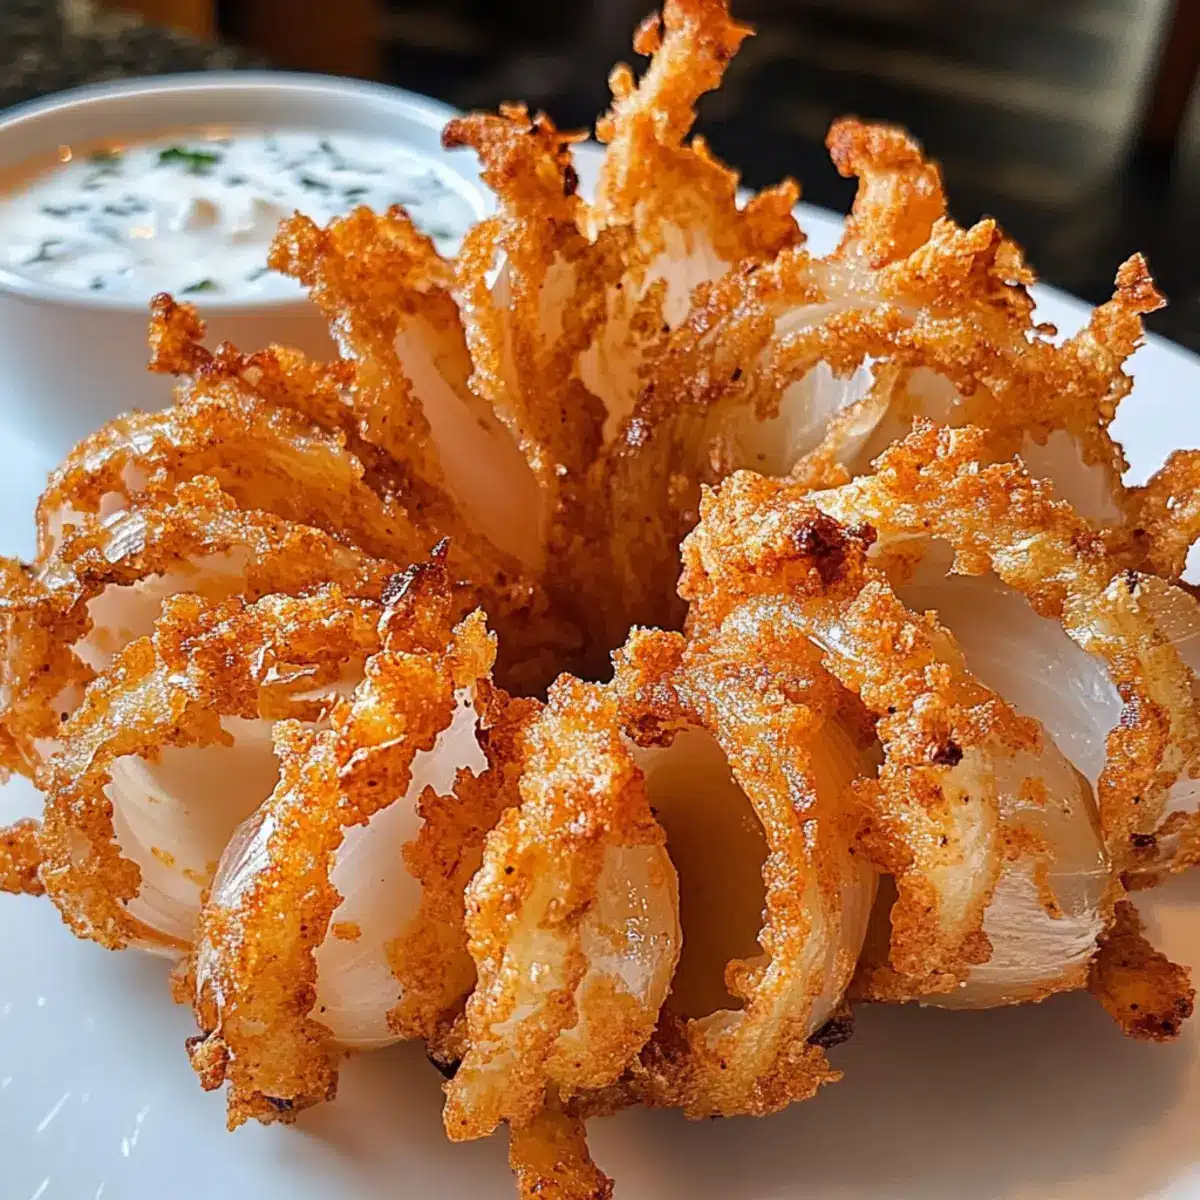
As I pulled the golden-brown mini bloomin’ onions from the fryer, the intoxicating aroma of crispy goodness filled my kitchen, making my mouth water in anticipation. There’s something magical about these bite-sized delights partnered with a velvety, creamy buttermilk ranch dip; they transform any gathering into a celebration. Perfect for game day snacking or as a shareable appetizer, these crispy mini bloomin’ onions are bound to wow your friends and family alike. Not only are they indulgent and fun to prepare, but they also offer you a gluten-free option that everyone can enjoy. Are you ready to impress your taste buds and elevate your appetizer game? Let’s dive into this delicious recipe!
Why are Mini Bloomin’ Onions irresistible?
Crunchy texture: Each onion petal delivers a satisfying crunch that keeps you coming back for more. Savory goodness: The blend of spices enhances the natural sweetness of the onions, providing a flavor explosion that pairs perfectly with the creamy dip. Versatile serving: Ideal for any occasion, from casual family dinners to festive parties, they easily become the star of the table. Plus, check out variations like our Crock Pot Dip or Parmesan Chicken Pasta for a crowd-pleasing feast. Gluten-free option: Adapt the recipe with gluten-free flour and breadcrumbs, making it inclusive for everyone. Quick and easy: With simple ingredients and straightforward steps, you can whip up these appetizers in no time, delighting your guests with minimal effort.
Mini Bloomin’ Onions Ingredients
• Ready to create these crispy delights? Let’s gather our ingredients!
For the Onions
- Onion – Choose sweeter varieties like Vidalia or Walla Walla for an irresistible taste.
- Buttermilk – Essential for soaking the onions and ensuring the coating adheres perfectly. Substitute with regular milk plus a tablespoon of vinegar if needed.
For the Coating
- All-Purpose Flour – Creates that crunchy outer layer; gluten-free flour works great for a gluten-free option.
- Seasoned Breadcrumbs – Adds delightful texture; opt for gluten-free breadcrumbs for a gluten-free twist.
- Spices (Paprika, Garlic Powder, Cayenne Pepper, Salt, Pepper) – Bring depth and savory warmth to the mix; feel free to adjust to your taste.
For Frying
- Vegetable Oil – Necessary for achieving that dreamily crispy finish when deep frying the onions.
For the Ranch Dip
- Buttermilk – A must-have for the creamy consistency; adjust according to your preferences.
- Mayonnaise – Provides richness; swap with Greek yogurt for a tangy variation.
- Seasonings (Garlic Powder, Dried Dill, Salt, Pepper) – Elevates the flavor of your dip, making it the perfect partner for your mini bloomin’ onions.
Now that you have everything ready, we’re just moments away from creating these scrumptious crispy mini bloomin’ onions!
Step‑by‑Step Instructions for Crispy Mini Bloomin’ Onions with Creamy Buttermilk Ranch Dip
Step 1: Prepare the Onions
Begin by peeling your chosen sweet onions, like Vidalia or Walla Walla. Carefully slice off the top 1/4 inch and then cut downwards into the onion, creating 8-12 evenly spaced cuts without slicing through the base. This allows the petals to bloom during frying, resulting in the impressive presentation of your mini bloomin’ onions.
Step 2: Soak in Buttermilk
In a large bowl, pour in enough buttermilk to fully submerge your prepared onions. Let them soak for about 10-15 minutes. This crucial step enhances flavor and ensures the coating adheres perfectly, leading to a delectably crispy bite.
Step 3: Mix the Coating
While the onions soak, grab another bowl and combine all-purpose flour, seasoned breadcrumbs, paprika, garlic powder, cayenne pepper (if desired), salt, and pepper. Stir well to ensure the spices are evenly distributed through the mixture, which forms the crunchy and flavorful coating for your mini bloomin’ onions.
Step 4: Coat the Onions
After soaking, remove the onions from the buttermilk, allowing excess liquid to drip off. Take each onion and dredge it in the prepared flour mixture, ensuring the coating gets into the petals and covers the onion thoroughly. This step is crucial for achieving that satisfying crunch everyone craves in a crispy appetizer.
Step 5: Heat the Oil
In a deep skillet or fryer, pour enough vegetable oil to fill it about 2-3 inches deep. Heat the oil to 350°F (175°C), using a thermometer for accuracy. Maintaining the correct temperature is vital for frying; too low will make them soggy, while too high can cause burning.
Step 6: Fry the Onions
Once the oil is heated, carefully lower each coated onion into the hot oil. Fry them for about 3-4 minutes or until they turn golden brown and crispy, watching closely for that perfect color. Use a slotted spoon to gently move them around during frying, ensuring even cooking and preventing sticking.
Step 7: Drain and Prepare the Dip
As the mini bloomin’ onions finish frying, transfer them to a plate lined with paper towels to drain excess oil. In a separate bowl, prepare the creamy buttermilk ranch dip by mixing buttermilk, mayonnaise, garlic powder, dried dill, salt, and pepper until smooth. This dip will perfectly complement your crispy creations.
Step 8: Serve and Enjoy
Serve your crispy mini bloomin’ onions hot, garnished with freshly chopped parsley or chives for an added touch. Arrange them alongside the creamy buttermilk ranch dip, inviting everyone to dive into this indulgent appetizer. These mini bloomin’ onions are not just delicious but also a visual treat that will delight your guests!
What to Serve with Crispy Mini Bloomin’ Onions with Creamy Buttermilk Ranch Dip
The perfect crispy mini bloomin’ onions deserve a spread of delightful accompaniments to make your dining experience truly unforgettable.
-
Creamy Coleslaw: A crunchy and tangy slaw adds a refreshing contrast and balances the richness of the fried onions. It brings a lively texture, perfect for every bite.
-
Sizzling Grilled Burgers: Juicy, savory burgers can elevate your appetizer game. Pair your mini bloomin’ onions alongside for an indulgent treat that marries flavors beautifully.
-
Spicy Chicken Wings: The heat from buffalo wings complements the savory onion petals, creating a delightful finger-food feast that will have everyone raving.
-
Zesty Corn Salad: A fresh corn salad brings bright, sweet notes to the table and provides a refreshing crunch that pairs flawlessly with the crispy texture of the onions.
-
Roasted Garlic Mashed Potatoes: These creamy, buttery potatoes create a comforting side that harmonizes with the crunchiness of your mini bloomin’ onions.
-
Crisp Side Salad: A simple green salad with a tangy vinaigrette adds an element of freshness and lightness, balancing the indulgence of your appetizer platter.
-
Icy Cold Beverages: Consider serving chilled craft beers or sparkling lemonade, which wash down the savory bites and enhance the overall joyful experience.
-
Decadent Chocolate Brownies: For a sweet finish, brownies offer a rich, fudgy contrast that invites dessert lovers to indulge alongside savory snacks.
How to Store and Freeze Mini Bloomin’ Onions
-
Fridge: Store leftover crispy mini bloomin’ onions in an airtight container for up to 2 days. To reheat, place them in the oven at 375°F (190°C) for about 10-15 minutes to regain their crunch.
-
Freezer: For longer storage, freeze uncoated mini bloomin’ onions before frying. Lay them flat on a baking sheet until solid, then transfer to a freezer bag for up to 3 months.
-
Reheating: When ready to enjoy, simply fry from frozen, adding a couple of extra minutes to the cooking time. This ensures they crisp up beautifully while still being tender inside.
-
Preparation Ahead: You can prepare the onions up to the coating stage, refrigerate them, and fry just before serving for the freshest taste of your mini bloomin’ onions.
Expert Tips for Crispy Mini Bloomin’ Onions
-
Onion Selection: Choose sweeter onions like Vidalia or Walla Walla for the best flavor and texture. Avoid stronger onions like yellow onions, which can overpower the dish.
-
Soaking Time: Don’t skip the buttermilk soak—this step ensures the coating sticks effectively and results in a perfect crunch.
-
Oil Temperature: Use a thermometer to maintain oil at 350°F (175°C). If the oil is too low, your mini bloomin’ onions will absorb oil and become soggy.
-
Coating Technique: Ensure the coating gets deep into the onion petals. Use a gentle touch while dredging; a thorough coating makes all the difference in texture.
-
Creative Dips: Feel free to experiment with your ranch dip! Add lemon zest or fresh herbs for a delightful twist that complements the crispy mini bloomin’ onions perfectly.
-
Serving Fresh: For optimal enjoyment, serve the onions immediately after frying. If making ahead, reheat in the oven to restore their crispy texture.
Make Ahead Options
These Crispy Mini Bloomin’ Onions are perfect for busy home cooks who want to save time without sacrificing flavor! You can prep the onions by cutting and soaking them in buttermilk up to 24 hours in advance; just keep them covered in the refrigerator to maintain their freshness. Additionally, you can mix the coating ingredients (flour, breadcrumbs, and spices) and store them in an airtight container for up to 3 days. When you’re ready to serve, simply coat the pre-soaked onions and fry them as instructed. This approach ensures that your mini bloomin’ onions are just as delicious when finished, allowing you to enjoy the fun of cooking without the hassle on the day of serving!
Mini Bloomin’ Onions Variations Made Easy
Feel free to unleash your creativity and customize this delightful recipe to suit your taste!
-
Dairy-Free: Substitute buttermilk with almond milk and add a splash of apple cider vinegar for a plant-based option.
-
Spicy Kick: Add extra cayenne pepper or crushed red pepper flakes to the coating for a fiery twist. Each bite will pack a punch!
-
Herb-Infused: Sprinkle in fresh herbs like dill or chives into your coating mix for an added burst of flavor that complements the onions beautifully.
-
Cheesy Goodness: Mix some grated Parmesan cheese into your coating to create a rich, savory crust that takes these mini bloomin’ onions to the next level.
-
Baked Version: For a healthier twist, bake the coated onions at 425°F (220°C) for 20-25 minutes until golden, achieving a crunchy finish without frying.
-
Alternative Dips: Experiment with various dips like tangy tzatziki or smoky chipotle mayo to switch things up from the classic ranch. Both will tantalize your taste buds!
-
Different Onions: Try using red or sweet onions for a sweeter flavor profile or even shallots for a more delicate taste and unique twist on the classic.
-
Crispy Coatings: Enhance texture by incorporating crushed cornflakes or panko breadcrumbs into your coating for extra crunch.
Remember, the beauty of cooking lies in experimentation. These variations will not only satisfy your cravings but also make your gathering more exciting! Looking for more delicious ideas? Don’t miss our tempting Tortellini Soup with Sausage or amazing Chicken Bacon Ranch delights to accompany your crispy creations!
Crispy Mini Bloomin’ Onions with Creamy Buttermilk Ranch Dip Recipe FAQs
How can I choose the best onions for this recipe?
Absolutely! Selecting the right onion can elevate your dish tremendously. I recommend going for sweeter varieties like Vidalia or Walla Walla, as they offer a milder flavor that pairs wonderfully with the crispy coating. Avoid stronger onions like yellow onions, which can dominate the taste. When you peel and cut into them, look for onions that are firm and free of dark spots or blemishes.
What is the best way to store leftover mini bloomin’ onions?
Leftover crispy mini bloomin’ onions can be stored in an airtight container in the refrigerator for up to 2 days. To reheat them and maintain their delicious crunch, preheat your oven to 375°F (190°C) and bake for about 10-15 minutes. This method helps them regain that crispy texture without becoming soggy.
Can I freeze the mini bloomin’ onions?
Very! Freezing uncoated mini bloomin’ onions is a fantastic way to extend their shelf life. Simply prepare the onions and lay them flat on a baking sheet until solid, then transfer them to a zip-top freezer bag and store for up to 3 months. When you’re ready to enjoy, fry them directly from the freezer, adding a couple of extra minutes to the cooking time for perfect results.
What should I do if my onions turn out soggy?
If your mini bloomin’ onions have turned out soggy, there’s a chance the oil wasn’t hot enough during frying. Ensure your oil reaches a consistent temperature of 350°F (175°C) before adding the onions. Also, make sure to properly drain them on paper towels after frying to remove excess oil; this step is key in achieving that desired crunch.
Are there any dietary considerations for this recipe?
Absolutely! If you’re looking for gluten-free options, simply substitute all-purpose flour and breadcrumbs for their gluten-free versions. It’s a simple swap that doesn’t compromise on taste. When serving with the ranch dip, you can also swap mayonnaise for Greek yogurt if you prefer a tangier flavor or are looking for a lighter option. Always ensure no ingredients in your coating or dip trigger any allergies for your guests.
Can I prepare these mini bloomin’ onions ahead of time?
Yes! You can prepare the onions all the way to the coating stage in advance. Just cover them tightly and refrigerate them until you’re ready to fry. This way, you’ll have a head start during your event, allowing you to fry them fresh just before serving for that delightful, crispy experience.

Crispy Mini Bloomin’ Onions with Dreamy Buttermilk Ranch Dip
Ingredients
Equipment
Method
- Step 1: Prepare the Onions - Peel the onions and slice off the top 1/4 inch. Make 8-12 evenly spaced cuts without slicing through the base.
- Step 2: Soak in Buttermilk - Submerge onions in buttermilk for 10-15 minutes.
- Step 3: Mix the Coating - Combine flour, breadcrumbs, paprika, garlic powder, cayenne pepper, salt, and pepper.
- Step 4: Coat the Onions - Dredge soaked onions in flour mixture thoroughly.
- Step 5: Heat the Oil - Heat oil to 350°F (175°C) in a deep skillet.
- Step 6: Fry the Onions - Fry onions for 3-4 minutes until golden brown.
- Step 7: Drain and Prepare the Dip - Drain fried onions and mix ranch dip ingredients until smooth.
- Step 8: Serve and Enjoy - Serve onions hot with the ranch dip and enjoy!
Leave a Reply