
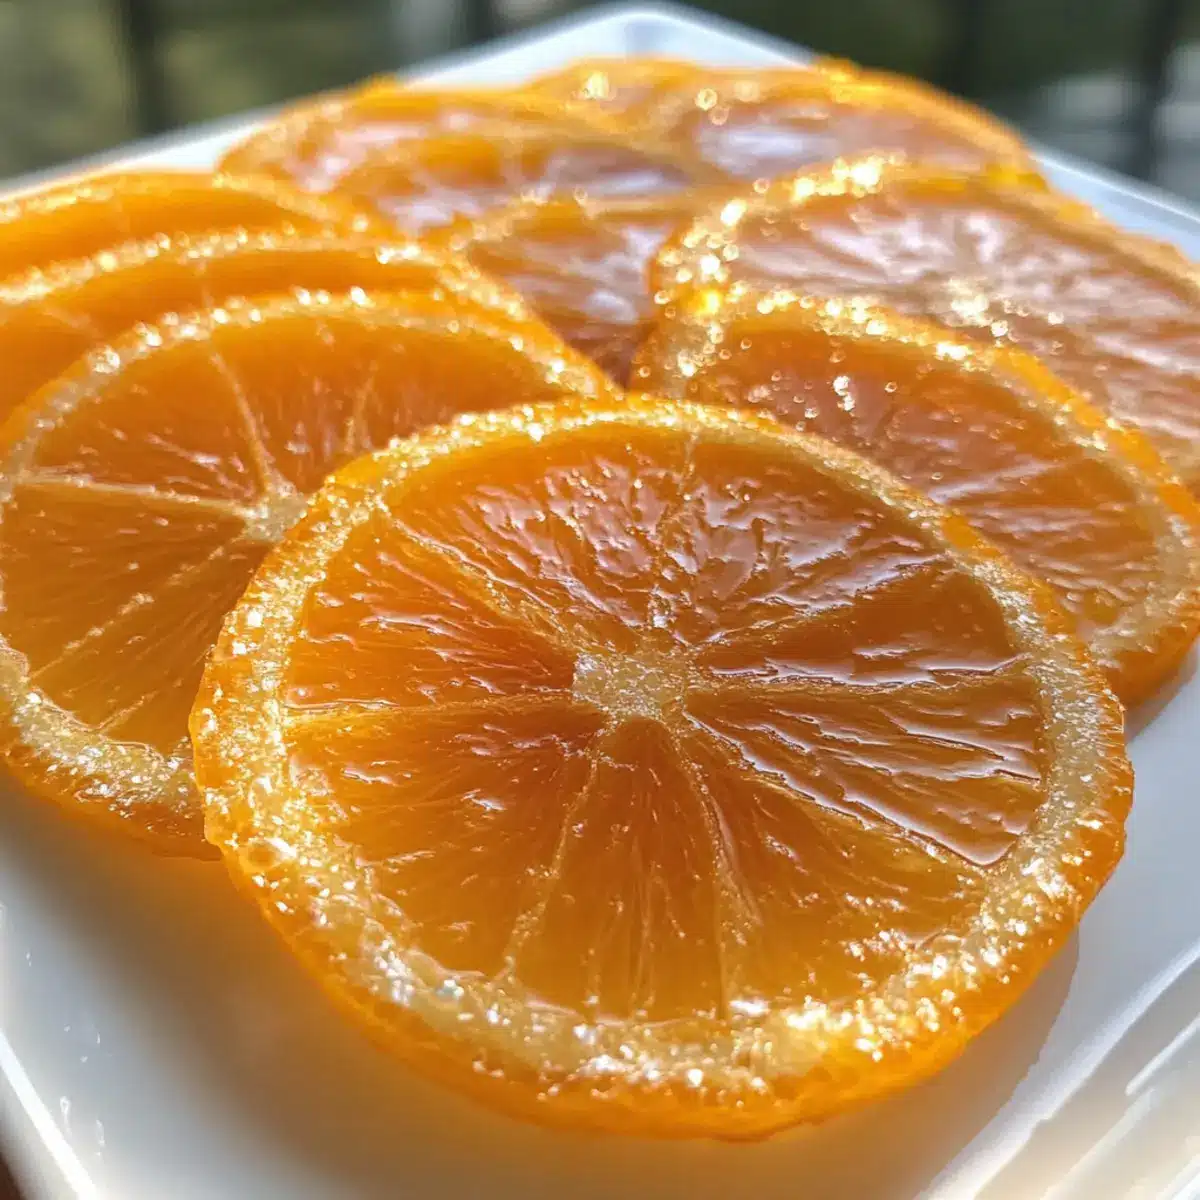
As I peeled back the bright skin of the oranges, the sweet, zesty aroma filled my kitchen, instantly transporting me to sun-soaked orchards. This is the magic behind my Classic Homemade Orange Candy—a simple yet elegant treat that turns these citrus gems into chewy jewels of delight. With just two ingredients, this naturally vegan and gluten-free recipe not only satisfies your sweet tooth but also provides a stunning addition to snacks or desserts. Whether you’re looking to brighten up a cake or simply enjoy a midday treat, these candied orange slices are quick to make and offer a delightful balance of sweet and tangy flavors. Curious about how to create this kitchen masterpiece? Let’s dive in!

Why Make Homemade Orange Candy?
Simplicity at its finest: With just two ingredients, this recipe is incredibly easy, allowing anyone to create a gourmet treat without a hassle.
Versatile and delightful: Use these candied citrus slices to elevate desserts like cheesecakes or tarts, or add them to your favorite cocktails.
Vibrant flavor profile: The sweet and tangy taste of these candies will brighten your day and impress your guests.
Storeable treats: Perfect for meal prep, these goodies can last in an airtight container for up to a month.
For more flavorful recipes, consider trying my delicious Homemade Butter Chicken or warming Potsticker Soup.
Homemade Orange Candy Ingredients
For the Candy
• Oranges (3 small oranges or tangelos) – Choose small oranges for more consistent slice shapes and a burst of citrus flavor.
• Granulated Sugar (3 cups) – This is essential for creating a syrup that will candy the oranges and preserve their delightful taste.
• Water (3 cups) – Needed to dissolve the sugar and form the syrup for that perfect homemade orange candy texture.
Optional Finishes
• Granulated Sugar (for rolling) – Adds a frosted effect that enhances the candy’s presentation and sweetness.
• Melted Chocolate (for dipping) – A luxurious touch that pairs wonderfully with the citrus flavor for a decadent treat.
Step‑by‑Step Instructions for Homemade Orange Candy
Step 1: Prepare Oranges
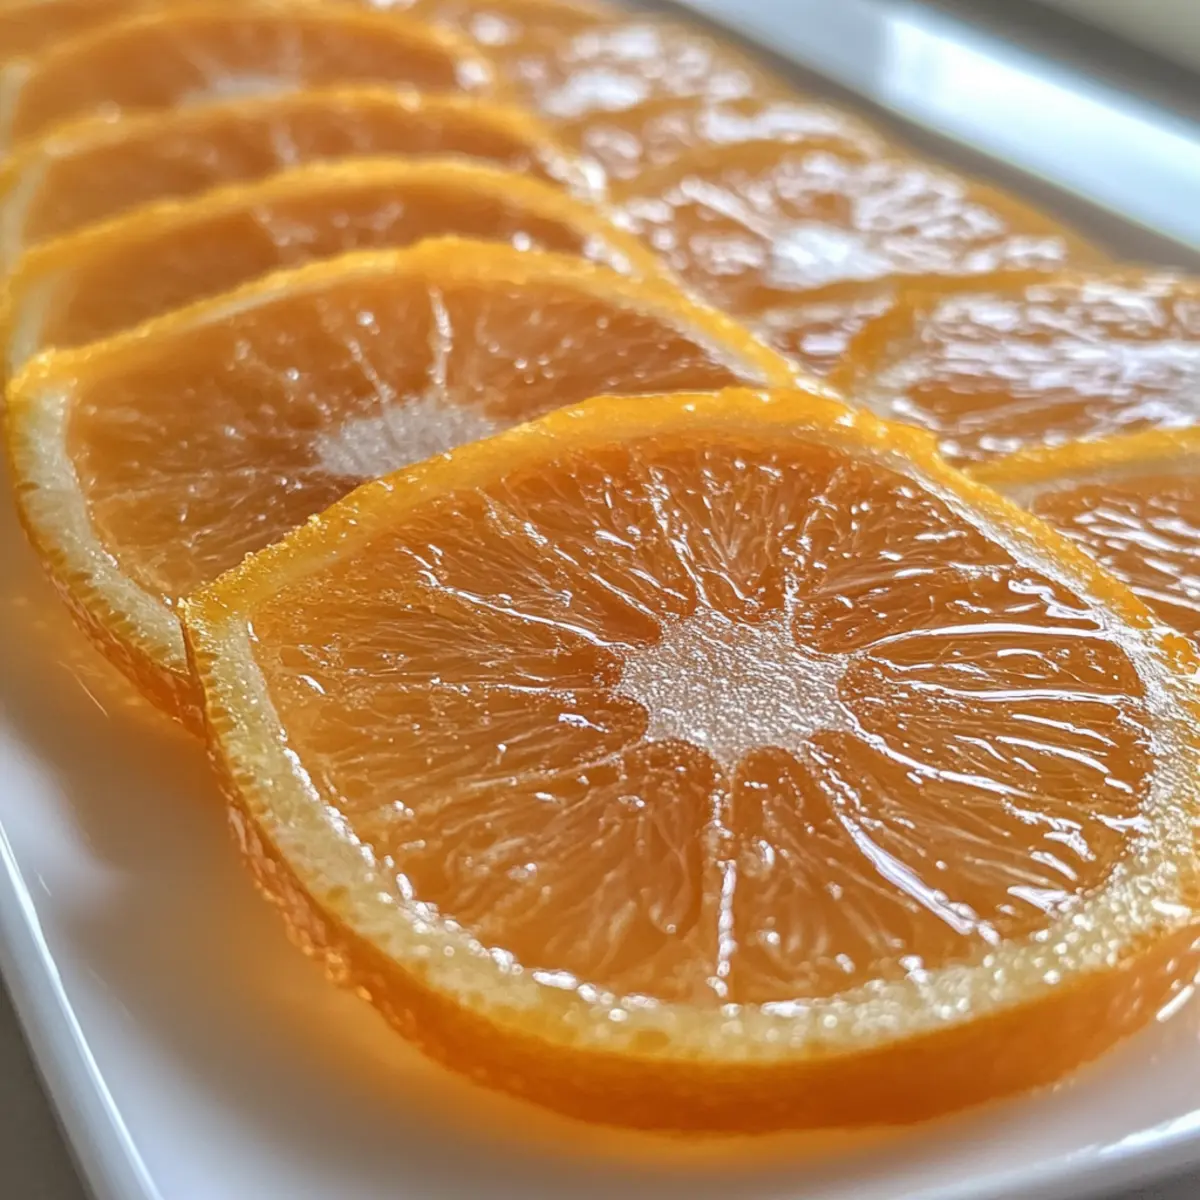
Begin by thoroughly washing the oranges to remove any pesticides or wax. Using a sharp knife or mandoline, slice the oranges into ¼-inch rounds for uniformity. Ensure the slices are even for consistent candying. You’ll need about three small oranges to achieve the ideal balance of sweet and tangy flavors in your homemade orange candy.
Step 2: Make Syrup
In a large skillet, combine three cups of granulated sugar and three cups of water. Bring the mixture to a gentle boil over medium heat, stirring continuously until the sugar completely dissolves, resulting in a clear syrup. This step is crucial; watch for bubbling but avoid cooking it too vigorously as you start the candy-making process.
Step 3: Simmer Oranges
Once the syrup reaches a boiling point, reduce the heat to a gentle simmer. Carefully add the orange slices in a single layer without overcrowding. Simmer for 45 to 60 minutes, turning the slices occasionally with tongs. The peel will gradually become translucent, indicating that they are transforming into delightful homemade orange candy.
Step 4: Dry Slices
Using the tongs, remove the candied orange slices from the syrup and lay them on a wire rack in a single layer. Allow them to dry uncovered for about 24 to 48 hours. After this time, the slices should be tacky but set, ready to showcase their beautiful glossy finish and chewy texture.
Step 5: Optional Finishes
If you desire an extra touch, consider rolling the dried orange slices in granulated sugar for a frosted appearance. Alternatively, you can dip them in melted chocolate for a luxurious treat. This gives your homemade orange candy a delightful contrast between the sweet citrus and rich chocolate, making them perfect for snacking or gifting.

Homemade Orange Candy: Fun Variations
Feel free to get creative with these delightful twists on your homemade orange candy! Let your kitchen be your playground as you explore new flavors and textures.
- Citrus Twist: Experiment with lemons, limes, or even blood oranges for unique flavor profiles. Each citrus brings its own zest and brightness!
- Mini Bites: Use clementines or mandarins for bite-sized treats that are perfect for snacking or sharing. Kids will love these fun-sized candy gems!
- Flavor Infusion: Add a few sprigs of fresh mint or rosemary to the syrup for an aromatic touch that deepens the flavor. It’s a lovely surprise in every bite!
- Spicy Kick: Incorporate a pinch of cayenne or chili powder into the syrup for a deliciously unexpected heat that balances the sweetness. Spice lovers will adore this version!
- Chocolate Dip: For a decadent twist, dip the dried orange slices in melted dark or white chocolate. The creamy chocolate complements the tangy citrus beautifully!
- Nuts & Seeds: For added crunch, sprinkle some finely chopped nuts or sesame seeds on top of the slices while they’re drying. This brings a delightful texture to your candied treats!
- Global Inspiration: Try adding vanilla bean or cinnamon to the syrup for a warm, comforting flavor reminiscent of classic desserts from around the world. Just imagine the aromatic sweetness!
- Pineapple Paragon: Swap in diced fresh pineapple for a tropical variation, turning your traditional recipe into a delightful Hawaiian-inspired candy. It’s like a sunny vacation in your mouth!
For more delicious homemade recipes, consider trying my delightful Yaki Udon Noodle or adding a touch of warmth to your meal with Potsticker Soup. Happy cooking!
Expert Tips for Homemade Orange Candy
- Slice Uniformly: Ensure all orange slices are ¼-inch thick for even candying. Thin or thick slices can lead to inconsistent texture in your homemade orange candy.
- Watch the Simmer: Maintain a gentle simmer; boiling too hard can burn the syrup. If it caramelizes, you’ll need to start over with fresh sugar syrup.
- Proper Drying: Allow the slices to dry for 24-48 hours; if they feel sticky, they need a bit more time. This step is crucial for the perfect chewy finish.
- Sugar Quality Matters: Use good-quality granulated sugar—substitutes won’t provide the same preservation and sweetness required for your homemade orange candy.
- Experiment with Flavors: Once you’re comfortable with the basic recipe, try mixing in different citrus fruits for unique flavor profiles.
What to Serve with Classic Homemade Orange Candy
A delightful candy deserves an equally charming ensemble to elevate your culinary experience.
- Cheesecake Topping: Add candied orange slices atop cheesecake for a burst of color and a sweet-tangy balance, transforming a simple dessert into a showstopper.
- Fruit Salad: Mix with fresh fruits like strawberries, kiwi, and pineapple for a refreshing salad that combines textures and flavors beautifully. The chewy candy contrasts nicely with the juiciness of fresh fruits.
- Hot Tea or Earl Grey: Pair your candy with a warm cup of tea—especially an aromatic Earl Grey. Its citrus notes complement the homemade orange candy while creating a soothing experience.
- Chocolate Fondue: Use the candied slices for dipping in chocolate fondue; the sweetness and tanginess provide a fun contrast that elevates a classic dessert.
- Ice Cream Sundae: Top your favorite scoop of vanilla ice cream with candied oranges. The creamy texture paired with zesty sweetness creates an indulgent treat.
- Mimosas: For a sparkling brunch, add a few slices to your mimosas for a citrus twist. The candy will add a sweet note that balances the cocktail.
- Toast with Cream Cheese: Spread cream cheese on toast and add pieces of candied orange for an exciting breakfast option. The flavors come together in a surprisingly delightful way, making your morning feel special.
- Granola: Sprinkle candied orange slices in granola or yogurt bowls for added sweetness and chewy texture, making your breakfasts not only nutritious but also exciting.
How to Store and Freeze Homemade Orange Candy
Room Temperature: Keep the homemade orange candy in an airtight container at room temperature for up to one month. Use parchment paper between layers to prevent sticking.
Fridge: If you prefer longer storage, you can refrigerate the candy in an airtight container for up to two months. Just ensure it’s sealed well to maintain its chewy texture.
Freezer: For extended preservation, freeze the orange slices in a single layer on a baking sheet, then transfer to a freezer-safe bag. They can be stored for up to six months.
Reheating: When ready to enjoy, let the slices thaw at room temperature. If they have become slightly sticky, a light dusting of sugar can restore their candy-like charm.
Make Ahead Options
These Classic Homemade Orange Candy slices are perfect for meal prep enthusiasts! You can slice the oranges and prepare the sugar syrup up to 24 hours in advance, storing everything in the refrigerator to maintain freshness. Simply combine the sugar and water, allowing it to cool, and then keep it tightly covered. When you’re ready to finish, just simmer the orange slices in the syrup and dry them as directed. To keep the slices from sticking together, ensure they are laid out in a single layer and dried uncovered. This thoughtful preparation allows you to enjoy these delightful candied treats with minimal effort on busy weeknights!
Homemade Orange Candy Recipe FAQs
What kind of oranges should I use for making homemade orange candy?
Absolutely! I recommend using small oranges or tangelos for this recipe. They provide a burst of citrus flavor and create more consistent slice shapes. Look for oranges that are firm, smooth, and bright in color, avoiding any with dark spots or soft blemishes, which may indicate overripeness.
How should I store homemade orange candy, and how long does it last?
For best results, store your homemade orange candy in an airtight container at room temperature for up to one month. Be sure to separate each layer with parchment paper to prevent sticking, ensuring they remain easy to enjoy as a delightful treat!
Can I freeze homemade orange candy?
Yes, you can! To freeze your homemade orange candy, first lay the slices in a single layer on a baking sheet and freeze them until solid. After they are frozen, transfer them to a freezer-safe bag, where they can be stored for up to six months. When ready to enjoy, just let them thaw at room temperature for the best texture!
What should I do if my orange slices are not translucent after simmering?
If your orange slices aren’t translucent after simmering for 45-60 minutes, it’s likely they need more time in the syrup. Keep an eye on the simmering process, and make sure you’re using a gentle simmer—not boiling too vigorously. You can continue to simmer them, turning occasionally, until they achieve that perfect, shiny look.
Are there any allergies I should be aware of with homemade orange candy?
This recipe for homemade orange candy is naturally vegan and gluten-free, making it suitable for many dietary needs. However, if you plan to serve it to others, be mindful of any specific citrus allergies or sugar sensitivities, particularly if rolling in additional granulated sugar or chocolate.
Can I use other fruits besides oranges?
Yes, definitely! The beauty of this recipe is its versatility. I often implement different citrus fruits like lemons, limes, or blood oranges for a unique twist. Just be sure to adjust the cooking time for thinner or thicker slices to achieve that perfect candy consistency!
Homemade Orange Candy: Chewy Citrus Treats You'll Love
Ingredients
Equipment
Method
- Begin by thoroughly washing the oranges and slice them into ¼-inch rounds.
- In a large skillet, combine granulated sugar and water to make syrup.
- Bring the syrup to a gentle boil, stirring until sugar dissolves.
- Reduce heat to a gentle simmer and add orange slices, simmer for 45-60 minutes.
- Remove candy from syrup and allow to dry on a wire rack for 24-48 hours.
- Optionally roll in sugar or dip in chocolate before serving.
Leave a Reply