
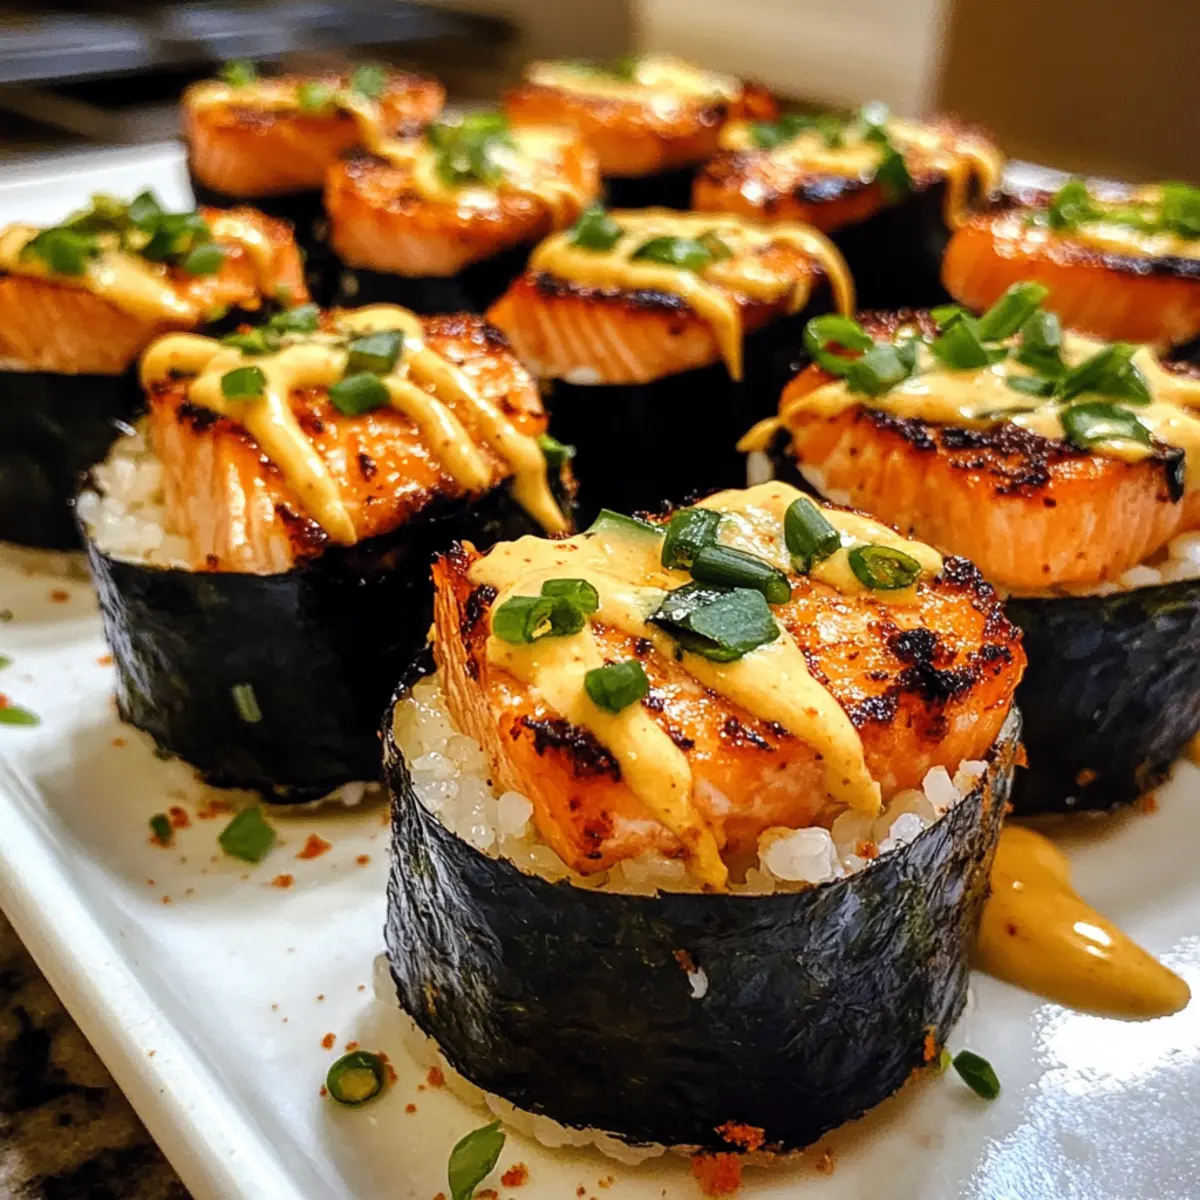
As I stood in my kitchen, the aroma of savory salmon wafting through the air instantly transported me to a bustling sushi bar in Tokyo. Inspired by that vibrant experience, I crafted these Easy Baked Salmon Sushi Cups, a delightful twist on traditional sushi that brings the theater of sushi-making right into your home. These bite-sized wonders not only blend the rich flavors of tender salmon with fluffy sushi rice, but they also offer an effortless option for entertaining or a fun family meal. Plus, they come together surprisingly quickly, making them a perfect solution for those weeks when time is tight, yet taste remains a priority. Ready to elevate your appetizer game? Let’s dive into these scrumptious Baked Salmon Sushi Cups!
Why are these sushi cups a must-try?
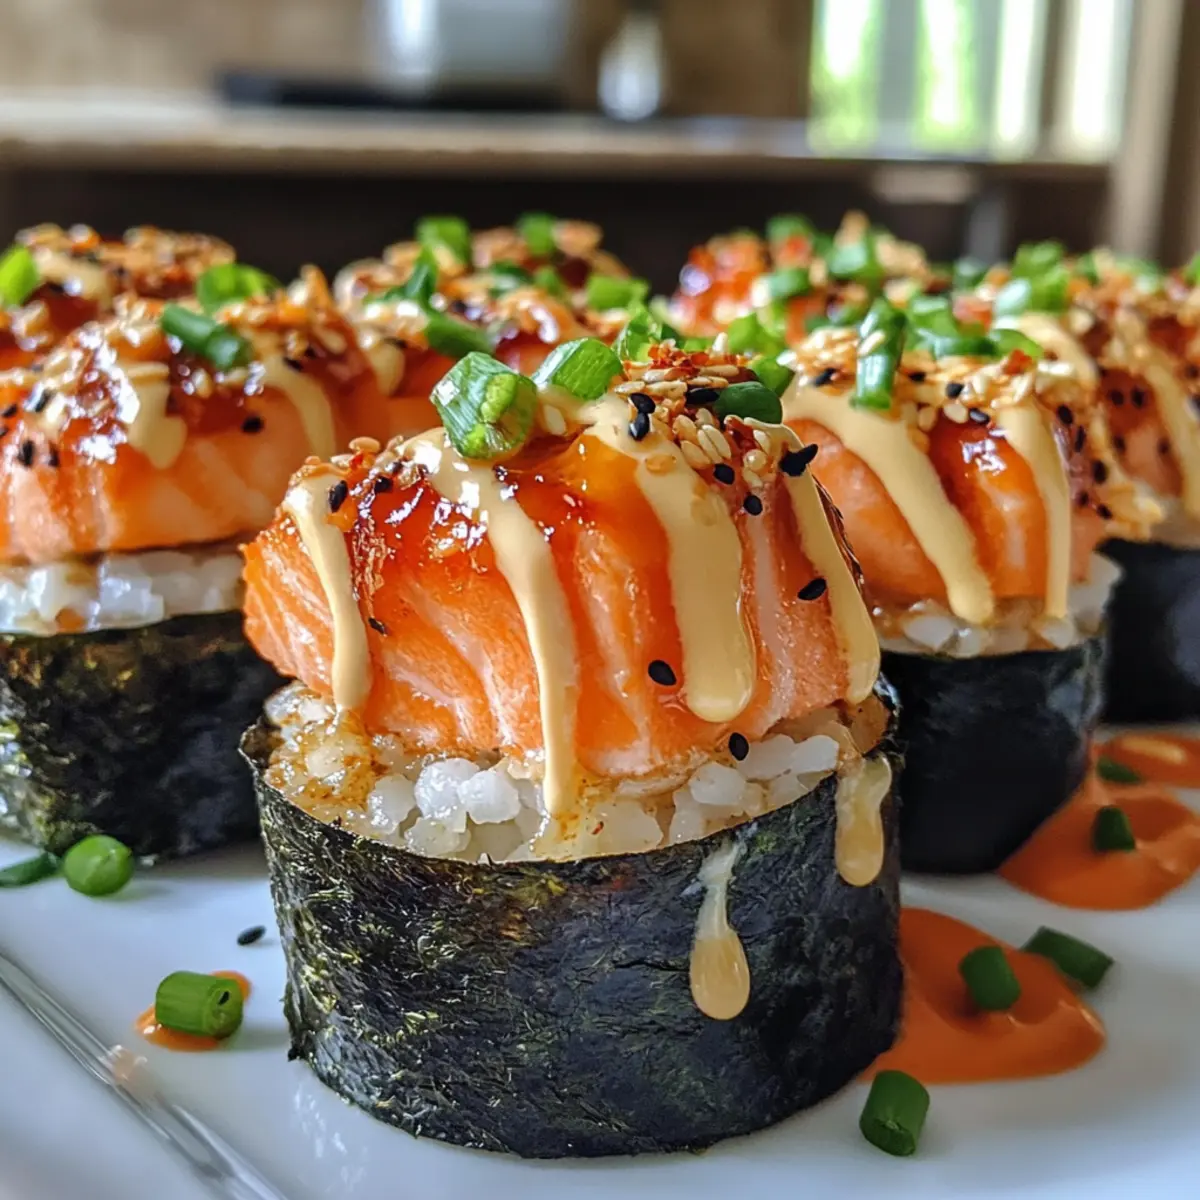
Delicious Flavor Explosion: The blend of succulent salmon, creamy Kewpie mayo, and zesty sriracha creates a taste sensation that will have your taste buds dancing with delight.
Quick & Easy: With minimal prep and cook time, these baked sushi cups can be whipped up in under 30 minutes, making them an ideal choice for busy weeknights or spontaneous get-togethers.
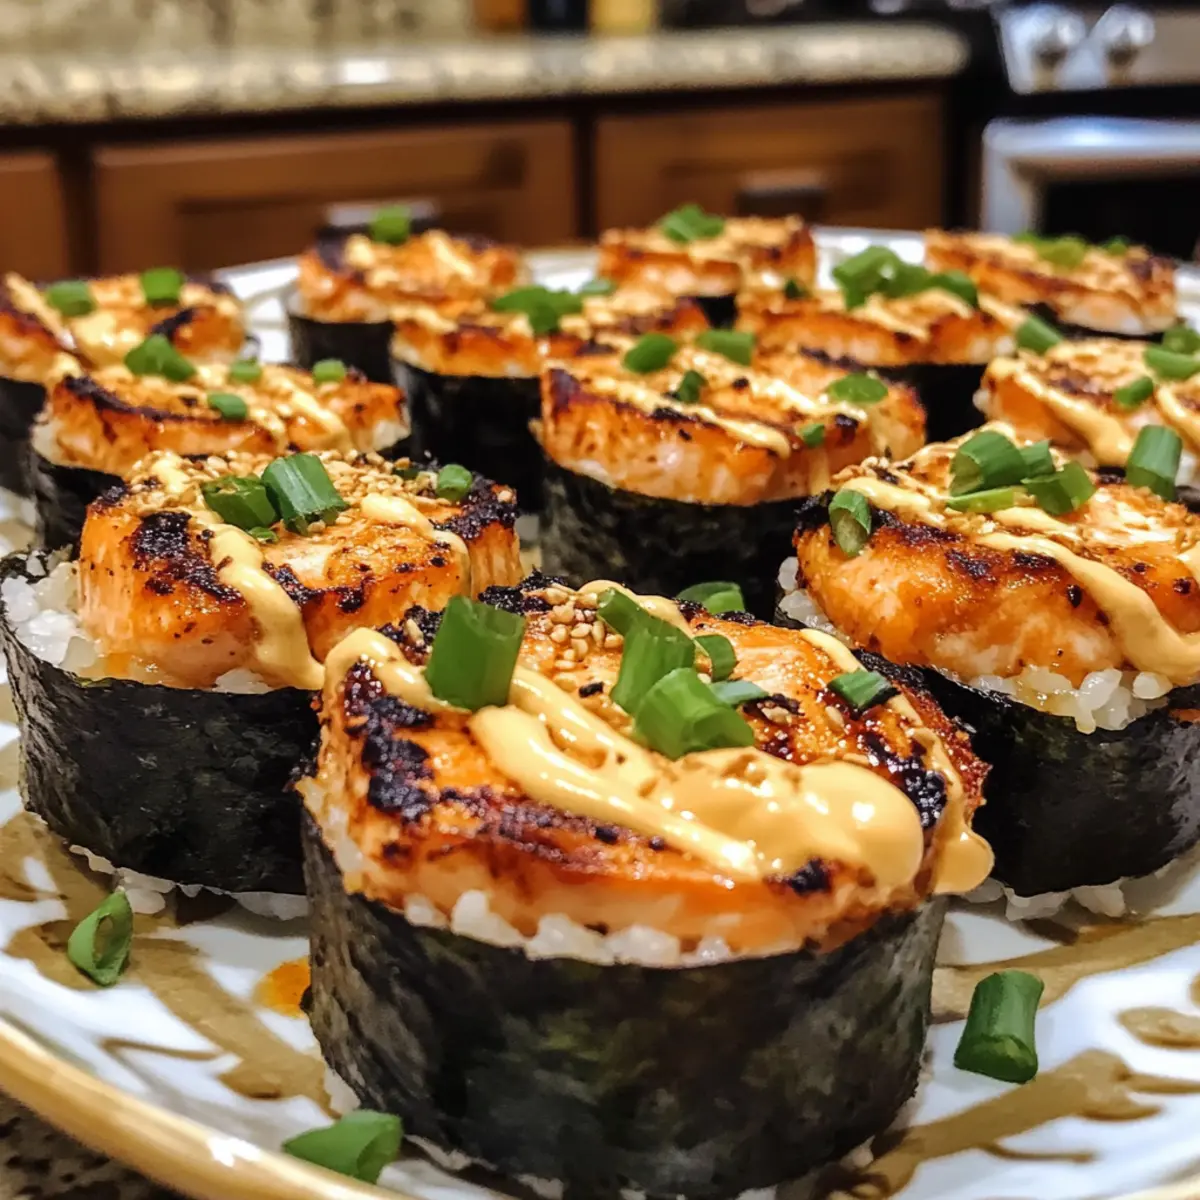
Perfect for Sharing: Whether you’re hosting a gathering or just cooking for your family, these bite-sized treats are sure to impress with their unique presentation and delightful flavors.
Versatile Options: Feel free to customize your sushi cups! Try substituting salmon with shrimp or marinated eggplant, or add fresh veggies for an extra crunch—these cups fit any palate.
Once you taste these Baked Salmon Sushi Cups, you’ll want to explore more exciting options like Texas Roadhouse Salmon or enjoy some light bites with the Salmon Bites Bowls.
Baked Salmon Sushi Cups Ingredients
For the Sushi Cups
• Salmon – Use fresh or quality frozen salmon for optimal flavor and richness.
• Light Soy Sauce – Adds umami; opt for low-sodium soy sauce if you’re looking for a healthier alternative.
• Kewpie Mayo – This creamy mayo brings unique flavor; regular mayo can be substituted but won’t replicate its taste.
• Sriracha – Gives a kick of heat; adjust the quantity based on your spice preference.
• Sesame Oil – Introduces a toasty flavor; if allergic, a neutral oil works as a substitution.
• Sushi Rice – Essential for texture; remember to use short grain rice for the best result.
• Rice Vinegar – Helps to flavor the rice; ensure the sugar is fully dissolved for an even blend.
• Sugar – Balances the tanginess of the rice vinegar in the sushi rice mix.
For the Wrapping & Toppings
• Nori Sheets – Vital for wrapping; you can swap them with rice paper if unavailable.
• Furikake – An optional garnish that adds crunch and umami; it enhances the cup’s presentation too!
• Green Onion – Offers freshness and color; chives can be a lovely substitute.
• Cooking Spray – A little helps prevent sticking when removing sushi cups from the muffin tin.
Get ready to impress with these easy-to-make Baked Salmon Sushi Cups that balance flavor and presentation beautifully!
Step‑by‑Step Instructions for Baked Salmon Sushi Cups
Step 1: Prepare Sushi Rice
Begin by cooking sushi rice according to the package instructions, usually around 20 minutes. Once cooked, transfer it to a large bowl and gently mix in rice vinegar and sugar until well combined and glossy. Let the rice cool slightly, allowing it to become fluffy and sticky, which will hold your Baked Salmon Sushi Cups together beautifully.
Step 2: Prep Salmon Mixture
While the rice cools, chop fresh salmon into small, bite-sized cubes. In a medium bowl, combine the cubed salmon with light soy sauce, Kewpie mayo, sriracha, and sesame oil. Mix thoroughly until all ingredients are evenly coated and the mixture is fragrant. Set this delicious salmon mixture aside to allow the flavors to meld together as you prepare the nori.
Step 3: Cut Nori
Take your nori sheets and use a sharp knife or kitchen scissors to cut them into squares or circles that fit into your muffin tin. Aim for pieces that are slightly larger than the muffin cups, ensuring they can support the layers of sushi rice and salmon. This will create a perfect vessel for your Baked Salmon Sushi Cups.
Step 4: Assemble Sushi Cups
Preheat your oven to 400°F (200°C) while you grease the muffin tin with cooking spray to prevent sticking. Press a spoonful of sushi rice into each nori piece, forming a small cup in each tin. Make sure the rice is compact enough to hold its shape, then fill each cup generously with the prepared salmon mixture, pressing lightly to secure everything.
Step 5: Bake
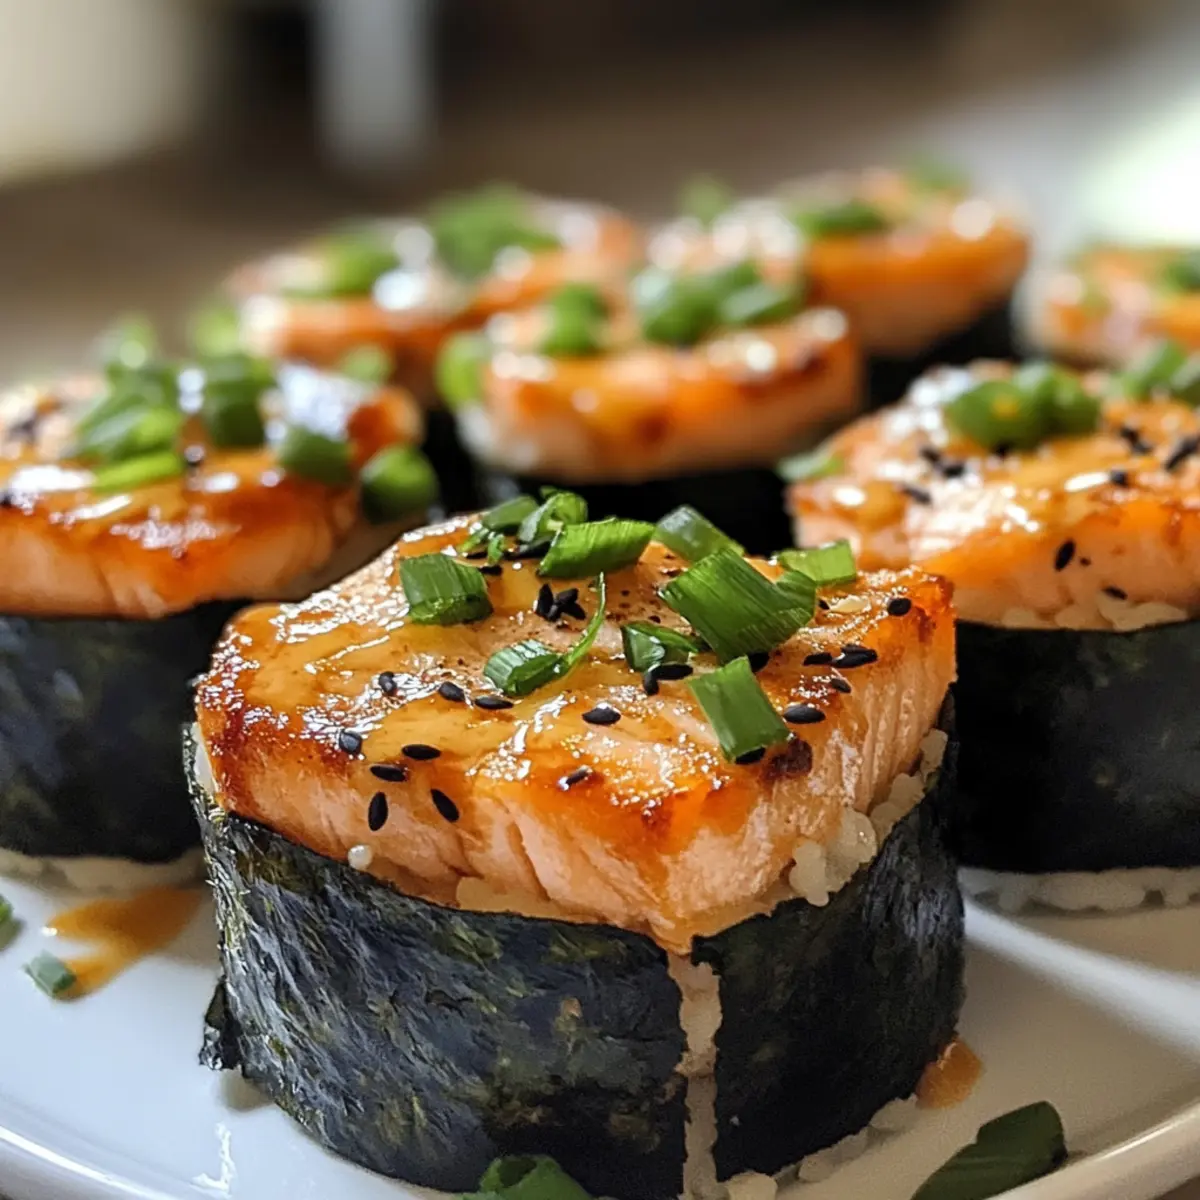
Place the muffin tin in your preheated oven and bake for about 15 minutes. Keep an eye on your Baked Salmon Sushi Cups; they’re ready when the salmon is cooked through, and the tops turn a beautiful golden brown. This cooking time will infuse the flavors together while giving the nori a slight crispiness.
Step 6: Garnish and Serve
Once baked, allow the sushi cups to cool for a few minutes before carefully removing them from the muffin tin. Top each cup with a drizzle of spicy mayo, a touch of sriracha, a sprinkle of furikake, and a scattering of chopped green onions. These finished Baked Salmon Sushi Cups are now ready to be served warm and enjoyed immediately!
How to Store and Freeze Baked Salmon Sushi Cups
Fridge: Store leftover sushi cups in an airtight container for up to 2-3 days. Be sure to allow them to cool completely before sealing to keep their freshness.
Freezer: If you’d like to freeze, place the sushi cups in a single layer on a baking sheet until firm, then transfer to a freezer-safe container. They can be frozen for up to 1 month.
Reheating: To reheat, thaw in the fridge overnight and warm in a preheated oven at 350°F (175°C) for about 10 minutes. This helps maintain moisture and flavor in your Baked Salmon Sushi Cups.
Serving Tip: For an extra pop of flavor when serving, drizzle with additional Kewpie mayo and sriracha after reheating!
Make Ahead Options
These Baked Salmon Sushi Cups are perfect for meal prep, allowing you to enjoy flavorful bites with ease! You can prepare the sushi rice and salmon mixture up to 24 hours in advance; simply store them separately in airtight containers in the refrigerator. For the sushi cups, assemble them with the rice and nori, then refrigerate before baking—this will help maintain their freshness while being convenient for last-minute gatherings. When you’re ready to serve, simply bake them for about 15 minutes until they’re golden brown and heated through. By prepping ahead, you save time and still achieve delicious, restaurant-quality sushi cups that your family will adore!
What to Serve with Easy Baked Salmon Sushi Cups
As you prepare to savor these delightful bites, let your imagination run wild with the perfect accompaniments that will elevate your meal experience.
-
Cucumber Salad: Perfectly refreshing, this light salad offers crunch and a subtle sweetness that beautifully contrasts the rich salmon. Toss in sesame seeds for an added nutty flavor.
-
Pickled Ginger: A sushi staple, it cleanses the palate between bites, adding a zesty zing that complements the creamy avocado and savory salmon perfectly.
-
Soy Sauce Dipping Bowl: A touch of soy sauce enhances the umami flavor of your sushi cups, creating an exciting and interactive dining experience.
-
Spicy Edamame: These protein-packed pods are lightly salted and seasoned with chili flakes, offering a fun appetizer that mirrors the kick in your sushi cups.
-
Miso Soup: This warm, savory soup provides a comforting contrast to the sushi’s textures, enhancing the overall meal while incorporating traditional Japanese flavors.
-
Tea or Sparkling Water: A crisp green tea or refreshing sparkling water balances the flavors and adds a touch of luxury to your dining experience.
-
Chocolate Mochi: End your meal on a sweet note with these chewy treats. Their subtle sweetness will round off the savory flavors of your baked salmon sushi cups.
-
Fruit Platter: Create a colorful arrangement of seasonal fruits like mango and berries. Their natural sweetness adds a vibrant and fresh element to your plate.
These pairings not only enhance the experience of your Baked Salmon Sushi Cups but also bring a lovely balance to the overall dining experience. Enjoy!
Baked Salmon Sushi Cups Variations
Feel free to get creative with your Baked Salmon Sushi Cups and enjoy different flavors and textures!
-
Seafood Swap: Replace salmon with cooked shrimp or crab for a delightful twist that’s equally satisfying. The flavors will bring a coastal vibe to your sushi cups.
-
Vegetarian Delight: Use marinated eggplant or roasted mushrooms instead of salmon for a delicious plant-based option that keeps it savory and hearty.
-
Crunchy Veggies: Add diced cucumbers or creamy avocado to bring an extra layer of freshness and texture. These ingredients provide a vibrant crunch that complements the softness of the rice.
-
Spice it Up: Incorporate jalapeños or even spicy kimchi into the salmon mixture to elevate the heat levels. The extra kick can transform your sushi cups into a flavorful explosion.
-
Herb-Infused: Introduce fresh herbs like cilantro or basil for an aromatic touch. This subtle change can breathe new life into the flavors.
-
Creamy Avocado: For an even creamier bite, layer slices of avocado between the rice and salmon mixture, making each cup irresistible.
-
Furikake Alternatives: If you’re out of furikake, try sprinkling toasted sesame seeds or crushed seaweed for an alternative garnish that packs a punch in flavor.
-
Nori-Free Option: Swap nori sheets for rice paper to create a gluten-free version that still maintains those fabulous sushi flavors.
Experimenting with your Baked Salmon Sushi Cups can be so much fun! And if you’re in the mood to explore more seafood options, don’t miss the chance to try the Texas Roadhouse Salmon or the delightful Salmon Bites Bowls. Enjoy the journey of flavors!
Expert Tips for Baked Salmon Sushi Cups
-
Use Fresh Salmon: Always select fresh or high-quality frozen salmon to ensure a rich flavor and tender texture in your baked salmon sushi cups.
-
Avoid Over-Baking: Keep an eye on your sushi cups during baking—overcooking can dry out the salmon. Look for a slight golden brown on top.
-
Rice Consistency Matters: Ensure your sushi rice is fluffy yet sticky. Overcooking or under-seasoning may lead to a crumbly cup that falls apart.
-
Nori Handling: When pressing nori into the muffin tin, make sure it fits snugly to support the sushi rice and salmon mixture for the best structural integrity.
-
Make Ahead: Prepare and assemble your sushi cups ahead of time. Refrigerate before baking for fresher cups at mealtime—just pop them in the oven when ready to enjoy!
Baked Salmon Sushi Cups Recipe FAQs
What type of salmon is best for sushi cups?
Absolutely! Using fresh or high-quality frozen salmon will provide the richest flavor and tender texture, which is crucial for delicious baked salmon sushi cups. Always check for a vibrant color and a firm texture when selecting your salmon, and avoid any that shows dark spots or a slimy surface.
How should I store my leftover sushi cups?
For optimal freshness, store any leftover baked salmon sushi cups in an airtight container in the refrigerator for up to 2-3 days. Make sure they cool completely before sealing to avoid condensation, which can affect their texture.
Can I freeze these sushi cups for later?
Certainly! To freeze baked salmon sushi cups, place them in a single layer on a baking sheet until firm. Once frozen, transfer them to a freezer-safe container or zip-top bag and freeze for up to 1 month. To reheat, simply thaw in the fridge overnight and then warm in a preheated oven at 350°F (175°C) for about 10 minutes.
What if my sushi rice isn’t sticking together?
No worries! If your sushi rice is not sticking together properly, ensure you’re using short-grain sushi rice as it has the right starch content for that perfect sticky texture. Additionally, try adding a bit more rice vinegar and sugar to your mixture, as combining these ingredients properly will enhance the stickiness. Let it cool a bit after cooking, as hot rice tends to be more workable.
Are there any dietary considerations for these sushi cups?
Very! If you’re cooking for guests with dietary restrictions, feel free to substitute ingredients as needed. For a vegetarian option, use marinated eggplant or roasted veggies instead of salmon. If someone has a seafood allergy, consider using cooked tofu or even a mix of vegetables. Always check if your soy sauce and other condiments are gluten-free if that’s a concern.
Can I make these sushi cups ahead of time?
Absolutely! You can assemble the baked salmon sushi cups ahead of time and refrigerate them before baking. Cover them tightly with plastic wrap to ensure freshness. When you’re ready to serve, just pop them in the oven for that warm, just-baked goodness that everyone will rave about.
Baked Salmon Sushi Cups: Deliciously Easy & Healthy Treats
Ingredients
Equipment
Method
- Cook sushi rice according to package instructions, typically around 20 minutes. Mix in rice vinegar and sugar, let cool slightly.
- Chop salmon into small cubes and mix with soy sauce, Kewpie mayo, sriracha, and sesame oil in a bowl.
- Cut nori sheets into squares/circles slightly larger than muffin cups.
- Preheat oven to 400°F (200°C) and grease muffin tin. Press sushi rice into nori, then fill with salmon mixture.
- Bake for about 15 minutes until salmon is cooked and tops are golden brown.
- Allow to cool, then garnish with spicy mayo, sriracha, furikake, and green onions.
Leave a Reply