
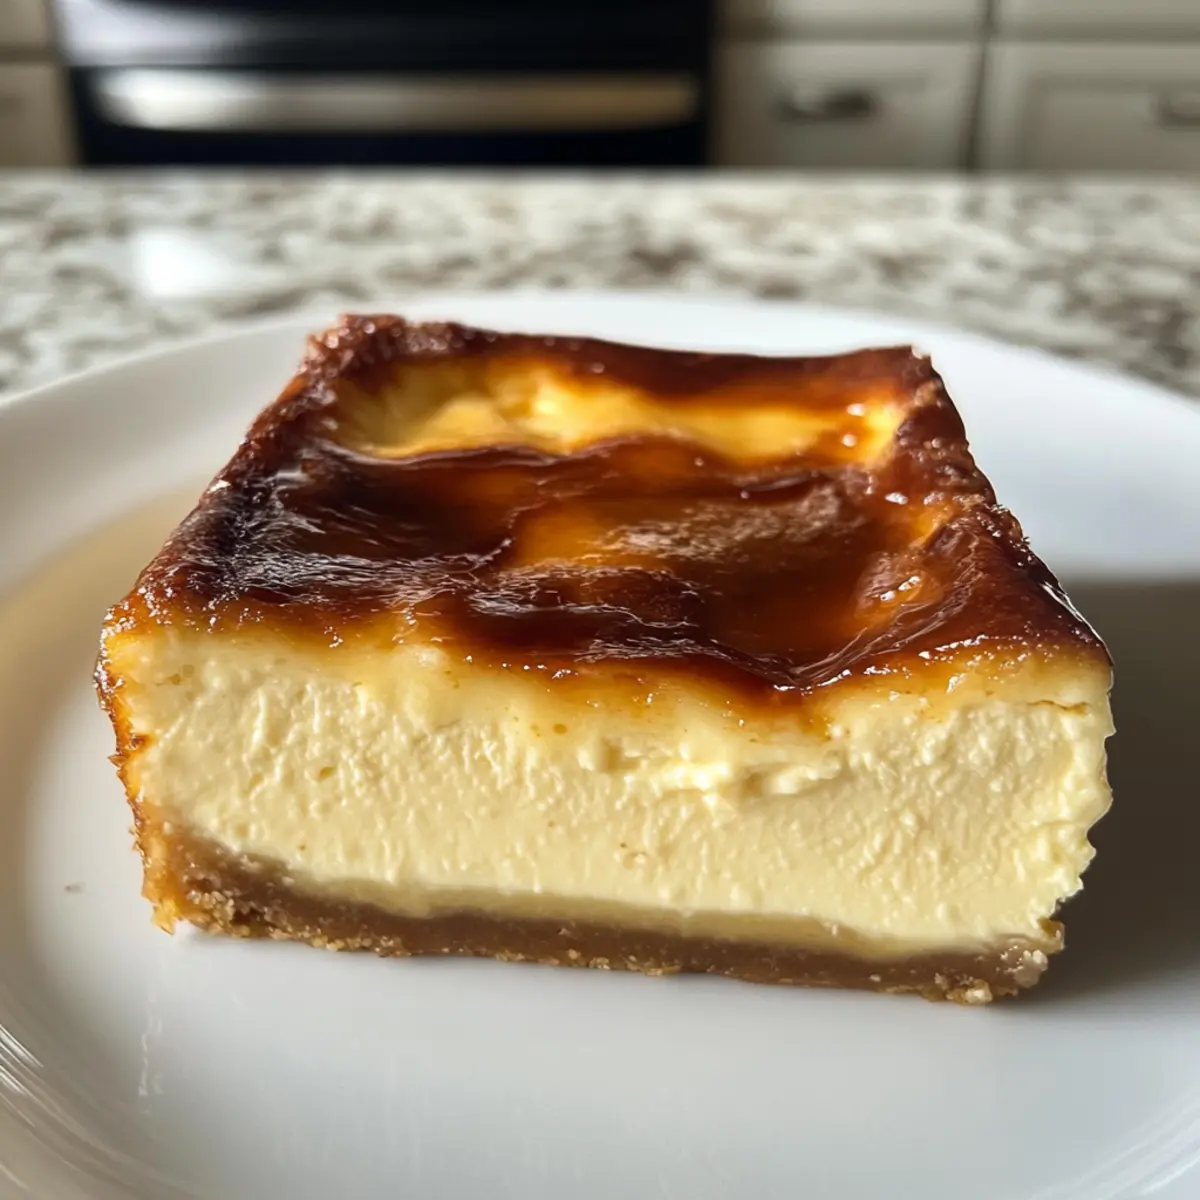
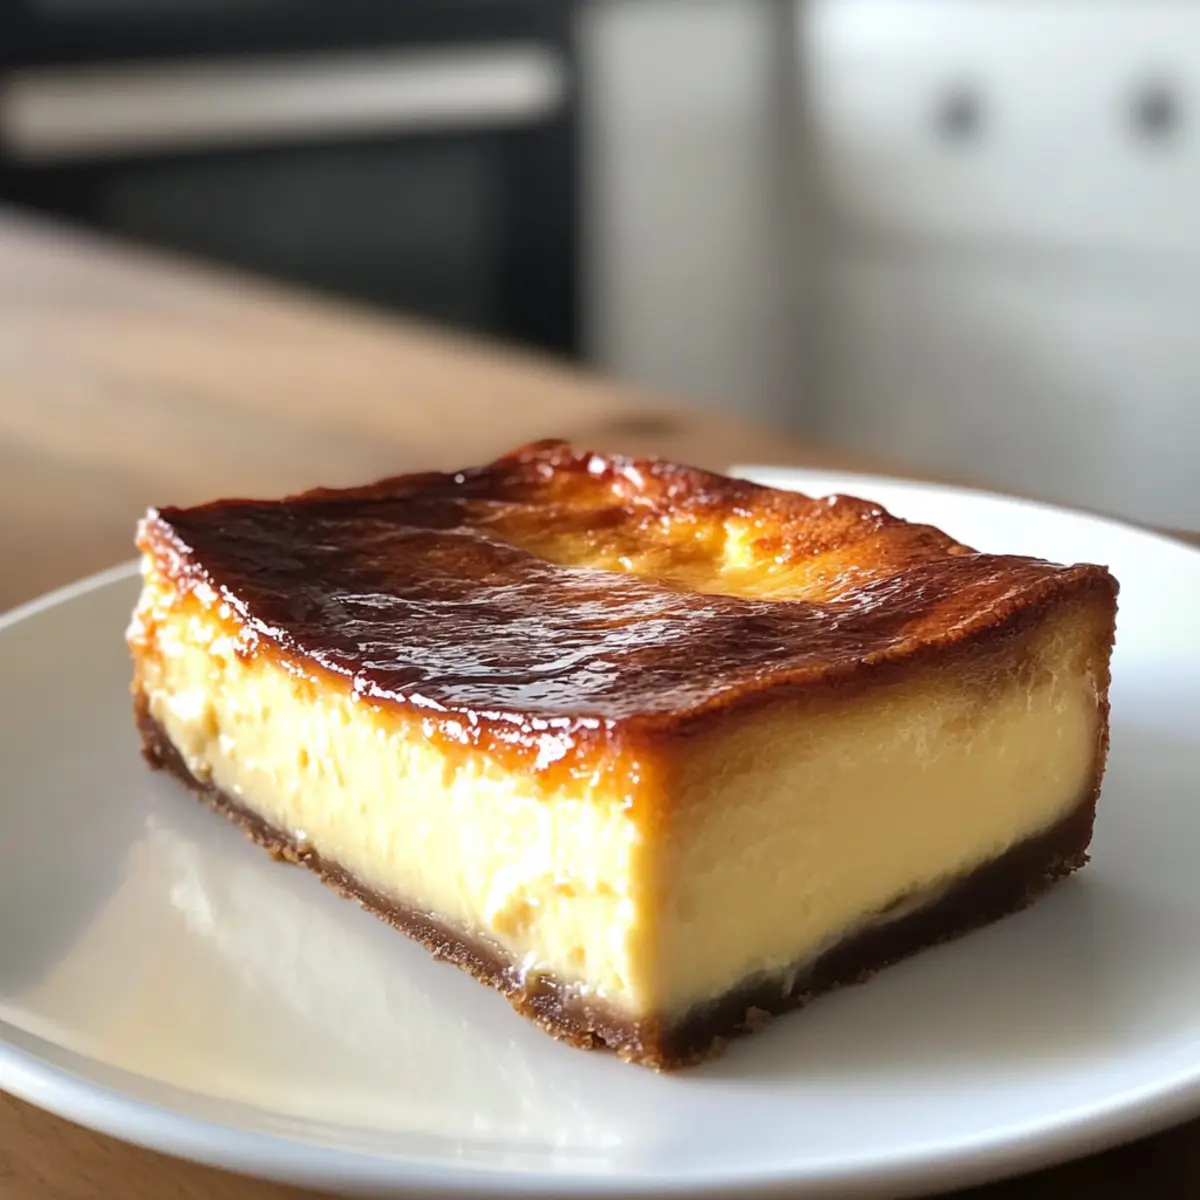
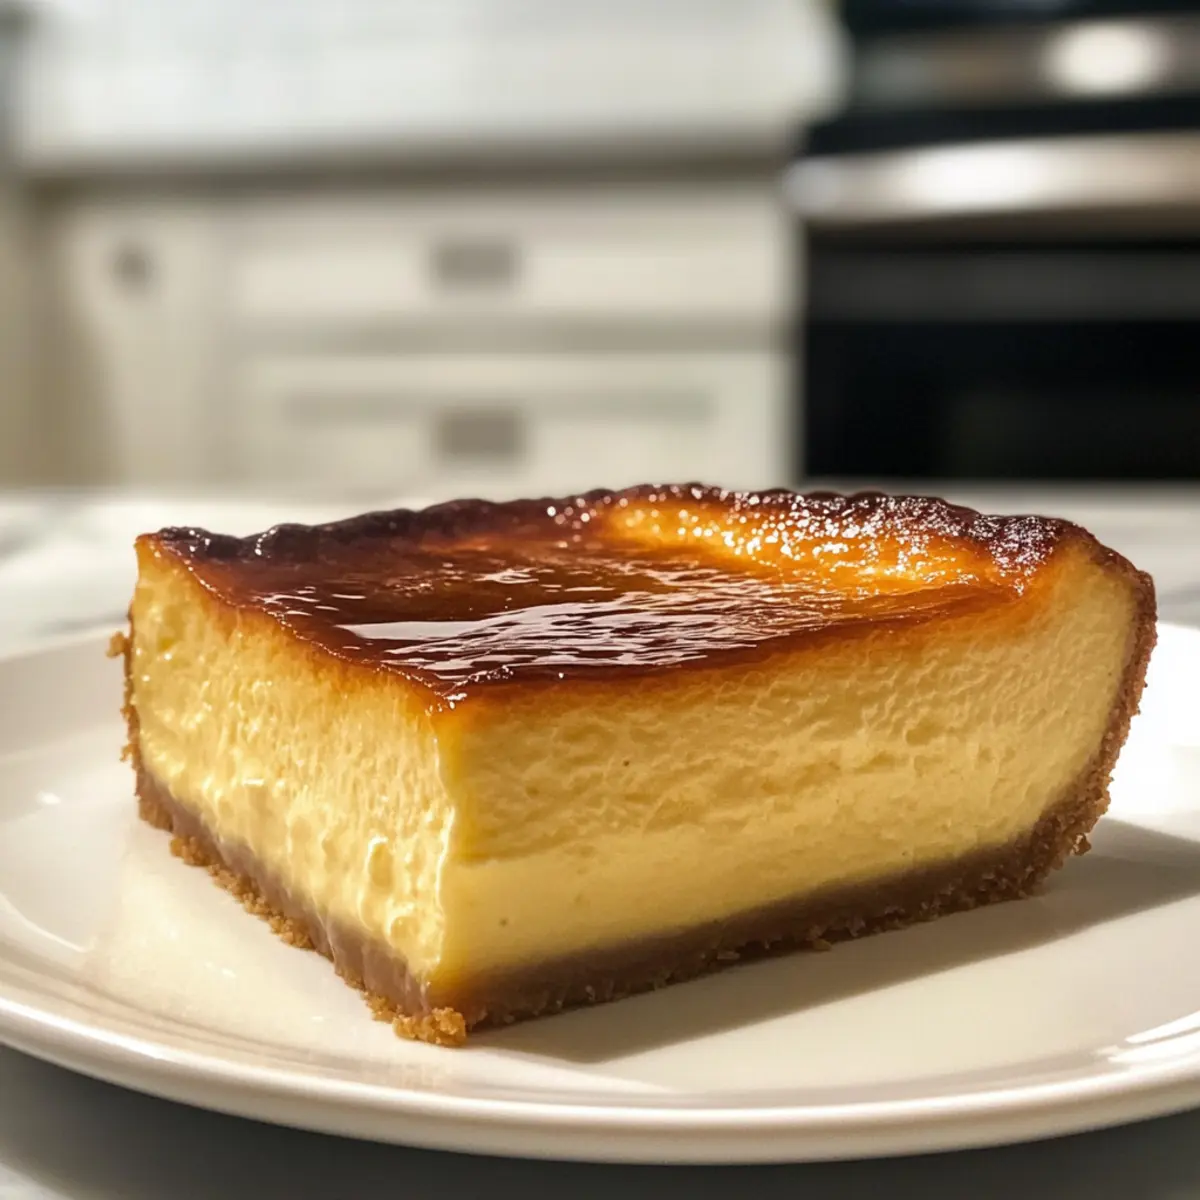
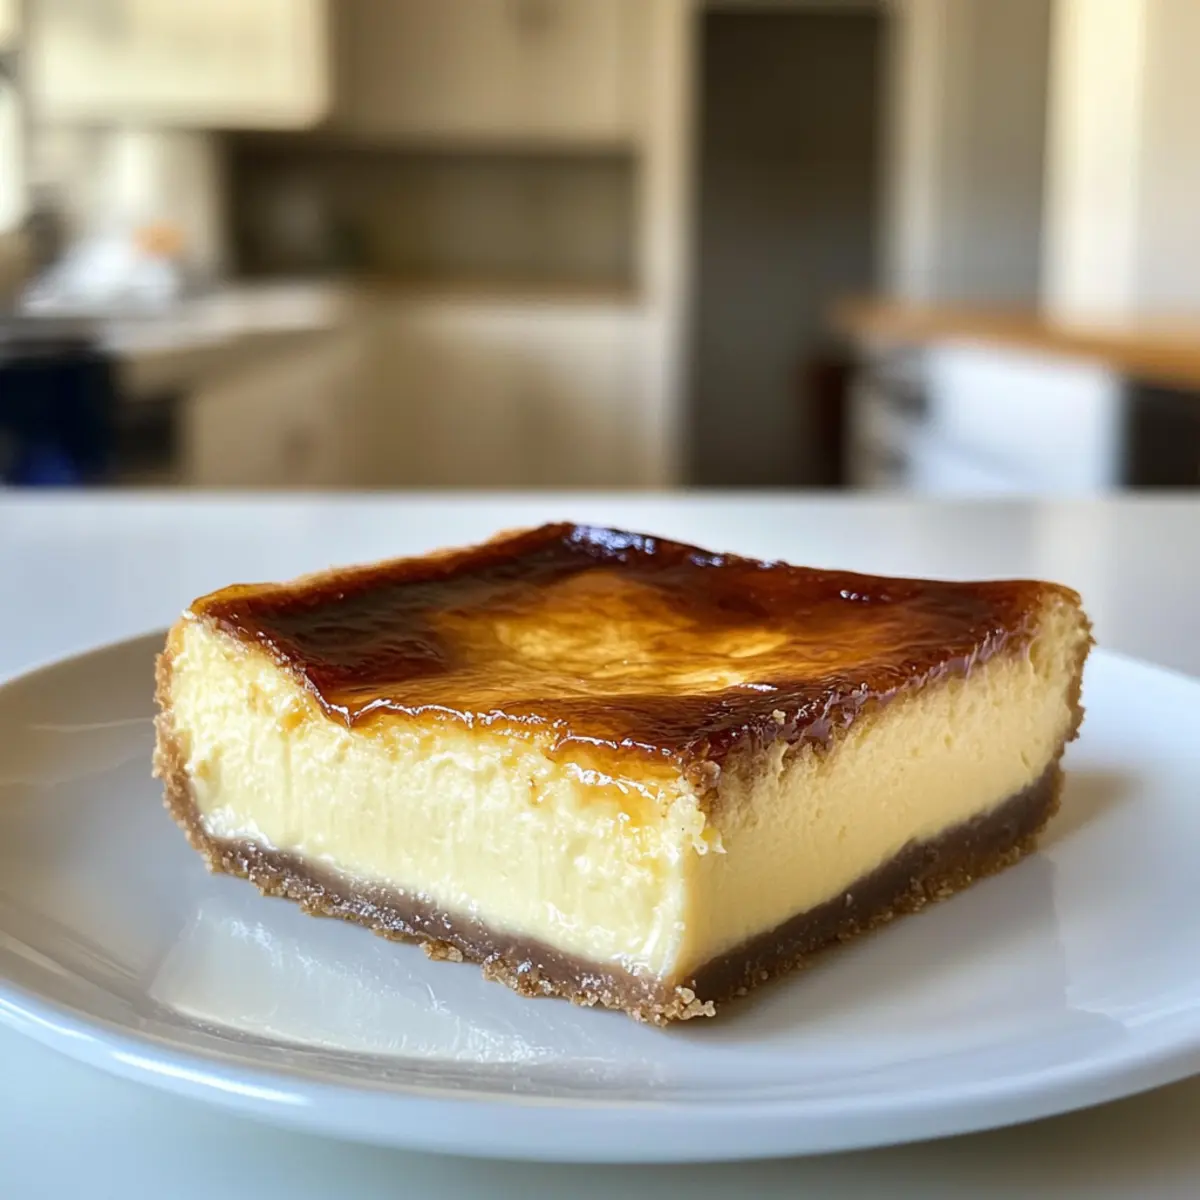
In moments of culinary creativity, there’s a thrill in finding the perfect recipe that balances indulgence with simplicity. Enter the Burnt Basque Cheesecake in a Loaf Pan—your new go-to for an easy dessert that promises a creamy texture and a delightful caramelized top without overwhelming leftovers. Designed for those cozy evenings or spontaneous celebrations, this small-batch wonder satisfies any sweet tooth craving without the guilt of excess. With just a handful of ingredients and a straightforward method, you’ll discover a fantastic way to embrace the deliciously rich flavors of this iconic dessert. Ready to dive into a heavenly slice of this Basque delight? Let’s get mixing!
Why is Burnt Basque Cheesecake So Irresistible?
Creamy Richness: The luxurious texture of this cheesecake melts in your mouth, offering a sensorial delight that keeps you coming back for more.
Effortless Preparation: With minimal ingredients and an uncomplicated method, you’ll spend less time in the kitchen and more time enjoying this treat.
Caramelized Perfection: The golden top not only adds visual appeal but also delivers a satisfying contrast to the creamy interior.
Small-Batch Convenience: Perfect for cozy gatherings or quiet nights in, you’ll relish this dessert without worrying about leftovers. Pair it with some delightful Pumpkin Cheesecake Truffles for an extra touch of autumn flavor!
Versatile Variations: Feel free to jazz things up by incorporating your favorite flavors, like citrus zest or chocolate chips, for a personal twist.
Burnt Basque Cheesecake Ingredients
For the Cheesecake Filling
• Cream Cheese – Adds creaminess and structure to the cheesecake filling; make sure it’s softened for a smooth batter.
• Sugar – Provides sweetness and contributes to the caramelized top when baked; sugar alternatives can be used if desired.
• Eggs – Essential for binding the ingredients together; use large eggs for the best custard texture.
• Heavy Cream – Enhances richness and creaminess of the cheesecake; light cream may change the texture slightly.
• Vanilla Extract – Adds depth of flavor; using pure vanilla extract is recommended for optimal taste.
• Salt – Balances sweetness and elevates flavors of the cheesecake; fine sea salt works best.
• All-Purpose Flour – Offers slight structure to the cheesecake; can be omitted for a gluten-free option, but expect differing results.
Baking up this Burnt Basque Cheesecake is a delightful way to indulge without the temptation of leftovers—let’s gather our ingredients and start creating a slice of heaven!
Step‑by‑Step Instructions for Burnt Basque Cheesecake
Step 1: Preheat the Oven
Begin by preheating your oven to 400°F (200°C). This high temperature is crucial for achieving that signature caramelized top on your Burnt Basque Cheesecake. While the oven heats, you can prepare your loaf pan to ensure everything is ready for baking.
Step 2: Prepare the Loaf Pan
Line your loaf pan with parchment paper, allowing an overhang on the sides to make removal easier once the cheesecake is set. The parchment will also help prevent sticking, ensuring your cheesecake retains its creamy custard-like texture while baking.
Step 3: Mix the Cream Cheese and Sugar
In a large mixing bowl, combine the softened cream cheese and sugar. Using an electric mixer, beat on medium speed for about 2–3 minutes until the mixture is smooth and fluffy. This process incorporates air into the batter, which is essential for a light and creamy Burnt Basque Cheesecake.
Step 4: Incorporate the Eggs
Next, add the eggs one at a time to the sugar and cream cheese mixture. Mix well after each addition, allowing them to fully incorporate and bind the ingredients together. This step is important for creating that rich custard-like filling that makes this cheesecake so irresistible.
Step 5: Add Cream and Flavorings
Pour in the heavy cream, vanilla extract, and a pinch of salt into the mixture. Beat the ingredients together on low speed until you achieve a silky smooth batter, about 1–2 minutes. This step enriches the cheesecake’s flavor and ensures a creamy texture throughout.
Step 6: Incorporate the Flour
Sift all-purpose flour into the batter and gently fold it in using a spatula. Be careful not to overmix, as you want to keep the airiness of the batter intact while blending just until you see no dry flour. This slight structure from the flour helps set the cheesecake during baking.
Step 7: Pour and Tap the Batter
Pour the cheesecake batter into the prepared loaf pan, smoothing the top with a spatula for an even surface. Gently tap the pan on the counter to release any air bubbles trapped in the batter, ensuring a smooth and creamy result after baking.
Step 8: Bake to Perfection
Slide the loaf pan into the preheated oven and bake for 40 to 45 minutes. You’re looking for a beautifully golden top with a slightly jiggly center when done. This jiggly effect indicates a creamy interior characteristic of your Burnt Basque Cheesecake.
Step 9: Cool and Refrigerate
Once baked, remove the cheesecake from the oven and let it cool to room temperature in the pan. For the best results, refrigerate it for at least four hours, or preferably overnight, before slicing. This chilling period deepens the flavors and enhances the texture of the cheesecake.
Make Ahead Options
These Burnt Basque Cheesecakes are perfect for meal prep, allowing you to indulge in this creamy delight with minimal fuss! You can prepare the cheesecake batter up to 24 hours in advance—simply mix all the ingredients, pour it into the lined loaf pan, and cover it tightly with plastic wrap before refrigerating. To maintain the quality, ensure the batter is well-sealed to prevent any odors from the fridge. When you’re ready to serve, just bake the cheesecake directly from the fridge and let it cool before chilling it for at least four hours or overnight. This way, you’ll enjoy a luxurious dessert with freshly baked flavor and texture—perfect for your busy weeknights!
Expert Tips for Burnt Basque Cheesecake
Softened Cream Cheese: Ensure that your cream cheese is at room temperature for easy blending and a smooth cheesecake filling, avoiding any lumps.
Resting Time Matters: Don’t rush the cooling and refrigeration steps; they are crucial for developing the cheesecake’s rich flavors and perfect texture.
Watch the Baking: Keep a close eye on the baking time; the cheesecake should have a golden top and a slightly jiggly center to achieve that classic creamy consistency.
Parchment Paper Perks: Use generous parchment paper overhang in your loaf pan for easy removal and to prevent sticking, guaranteeing a beautiful slice every time.
Serve Chilled: Enjoy your Burnt Basque Cheesecake perfectly chilled from the fridge; this ensures the layers remain distinct and the flavors pop delightfully.
Storage Tips for Burnt Basque Cheesecake
Fridge: Store your Burnt Basque Cheesecake covered with plastic wrap or in an airtight container for up to 1 week, helping to maintain its creamy texture.
Freezer: If you’d like to save some for later, wrap slices tightly in plastic wrap and foil before placing them in an airtight container. It can be frozen for up to 3 months.
Thawing: To enjoy, simply place the frozen cheesecake in the fridge overnight to thaw. Serve it chilled for the best flavor and texture experience.
Reheating: Avoid reheating in the microwave as it can alter the cheesecake’s delightful creamy nature; enjoy it cold straight from the fridge for the optimal taste!
Variations & Substitutions for Burnt Basque Cheesecake
Feel free to get creative with this scrumptious cheesecake and make it uniquely yours!
-
Dairy-Free: Swap cream cheese and heavy cream for dairy-free alternatives like cashew cream for a delicious vegan twist.
Embrace the creamy texture while enjoying your favorite non-dairy products. Just remember, the taste and texture may vary a bit, but it’s still worth a try! -
Flavored Zest: Add a tablespoon of lemon or orange zest to the batter for a refreshing citrus flavor that brightens up each bite.
The vibrant zest pairs beautifully with the creamy cheesecake, creating an irresistible flavor combination that’s sure to impress! -
Chocolate Chip Delight: Fold in a handful of chocolate chips into your batter for a hint of sweetness and texture.
As they melt during baking, you’ll enjoy delightful pockets of chocolate goodness in every slice, enriching your dessert experience. -
Caramel Swirls: Drizzle caramel sauce into the batter before baking for a rich, decadent touch.
This added sweetness creates a beautiful marbled effect and enhances the overall indulgence of your Burnt Basque Cheesecake. -
Nutty Crunch: Add crushed nuts such as walnuts or pecans on top before baking for an added crunch.
The texture contrast against the creamy filling brings an exciting variety that your taste buds will surely cherish. -
Extract Exploration: Substitute vanilla extract with almond or hazelnut extract for a unique twist on flavor.
Each option brings its own character, inviting a delightful surprise in every bite that turns this classic into something uniquely yours! -
Mini Cheesecakes: Use a muffin tin instead of a loaf pan for cute mini versions of this cheesecake.
These bite-sized treats are perfect for parties or gatherings, allowing you to share the indulgence without the temptation of leftovers! -
Spicy Kick: Incorporate a pinch of ground cinnamon or nutmeg into the batter for a warm spice note.
This addition adds an inviting warmth to your cheesecake that beautifully complements the sweet, creamy flavors.
Dive into your personalized Burnt Basque Cheesecake; each variation adds a splash of creativity and flavor. If you’re feeling inspired, consider pairing it with some delectable Chocolate Chip Cheesecake Cookies for a wonderful dessert spread!
What to Serve with Burnt Basque Cheesecake?
Elevate your dessert experience with delightful pairings that enhance each luscious bite of this creamy indulgence.
-
Whipped Coconut Cream:
A light and fluffy topping that adds a tropical twist and balances the rich flavors of the cheesecake beautifully. -
Seasonal Fruit Compote:
Fresh berries or a warm fruit compote bring a burst of color and tartness, creating a harmonious contrast to the creamy dessert. -
Espresso or Coffee:
The bold flavors of coffee complement the sweetness of the cheesecake, enhancing its depth and making for a perfect cozy pairing. -
Chocolate Drizzle:
A simple chocolate sauce creates an indulgent, decadent experience, while its richness beautifully harmonizes with the cheesecake’s flavors. -
Caramel Sauce:
A drizzle of homemade or store-bought caramel adds an extra layer of sweetness that echoes the cheesecake’s burnt top. -
Matcha Tea:
The earthy notes of matcha tea provide a subtle flavor contrast and serve as a refreshing drink alongside your rich dessert. -
Almond Biscotti:
Crunchy and lightly sweet, these Italian cookies are excellent for dipping and add a delightful texture contrast to the creamy cheesecake. -
Toasted Nuts:
Chopped pistachios or hazelnuts sprinkled on top introduce a pleasant crunch and nutty flavor that enhances the overall dessert experience.
When choosing your pairings, consider how they complement the creaminess and slight sweetness of the Burnt Basque Cheesecake, turning each slice into an unforgettable moment.
Burnt Basque Cheesecake Recipe FAQs
What type of cream cheese should I use for the Burnt Basque Cheesecake?
I always recommend using full-fat cream cheese, as it provides the best flavor and texture. Make sure it’s softened to room temperature before mixing; this helps to avoid lumps and ensures a smooth, creamy batter.
How should I store my Burnt Basque Cheesecake?
Store your cheesecake covered with plastic wrap or in an airtight container in the fridge. It will stay fresh for up to one week, so you can enjoy a slice (or two!) each day without feeling guilty about leftovers!
Can I freeze Burnt Basque Cheesecake?
Absolutely! If you’d like to save some for later, wrap slices tightly in plastic wrap, then cover with foil and place in an airtight container. It can be frozen for up to 3 months. When you’re ready to enjoy, simply thaw it overnight in the fridge for the best taste and texture.
What if my Burnt Basque Cheesecake doesn’t set properly?
If your cheesecake is too jiggly in the center after baking, it simply needs more time in the oven. Every oven is different, so if you notice the top is golden brown but the center is still too wobbly, continue baking in 5-minute increments until it reaches that slightly jiggly consistency. Remember, it will set as it cools!
Are there any dietary considerations for the Burnt Basque Cheesecake?
For those with allergies, this cheesecake contains dairy and gluten. However, you can make it gluten-free by omitting the flour or using a gluten-free alternative. For a dairy-free option, try substituting cream cheese and heavy cream with dairy-free alternatives, though the texture may vary slightly.
Can I add flavors to my Burnt Basque Cheesecake?
Yes, the more the merrier! You can incorporate flavors like citrus zest, chocolate chips, or caramel swirls right into the batter. Just remember to adjust the amounts to keep the balance and cohesiveness of the cheesecake. Enjoy experimenting!
Decadent Burnt Basque Cheesecake - Creamy Small-Batch Delight
Ingredients
Equipment
Method
- Preheat your oven to 400°F (200°C).
- Line your loaf pan with parchment paper.
- In a large mixing bowl, combine the softened cream cheese and sugar, beating until smooth.
- Add the eggs one at a time, mixing well after each addition.
- Pour in the heavy cream, vanilla extract, and salt, mixing until smooth.
- Sift in the flour and gently fold it into the batter.
- Pour the cheesecake batter into the prepared loaf pan.
- Bake for 40 to 45 minutes until the top is golden and the center is slightly jiggly.
- Allow the cheesecake to cool to room temperature, then refrigerate for at least 4 hours.
Leave a Reply