
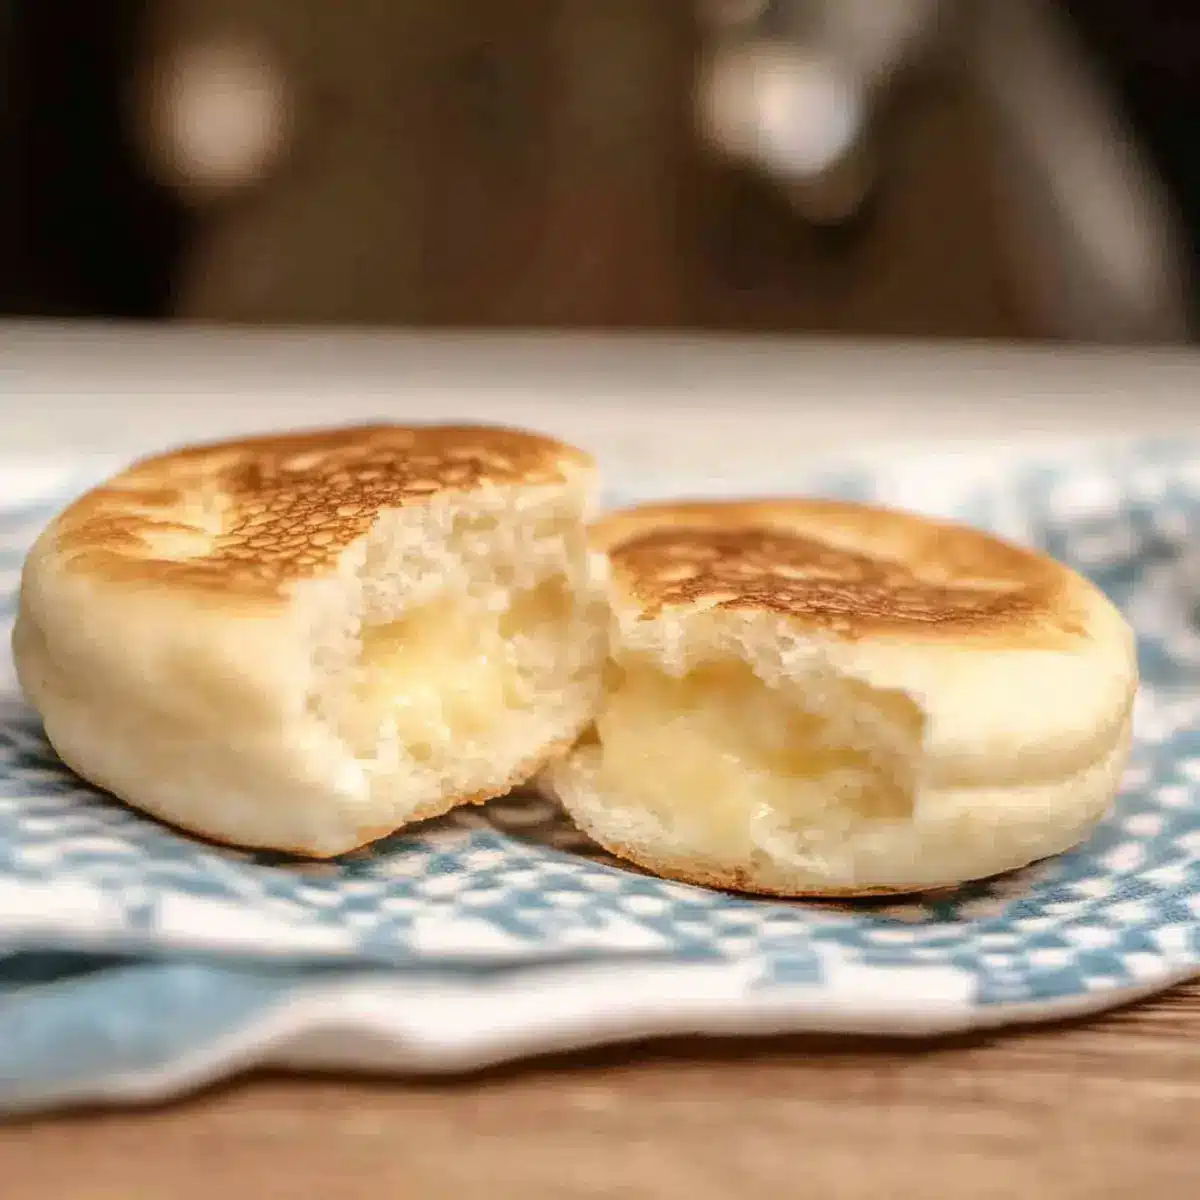
As the aroma of warm dough fills my kitchen, I can’t help but reminisce about those lazy weekend mornings when homemade breakfast was a cherished ritual. Today, I’m excited to share my recipe for English Muffins From Scratch—yes, they’re easier to make than you might think! These delightful muffins promise a soft texture with those signature nooks and crannies, perfect for slathering on butter or your favorite jam. Beyond being a simple baking project, they add a touch of warmth to your breakfast routine and are entirely vegetarian-friendly. You’ll love how they transform any meal, from classic brunch setups to on-the-go sandwiches. Curious to see just how easy it is to elevate your mornings? Let’s dive into the delightful world of homemade English muffins!
Why Make English Muffins From Scratch?
Homemade English muffins bring the bakery to your kitchen, offering incredible freshness that store-bought versions simply can’t compete with. Deliciously versatile, they pair perfectly with everything from sweet jams to savory breakfast sandwiches. Simple process means anyone can master this skill, regardless of baking experience! Plus, you have the freedom to experiment with ingredients, like adding herbs or cheese for a gourmet twist. Looking for more inspiration? Check out my Flourless Pumpkin Muffins for another easy and delicious homemade treat!
English Muffins From Scratch Ingredients
Making your English muffins from scratch is a delightful way to start your day!
For the Dough
- Lukewarm Milk – Activates the yeast for a delightful rise; whole or skim milk will work beautifully.
- Active Yeast – Essential for leavening; feel free to use instant yeast for convenience and skip the activation step.
- Unsalted Butter – Adds a rich flavor; margarine can be substituted if you prefer a dairy-free option.
- Fine Ground Salt – Enhances the overall taste; steer clear of coarse salt to ensure proper dissolution.
- Sugar – Provides a hint of sweetness and helps activate the yeast; honey or maple syrup can be a great substitute!
- Large Egg – Binds everything together; using a room-temperature egg ensures better results.
- All-Purpose Flour – The main building block of your muffins; weigh for accuracy (590g is ideal).
- Olive Oil – Greasing your bowls and hands to keep dough from sticking is key!
- Cornmeal – Sprinkle this on your pan to prevent sticking and add a lovely texture.
With these ingredients, you’re on your way to creating warm, homemade English muffins that will become a cherished part of your breakfast routine!
Step‑by‑Step Instructions for English Muffins From Scratch
Step 1: Activate Yeast
In a stand mixer bowl, combine lukewarm milk and active yeast. Let the mixture sit for about 10 minutes, or until it becomes frothy and bubbly. This step is crucial for ensuring your English muffins rise properly, so keep an eye out for those visual cues indicating the yeast’s activation.
Step 2: Mix Ingredients
Once the yeast is ready, add softened unsalted butter, fine ground salt, sugar, and a large room-temperature egg to the bowl. Gradually incorporate all-purpose flour and mix on low speed until combined. Increase the speed to medium for about 5 minutes, beating until the dough is soft and sticky, indicating it’s well mixed.
Step 3: First Rise
Transfer the mixed dough into a lightly oiled bowl, making sure to coat all sides. Cover the bowl with a damp cloth or plastic wrap, and let it rise in a warm area for approximately 2 hours. The dough should double in size, becoming light and airy, which is essential for those delightful nooks and crannies.
Step 4: Shape Muffins
After the dough has risen, gently punch it down to release air. Pinch off pieces of dough weighing about 2 ounces each and roll them into smooth balls. Place these balls on a griddle or baking sheet dusted with cornmeal to prevent sticking. Allow them to rest for 20 minutes, which helps them plump up a bit more.
Step 5: Cook Muffins
Preheat your griddle to medium-low heat. Carefully transfer the dough balls onto the griddle and cook them for 10-12 minutes on each side, or until they turn golden brown and develop a lovely crust. Keep a close watch, adjusting the heat as necessary to prevent burning while achieving that perfect golden color.
Step 6: Cool
Once cooked, remove the English muffins from the griddle and transfer them to a cooling rack. Allow them to cool completely before separating. This step is key, as it ensures the interior remains soft and fluffy, setting you up perfectly for that first warm bite slathered in butter or jam.
What to Serve with Homemade English Muffins From Scratch
The possibilities for creating a delightful breakfast spread alongside your freshly baked muffins are endless, inviting you to indulge your senses.
- Scrambled Eggs: Fluffy and creamy, they pair beautifully with warm muffins for a comforting breakfast experience.
- Avocado Toast: Top with smashed avocado and a sprinkle of salt for a trendy, healthy option that offers both flavor and texture.
- Homemade Jam: The sweet, fruity spread complements the nooks and crannies perfectly, making every bite a delicious treat.
- Smoked Salmon: Adding savory, rich slices gives an elegant touch, transforming your muffins into an indulgent brunch.
- Herbed Cream Cheese: Spread a layer for a creamy, tangy flavor that takes your muffin sandwiches to the next level.
- Fresh Fruit Salad: A medley of colors and flavors adds a refreshing contrast to the warm muffins, balancing your meal wonderfully.
- Coffee or Tea: Start your morning right; both drinks enhance the warm, soft muffins with their comforting aromas.
- Maple Syrup: Drizzle over warm muffins for a classic touch that adds sweetness and keeps things traditional.
- Breakfast Sandwich: Layer with bacon, egg, and cheese for a hearty meal that truly satisfies, especially on busy mornings!
Expert Tips for English Muffins From Scratch
- Yeast Activation: Make sure your milk is lukewarm, not hot. Hot milk can kill yeast, preventing your English muffins from rising.
- Sticky Dough: Keep your hands lightly oiled while working with the dough to prevent sticking, ensuring an easier shaping process.
- Shaping Technique: For best nooks and crannies, gently handle the dough while forming balls; avoid using a knife to cut—split them open with a fork instead.
- Cooking Temperature: Maintain a medium-low heat on the griddle to ensure even cooking; too high might burn the muffins before they’re fully cooked inside.
- Storage Tips: To keep your English muffins fresh, store them in an airtight container at room temperature for up to 3 days, or freeze for longer freshness.
English Muffins From Scratch Variations
Feel free to personalize your English muffins and make them uniquely yours with these delightful twists!
- Whole Wheat: Swap all-purpose flour for whole wheat flour to add a nuttier flavor and a wholesome touch.
- Herb & Cheese: Incorporate fresh herbs like rosemary or thyme, and mix in shredded cheese for savory muffins that elevate any breakfast plate. This combination brings a delightful taste with every bite!
- Sweet Potato: For a slight sweetness, mix in mashed sweet potato. This adds color and a hint of sweetness that pairs beautifully with butter.
- Seeded: Toss in seeds like sesame or poppy to the dough for a delightful crunch and added nutrition, enhancing both texture and flavor.
- Baking Option: Bake your muffins in the oven at 375°F (190°C) instead of frying for a healthier option, though you may lose some nooks. Your kitchen will still smell wonderful!
- Warm Spice: Add cinnamon or nutmeg to the dough for a warm taste that makes your muffins feel like a cozy hug, especially lovely with butter or jam.
- Spicy Kick: Mix in diced jalapeños or a pinch of cayenne pepper for a spicy version, perfect for adventurous palates! These muffins can add some zing to your breakfast.
- Dairy-Free: Use almond or oat milk and dairy-free butter instead of traditional milk and butter for a completely dairy-free muffin. Your friends with dietary restrictions will appreciate it!
If you’re looking to explore more baking, consider trying these Flourless Pumpkin Muffins or perhaps add some delightful herbs from your garden to elevate your culinary creations. The possibilities are endless!
How to Store and Freeze English Muffins
Room Temperature: Store your English muffins in a cool, dry place in a paper bag for 2-3 days. This keeps them softer while allowing some air circulation.
Fridge: For a bit longer life, keep them in the refrigerator for up to 2 weeks. Make sure to use an airtight container to prevent them from drying out.
Freezer: If you’d like to enjoy your homemade English muffins later, freeze them in a zip-top freezer bag for up to 3 months. Just ensure they are completely cooled before wrapping to retain their texture.
Reheating: To enjoy your frozen treats, toast them directly from the freezer or warm them in the oven for 10-15 minutes at 350°F (175°C).
Make Ahead Options
These English Muffins From Scratch are a fantastic choice for meal prep enthusiasts! You can prepare the dough up to 24 hours in advance by completing steps 1 through 3, then covering the rising dough tightly with plastic wrap and refrigerating it. This method enhances flavor while developing that fluffy texture! When you’re ready to cook, simply proceed to shaping and cooking the muffins as instructed. Remember to let the dough come to room temperature before shaping to maintain quality. With these tips, you’ll enjoy delicious homemade English muffins without the last-minute rush, making your mornings feel a little brighter!
English Muffins From Scratch Recipe FAQs
How do I choose the right milk for my English muffins?
Absolutely! Lukewarm milk is essential, as it provides the necessary moisture and helps activate the yeast. Both whole and skim milk work beautifully. Just make sure it’s warm but not hot—hot milk can kill your yeast!
What’s the best way to store my English muffins?
Great question! For optimal freshness, keep your English muffins at room temperature in a paper bag for 2-3 days. If you want to extend shelf life, place them in an airtight container in the refrigerator for up to 2 weeks. Remember, they’re best enjoyed fresh!
Can I freeze English muffins, and how?
Yes, you can! To freeze your English muffins, allow them to cool completely first. Place them in a single layer on a baking sheet to freeze for about an hour, then transfer to a zip-top freezer bag. They’ll stay delicious for up to 3 months. You can simply toast them straight from the freezer when you’re ready to enjoy!
What should I do if my dough is too sticky?
Very common! If your dough feels too sticky, try lightly oiling your hands and the surface you’re working on. This will help you handle the dough more easily. If it’s excessively sticky, you can gradually incorporate a little more flour—just be careful not to overdo it, as too much flour can make the muffins dense.
Are there any dietary considerations for these English muffins?
Absolutely! This recipe is vegetarian-friendly and can be adapted for dairy-free diets by using margarine in place of butter. If you have gluten intolerance, experimenting with a gluten-free all-purpose flour blend might work; just be sure to follow the instructions specific to that blend. Always check ingredient labels for allergens!
Can my pets eat these English muffins?
While the ingredients are generally safe, it’s best to avoid sharing your English muffins with pets, especially if they contain sugar or butter. Always consult your veterinarian for guidance on pet diets.
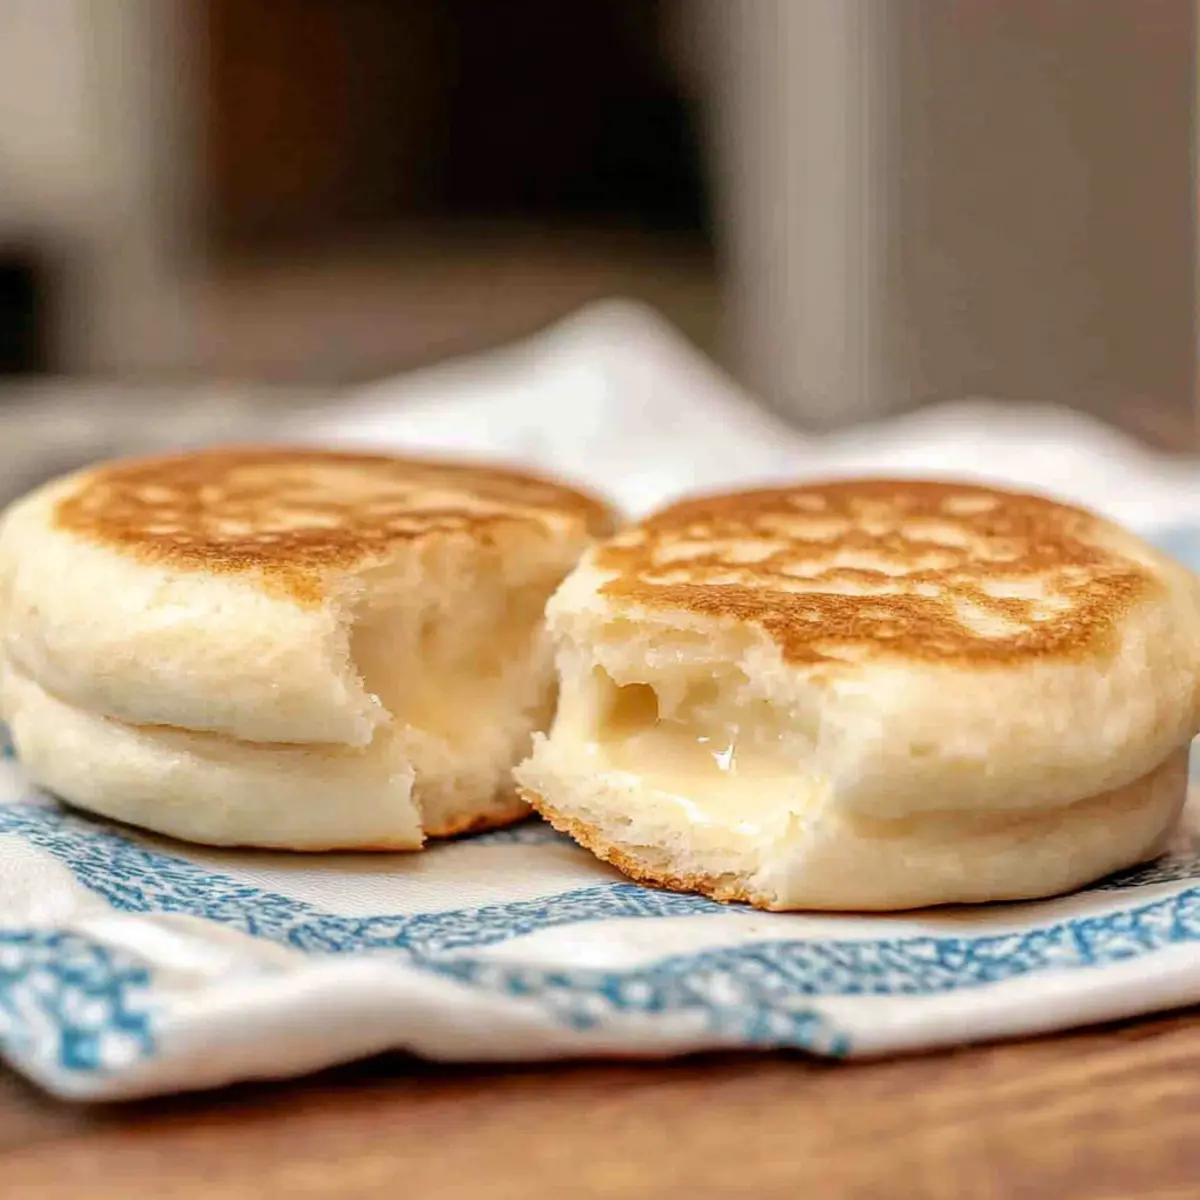
Soft and Buttery English Muffins From Scratch You'll Love
Ingredients
Equipment
Method
- In a stand mixer bowl, combine lukewarm milk and active yeast. Let sit for about 10 minutes until frothy.
- Add softened unsalted butter, fine ground salt, sugar, and a large egg to the bowl. Gradually mix in all-purpose flour on low speed.
- Transfer the mixed dough into a lightly oiled bowl, cover, and let rise in a warm area for approximately 2 hours.
- Gently punch down the dough and pinch off about 2 ounces of dough each. Roll them into balls and rest on cornmeal-dusted surface for 20 minutes.
- Preheat a griddle to medium-low heat. Cook dough balls for 10-12 minutes on each side until golden brown.
- Remove from griddle and allow to cool completely on a cooling rack before separating.
Leave a Reply