
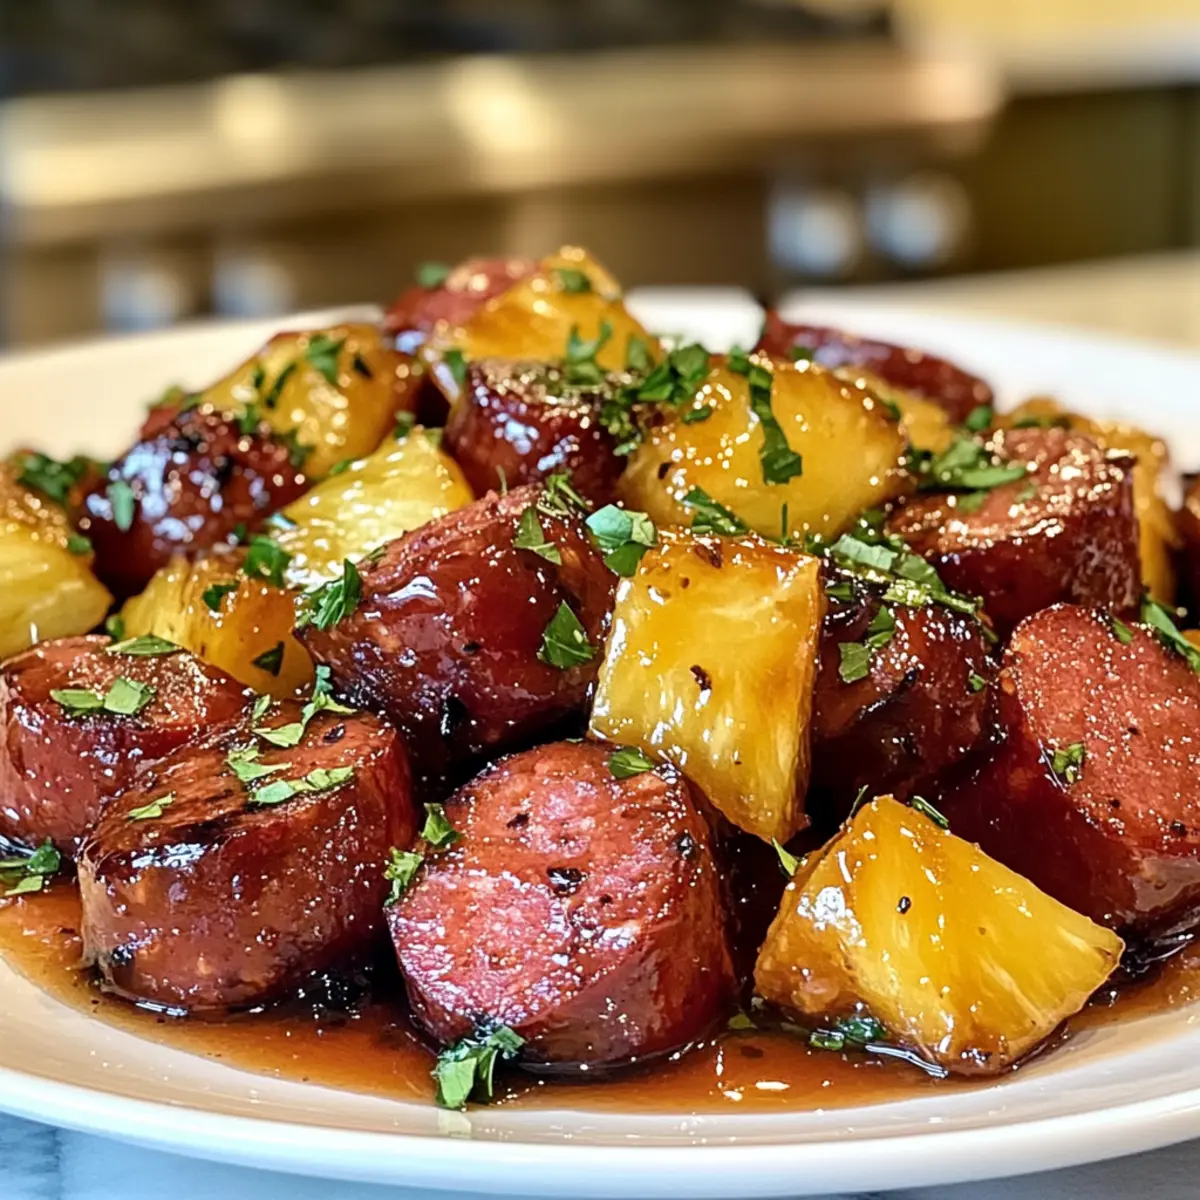
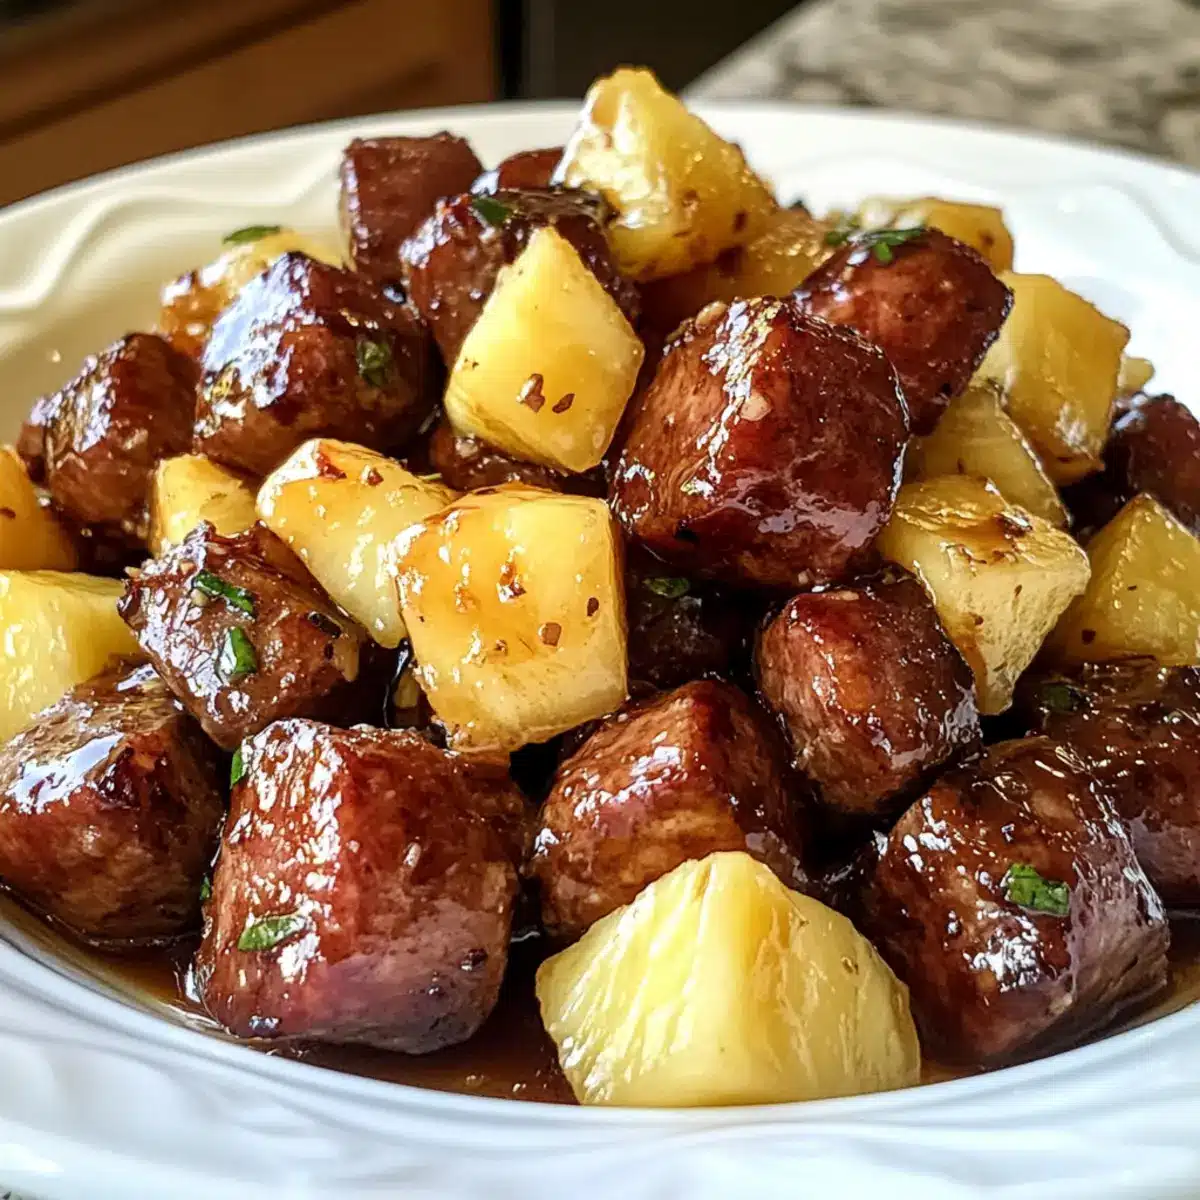
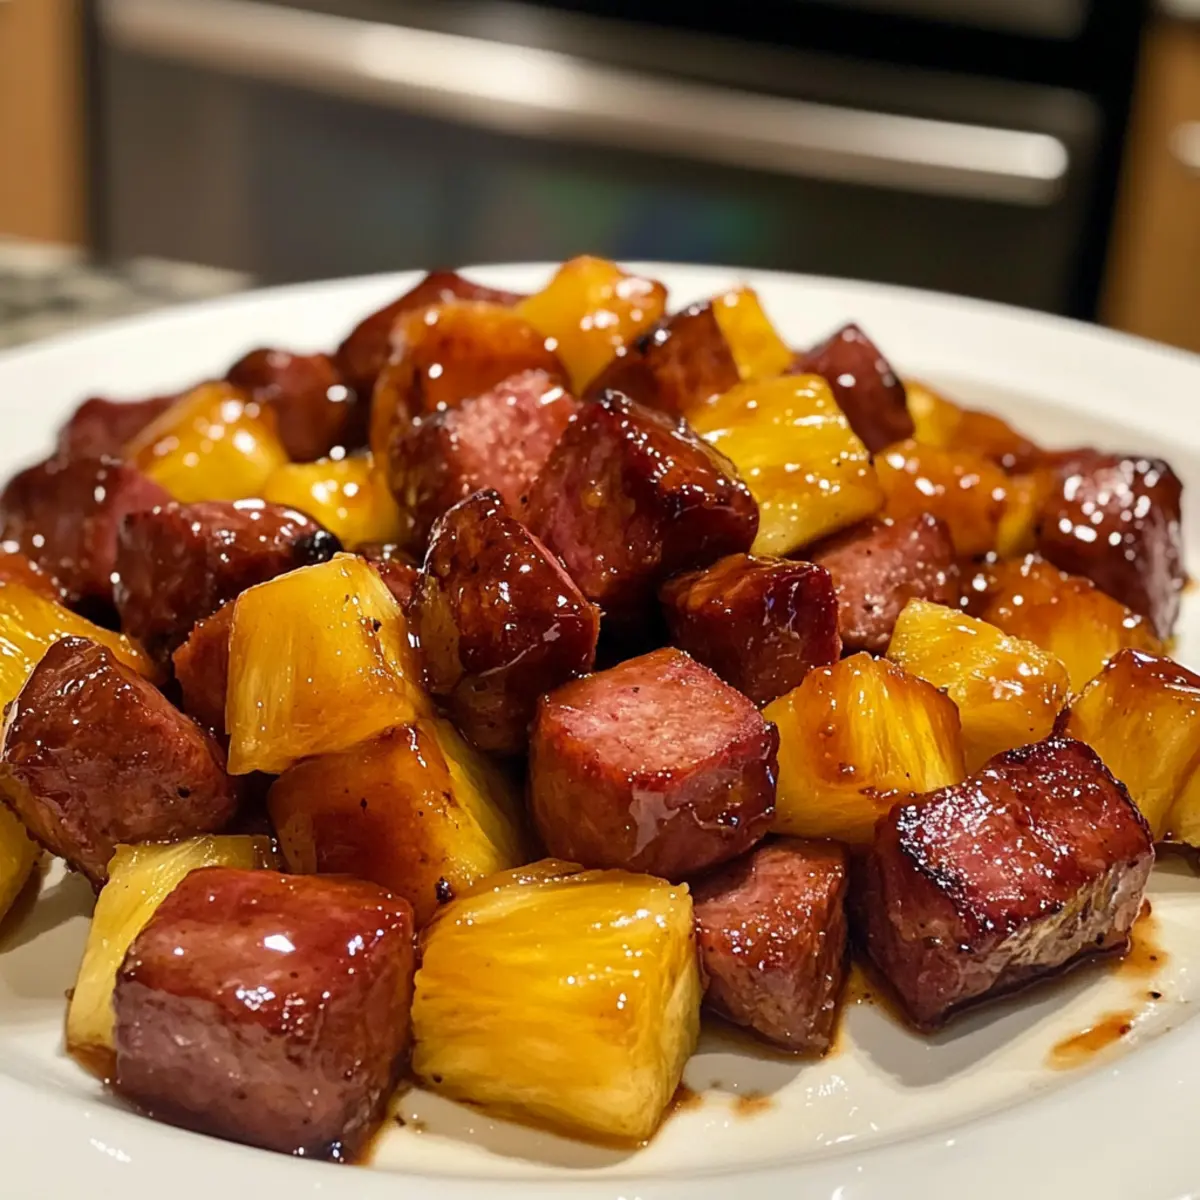
As I tossed some smoky kielbasa and vibrant pineapple chunks together for a quick snack, I couldn’t help but smile at how the kitchen transformed into an inviting space filled with irresistible aromas. These Glazed Kielbasa Pineapple Bites bring the perfect balance of sweet and savory to your table, thanks to a scrumptious teriyaki-chili-honey glaze. Whether you’re planning a game night or a casual gathering, this recipe is not only quick to prepare but also a guaranteed crowd-pleaser. Trust me, your friends and family will be begging for the recipe! With the flexibility to mix it up using different meats or sauces, you can easily customize these bites to suit every palate. Are you ready to elevate your appetizer game and impress your guests with a dish that’s as delightful to eat as it is to behold? Let’s dive into this simple yet stunning recipe!
Why Are These Bites So Irresistible?
Flavor Explosion: The delightful combination of smoky kielbasa paired with fresh pineapple delivers a burst of flavors that’s hard to resist.
Quick Prep Time: These bites come together in just 20 minutes, making them an ideal choice for unexpected guests or last-minute gatherings.
Flexible Ingredients: Whether you prefer a lighter option with turkey sausage or a kick with sriracha, this recipe easily adapts to your taste. You can also try them alongside other popular snacks like Garlic Chicken Bites.
Crowd-Pleasing Appeal: The sticky teriyaki-chili-honey glaze makes these bites a hit at any party, ensuring everyone goes back for seconds.
Unique Texture: The chewy kielbasa and juicy pineapple complement each other beautifully, creating a wonderfully satisfying bite.
Elevate your appetizer game and enjoy the compliments this dish will bring!
Glazed Kielbasa Pineapple Bites Ingredients
Get ready to create magic in your kitchen!
For the Bites
• Beef Kielbasa – This rich, smoky protein forms the backbone of your dish; consider smoked turkey or chicken sausage for a lighter twist.
• Pineapple Chunks – They bring a juicy burst of sweetness; fresh pineapple can elevate the tropical vibes.
For the Glaze
• Teriyaki Sauce – Sets the stage with a sweet and tangy flavor; swap it for soy sauce mixed with ginger for a unique experience.
• Sweet Chili Sauce – Adds a zesty hint of spice to the mix.
• Honey – Sweetens the glaze naturally and helps it stick perfectly to the bites.
• Pineapple Juice – Utilize the reserved juice from canned pineapple to maintain moisture and maximize flavor.
For Assembly
• Plain Toothpicks – Essential for holding your delicious bites together; soak in water to keep them from burning in the oven.
These Glazed Kielbasa Pineapple Bites are simple yet oh-so-satisfying. Enjoy making, sharing, and savoring every last bite!
Step‑by‑Step Instructions for Glazed Kielbasa Pineapple Bites
Step 1: Prep Toothpicks
Begin by soaking plain toothpicks in water for about 20 minutes. This step prevents them from burning during baking and ensures your Glazed Kielbasa Pineapple Bites stay beautifully intact. While the toothpicks absorb moisture, gather your other ingredients and preheat your oven, setting it to 425°F (220°C) to get it ready for baking.
Step 2: Preheat Oven
With the oven now heating up to 425°F (220°C), prepare your baking sheet by lining it with parchment paper. This not only prevents sticking but also makes for an easier cleanup. As you wait for the oven temperature to reach the right level, take this time to organize your workspace for a smooth assembly process.
Step 3: Assemble Bites
Once your oven is preheated, it’s time to assemble your bites! On the lined baking sheet, place a piece of kielbasa, then add a pineapple chunk on top. This stacked combination of smoky kielbasa and sweet pineapple will form the base of your Glazed Kielbasa Pineapple Bites. Make sure to leave enough space between each bite for even cooking.
Step 4: Make Glaze
In a small bowl, whisk together the teriyaki sauce, sweet chili sauce, honey, and reserved pineapple juice from the canned pineapple. This mixture creates the scrumptious glaze that will enhance the flavor of your Glazed Kielbasa Pineapple Bites. Ensure everything is well incorporated, resulting in a smooth and glossy texture.
Step 5: Glaze Bites
Now, brush the prepared glaze generously over each kielbasa and pineapple piece on the baking sheet. This step is crucial, as the glaze will caramelize during baking, turning into a delightful sticky coating. After glazing, insert a soaked toothpick into each bite to hold everything together perfectly while they cook.
Step 6: Bake
Carefully place your baking sheet in the preheated oven and let the bites bake for 15–20 minutes. Keep an eye on them; they should become hot throughout and slightly caramelized on top. Shortly before they finish baking, you’ll notice the enticing aroma filling your kitchen, promising delicious Glazed Kielbasa Pineapple Bites.
Step 7: Serve
Once baked, remove the bites from the oven and allow them to cool slightly. This brief cooling period makes them more manageable to eat while allowing those sticky flavors to set. Serve these warm as an irresistible appetizer that’s sure to delight friends and family at your next gathering!
What to Serve with Glazed Kielbasa Pineapple Bites
Bring your gathering to life with accompaniments that harmonize beautifully with this sweet and savory delight.
- Creamy Coleslaw: This crunchy, tangy salad balances the rich flavors of the bites, providing a refreshing contrast that your guests will love.
- Light Potato Salad: A chilled potato salad adds smoothness and a subtle herbal note, making for a delightful pairing that contrasts nicely with the warm bites.
- Grilled Vegetables: Charred veggies like bell peppers and zucchini bring a smoky element that complements the kielbasa, adding a colorful visual appeal to your spread.
- Garlic Breadsticks: Soft, warm breadsticks with a hint of garlic are perfect for soaking up any extra glaze, elevating the experience for those wanting to savor every last taste.
- Sparkling Lemonade: The zesty and bubbly refreshment of sparkling lemonade enhances the sweetness of the pineapple, making your meal feel festive and bright.
- Fruit Platter: A summery fruit platter with berries and melon offers a light and vibrant contrast, rounding out the meal with freshness.
- Spicy Mustard Dipping Sauce: For those seeking more heat, a spicy mustard can offer a flavorful kick, enhancing the savory elements of the bites.
- Chocolate Brownie Bites: End the meal on a sweet note with fudgy brownie bites that playfully contrast the salty-sweet profile of the appetizers.
Enjoy the harmony of flavors and textures as you serve these Glazed Kielbasa Pineapple Bites with these delightful pairings!
Expert Tips for Glazed Kielbasa Pineapple Bites
-
Soak Toothpicks: To prevent burning, soak your plain toothpicks in water for at least 20 minutes before using them in your Glazed Kielbasa Pineapple Bites.
-
Customize Glaze: Feel free to experiment with different sauces; mix up teriyaki with soy sauce or add sriracha for a spicy kick while keeping the sweet balance intact.
-
Watch Baking Time: Keep an eye on the baking process—aim for a caramelized exterior, avoiding overcooking that could dry out the kielbasa and pineapple.
-
Serve Warm: These bites are best enjoyed fresh out of the oven. Serve them warm to maintain their deliciously sticky glaze and juicy texture.
-
Make Ahead: You can assemble the bites a few hours in advance. Just glaze and bake them just before serving for a fresh taste at your gathering.
-
Store Safely: Store leftover Glazed Kielbasa Pineapple Bites in an airtight container for up to 3 days. Reheat in the oven for the best texture.
How to Store and Freeze Glazed Kielbasa Pineapple Bites
Fridge: Store leftover glazed kielbasa pineapple bites in an airtight container for up to 3 days, ensuring they stay fresh and delicious.
Freezer: For longer storage, freeze assembled but uncooked bites in a single layer on a baking sheet, then transfer to a freezer-safe container for up to 2 months.
Reheating: When ready to enjoy, bake frozen bites straight from the freezer at 425°F (220°C) for 20-25 minutes, or until heated through and slightly caramelized.
Thawing Tips: If you prefer thawing first, move the bites to the fridge overnight before baking, to maintain their flavor and texture.
Make Ahead Options
These Glazed Kielbasa Pineapple Bites are perfect for busy weeknights and meal prep enthusiasts! You can assemble the bites (without baking) and store them in the refrigerator for up to 24 hours. To do this, prepare the toothpicks, place the kielbasa and pineapple on them, and arrange them on a baking sheet. Cover with plastic wrap to keep them fresh. When you’re ready to serve, simply brush on the glaze and bake the bites in a preheated oven at 425°F (220°C) for 15–20 minutes until heated through and caramelized. This way, you’ll enjoy the same delicious flavor with minimal effort, making your gatherings stress-free and enjoyable!
Glazed Kielbasa Pineapple Bites Variations
Feel free to get creative with these scrumptious bites, adapting them to suit your cravings and kitchen pantry!
-
Spicy Kick: Add sriracha to the glaze for a fiery heat that pairs perfectly with the sweetness.
-
BBQ Twist: Use BBQ sauce instead of teriyaki for a smokier, tangy flavor that will change the whole profile.
-
Mustard Lovers: Opt for a honey mustard glaze instead to add a tangy zing that complements the smoky kielbasa.
-
Pineapple Salsa: Top with a fresh pineapple salsa—mix diced pineapple, cilantro, and lime juice for a refreshing crunch.
-
Chunky Veggies: Add chopped bell peppers or red onions to the baking sheet for added color and a pop of flavor.
-
Vegan Version: Swap kielbasa for tofu or tempeh and use a plant-based teriyaki sauce for a delicious vegan alternative.
-
Tropical Fusion: Mix in diced mango or papaya with the pineapple chunks for a tropical flair.
-
Herb Infusion: Sprinkle fresh herbs like cilantro or parsley over the bites before serving for an added freshness that brightens each bite.
With these variations, you’ll discover a whole new world of flavors! You might even want to pair them with comforting options, like Salmon Bites Bowls or the refreshing Pineapple Chicken Fried Rice for a delightful feast!

Glazed Kielbasa Pineapple Bites Recipe FAQs
What type of kielbasa should I use for this recipe?
You can use beef kielbasa for its rich, smoky flavor, which pairs beautifully with the sweetness of pineapple. If you’re looking for a lighter option, smoked turkey sausage or chicken sausage works just as well.
How long can I store leftover glazed kielbasa pineapple bites in the fridge?
Absolutely! After enjoying your bites, you can store any leftovers in an airtight container in the fridge for up to 3 days. Just be sure they’re sealed tightly to maintain their flavor and freshness.
Can I freeze glazed kielbasa pineapple bites?
Yes, you can! To freeze, simply assemble the uncooked bites on a baking sheet in a single layer and freeze them for about 1-2 hours until firm. Then, transfer the frozen bites to a freezer-safe container and store them for up to 2 months. When ready to enjoy, bake them straight from the freezer at 425°F (220°C) for 20-25 minutes.
What should I do if the glaze doesn’t stick properly during baking?
If you notice the glaze not adhering well, you may need to brush on a bit more glaze halfway through baking. Additionally, make sure you’re brushing it on evenly before inserting the toothpicks, as this helps the glaze form that delicious sticky coating.
Are these bites suitable for people with dietary restrictions, like allergies?
Yes, these Glazed Kielbasa Pineapple Bites can accommodate various dietary preferences! Choose halal-certified kielbasa and substitute with gluten-free sauces if needed. Always check labels for allergens, particularly for soy or honey, to keep everyone safe and happy.
How can I make these bites spicier?
If you love a kick, consider mixing sriracha into your glaze. Start with a tablespoon and adjust to your taste. Alternatively, adding some finely chopped jalapeños or red pepper flakes just before baking can elevate the flavor!
Irresistible Glazed Kielbasa Pineapple Bites for Every Party!
Ingredients
Equipment
Method
- Soak plain toothpicks in water for about 20 minutes.
- Preheat your oven to 425°F (220°C) and line a baking sheet with parchment paper.
- On the lined baking sheet, place a piece of kielbasa, then add a pineapple chunk on top.
- In a small bowl, whisk together the teriyaki sauce, sweet chili sauce, honey, and reserved pineapple juice.
- Brush the prepared glaze generously over each kielbasa and pineapple piece on the baking sheet.
- Insert a soaked toothpick into each bite.
- Bake in the preheated oven for 15–20 minutes until hot throughout and slightly caramelized.
- Remove from oven and let cool slightly before serving.
Leave a Reply