
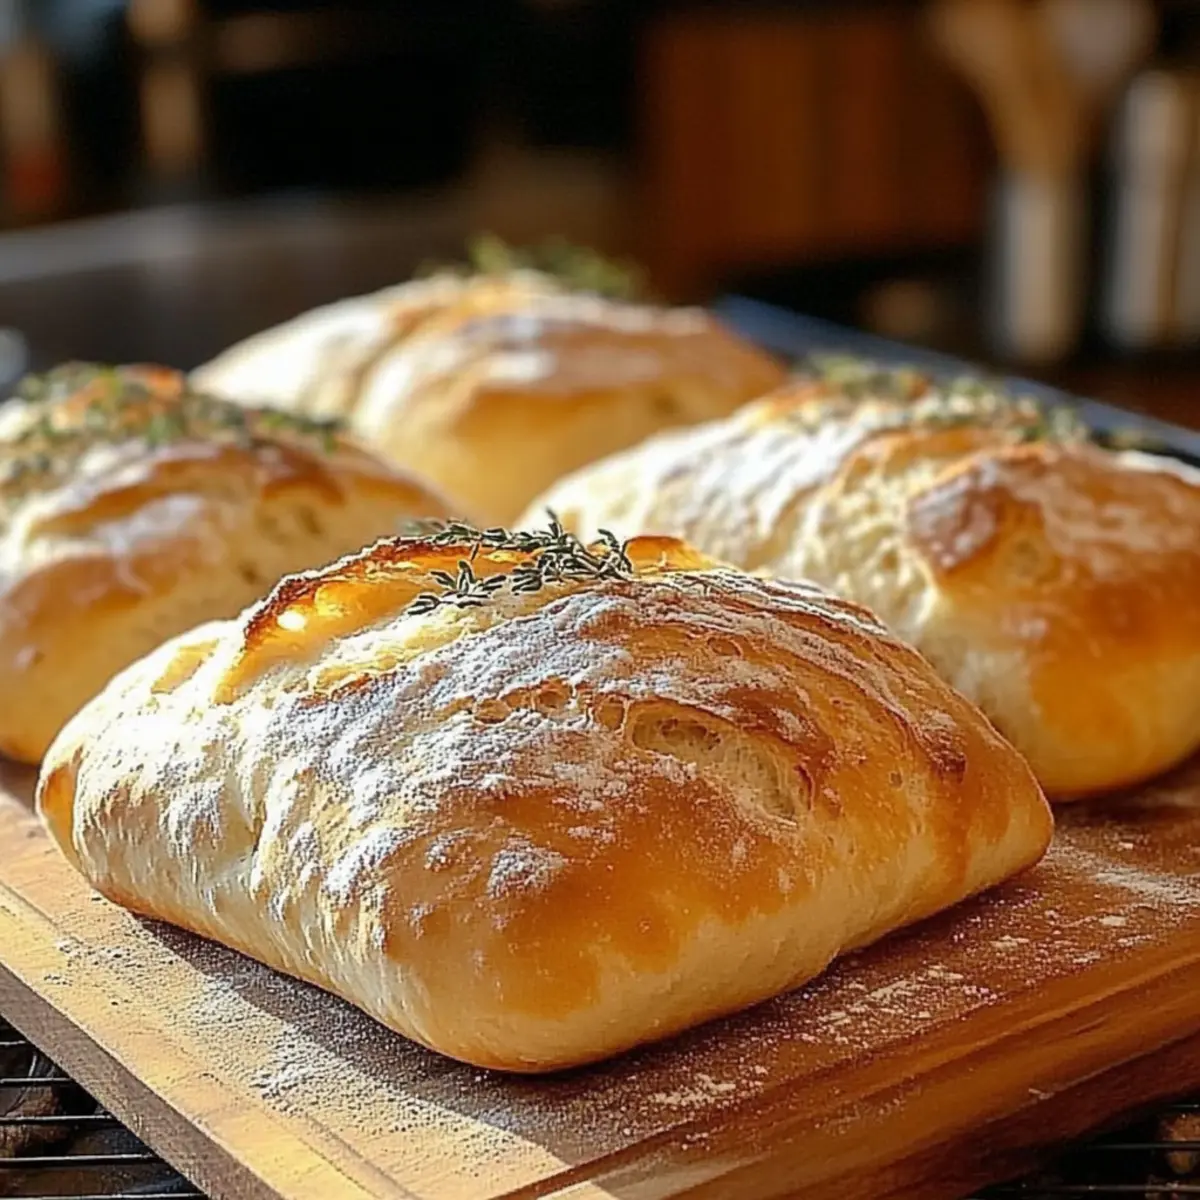
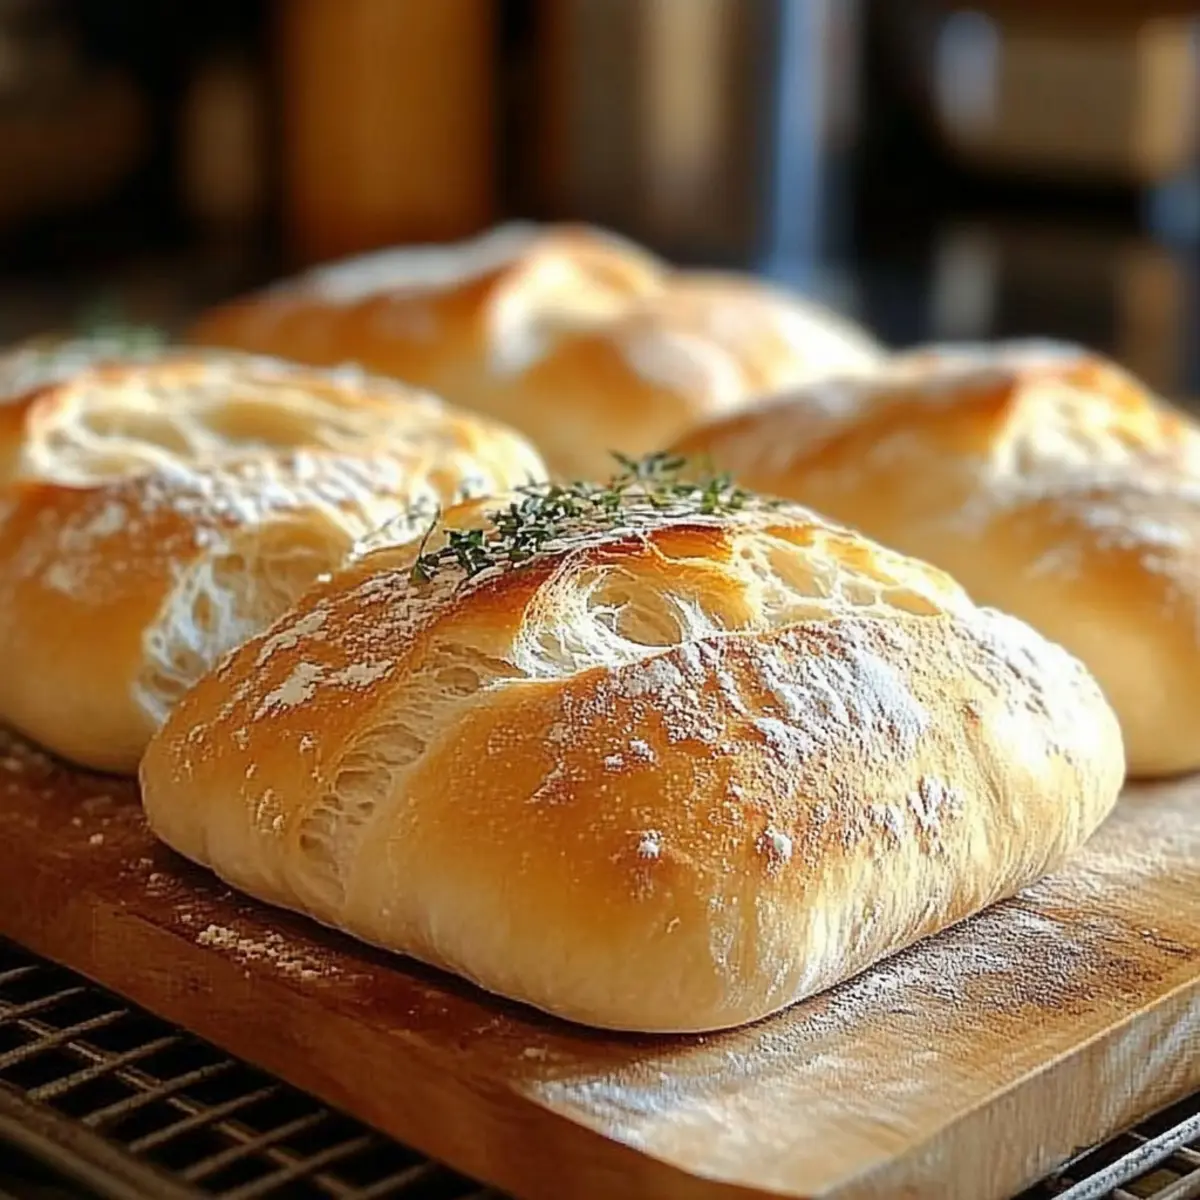
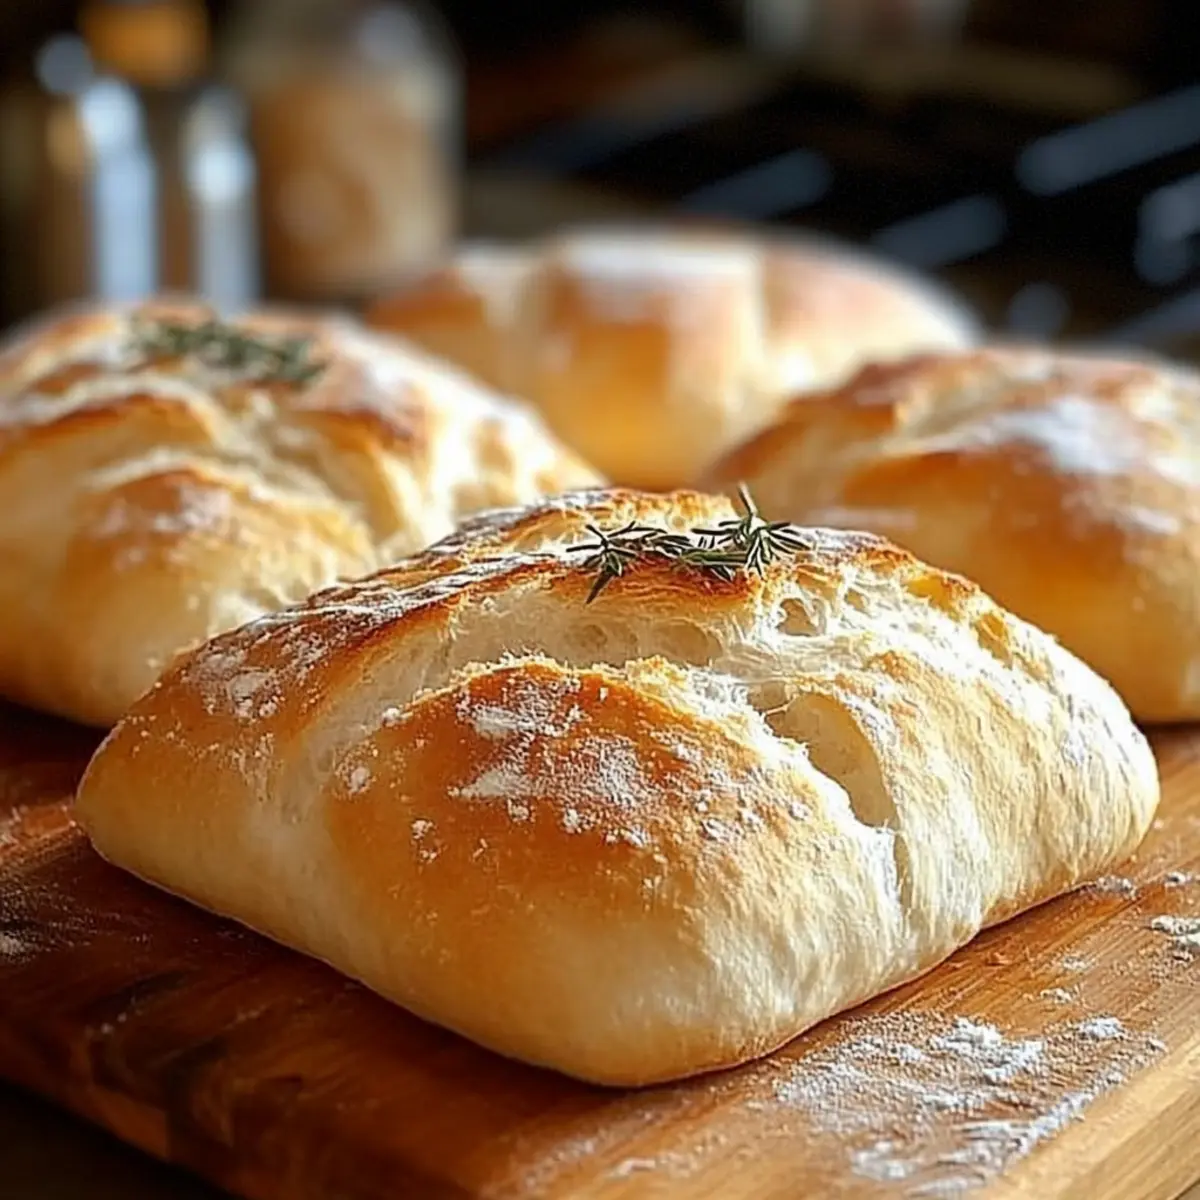
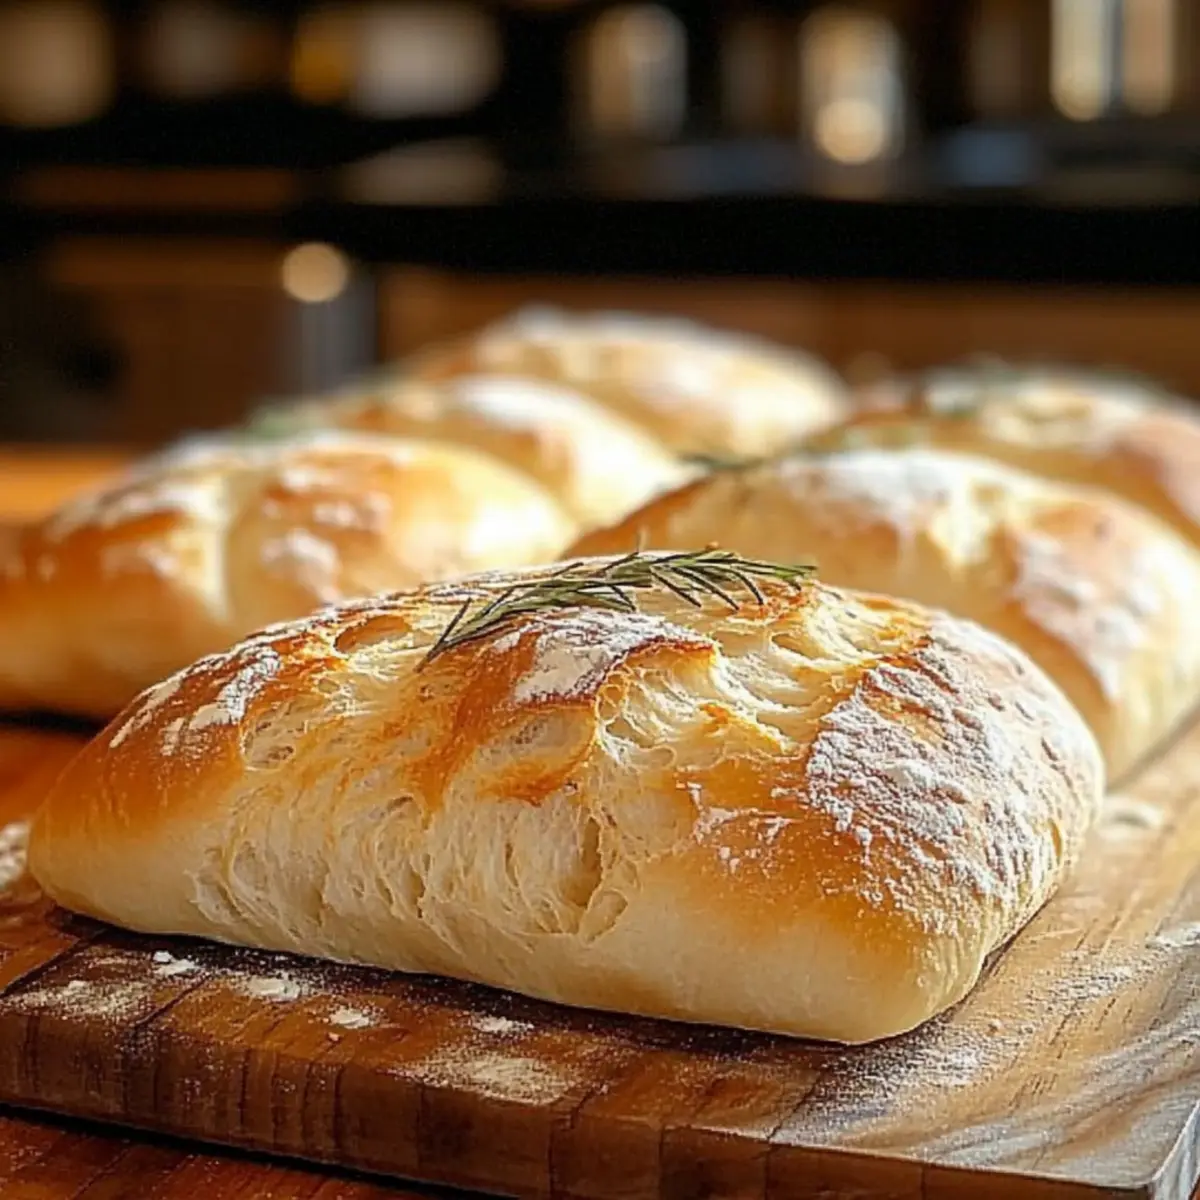
The aroma of freshly baked bread has a way of turning an ordinary day into something special. Today, I’m excited to share my Homemade Ciabatta Bread Recipe, a delightful creation that offers bakery-quality results in under three hours! This quick ciabatta bread isn’t just about convenience; it’s also a celebration of flavor and texture that will impress friends and family alike. Imagine a crispy crust giving way to a soft, airy interior, perfect for everything from gourmet sandwiches to serving alongside your favorite soups. Plus, the ease of making this bread means you can satisfy those spontaneous cravings without the stress of lengthy preparations. Are you ready to transform your kitchen into a cozy bakery? Let’s get started!
Why Is Homemade Ciabatta Bread Special?
Simplicity at Its Core: This Homemade Ciabatta Bread Recipe is remarkably easy to follow, even for novice bakers. With just a few basic ingredients, you can achieve bakery-quality bread in no time!
Incredible Flavor: Experience the rich taste that’s a perfect blend of crispy crust and airy crumb, making every bite a joyful sensory delight.
Time-Saving Delight: Forget the long wait—this recipe gets you fresh bread in under three hours, perfect for unplanned gatherings or last-minute meals.
Versatile Use: Whether you’re crafting gourmet sandwiches or pairing it with soups and sauces, this ciabatta bread is an all-around culinary superstar.
A Touch of Italy: Bring a bit of Italian charm into your home with this rustic bread. It’s a love letter to culinary tradition, connecting your meals to the rich history of ciabatta.
For more delightful baking ideas, check out my recipes for Banana Bread Moist and Apple Bread Moist, and elevate your homemade creations!
Homemade Ciabatta Bread Ingredients
• Experience the joy of baking with these essential ingredients!
For the Dough
- All-Purpose or Bread Flour – Provides structure and chewiness; substitute with a gluten-free flour blend for a gluten-free version (note that texture may vary).
- Salt – Enhances flavor and strengthens gluten; do not substitute or omit for best results.
- Instant Yeast – Promotes fermentation and rise; you can replace with active dry yeast by dissolving it in water beforehand.
- Lukewarm Water – Hydrates the dough for a wet consistency, crucial for a light texture; ensure it’s warm, not hot, to activate the yeast without killing it.
- Olive Oil – Used for greasing and optional for added flavor; a touch can elevate the bread’s taste.
With these ingredients, your Homemade Ciabatta Bread will transform your kitchen into a lovely bakery!
Step‑by‑Step Instructions for Homemade Ciabatta Bread Recipe
Step 1: Make the Dough
In a large mixing bowl, whisk together 4 cups of all-purpose flour, 2 teaspoons of salt, and 2 teaspoons of instant yeast until well combined. Gradually pour in 1 ¾ cups of lukewarm water, mixing continuously with a wooden spoon until a shaggy and sticky dough forms. The dough should resemble thick cake batter—this wet consistency is key for that airy texture in your ciabatta.
Step 2: First Rise
Cover the bowl with a clean kitchen towel and place it in a warm area of your kitchen. Let the dough rise for about 1 hour, or until it has doubled in size and appears bubbly on the surface. This crucial step helps develop the flavors and contributes to the lightness of your Homemade Ciabatta Bread, so don’t rush it!
Step 3: Fold and Rest
After the first rise, generously flour your work surface to prevent sticking. Gently transfer the dough onto the floured surface and lightly flour the top of the dough. Using your hands, fold the dough over itself 2–3 times, forming a loose rectangle. Carefully place the dough on a baking sheet lined with parchment paper, dust with a little more flour, and let it rest for 30 minutes to allow the gluten to relax.
Step 4: Preheat Oven
While the dough rests, preheat your oven to 450°F (230°C). A hot oven is essential for achieving that beautiful crispy crust characteristic of ciabatta bread. If you have a baking stone, place it inside the oven while it preheats to enhance the bread’s texture during baking.
Step 5: Bake the Bread
Once the oven is preheated and the dough has rested, carefully slide the baking sheet into the oven. Bake the Homemade Ciabatta Bread for 22 to 25 minutes, or until the loaf turns a deep golden brown. You’ll know it’s done when it sounds hollow when tapped on the bottom; this sound is music to a baker’s ears!
Step 6: Cool and Serve
When your ciabatta is beautifully baked, remove it from the oven and transfer the loaf to a wire rack. Allow it to cool for at least 30 minutes before slicing. This cooling period helps maintain the bread’s texture and prevents a gummy interior, ensuring each slice of your Homemade Ciabatta Bread is perfectly tender and airy.
What to Serve with Quick & Easy Ciabatta Bread
Transform your freshly baked ciabatta into a delightful meal that tantalizes the senses and warms the heart.
-
Zesty Tomato Soup: A classic pairing, the vibrant flavors of tomato soup complement the chewy texture of ciabatta perfectly. Dip in chunks for a cozy experience.
-
Creamy Garlic Mashed Potatoes: The smooth richness of these mashed potatoes creates a contrast that beautifully balances the crusty bread. Each bite of ciabatta soaked in garlic-infused goodness is pure bliss.
-
Herbed Olive Oil Dip: Drizzle some fresh, herbed olive oil for dipping. The infused aromas enhance ciabatta’s soft interior, turning each slice into a decadent treat.
-
Charcuterie Board: Serve slices with prosciutto, cheese, and olives. The saltiness of cured meats and a variety of textures make the meal feel gourmet while celebrating the ciabatta’s versatility.
-
Spinach and Artichoke Dip: The creaminess of this dip is wonderfully offset by the ciabatta’s rustic crunch. Use the bread to scoop up every last bit—delicious!
-
Homemade Bruschetta: Top your ciabatta with fresh tomatoes, basil, and a drizzle of balsamic glaze. This vibrant dish showcases the bread’s ability to hold up against juicy toppings wonderfully.
-
Italian Salad: A fresh, zesty salad featuring arugula, cherry tomatoes, and a lemony vinaigrette adds a burst of freshness that balances the hearty bread.
-
Chardonnay: A crisp white wine brings out the flavors of the bread and any dishes you serve it with, enhancing the overall dining experience.
-
Tiramisu: End your meal with layers of coffee-soaked ladyfingers and mascarpone. The sweet finish is perfect after savoring artisan bread, wrapping up your Italian-inspired feast.
Expert Tips for Homemade Ciabatta Bread
Keep Dough Wet: Maintain the wetness of the dough; resist the urge to add extra flour, as this can lead to a dense loaf instead of the airy texture you desire.
Handle Gently: Always use wet hands when working with the dough to prevent sticking. This gentle approach preserves air bubbles, which are key for that light ciabatta consistency.
Fold Carefully: Remember to be gentle during the folding process. Rough handling can deflate the dough, affecting the rise and crumb structure of your Homemade Ciabatta Bread.
Don’t Rush Cooling: Allow your bread to cool entirely on a wire rack. Cutting too soon can lead to a gummy interior, so be patient for the best results.
Preheat Properly: Make sure your oven is fully preheated to 450°F (230°C) before baking. A properly heated oven ensures that the bread achieves that lovely crispy crust you’re aiming for.
Make Ahead Options
These Homemade Ciabatta Bread are perfect for busy home cooks looking to save time! You can prepare the dough up to 24 hours in advance; after mixing, simply cover it tightly with plastic wrap and refrigerate. This slow fermentation enhances flavor, giving you even more delicious results. Additionally, the shaped loaf can be left to rest for up to 3 hours at room temperature before baking. When you’re ready to enjoy your fresh ciabatta, preheat the oven and bake the dough just as directed, allowing the bread to cool completely on a wire rack for the best texture. With these make-ahead tips, you’ll have bakery-quality bread with minimal effort!
Storage Tips for Homemade Ciabatta Bread
Room Temperature: Store your homemade ciabatta bread in a zip-top bag at room temperature for up to 2 days. Ensure it is completely cooled before sealing to maintain its texture.
Freezer: For longer storage, freeze slices of ciabatta bread individually. Wrap each slice in plastic wrap, then place in a freezer-safe bag. It can be stored for up to 3 months without losing flavor.
Reheating: To enjoy your frozen ciabatta, toast the slices directly from frozen, or for a softer loaf, thaw at room temperature and reheat in a preheated oven at 350°F (175°C) for 5-10 minutes.
Wrapping: Always use airtight wrapping to prevent freezer burn and maintain the splendid airy texture of your homemade ciabatta bread.
Homemade Ciabatta Bread Recipe Variations
Feel free to get creative with your homemade ciabatta bread and make it your own!
-
Herbed Delight: Add a tablespoon of your favorite dried herbs or minced garlic to the dough for a fragrant twist. It’ll fill your kitchen with irresistible aroma!
-
Roll it Up: Shape the dough into smaller rolls instead of a single loaf for quicker baking. These delightful bites are perfect for dipping and appetizers.
-
Sweet Surprise: Incorporate a splash of honey or a sprinkle of sugar into the dough for a subtly sweet flavor. Perfect for breakfast or pairing with jam!
-
Cheesy Ciabatta: Fold in shredded cheese like mozzarella or parmesan to the dough for an extra layer of flavor that melts beautifully as it bakes. Your taste buds will thank you!
-
Olive Options: Consider adding chopped olives or sun-dried tomatoes into the dough. Each bite will bring an enjoyable surprise, like a bite of Italian sunshine.
-
Spice it Up: Want some heat? Add a pinch of red pepper flakes to the dough for a subtle kick that enhances the bread’s rustic warmth.
-
Gluten-Free Version: Swap the all-purpose flour with a gluten-free blend. Keep in mind, the texture may change slightly, but it will still be delicious!
-
Classic Italian Flair: Mix in some old bread crumbs or use semolina flour on the surface for that rustic, traditional Italian finish. It adds a lovely texture to the crust!
Don’t forget to enjoy this ciabatta bread with a delightful dip of olive oil and balsamic vinegar—it’ll elevate your culinary experience! For more baking inspiration, check out my Cinnamon Swirl Banana Bread or try the delicious Homemade Butter Chicken for an unforgettable meal.
Homemade Ciabatta Bread Recipe FAQs
What kind of flour should I use for ciabatta bread?
For the best results in your Homemade Ciabatta Bread, I recommend using all-purpose or bread flour. Both options provide structure and that delightful chewiness. If you need a gluten-free version, you can use a gluten-free flour blend; just remember that the texture may not be quite the same.
How should I store homemade ciabatta bread to keep it fresh?
To keep your ciabatta bread fresh, store it in a zip-top bag at room temperature for up to 2 days. Make sure the bread has cooled completely before sealing to prevent moisture buildup. If it lasts longer than that, freeze slices individually wrapped in plastic wrap and placed in a freezer-safe bag for up to 3 months.
Can I freeze homemade ciabatta bread?
Absolutely! To freeze your Homemade Ciabatta Bread, slice it first, then wrap each slice tightly in plastic wrap. Place them in a freezer-safe bag, making sure to push out as much air as possible. When you’re ready to enjoy, you can toast the slices straight from the freezer, or thaw them at room temperature and reheat in a preheated oven at 350°F (175°C) for 5-10 minutes.
What should I do if my ciabatta dough is too sticky?
It’s important to maintain the wetness of your dough for the ideal ciabatta texture, but if it feels excessively sticky, try lightly oiling your hands while handling the dough instead of adding more flour. This technique will help manage the stickiness without compromising the loaf’s lightness.
Can I add flavors to my ciabatta bread?
Yes! You can enhance the flavor of your Homemade Ciabatta Bread by mixing in ingredients like herbs, garlic, or even a hint of cheese to the dough. For a sweeter variation, consider adding a splash of honey or a sprinkle of sugar during the mixing process. Be sure to adjust your liquid amounts if needed when adding extra ingredients.
Is ciabatta bread safe for dogs?
While your furry friends may love the smell of freshly baked ciabatta bread, it’s best to avoid giving it to your pets. The ingredients in the bread, particularly yeast and salt, can be harmful to dogs in large quantities. Instead, stick to pet-safe treats to keep them happy!
Homemade Ciabatta Bread Recipe for Effortless Artisan Baking
Ingredients
Equipment
Method
- In a large mixing bowl, whisk together 4 cups of all-purpose flour, 2 teaspoons of salt, and 2 teaspoons of instant yeast until well combined. Gradually pour in 1 ¾ cups of lukewarm water, mixing continuously with a wooden spoon until a shaggy and sticky dough forms.
- Cover the bowl with a clean kitchen towel and place it in a warm area of your kitchen. Let the dough rise for about 1 hour, or until it has doubled in size.
- Generously flour your work surface to prevent sticking. Gently transfer the dough onto the floured surface and lightly flour the top. Fold the dough over itself 2–3 times, forming a loose rectangle.
- While the dough rests, preheat your oven to 450°F (230°C). If you have a baking stone, place it inside the oven.
- Once the oven is preheated and the dough has rested, slide the baking sheet into the oven. Bake for 22 to 25 minutes, or until the loaf is a deep golden brown.
- Remove the bread from the oven and transfer it to a wire rack. Allow it to cool for at least 30 minutes before slicing.
Leave a Reply