
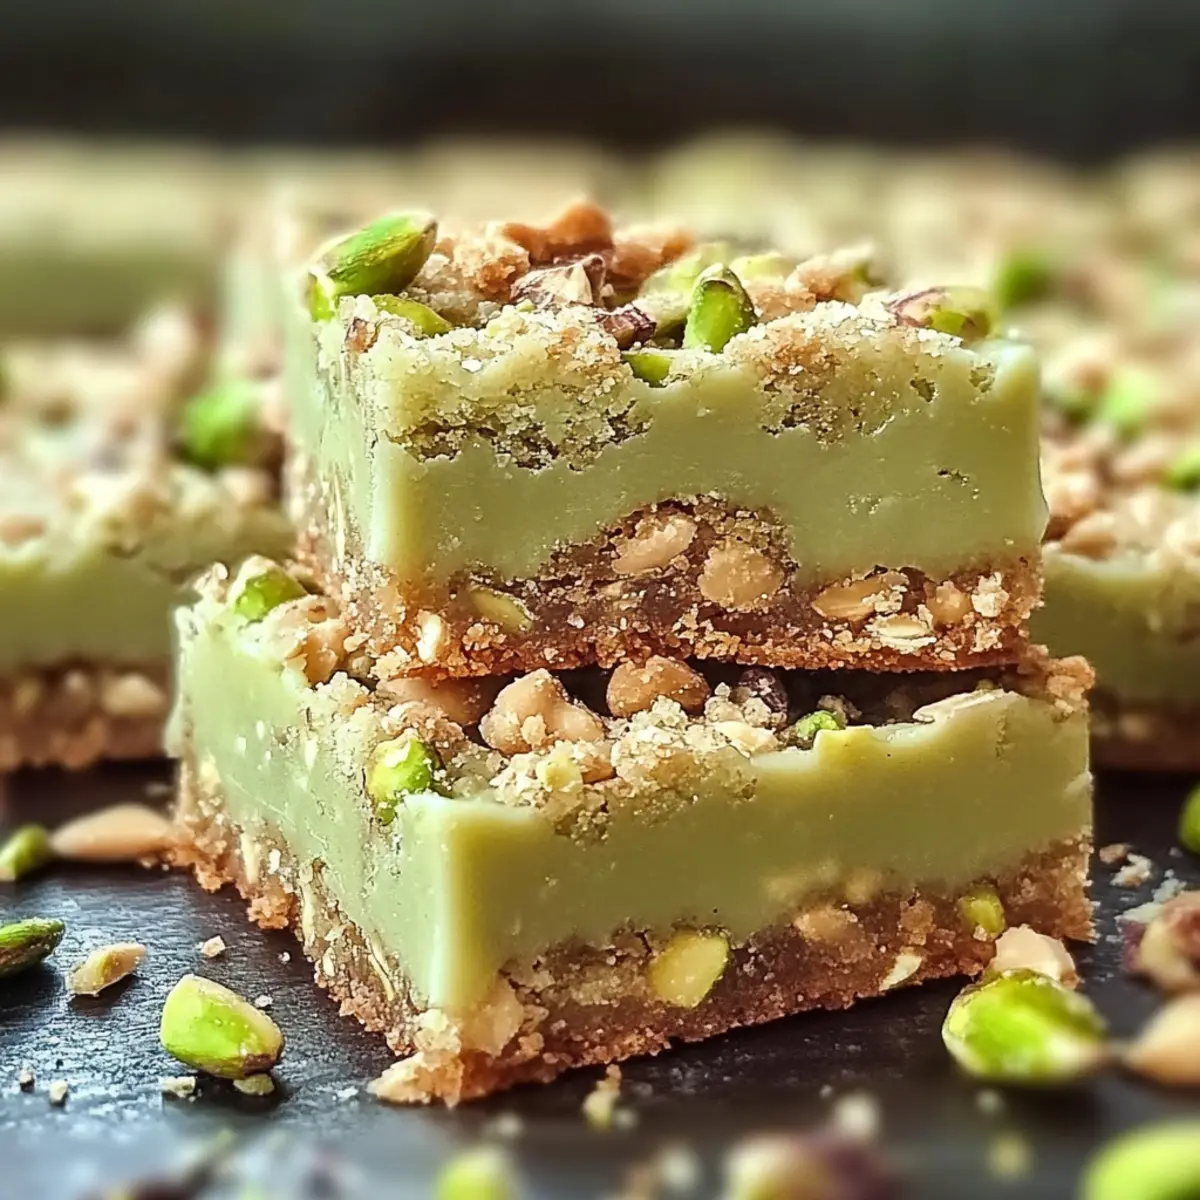
As I rummaged through my pantry one afternoon, my eyes landed on a bright green box of pistachio pudding mix, sparking a delightful memory of the soft, chewy treats I used to enjoy. This inspired me to create these easy and delectable Pistachio Dream Cookie Bars, a dessert that beautifully marries buttery cookie dough with the nutty essence of pistachios. Not only do they look inviting and whimsical with their vibrant green hue, but they also make a crowd-pleasing addition to any gathering or an indulgent snack for a cozy night in. Trust me, the tender texture and rich flavor will have everyone reaching for seconds. Are you ready to elevate your dessert game with this delightful treat?
Why are Pistachio Dream Cookie Bars special?
Uniquely Irresistible: The delightful combination of buttery cookie dough and pistachio pudding creates a treat that’s simply unforgettable.
Vibrant Colors: The eye-catching green hue adds a touch of whimsy to your dessert table, making them perfect for any occasion.
Easy to Make: Anyone can whip these bars up in no time, making them a fantastic option for those busy weeknights.
Crowd Pleaser: Whether it’s a party or a cozy night in, these bars are sure to impress friends and family alike.
Versatile Serving Options: Pair them with vanilla ice cream, or for a more indulgent twist, drizzle with melted chocolate for a decadent dessert that will leave your guests asking for your secret recipe!
Pistachio Dream Cookie Bars Ingredients
For the Bars
- Unsalted Butter – Provides a rich, creamy flavor; substitute with dairy-free butter for a vegan option.
- Large Eggs – Contributes moisture and binding; replace with applesauce or flaxseed meal mixed with water for an egg-free version.
- Pistachio Instant Pudding Mix – Essential for the unique nutty flavor and vibrant color that defines these bars; opt for a mix with natural flavors for the best taste.
- Sugar Cookie Mix – Simplifies the recipe while ensuring a sweet base; this is crucial for achieving the perfect texture.
- Cooking Spray or Butter – Use to grease your baking sheet, allowing for easy release of the cookie bars.
For Optional Toppings
- Melted Chocolate – Drizzling adds a layer of decadence; choose dark, milk, or white chocolate depending on your preference.
- Chopped Pistachios – For an added crunch and to enhance the nutty flavor; they also reinforce the vibrant aesthetic of the bars.
Indulging in these Pistachio Dream Cookie Bars will create memories that linger long after the last bite!
Step‑by‑Step Instructions for Pistachio Dream Cookie Bars
Step 1: Preheat the Oven
Begin your adventure with these Pistachio Dream Cookie Bars by preheating your oven to 375°F (190°C). This ensures a perfect, even bake, allowing those bars to rise delightfully. While the oven heats, gather your mixing bowl and other ingredients to streamline your process and keep things organized.
Step 2: Cream the Ingredients
In a large mixing bowl, combine 1 cup of softened unsalted butter, 2 large eggs, and 3.4 ounces of pistachio instant pudding mix. Using a hand mixer, cream these together until the mixture is smooth and fluffy, about 2-3 minutes. The color will transform into a lovely, inviting green, enhancing the anticipation of your upcoming treat.
Step 3: Incorporate the Sugar Cookie Mix
Gradually add in a 17.5-ounce package of sugar cookie mix, stirring with a spatula until a soft, sticky dough forms. Be careful not to overmix to maintain that chewy texture characteristic of your Pistachio Dream Cookie Bars. This step is key in blending the flavors and creating a uniform dough that’s just right for baking.
Step 4: Prepare the Baking Sheet
Grease a 10 x 15-inch baking sheet with cooking spray or a little butter to prevent sticking. This ensures your delightful bars release easily after baking. Once greased, use your spatula to spread the dough evenly across the pan, pressing it firmly into the corners and smoothing the top for an even bake throughout.
Step 5: Bake to Perfection
Place your baking sheet in the preheated oven and bake for 18-22 minutes. Keep an eye on the edges; they should turn a light golden brown while the center remains soft. This visual cue is essential, as it indicates that your Pistachio Dream Cookie Bars are rising beautifully and almost ready to come out.
Step 6: Cool Down
Once baked, remove the bars from the oven and allow them to cool in the pan on a wire rack for about 30 minutes. Cooling in the pan helps them set properly, preventing crumbling. Be patient, as this step is crucial for achieving that perfect chewy consistency in your bars.
Step 7: Slice and Serve
After the bars have completely cooled, it’s time to slice them into squares or rectangles. For the best results, use a sharp knife to create clean edges that showcase the delightful green color. Serve them as is, or drizzle with melted chocolate for an indulgent twist that will impress everyone.
How to Store and Freeze Pistachio Dream Cookie Bars
Room Temperature: Store in an airtight container at room temperature for up to 5 days to maintain their chewiness and flavor.
Fridge: If you’d like them to last longer, refrigerate in an airtight container for up to 7 days. Allow them to come to room temperature before serving for the best taste.
Freezer: For longer storage, individually wrap the bars and place them in a freezer-safe container or bag. They can be frozen for up to 3 months. Thaw before serving for a fresh taste.
Reheating: If you prefer them warm, briefly reheat in the microwave for about 10-15 seconds for that fresh-baked experience.
Pistachio Dream Cookie Bars Variations
Feel free to get creative and make these delicious bars your own with these fun variations!
-
Nuts Galore: Consider folding in some chopped walnuts or macadamia nuts for an added crunch that complements the pistachio flavor beautifully. The combination of textures will be a delightful surprise in every bite.
-
Chocolate Loaded: Mix in semi-sweet chocolate chips or drizzle melted chocolate over the cooled bars for an indulgent twist. The rich chocolate contrast pairs stunningly with the nutty cookie base.
-
Tropical Twist: Add shredded coconut to the dough for a tropical flair. The sweetness of the coconut harmonizes nicely with the pistachios, creating a unique flavor profile that’s sure to impress.
-
Citrus Zing: Incorporate lemon or orange zest into the dough for a bright citrus note. This will elevate your bars with freshness and balance the richness of the pistachio perfectly.
-
Spiced Up: For a warm flavor twist, add a pinch of cinnamon or nutmeg to the dough. These spices will add a cozy warmth that makes these bars even more comforting.
-
Almond Essence: Swap out the vanilla extract for almond extract to deepen the nutty flavor. It adds a layer of complexity that pairs well with the pistachios, making for a sophisticated taste experience.
-
Lower Sugar Option: Use a sugar-free sugar cookie mix for a lighter version. You won’t sacrifice flavor, but you’ll enjoy the bars with fewer calories, perfect for guilt-free snacking!
Don’t forget to check out some of my other sweet treats like Sugar Cookie Cheesecake or Chocolate Chip Cheesecake Cookies for more inspiration!
Make Ahead Options
These Pistachio Dream Cookie Bars are perfect for meal prep enthusiasts! You can prepare the dough up to 24 hours in advance by mixing all the ingredients and storing the unbaked dough in an airtight container in the refrigerator. This not only saves time but also allows the flavors to meld beautifully. For even more flexibility, bake the bars in advance and store them in an airtight container. They will maintain their chewy texture for up to 5 days at room temperature or up to 7 days if refrigerated. When you’re ready to serve, simply slice them and, for an extra touch of decadence, drizzle with melted chocolate just before presenting. Enjoy stress-free baking with these delightful Pistachio Dream Cookie Bars!
Expert Tips for Pistachio Dream Cookie Bars
- Room Temperature Ingredients: Ensure butter and eggs are at room temperature for a smoother dough that blends easily. This promotes a perfectly chewy texture.
- Avoid Overmixing: Once you add the sugar cookie mix, stir gently until combined. Overmixing can lead to dense bars instead of the light, chewy Pistachio Dream Cookie Bars you desire.
- Cooling is Key: Allow the bars to cool completely in the pan before slicing. This helps them set properly and avoids crumbling when you cut into them.
- Sharp Knife for Slicing: For clean edges, always use a sharp knife when cutting your bars. A dull knife can result in uneven, messy pieces.
- Add Texture: If you’re feeling adventurous, fold in some chopped pistachios or white chocolate chips for delightful variations that enhance flavor and texture!
What to Serve with Pistachio Dream Cookie Bars?
Treat your loved ones to a well-rounded meal with delightful pairings that complement these chewy, nutty bars.
-
Vanilla Ice Cream: The creamy sweetness of vanilla ice cream brings out the nutty flavors of the bars, creating a perfect balance.
-
Fresh Fruit Salad: A medley of seasonal fruits adds a refreshing acidity that contrasts beautifully with the sweetness of the cookies.
-
Mint Tea: The light, herbal notes of mint tea provide a fresh counterpoint to the rich flavors of the cookie bars, making every bite feel luxurious.
-
Whipped Cream: A dollop of whipped cream enhances the bars’ texture, adding a soft, airy complement to their chewiness.
-
Chocolate Drizzle: Elevate the bars with melted chocolate on top, creating a decadent twist that has chocolate lovers swooning.
-
Chopped Nuts: Sprinkling extra chopped pistachios adds a delightful crunch and reinforces the bars’ nutty theme, enticing the taste buds.
-
Iced Coffee: The rich, bold flavors of iced coffee create a wonderful lunchtime treat, pairing perfectly with the modest sweetness of the bars.
-
Dark Chocolate Espresso Beans: The intense flavors and crunch of dark chocolate espresso beans bring a sophisticated touch to your dessert experience.
Let these pairings sweep you and your guests into a sweet escape, where simple, homemade charm reigns supreme!

Pistachio Dream Cookie Bars Recipe FAQs
How do I choose the right pistachio instant pudding mix?
Absolutely! When selecting your pistachio instant pudding mix, look for a brand that uses natural flavors and ingredients. Some mixes may contain artificial colors or sweeteners that can alter the taste. Reading the label is key – you want that delightful nutty essence to shine through in your Pistachio Dream Cookie Bars.
What is the best way to store leftover cookie bars?
Very! For maximum freshness, store your Pistachio Dream Cookie Bars in an airtight container at room temperature for up to 5 days. If you anticipate keeping them longer, refrigerating them for up to 7 days is a great option. Before serving, just let them come to room temperature to soften a bit and bring out their lovely flavors.
Can I freeze Pistachio Dream Cookie Bars?
Absolutely! To freeze your bars, first, cut them into portions. Wrap each bar individually in plastic wrap and then place them in a freezer-safe bag or container. They can be kept in the freezer for up to 3 months. When you’re ready to enjoy them, simply thaw at room temperature or warm them in the microwave for 10-15 seconds for that fresh-out-of-the-oven experience.
What should I do if my cookie bars crumble when cutting?
To avoid crumbling, it’s crucial to let your Pistachio Dream Cookie Bars cool completely in the pan before slicing. Cooling allows them to set properly. If they still crumble, try using a sharp knife for cutting; this helps achieve cleaner, neater edges. If the bars are too warm, they may not hold together well, so giving them time is essential!
Are these cookie bars suitable for people with nut allergies?
If you’re serving individuals with nut allergies, it’s best to avoid using pistachio pudding mix altogether or look for nut-free alternatives. You can still enjoy making cookie bars by using a vanilla pudding mix along with a nut-free cookie mix. Always check that any substitutes like pudding or cookie mixes are labeled safe for nut allergies to ensure everyone’s safety!
Pistachio Dream Cookie Bars: Irresistibly Chewy & Nutty Delight
Ingredients
Equipment
Method
- Preheat your oven to 375°F (190°C).
- In a large mixing bowl, combine 1 cup of softened unsalted butter, 2 large eggs, and 3.4 ounces of pistachio instant pudding mix. Cream together until smooth and fluffy, about 2-3 minutes.
- Gradually add in 17.5 ounces of sugar cookie mix, stirring with a spatula until a soft, sticky dough forms.
- Grease a 10 x 15-inch baking sheet with cooking spray or butter. Spread the dough evenly across the pan and press firmly into the corners.
- Place your baking sheet in the preheated oven and bake for 18-22 minutes until the edges are light golden brown.
- Allow the bars to cool in the pan on a wire rack for about 30 minutes.
- Slice the bars into squares or rectangles using a sharp knife, and serve as is or with melted chocolate drizzle.
Leave a Reply