
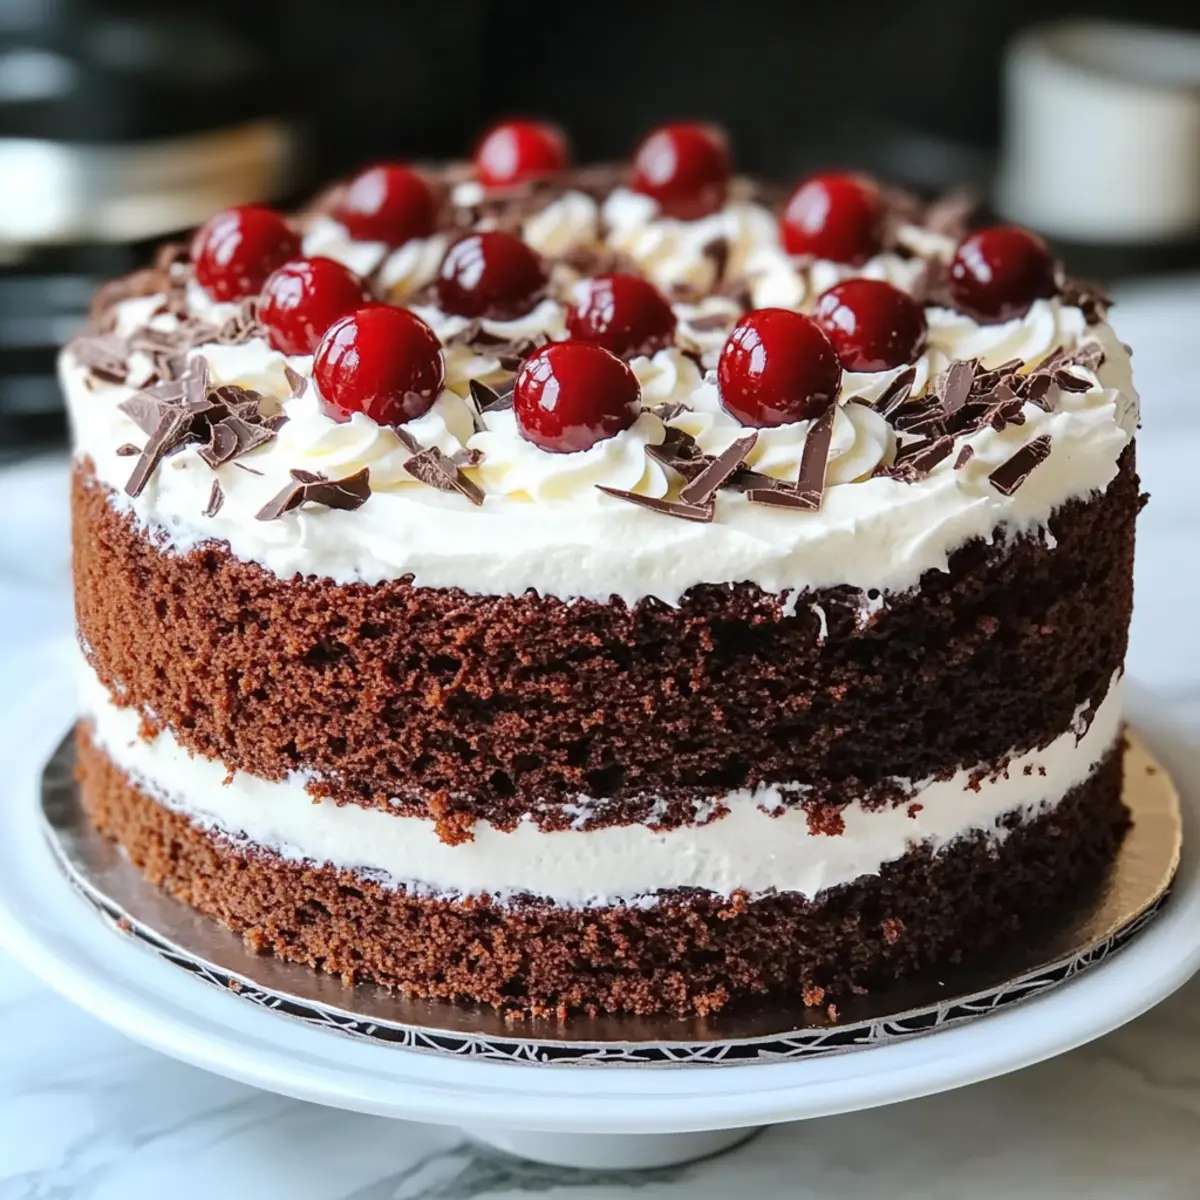
The aroma of cocoa mingling with fresh cherries and whipped cream is a nostalgic memory that always takes me back to family celebrations. My Classic Black Forest Cake Recipe is a tribute to that rich tradition, bringing together moist chocolate layers and a vibrant cherry filling that’s simply unforgettable. Whether you’re planning a birthday bash or just looking to impress at a dinner gathering, this cake is incredibly easy to whip up and boasts an elegance that feels luxurious without the fuss. It’s a delightful blend of flavors that will have everyone eagerly reaching for a second slice. Have you ever thought about how a single dessert can create so many sweet memories? Let’s dive into this cake that is sure to become a family favorite!
Why is Black Forest Cake So Special?
Indulgent, Rich Chocolate: The experience starts with decadent chocolate layers, creating a treat that satisfies the sweetest cravings.
Juicy, Tart Cherries: Complemented by cherry filling, this cake brings a burst of fruity flavor that contrasts beautifully with the chocolate.
Fluffy Whipped Cream: A generous layer of whipped cream adds airiness and balances the richness, making each bite irresistible.
A Showstopper: Perfect for celebrations, this cake not only tastes fantastic but also looks stunning on any dessert table. Think of pairing it with my delicious Butter Pecan Cake for an unforgettable dessert spread!
Ease of Preparation: Despite its impressive look and taste, this recipe is straightforward – perfect for both novice and seasoned bakers.
Versatile Enjoyment: Whether for birthdays, holidays, or casual get-togethers, this cake is sure to be a crowd-pleaser every time!
Black Forest Cake Recipe Ingredients
For the Cake
- All-Purpose Flour – Essential for cake structure; you can swap it with cake flour for an even lighter texture.
- Granulated Sugar – Adds sweetness and moisture; try brown sugar for a richer flavor.
- Cocoa Powder (unsweetened) – Provides that rich chocolate taste; be sure it’s unsweetened for a well-balanced flavor.
- Baking Powder – Acts as a leavening agent; check the expiration date to ensure a good rise.
- Baking Soda – Adds further leavening and color; don’t overdo it to prevent any bitterness.
- Salt – Enhances the cake’s flavors; sea salt is a lovely choice for a subtle boost.
- Large Eggs – Provide binding and moisture; substitute with flax eggs for a vegan Black Forest Cake Recipe.
- Whole Milk – Adds richness and moisture; buttermilk works well too for an extra bit of tang.
- Vegetable Oil – Ensures moisture and tenderness; melted butter can provide a wonderful flavor alternative.
- Vanilla Extract – Boosts flavor; opt for pure extract for the best taste.
- Boiling Water – Intensifies cocoa flavor; don’t skip this step for maximum richness.
For the Cherry Filling
- Pitted Cherries – Use fresh or canned; if using canned, make sure to drain them thoroughly to avoid excess moisture.
- Granulated Sugar (for cherries) – Sweetens the filling; lessen the amount if the cherries are already sweetened.
- Cornstarch – Thickens the cherry filling; ensure it’s blended smoothly to avoid lumps.
- Kirsch (optional) – Adds a delightful depth of flavor; you can omit it if you prefer a non-alcoholic dessert.
For the Whipped Topping
- Heavy Cream – The heart of your whipped topping; consider using coconut cream for a dairy-free alternative.
- Powdered Sugar – Sweetens the whipped cream; adjust it based on how sweet you want your topping to be.
- Chocolate Shavings – A decorative and delicious garnish; store-bought or homemade will do just fine.
- Fresh Cherries – For garnishing; sweeter, ripe cherries will make your presentation pop!
Step‑by‑Step Instructions for Black Forest Cake Recipe
Step 1: Preheat the Oven
Begin by preheating your oven to 350°F (175°C). While the oven warms up, grab two 9-inch round cake pans and grease them generously with butter or cooking spray. Line the bottoms with parchment paper for easy release. Ensure everything is ready as you want a smooth transition into baking the Black Forest Cake.
Step 2: Combine Dry Ingredients
In a large mixing bowl, whisk together 1 ¾ cups of all-purpose flour, 2 cups of granulated sugar, ¾ cup of unsweetened cocoa powder, 1 ½ teaspoons of baking powder, 1 ½ teaspoons of baking soda, and 1 teaspoon of salt. This step combines flavors and ensures even distribution, creating a solid base for your cake layers.
Step 3: Add Wet Ingredients
Add 2 large eggs, 1 cup of whole milk, ½ cup of vegetable oil, and 2 teaspoons of vanilla extract into the dry mixture. Using an electric mixer, mix on medium speed until the batter is well combined and smooth. This should take about 2 minutes. The batter will be thick and glossy, perfectly preparing for the next step.
Step 4: Incorporate Boiling Water
Gradually add 1 cup of boiling water to the cake batter, mixing on low speed until just combined. Be careful as the batter will thin out considerably. The heat from the water intensifies the cocoa flavor, enhancing the richness that makes this Black Forest Cake so delightful.
Step 5: Bake the Cake Layers
Evenly divide the batter between the prepared cake pans. Bake in the preheated oven for 30-35 minutes, or until a toothpick inserted into the center comes out clean. Keep an eye on them, and when you see the edges pulling away from the sides, you know they’re almost done.
Step 6: Cool the Layers
Once baked, remove the cake pans from the oven, and let them cool in the pans for 10 minutes. Then, gently transfer the cake layers to a wire rack to cool completely. This cooling process is crucial, as frosting a warm cake can lead to a melty mess!
Step 7: Prepare the Cherry Filling
For the cherry filling, combine 2 cups of pitted cherries and ½ cup of granulated sugar in a medium saucepan over medium heat. Stir occasionally until the cherries release their juices, about 5-7 minutes. The mixture should become fragrant and slightly syrupy while still retaining some cherry chunks.
Step 8: Thicken the Cherry Mixture
In a small bowl, mix 2 tablespoons of cornstarch with 2 tablespoons of water until smooth. Slowly stir this mixture into the cherry filling, cooking for another 2-3 minutes until thickened. If desired, add 2 tablespoons of Kirsch for an extra depth of flavor, stirring well. Set aside to cool completely.
Step 9: Whip the Cream
Chill a mixing bowl and beaters in the freezer for about 10 minutes. Once chilled, pour in 2 cups of heavy cream, add ½ cup of powdered sugar and 1 teaspoon of vanilla extract, and whip until stiff peaks form. This light, fluffy whipped cream will perfectly complement your Black Forest Cake.
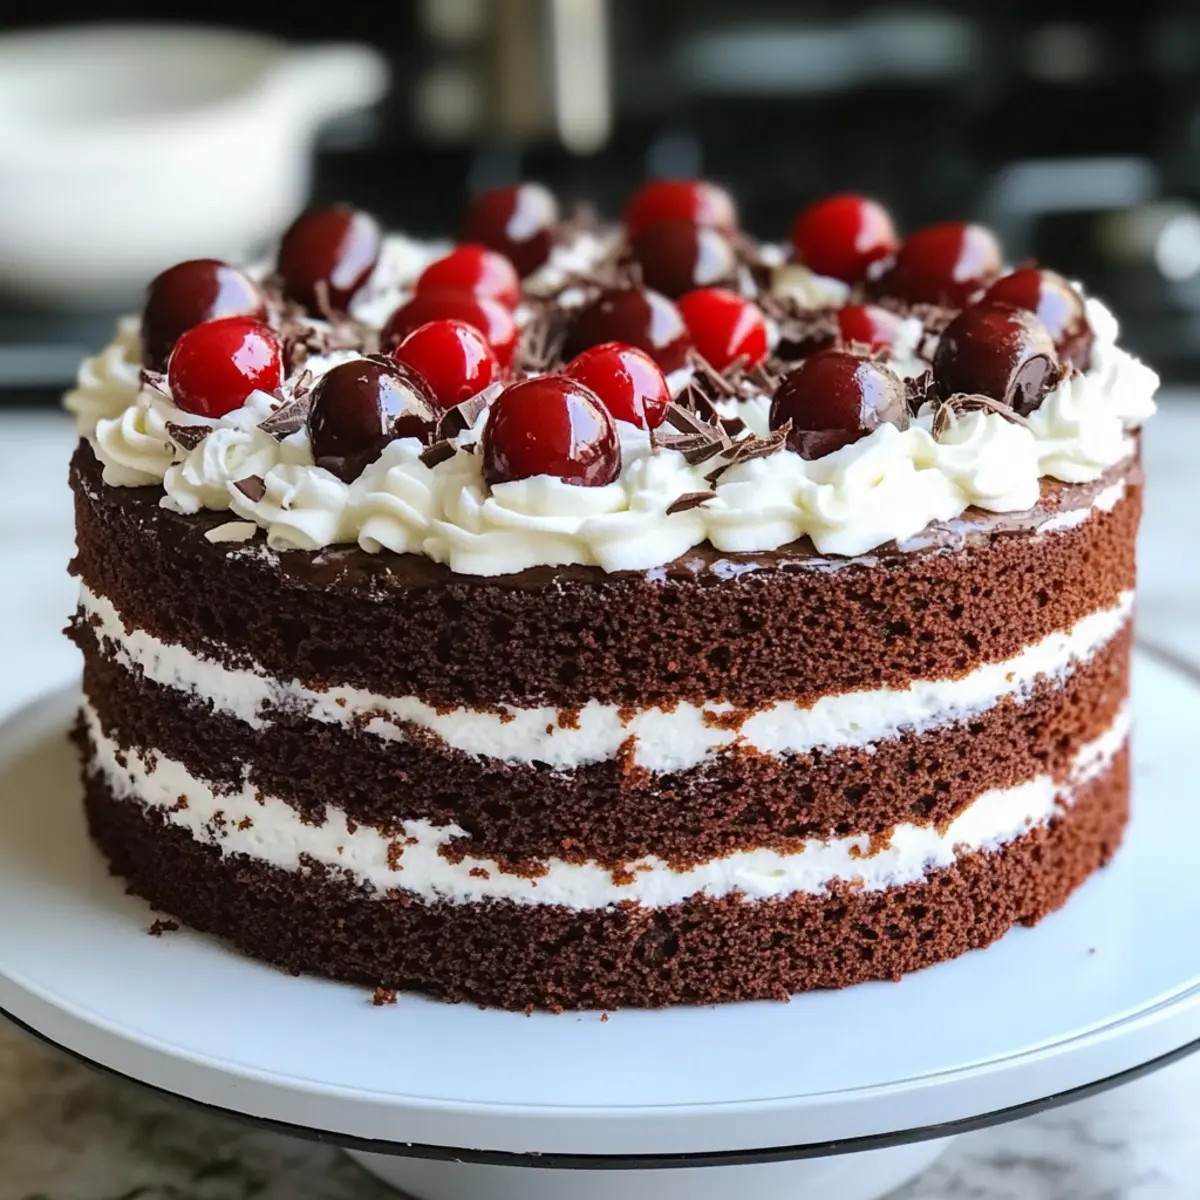
Step 10: Assemble the Cake
Carefully place one cooled cake layer on a serving platter. Spread a generous layer of whipped cream over the top, followed by an even distribution of the cherry filling. Gently place the second cake layer on top and repeat the process for even flavor in every bite.
Step 11: Frost and Decorate
Frost the entire outside of the Black Forest Cake with the remaining whipped cream. Take your time to make it look beautiful, and then sprinkle chocolate shavings over the top. Decorate with fresh cherries as a stunning garnish, adding a vibrant visual accent to your dessert.
Step 12: Chill Before Serving
Refrigerate the completed cake for at least 2-3 hours before serving, allowing the flavors to meld beautifully together. This waiting period enhances the cake’s moisture and richness, making it even more delightful when served.
Black Forest Cake Recipe Variations
Feel free to get creative with this delicious Black Forest Cake, as there are numerous ways to tailor it to your tastes and dietary preferences!
- Gluten-Free: Use a gluten-free all-purpose flour blend to accommodate gluten sensitivities without sacrificing flavor.
- Dairy-Free: Replace whole milk with almond milk and heavy cream with coconut cream for a delightful vegan twist.
- Richer Chocolate: Substitute dark chocolate for cocoa powder for a more intense chocolaty flavor that deepens the cake.
- Fruit Twist: Swap cherries for raspberries or strawberries to add a refreshing fruit note; imagine that tartness dancing on your palate.
- Nutty Variation: Fold in some chopped walnuts or hazelnuts into the batter for added texture and a subtle nutty flavor that complements the cake beautifully.
- Less Sugar: Consider reducing the amount of granulated sugar or using a natural sweetener like honey or maple syrup to make it a bit lighter.
- Festive Flavor: Add a splash of peppermint extract for a holiday-inspired version that will leave your guests enchanted.
- Cheesecake Layer: Mix a layer of cream cheese and powdered sugar in the filling for a delightful cheesecake variation that offers creaminess in every bite.
And if you’re looking for fabulous dessert pairings, how about a slice of my Butter Pecan Cake alongside? Or perhaps a delightful Pumpkin Spice Roll Cake during the fall months? Each addition creates a festive touch that complements your Black Forest Cake!
Make Ahead Options
These Black Forest Cake Recipe components are perfect for meal prep enthusiasts! You can bake the chocolate cake layers up to 24 hours in advance. Once cooled completely, wrap them tightly in plastic wrap and store them at room temperature, preventing moisture loss. The cherry filling can also be prepared ahead of time and refrigerated for up to 3 days; just allow it to cool completely before storing. When you’re ready to serve, whip the cream and assemble the layers, frosting the cake at the last minute for the best texture and flavor. This way, you’ll have a stunning dessert with minimal last-minute effort, allowing you to focus on enjoying time with your family and friends!
What to Serve with Classic Black Forest Cake?
Indulge in an unforgettable meal experience that beautifully complements the richness of your Black Forest Cake.
- Creamy Mashed Potatoes: The velvety texture of mashed potatoes pairs perfectly, offering a comforting balance to the sweet decadence of the cake.
- Grilled Chicken Salad: Opt for a light salad with grilled chicken and a tangy vinaigrette; it adds a fresh contrast to the cake’s richness.
- German Potato Salad: This tangy-sweet side dish echoes the German roots of the cake, creating a lovely harmony with every bite.
- Spiced Apple Cider: A warm cup of spiced apple cider enhances the dish’s flavor, providing a cozy and aromatic drink option.
- Chocolate Mousse: For those who want to double down on the chocolate experience, a delicate chocolate mousse adds an elegant touch alongside the cake.
- Raspberry Sorbet: The tartness of raspberry sorbet refreshes the palate between bites, beautifully contrasting the sweet cake.
- Cheese Platter: A selection of aged cheeses, like Brie or Gouda, rounds out the meal with savory notes, enhancing the cake’s deep flavors.
- Vanilla Bean Ice Cream: A scoop of vanilla ice cream melts lightly over each slice, intensifying the overall dessert experience and indulgence.
Storage Tips for Black Forest Cake
Fridge: Store your Black Forest Cake in the refrigerator for up to 3 days. Cover the cake loosely with plastic wrap to prevent any sogginess from the whipped cream.
Freezer: You can freeze the unassembled cake layers for up to 3 months. Wrap each layer tightly in plastic wrap and aluminum foil to protect against freezer burn.
Reheating: If you wish to serve leftover cake slightly warm, allow it to thaw in the fridge overnight, then un-wrap and reheat in the microwave for 10-15 seconds. This keeps it moist without compromising the whipped cream.
Serving Suggestions: For an extra treat, serve slices of your stored cake alongside a scoop of vanilla ice cream or a dollop of additional whipped cream.
Expert Tips for Black Forest Cake Recipe
- Room Temperature Eggs: Ensure eggs are at room temperature before mixing for better emulsification and a fluffier cake texture.
- Canned Cherry Drainage: If using canned cherries, drain them thoroughly to avoid soggy layers and maintain cake structure.
- Cooling Time: Allow cake layers to cool completely before frosting, which prevents the whipped cream from melting into the cake.
- Cutting Techniques: For clean slices, chill the cake before cutting and let it sit at room temperature for a few minutes before serving.
- Fresh Ingredients: Use fresh ingredients, particularly cocoa powder and baking powder, for the best flavor in your Black Forest Cake Recipe.

Black Forest Cake Recipe FAQs
What type of cherries can I use for the filling?
You can use either fresh or canned pitted cherries for the filling. If you choose canned cherries, make sure to drain them thoroughly to avoid excess moisture that could make your cake soggy. Fresh cherries provide a lovely, vibrant flavor, especially when they are in season, so I definitely recommend them for a fresher taste!
How should I store leftover Black Forest Cake?
Store your Black Forest Cake in the refrigerator for up to 3 days. It’s best to cover the cake loosely with plastic wrap or aluminum foil to prevent any sogginess from the whipped cream. This way, you’ll keep that fluffy texture intact for a delightful slice whenever you feel like indulging!
Can I freeze the Black Forest Cake layers?
Absolutely! You can freeze the unassembled cake layers for up to 3 months. Wrap each layer tightly in plastic wrap, then wrap it again in aluminum foil to prevent freezer burn. When you’re ready to enjoy, thaw the layers in the fridge overnight before assembling.
What if my cake layers turn out dry?
If your cake layers end up dry, it could be due to several reasons such as over-baking or not properly measuring the flour. To remedy this, brush the layers with a little cherry juice or syrup before assembling. This will add moisture and vibrancy back into your cake, making it much more enjoyable.
Are there any dietary considerations for this Black Forest Cake Recipe?
Yes! If you’re looking for vegan alternatives, you can substitute the large eggs with flax eggs (1 tablespoon of ground flaxseed mixed with 2.5 tablespoons of water equals one egg). Additionally, replace the heavy cream with chilled coconut cream to make it dairy-free. Just note that using these substitutes may alter the flavor slightly, but it’ll still be delicious!

Decadent Black Forest Cake Recipe with Chocolate and Cherries
Ingredients
Equipment
Method
- Preheat your oven to 350°F (175°C) and prepare two 9-inch round cake pans.
- Whisk together all dry ingredients in a large mixing bowl.
- Add wet ingredients and mix until smooth.
- Incorporate boiling water carefully into the batter.
- Divide batter between the prepared pans and bake for 30-35 minutes.
- Allow baked layers to cool in pans for 10 minutes, then transfer to wire rack.
- Combine cherries and sugar in a saucepan over medium heat until juices are released.
- Mix cornstarch with water and stir into cherry mixture, cooking until thickened.
- Chill mixing bowl and beaters, then whip heavy cream with sugar and vanilla until stiff peaks form.
- Place one cake layer on a platter, add whipped cream and cherry filling, then repeat with the second layer.
- Frost the entire outside with whipped cream and garnish with chocolate shavings and fresh cherries.
- Chill the cake in the fridge for at least 2-3 hours before serving.
Leave a Reply